If you’re looking to add a carousel or slider showcasing your Instagram posts, then you’re in the right place.
In this quick tutorial, you’ll learn how to create an Instagram feed just like this:

All you need to get started is your Instagram account and an Instagram feed plugin, called Spotlight.
Why you should use Spotlight to create an Instagram carousel
Although there are other Instagram feed plugins available, Spotlight is by far, the easiest and most user-friendly one to use. Not only that but it’s been used by over 40,000 users and has a 5/5 star rating on the WordPress plugin library.
Spotlight comes with a large selection of customization tools, so if you really want to design your feed in a way that seamlessly integrates with your website’s design, you won’t be disappointed. In fact, it comes with over 40 customization options and is fully responsive.
However, if you want a quick layout with no fuss, Spotlight comes with awesome pre-made layouts, including one for carousels!
To get started, you’ll need the premium version of Spotlight. It comes in three tiers: Essentials, PRO, and All Access.
How to add an Instagram carousel to WordPress
To create an Instagram carousel, install and activate the Spotlight plugin. Next, log into your Instagram account in your web browser and return to Spotlight in your WordPress dashboard.
Step 1: Create a carousel feed
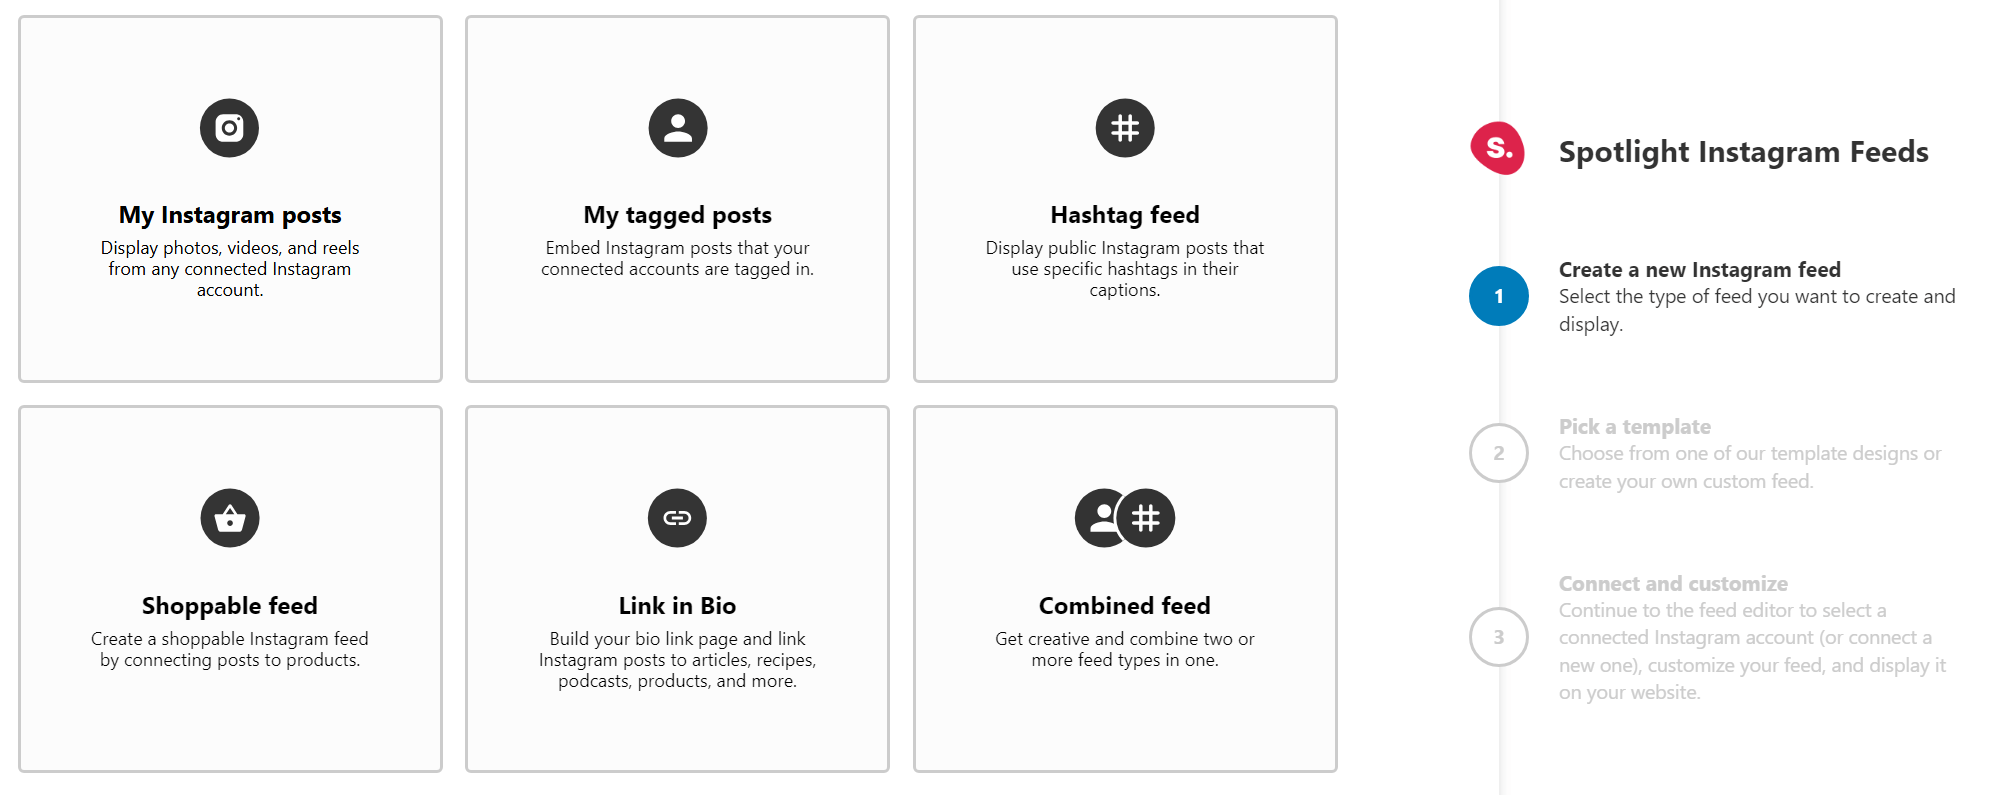
The first step is to select the type of feed you’ll be creating. In this example, I’ll be using my Instagram posts only, so I’ve selected “My Instagram Posts” in the first step.
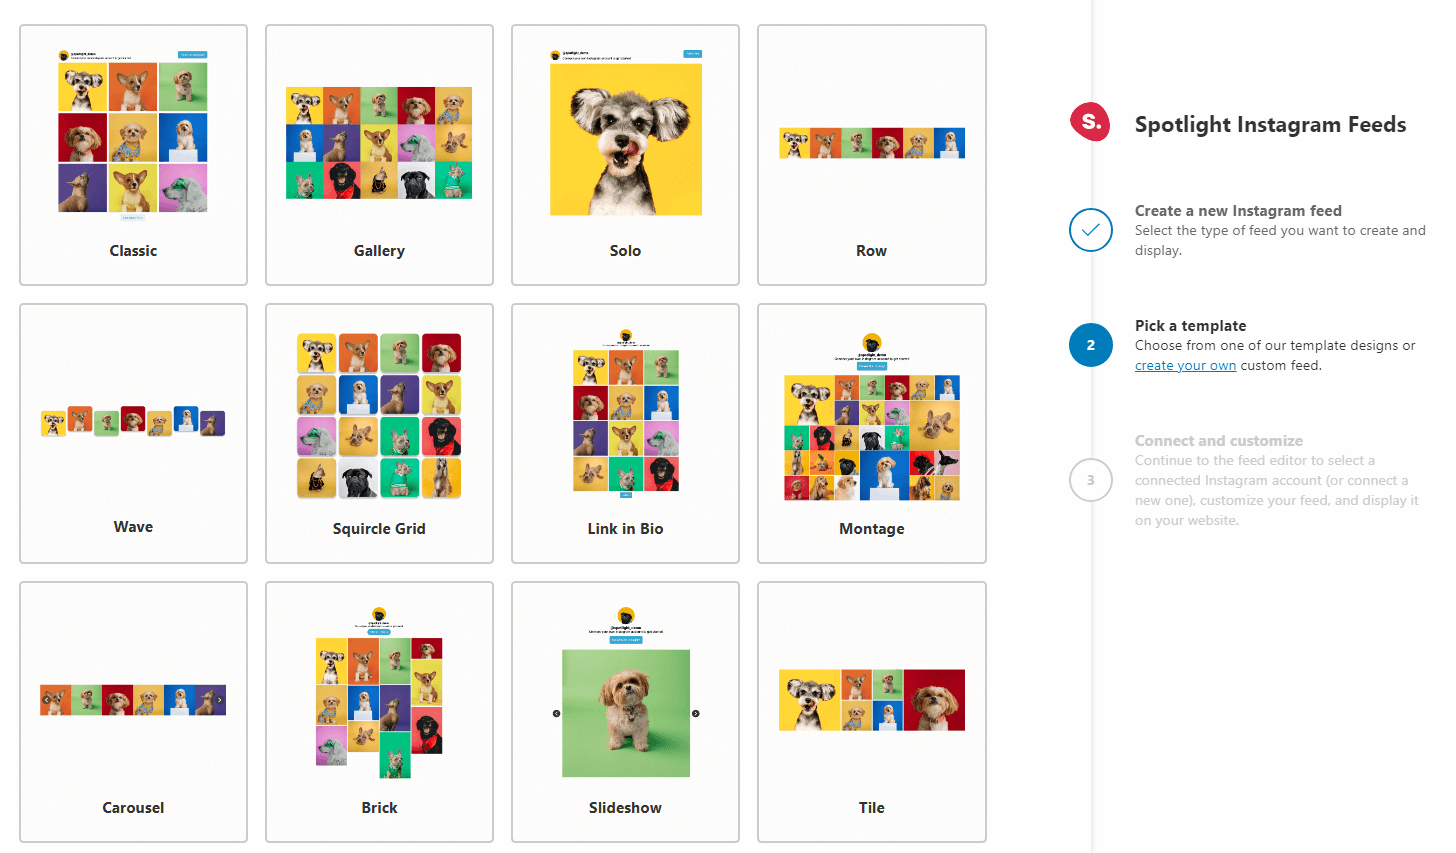
The second step is what’s important. Here, you can select the layout you want for your feed. Scroll down to find the “Carousel” option.
Step 2: Connect your account
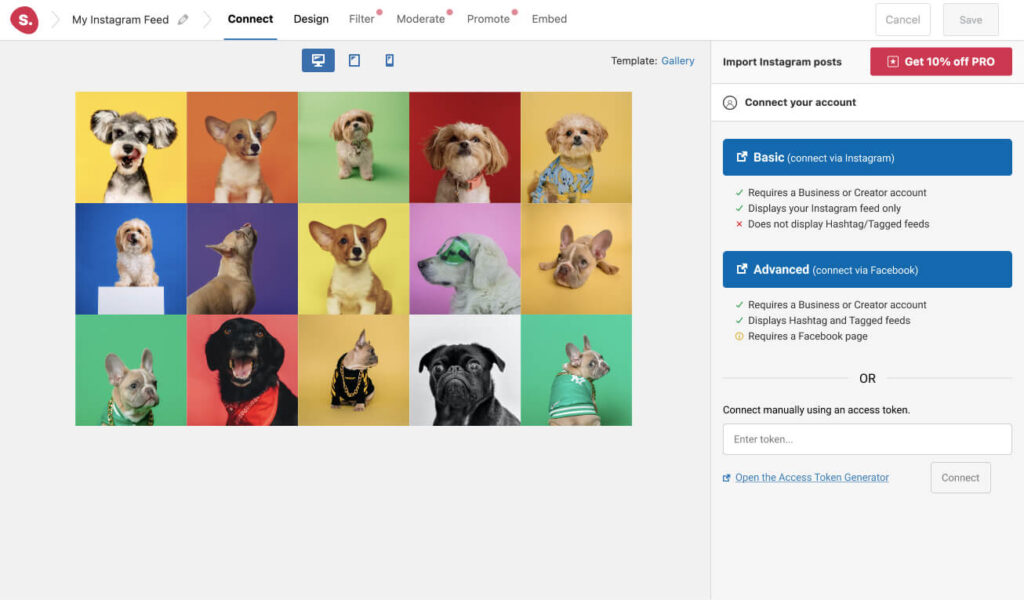
If this is your first time creating a feed with Spotlight, you’ll need to connect an Instagram account with the plugin. Note that Spotlight only works with Instagram Professional (Business or Creator) accounts.
If you’re using a Personal account, you can switch to a Business or Creator account in a matter of minutes. This won’t affect your account (beyond making it public if it’s set to private), but it will give you access to more tools for monitoring analytics and controlling your brand’s image.
Also, you’ll need to select either a Basic or Advanced option. The difference between a Basic and an Advanced account is that a Basic account connects your professional account directly to Spotlight through Instagram, doesn’t require a Facebook Page, but doesn’t support hashtags or tagged feeds.
In contrast, an Advanced account requires your professional Instagram account to be linked to a Facebook Page before connecting it to Spotlight and gives you access to more features than a Basic account
Select one of the options to connect your account, depending on what kind of feed you want to set up:
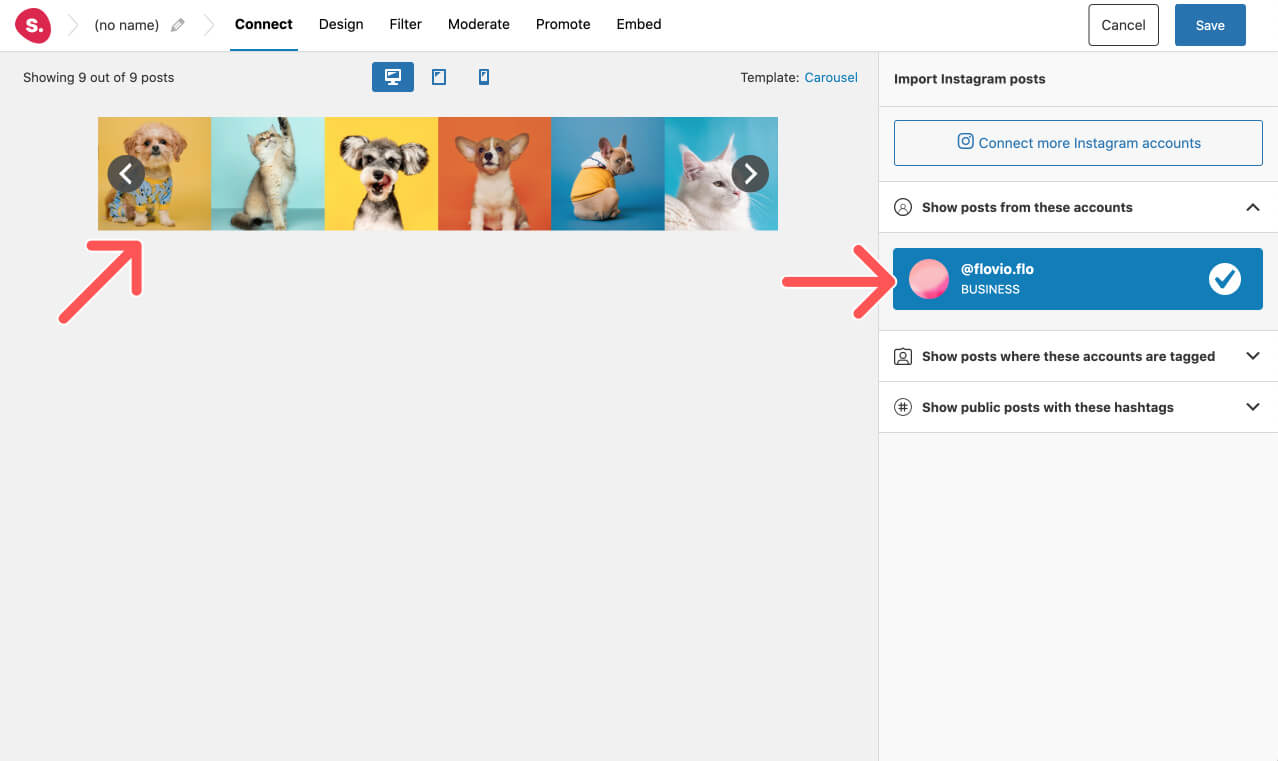
Once you connect an account, Spotlight will display part of its feed in the main preview window:
Step 3: Customize your feed
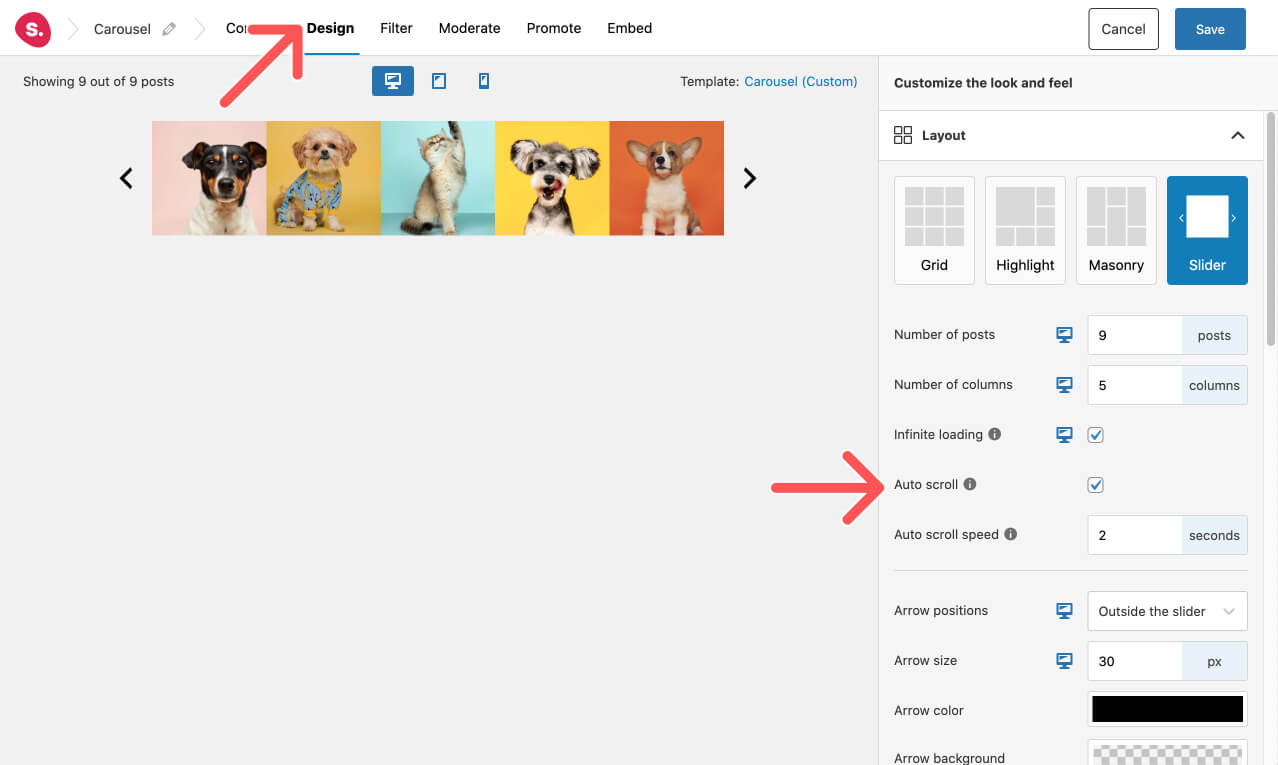
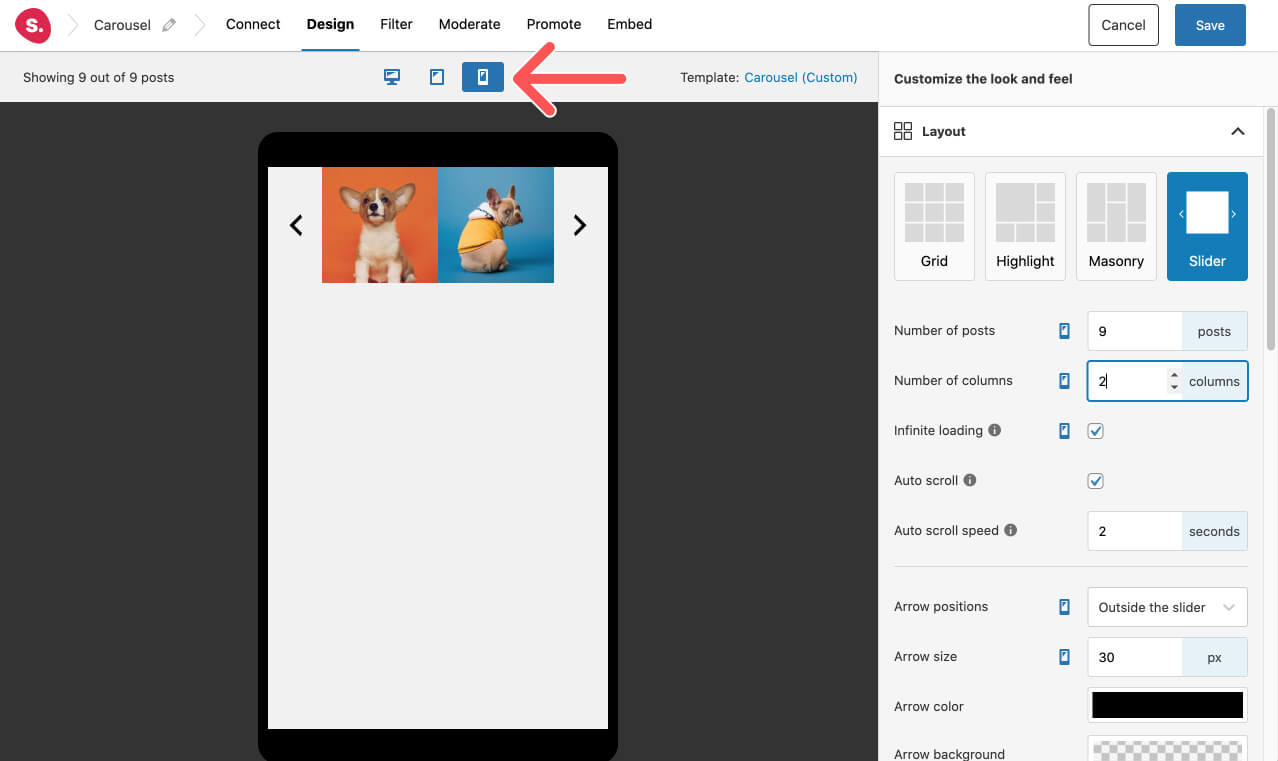
This step is completely optional. However, if you wish to customize your feed further, the Design tab is right at your fingertips. Here, you can adjust the space around each post, the number of columns, as well as the design of the navigation buttons, among many other options.
In this example, I’ve moved the navigation buttons outside the feed and changed their color. I’ve also adjusted the number of posts and made the feed scroll automatically.
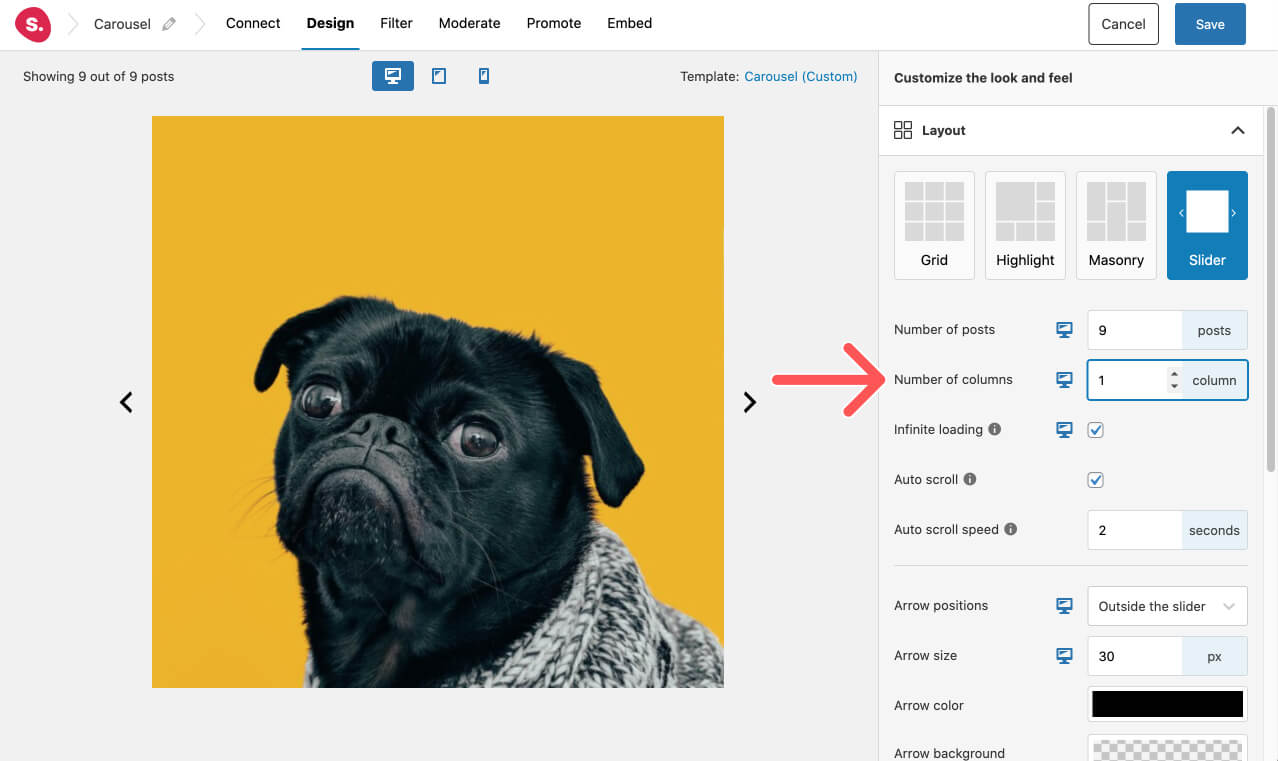
Bonus: If you set the carousel feed to display one image at a time, it can function as a regular slider. Use it to create large image sliders for your homepage or landing pages.
Next, switch between devices to ensure your feed looks stunning on desktop, tablet, and mobile. Spotlight will let you adjust settings for each individual device.
Step 4: PRO features – filtering, moderation, and promotion
If you’ve signed up for Spotlight PRO or All Access, you’ll also get access to the following three main features.
Filtering
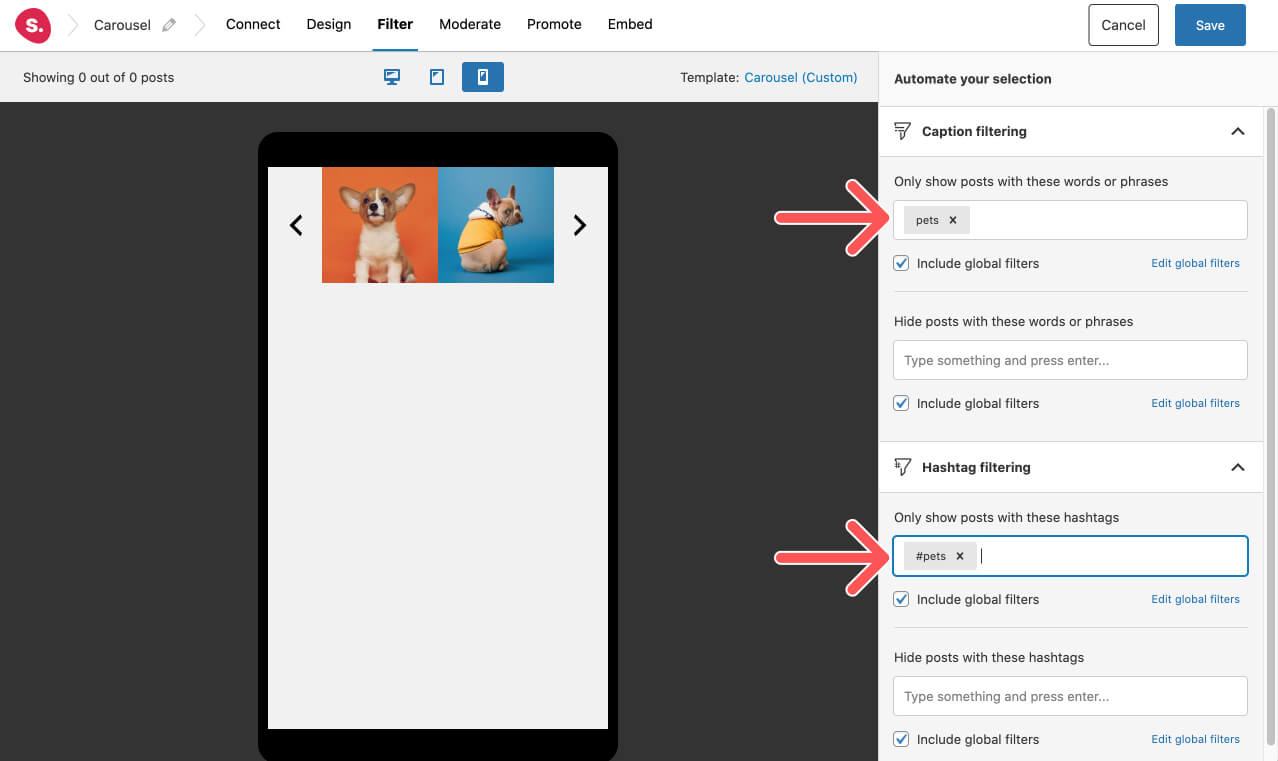
With filtering, you can filter out posts based on words or hashtags in their caption. This is an awesome way to control which posts to show in your feed.
Moderation
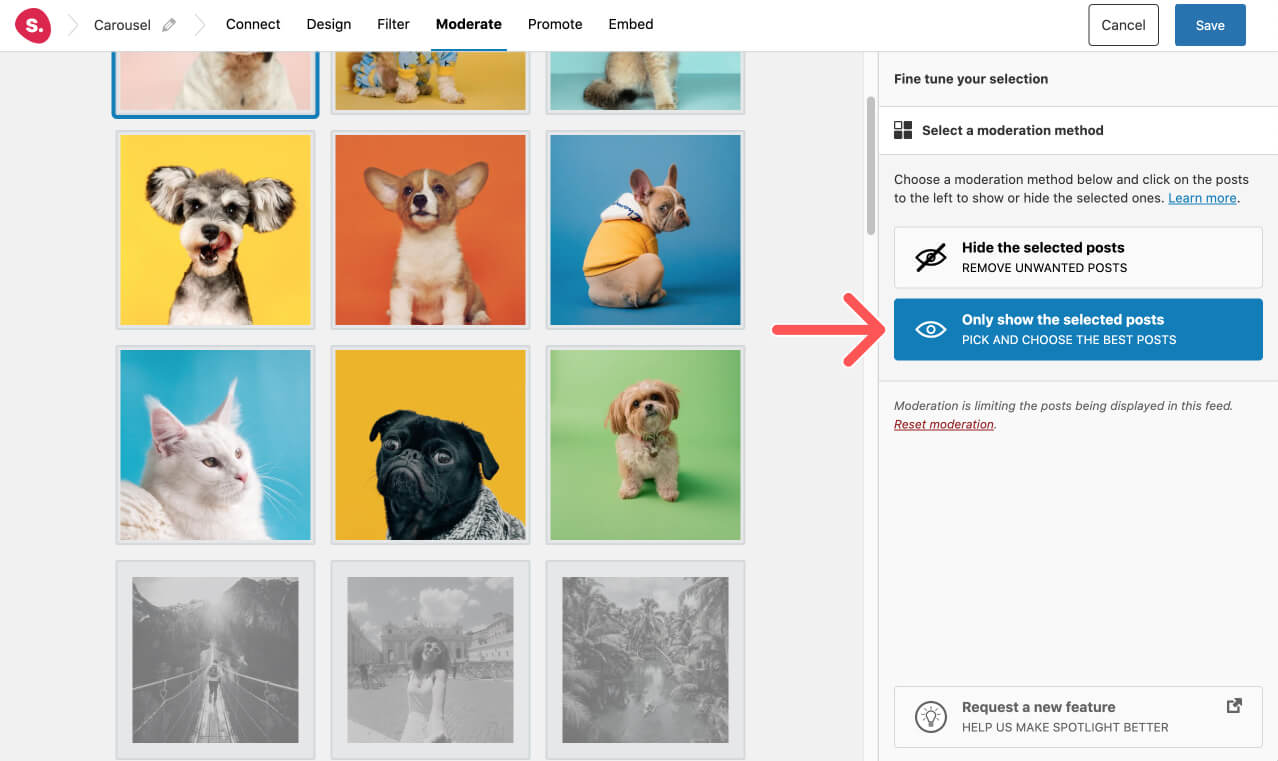
The moderation tab will show all your account’s posts. You can then manually select which ones to show or hide in your carousel feed.
Promotion
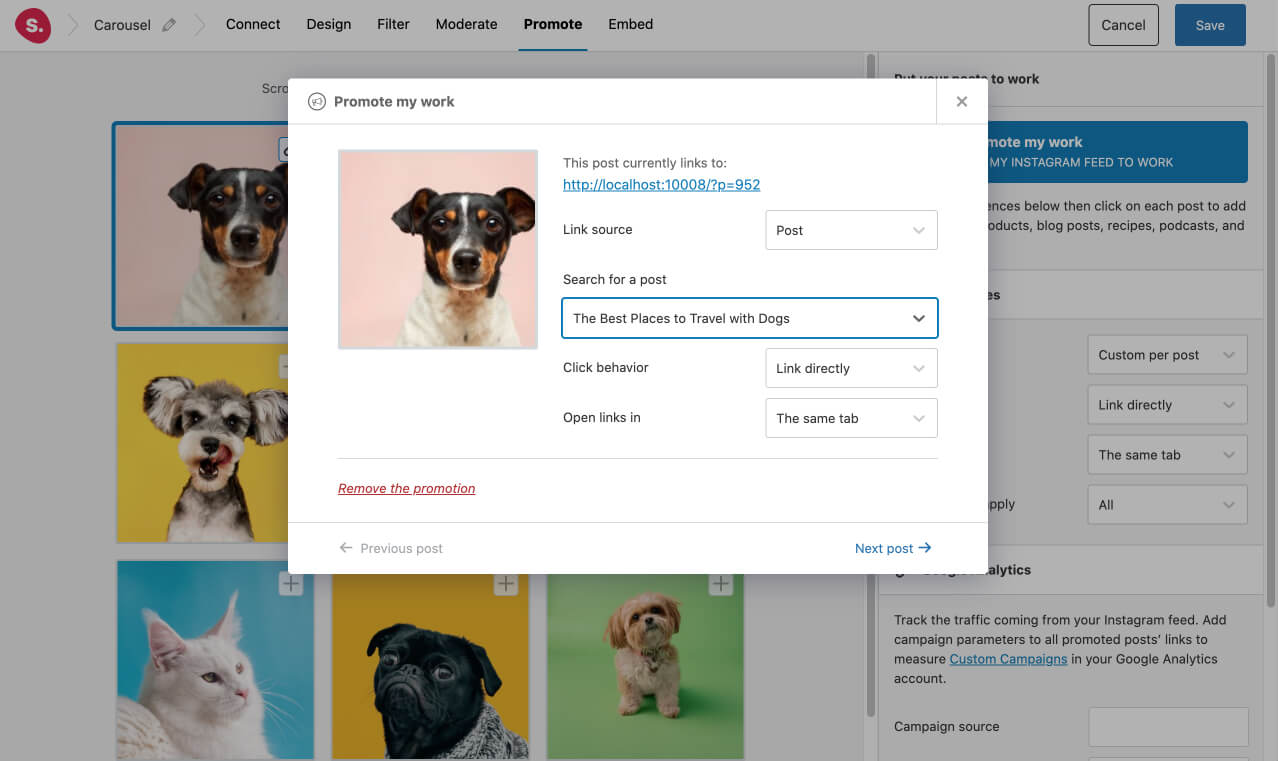
Finally, in the Promote tab, you’ll be able to link Instagram posts to pages, posts, products, and any URL. This is great if you use your feed to direct visitors to other important parts of your website.
Step 5: Embed your feed
Now, you’re ready to embed your feed! You can do so in three main ways:
- Using the generated shortcode.
- Using the WordPress block.
- Using the Elementor widget.
Spotlight also makes it really easy to create posts and pages with your Instagram carousel feed embedded. Simply select “Create new page” or “Create new post” and Spotlight will handle everything for you.
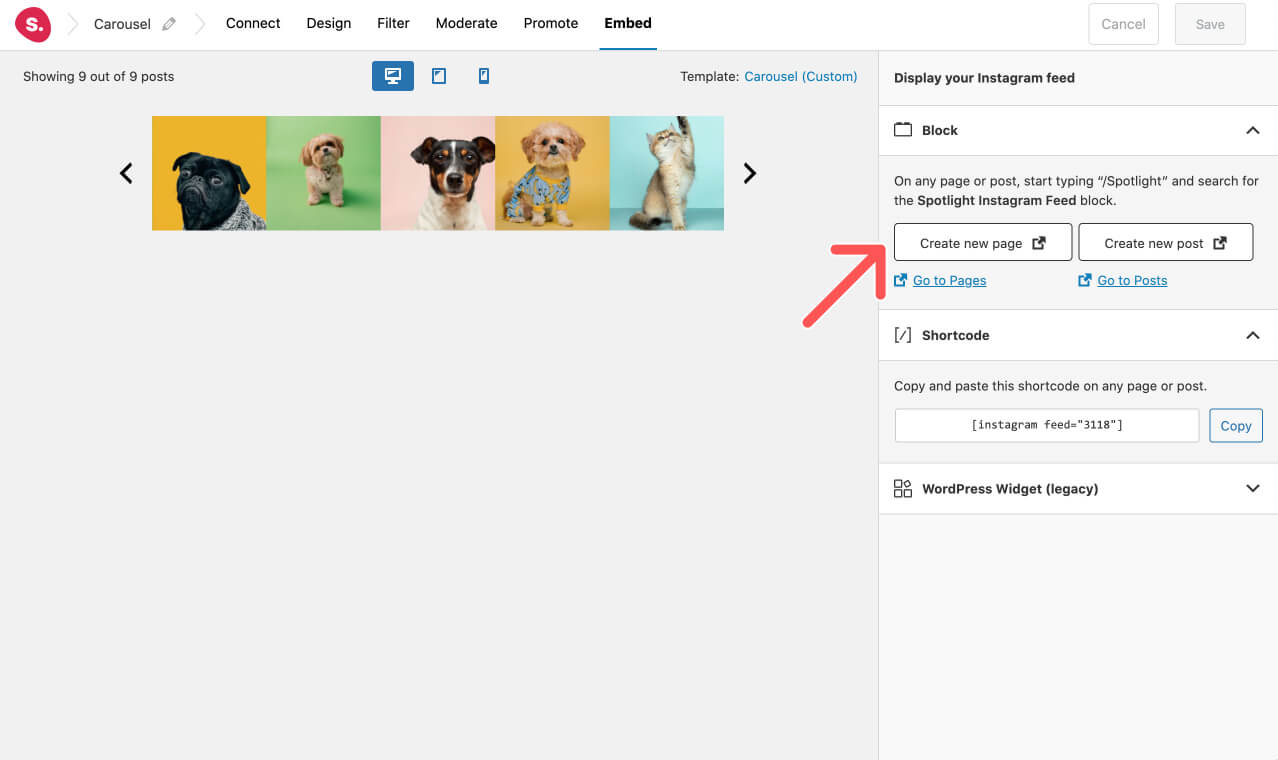
I’ve chosen to embed my carousel feed in a new post. All I had to do is add my content and hit publish!
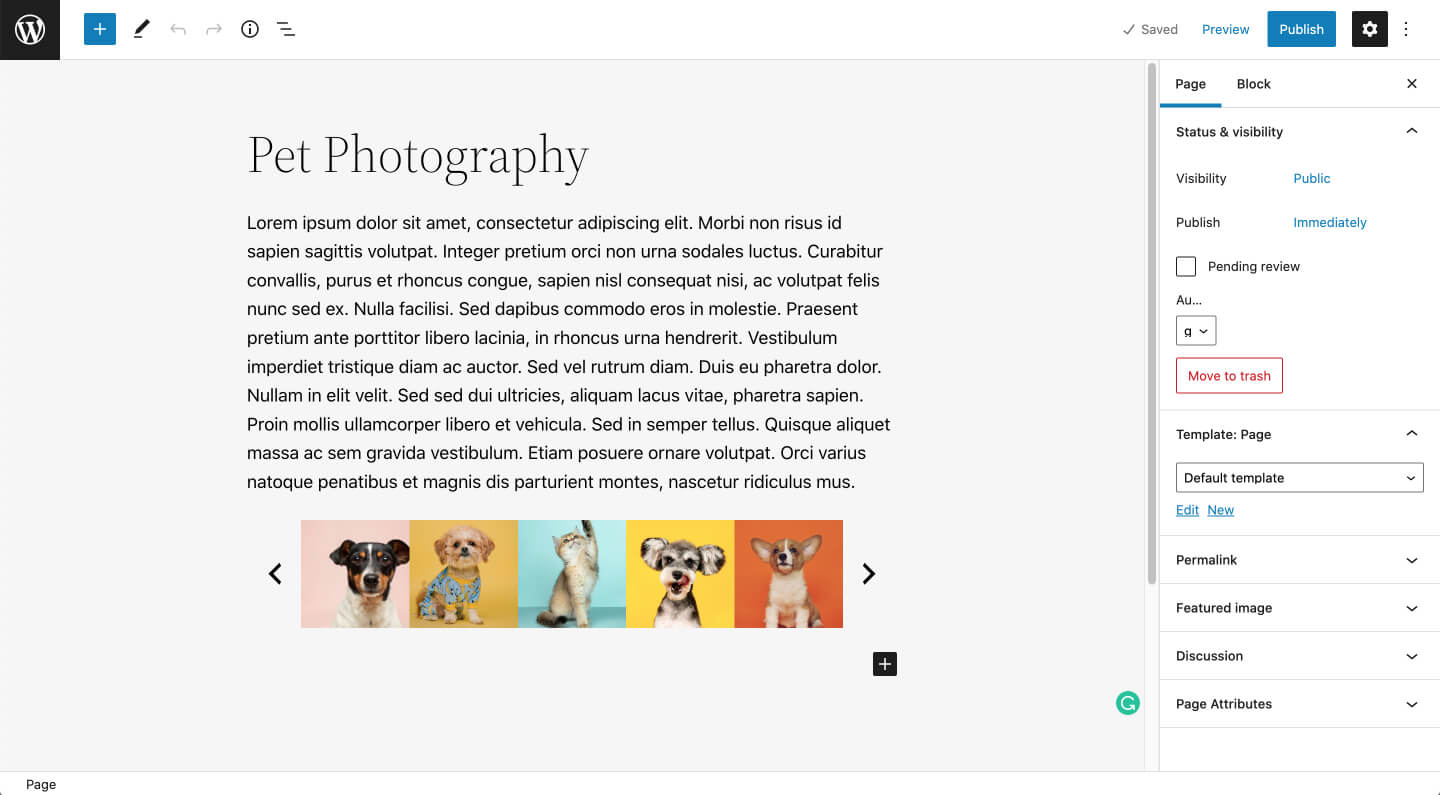
Result
A carousel is a great way to showcase your Instagram posts. Why? With Spotlight, you can create an animated gallery to display a collection of Instagram posts that interchange automatically or with navigation buttons.
Spotlight gives you complete control over every element of your carousel gallery, which is extremely helpful to make the feed fit perfectly into any page that you create.
Give it a go and fill your website with beautiful galleries, thanks to Spotlight.

![How to Add an Instagram Carousel to WordPress [2022]](https://spotlightwp.com/wp-content/uploads/2022/09/How-to-Add-an-Instagram-Carousel-to-WordPress-2022.png)


