In this beginner’s guide, we’ll be showing you how to add an Instagram feed to your block editor.
All you’ll need is the Spotlight PRO plugin.
With it, you’ll be able to create, design, and embed your feeds in just a few minutes.
Ready to get started? Let’s go!
- Install Spotlight PRO and connect your account
- Design your Instagram feed
- Add your Instagram feed to your website

Why you should add your Instagram feed to your website
Instagram is one of the leading social media platforms. Especially if you own a business or run a blog.
In fact, you’ll notice that many websites either link to Instagram or, better yet, display an Instagram feed on their home page, in their footer, or pretty much anywhere on their website.
But why are they doing it?
Let’s have a look:
- Automatically updated galleries – Cut your marketing time by half by only uploading images to Instagram. Spotlight will then update your website’s galleries automatically.
- Social proof – With influencer marketing skyrocketing, so is social proof. Show off your follower engagement through an Instagram feed.
- Turn site visitors into Instagram followers – Add a “Follow me on Instagram” button to direct website visitors to your Instagram account.
- Share your Instagram with non-IG users – Apply your social media marketing efforts to non-Instagram users through Instagram feeds on your website.
- Connect Instagram to your website – Do you have a great Instagram following? Direct them to your posts, products, or pages with a Link in Bio feed.
- Increase your sales – Use shoppable Instagram feeds to funnel website visitors to your WooCommerce products.
How to embed your Instagram feed
The easiest way to embed your Instagram feed on your website is using a plugin. In this tutorial, we’ll be using Spotlight PRO – one of the easiest WordPress plugins to use.
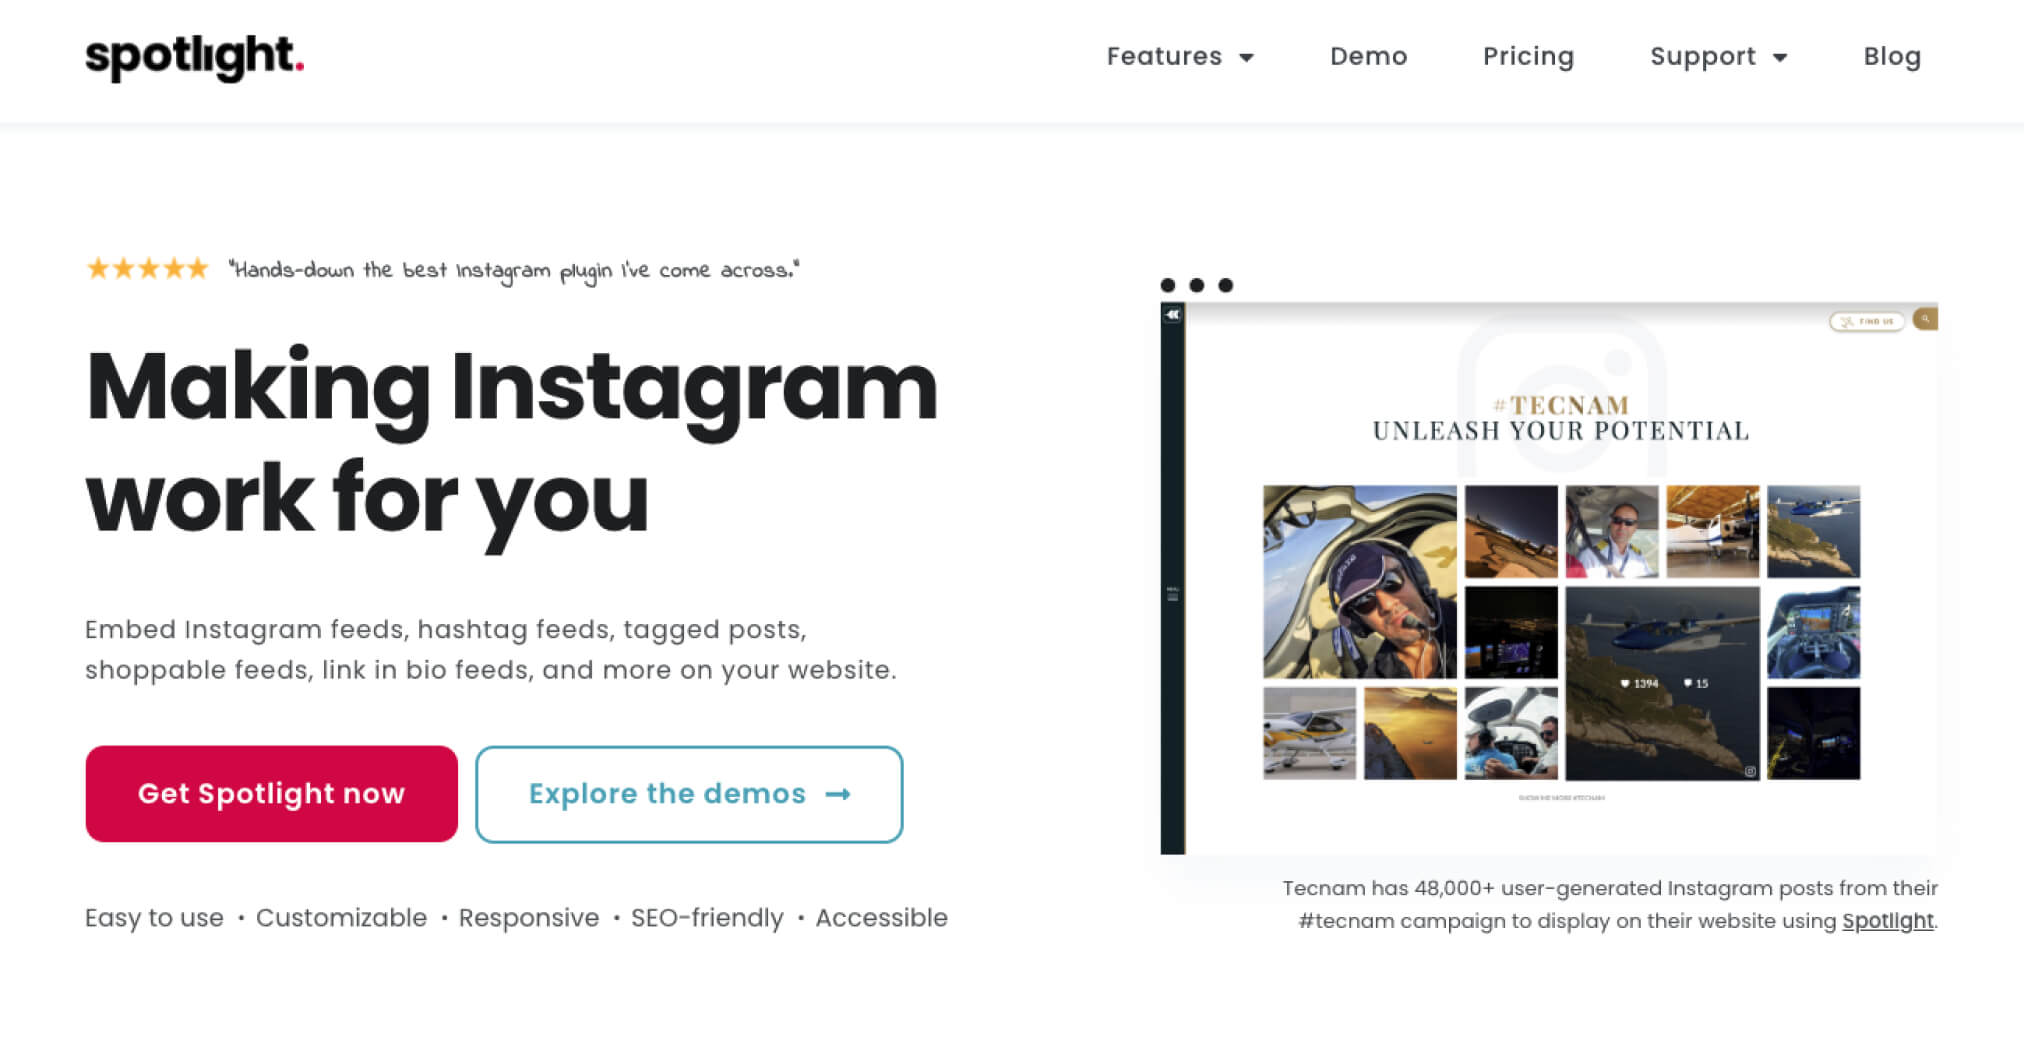
Whether you’re a total beginner or an Instagram expert, Spotlight will cater to all your needs with its excellent user interface and premium features.
Instagram is a visual platform, so naturally, you’ll need a spectacular feed on your website. Spotlight provides you with pre-made templates that you can use right out of the box for any situation. If you’d like to customize them further, you’ll find a vast range of options to help you do just that.
A good Instagram feed, like any website, should also be responsive. Spotlight enables you to adjust your feeds according to any device they are viewed on. What’s more, it’s completely SEO-friendly and accessible.
This lightweight plugin has been used by over 50,000 brands and creators to produce Instagram feeds for any use case imaginable.
Let’s take a look at how to get started.
How to embed your Instagram feed (tutorial)
Step 1: Install Spotlight PRO and connect your account
The first thing you need to do is to make sure that you have Spotlight PRO installed. First, get your copy of Spotlight here and upload it to your website.
If you’re unsure about how to do that, you can follow the instructions here. For a broader walkthrough on how to add an Instagram feed to your WordPress site, see our standalone guide before continuing with the block-editor steps below.
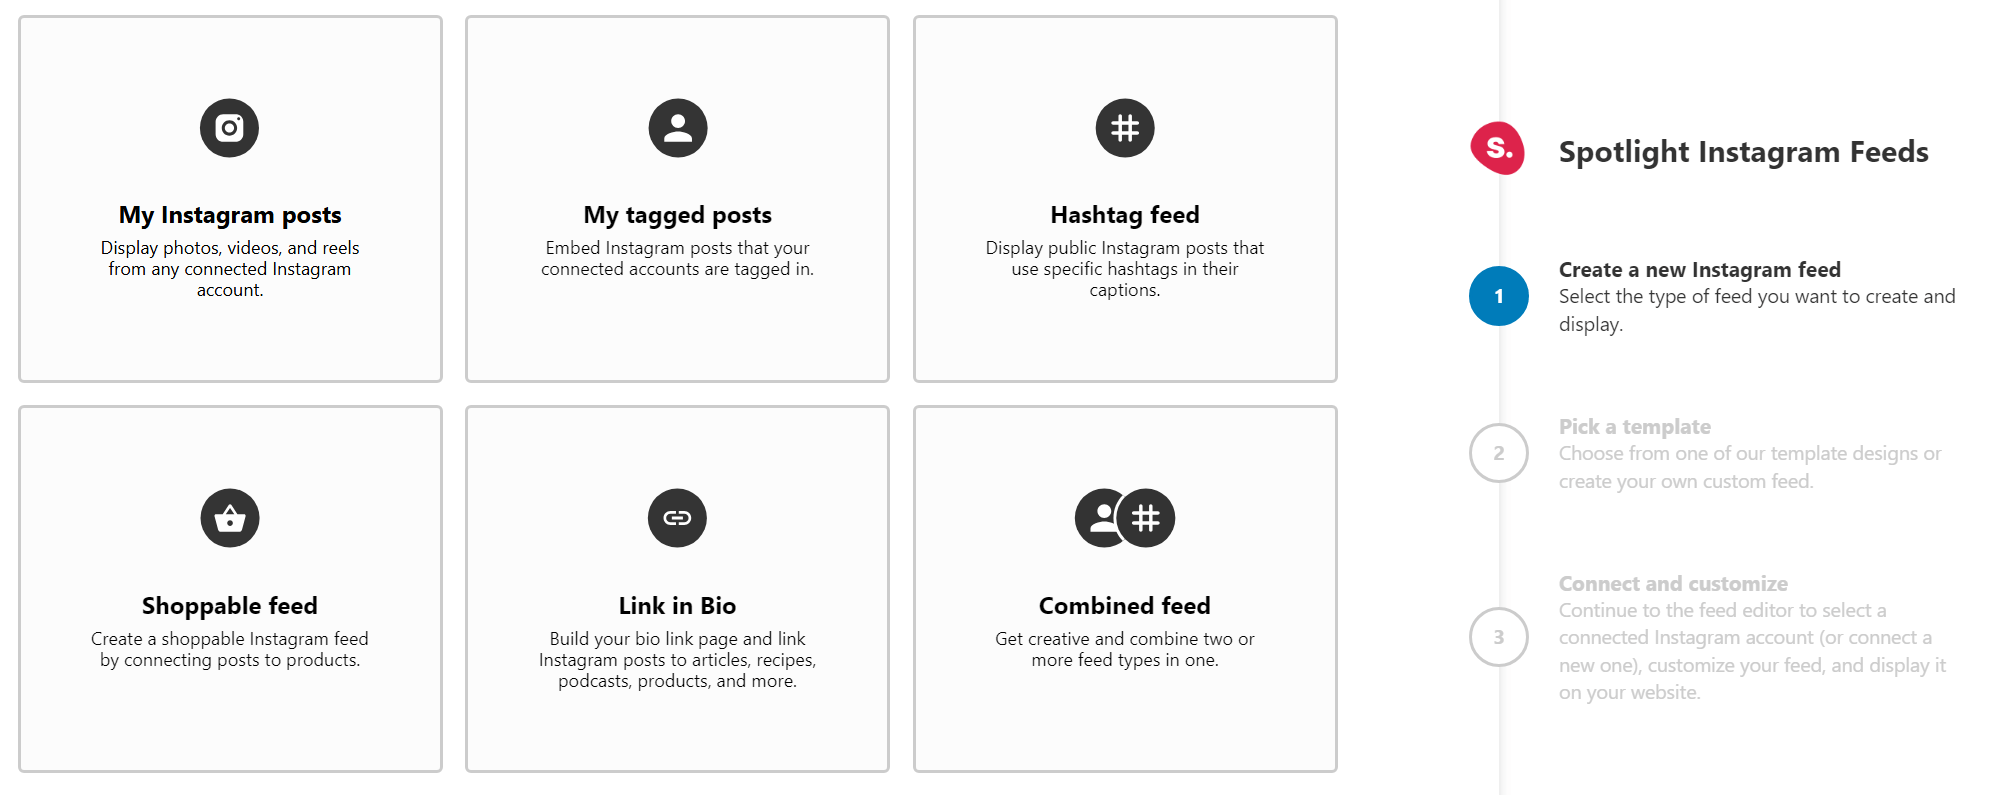
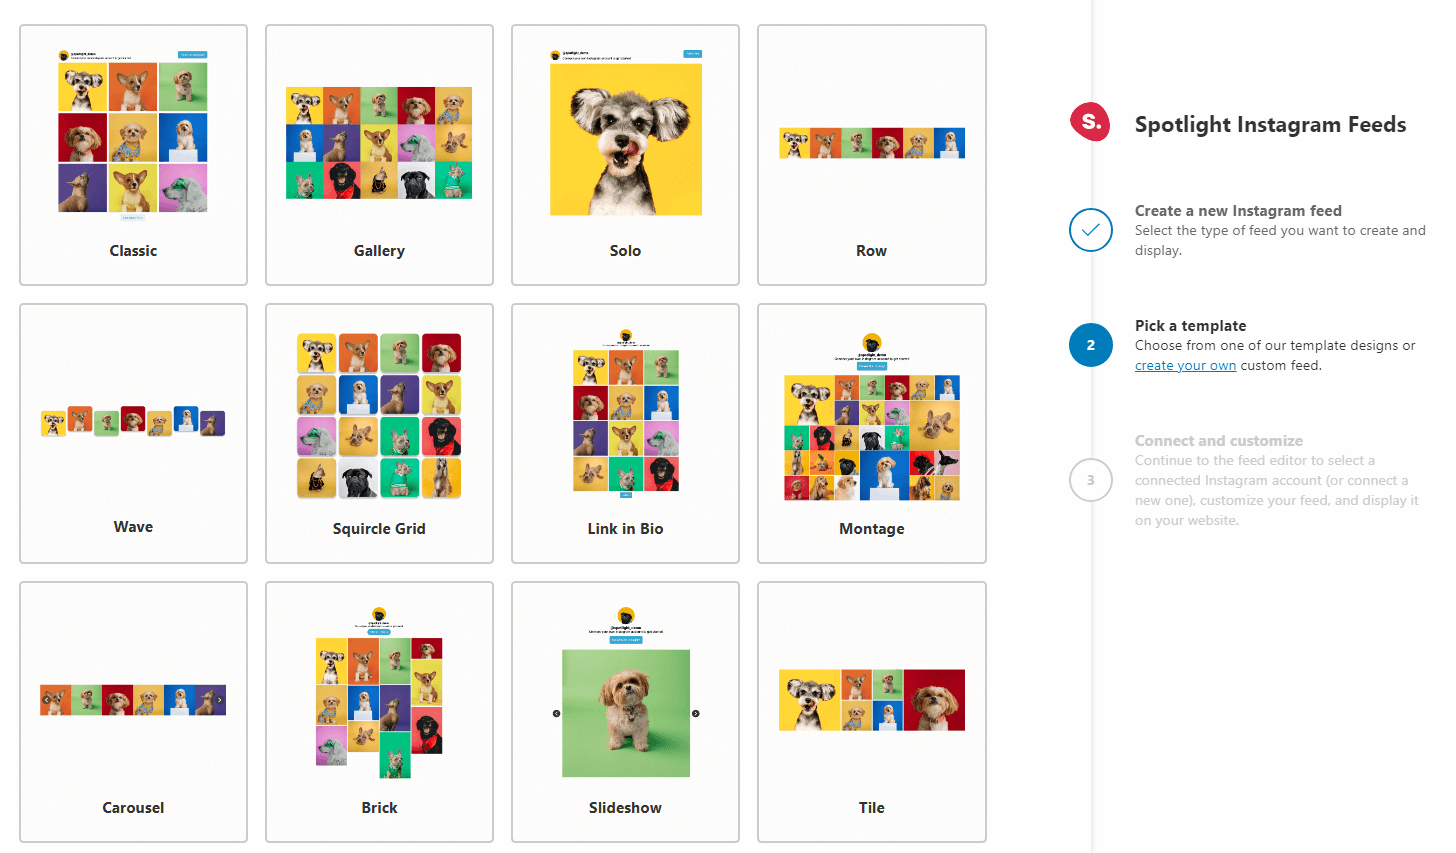
Once installed, Spotlight will ask you to choose the type of feed you would like to create, and a template.
To start working on the feed, you’ll need to connect a Professional Instagram account. If you’re using a Personal account, you’ll need to switch to either a Creator or Business account. This will give you access to advanced analytics and more control over your content. However, it also means your account will be public (which makes sense for a brand!). If you’re wiring up a client’s account rather than your own, you can generate an Instagram access token and paste it into Spotlight’s manual-connection option.
Also to connect your account to Spotlight, you’ll need to select a Basic or Advanced option. The difference between a Basic and an Advanced account is that a Basic account connects your professional account directly to Spotlight through Instagram, doesn’t require a Facebook Page, but doesn’t support hashtags or tagged feeds.
In contrast, an Advanced account requires your professional Instagram account to be linked to a Facebook Page before connecting it to Spotlight and gives you access to more features than a Basic account
Click on Connect more Instagram accounts to the right of the feed preview and select the type of connection you want to use:
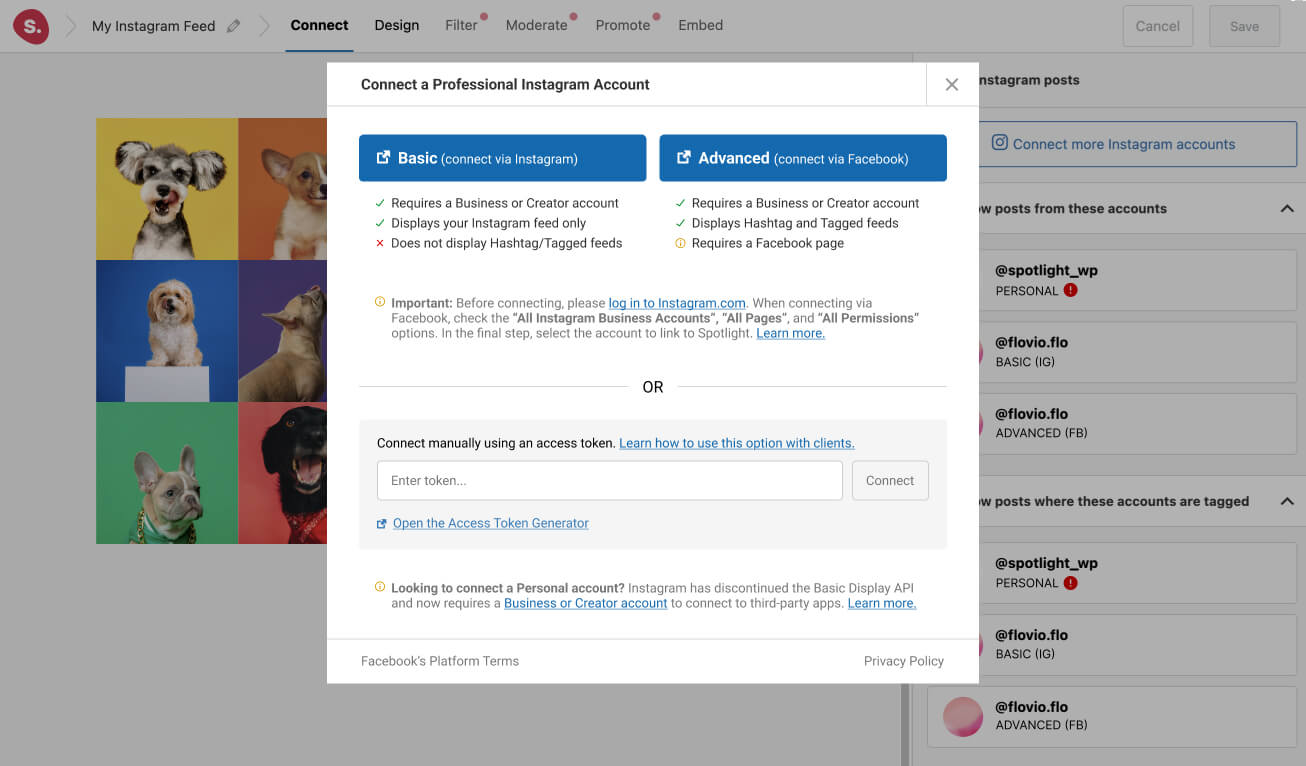
Ensure that you are already logged into your Instagram account in your browser. Spotlight will then confirm it’s the correct account, and you can allow access.
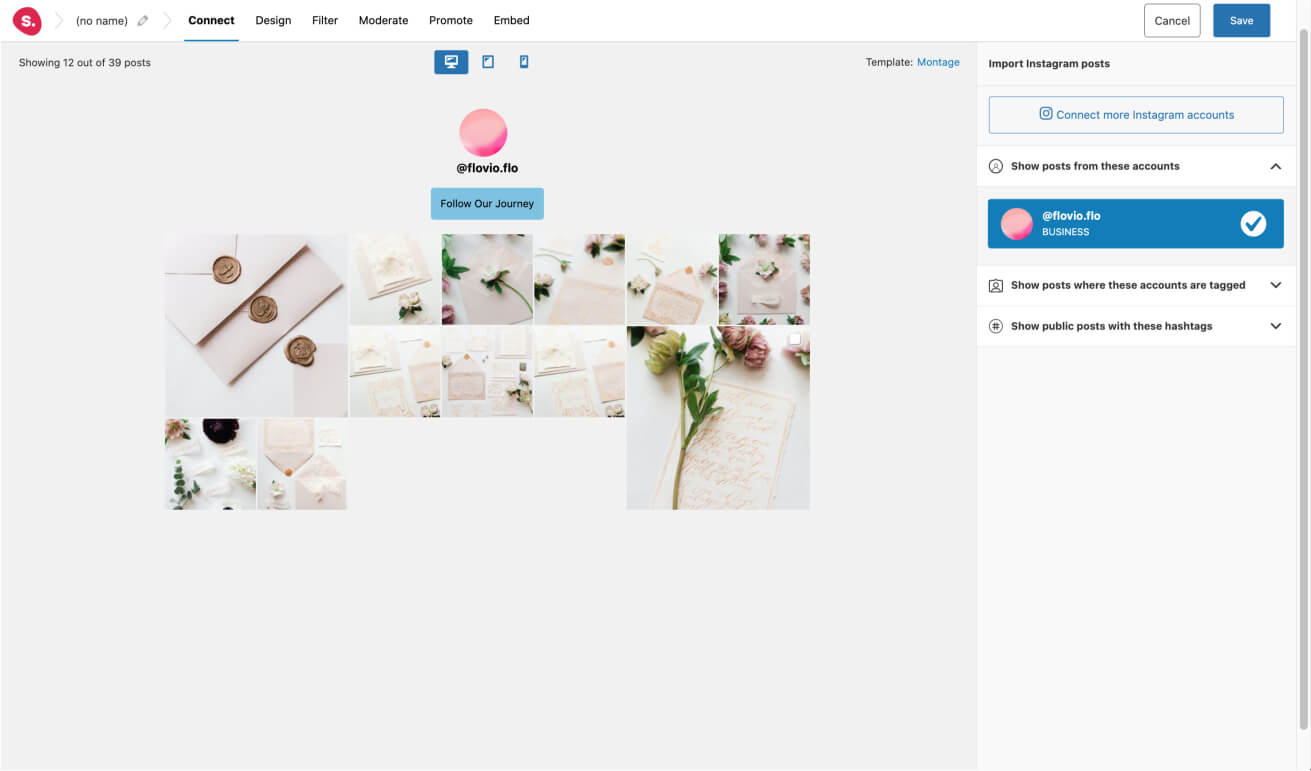
Your Instagram feed will now be visible within Spotlight!
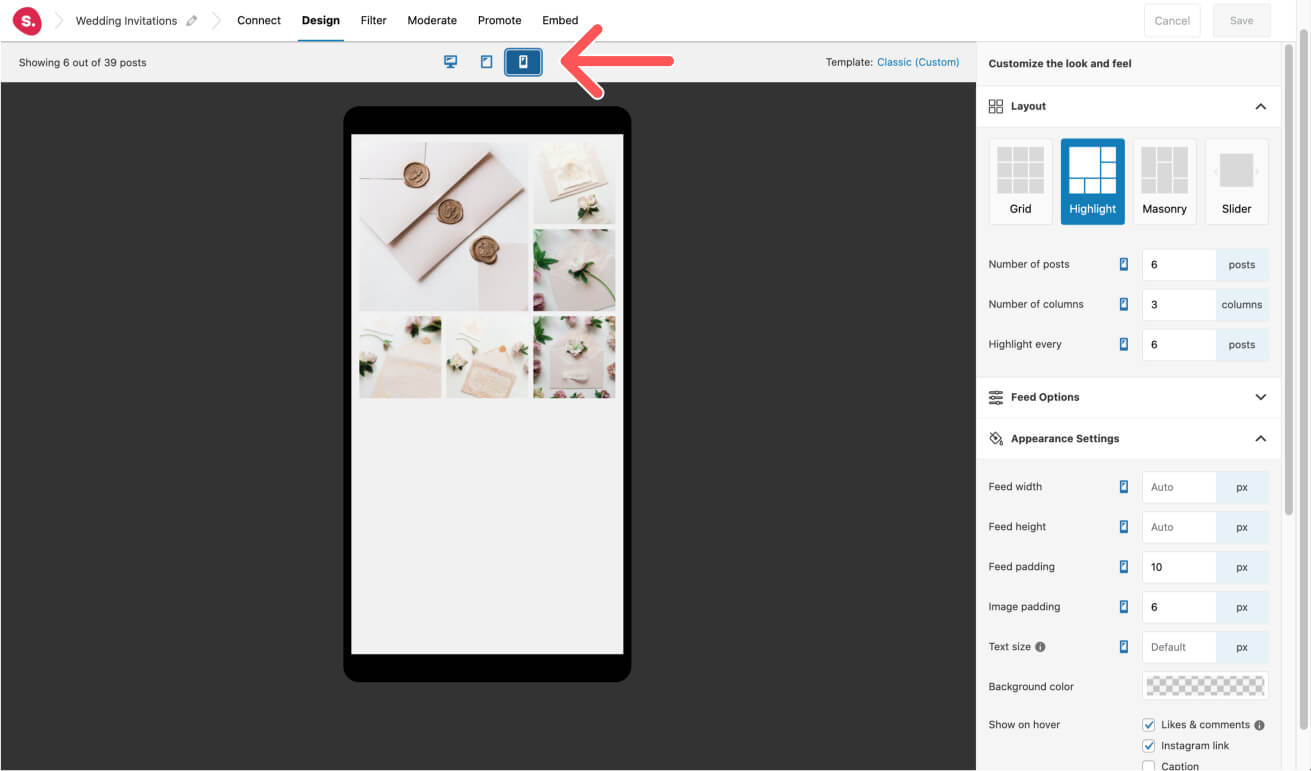
Step 2: Design your Instagram feed
Now, it’s time to make some small adjustments to make sure that our Instagram feed integrates seamlessly with our website.
To do this, navigate to the Design tab. In this example, I removed the header, set the background to transparent and altered the number of posts and columns.
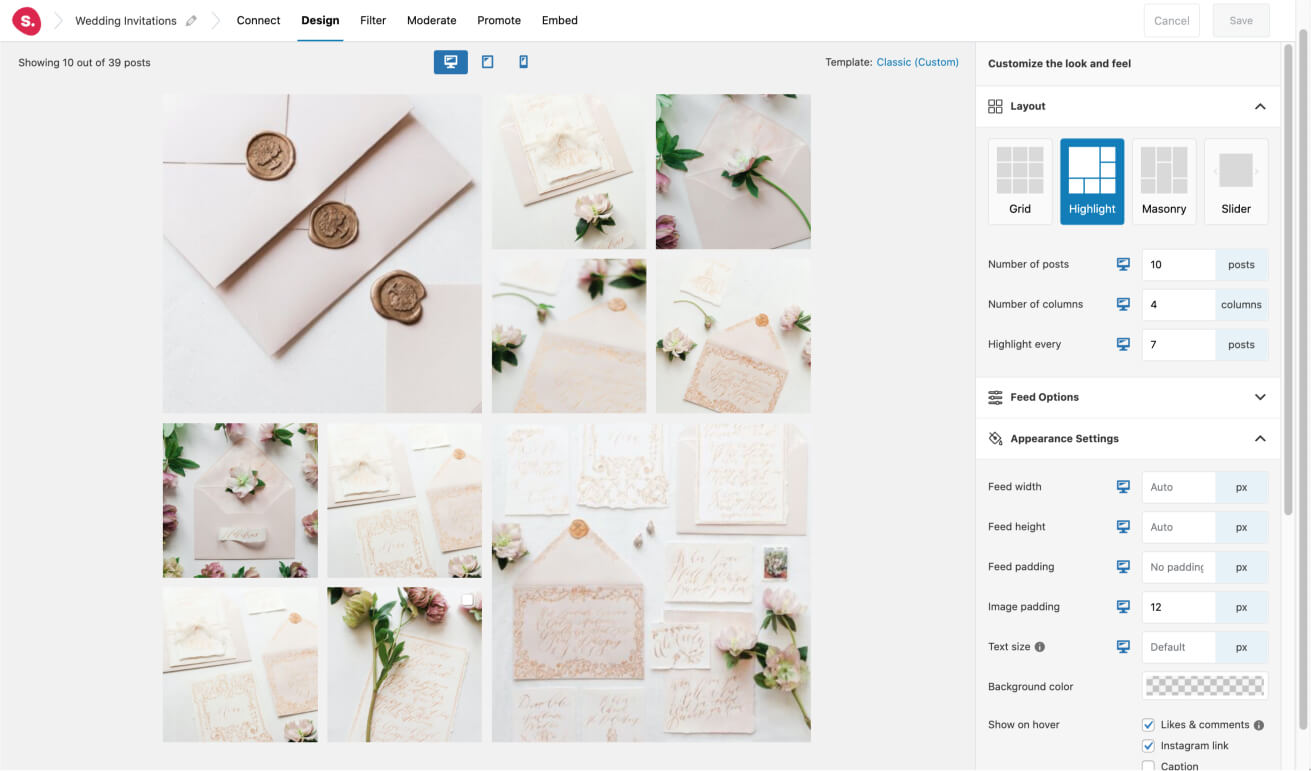
Spotlight comes with a ton of customization options so you’ll definitely find the right combination for your website.
The plugin also makes sure that your feeds are 100% fully responsive. You can switch between devices and apply different settings to make sure the feed looks good on desktop, mobile and tablet.
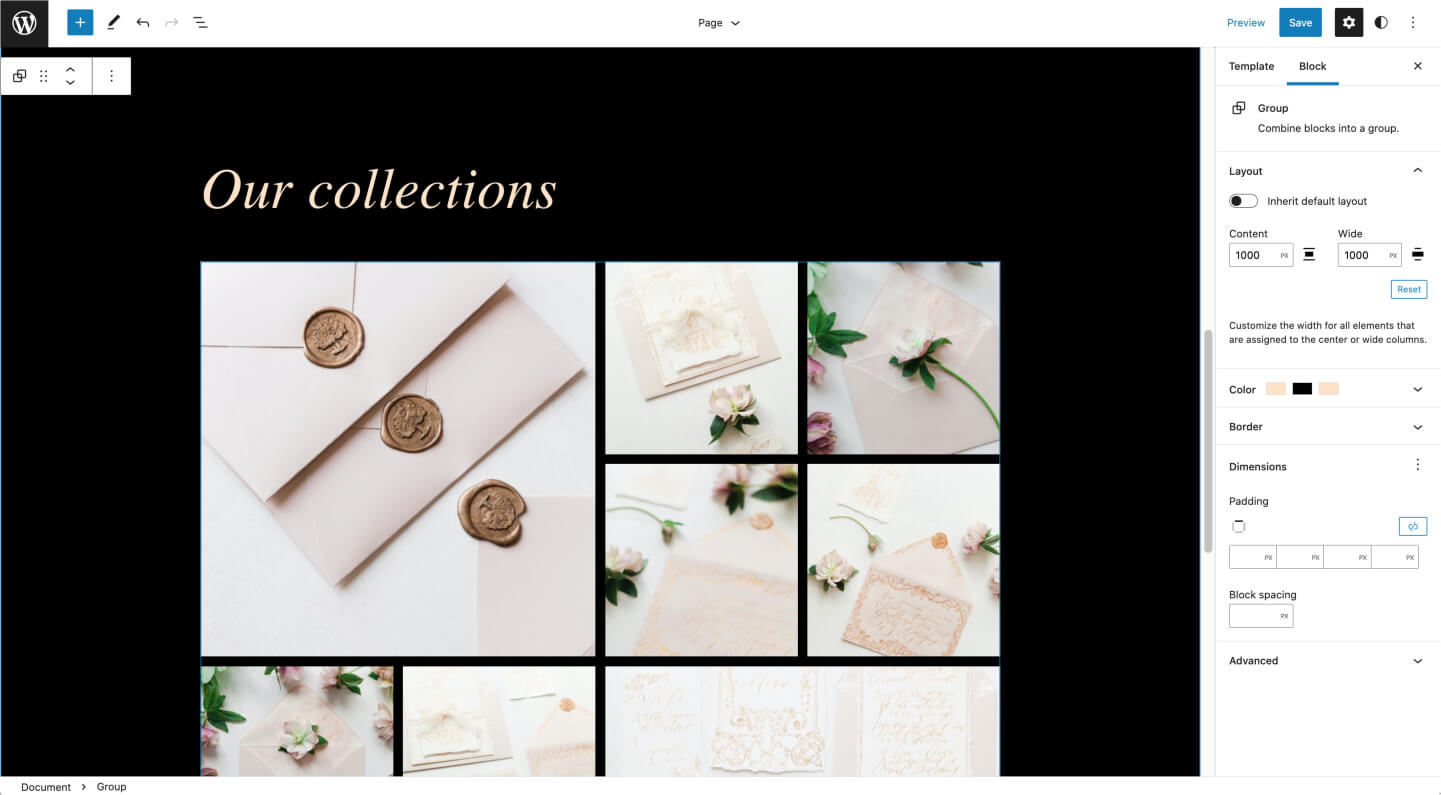
Step 3: Add your Instagram feed to your website
Finally, it’s time to embed your Instagram feed. In this example, we’ll be using the Block Editor. More specifically, we’ll be using Full Site Editing within WordPress.
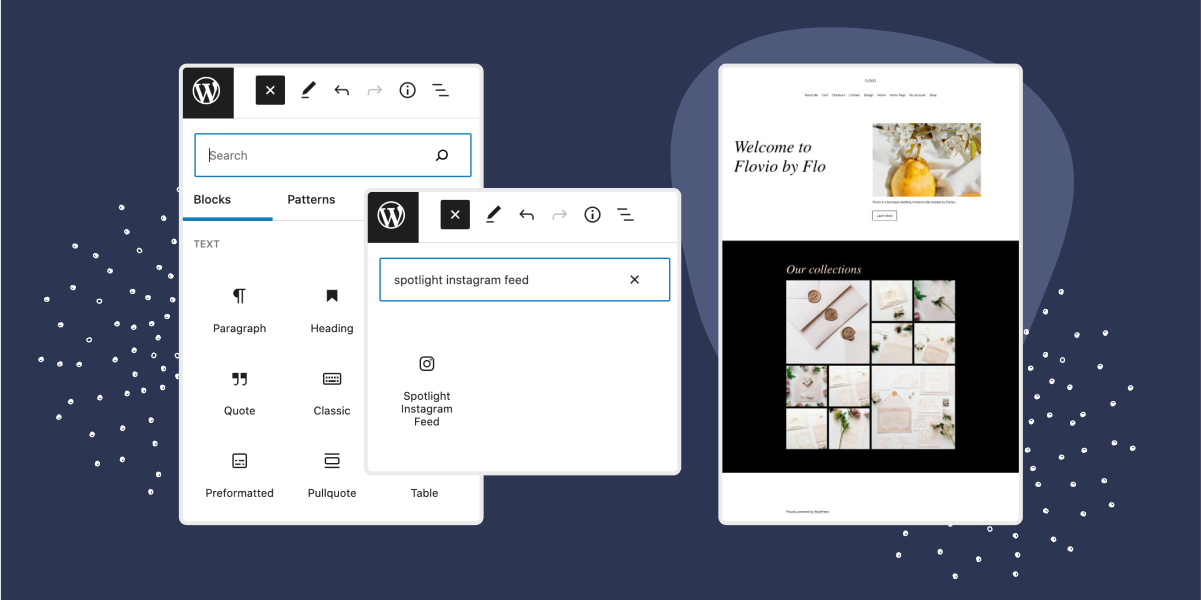
To add your feed to a page, all you need to do is navigate to that page and add the Spotlight block.
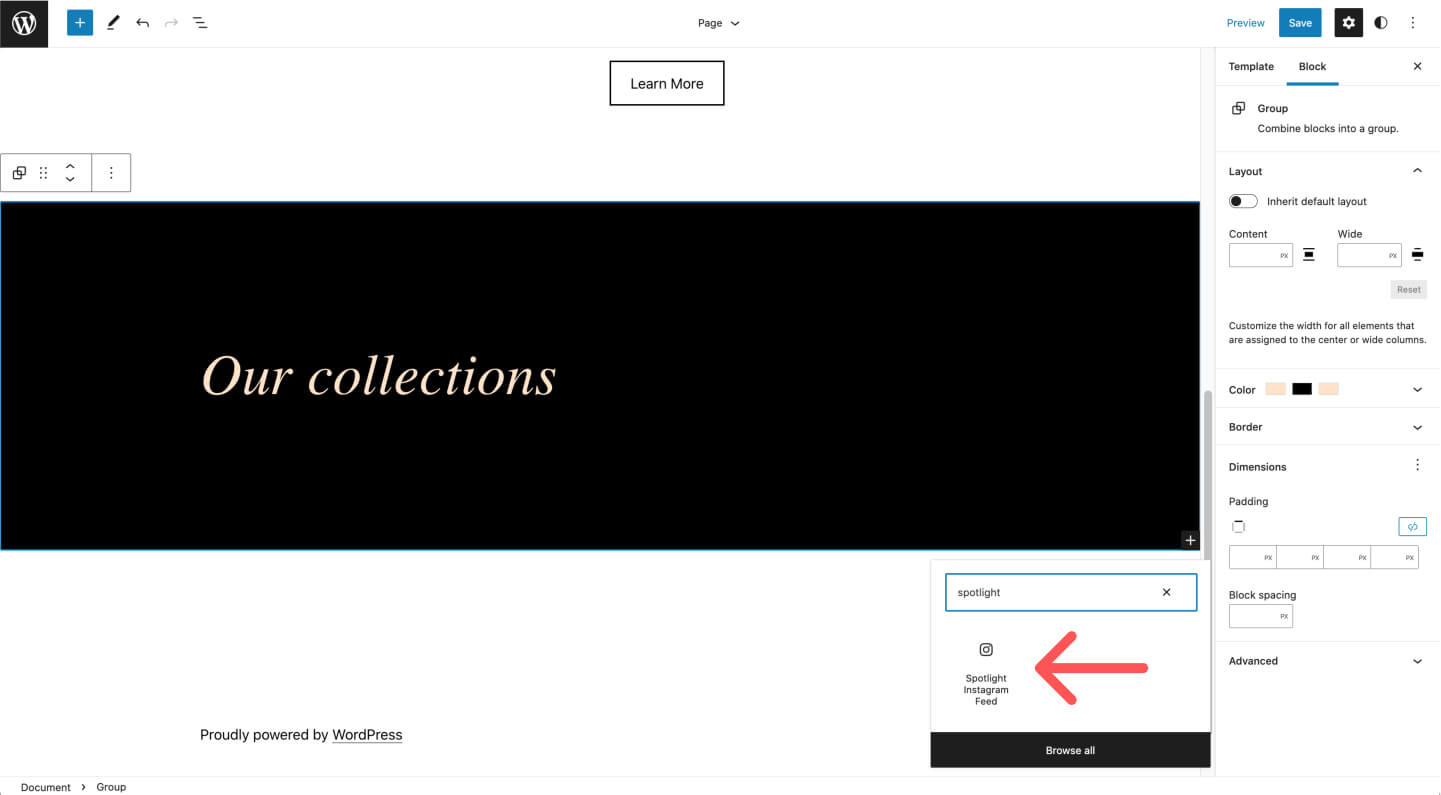
Next, you’ll need to select the feed you want to show from the dropdown menu, and voila! Your feed is now showing on your page.
Tips and Tricks
Connect more accounts
Do you want to add more accounts? No problem.
Spotlight lets you add as many Professional Instagram accounts as you like. You can do this in two ways. Either start the whole process listed above again and connect another account, or, head over to the Settings page to connect your Instagram account there.
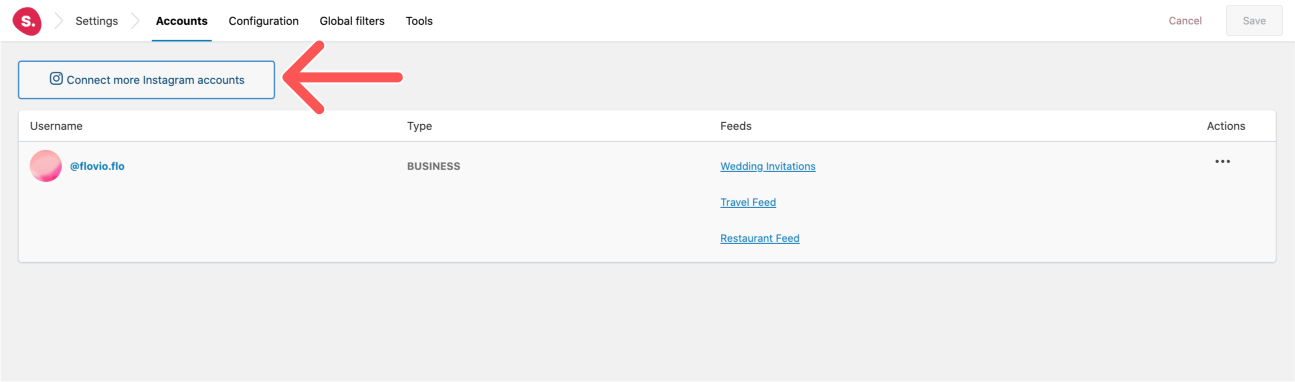
Note: If the account you’re already connected to shows up, simply log out from that account in your browser and log in to the new account before proceeding further.
Spotlight also lets you display posts from all your connected accounts in one layout.
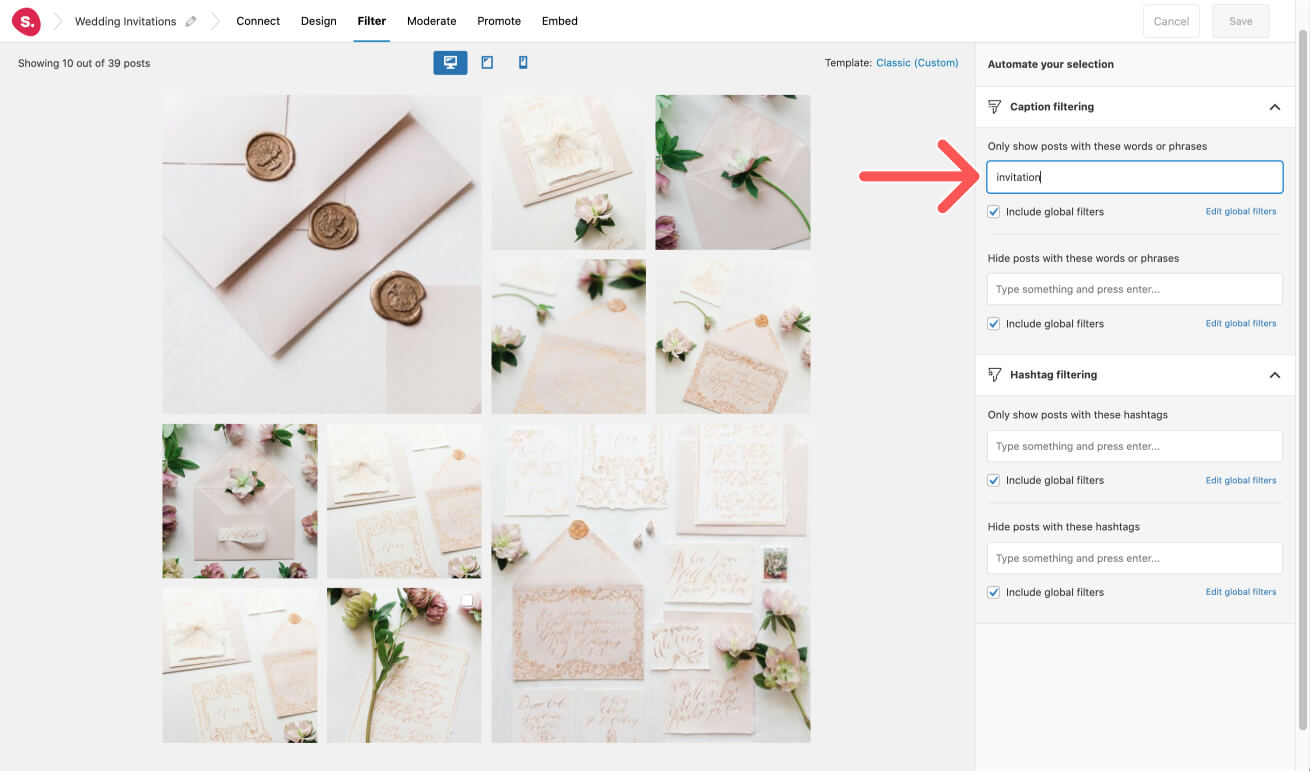
Filter
You might be wondering how to specify which posts should show up in your Instagram feed. Spotlight gives you the opportunity to have full control over your feeds thanks to its filtering and moderation features.
Let’s start off with filtering. Spotlight lets you filter posts by hashtag or by caption. This means that you can enter a hashtag or word and Spotlight will show any of the posts containing that hashtag or word in their caption.
It’s that easy.
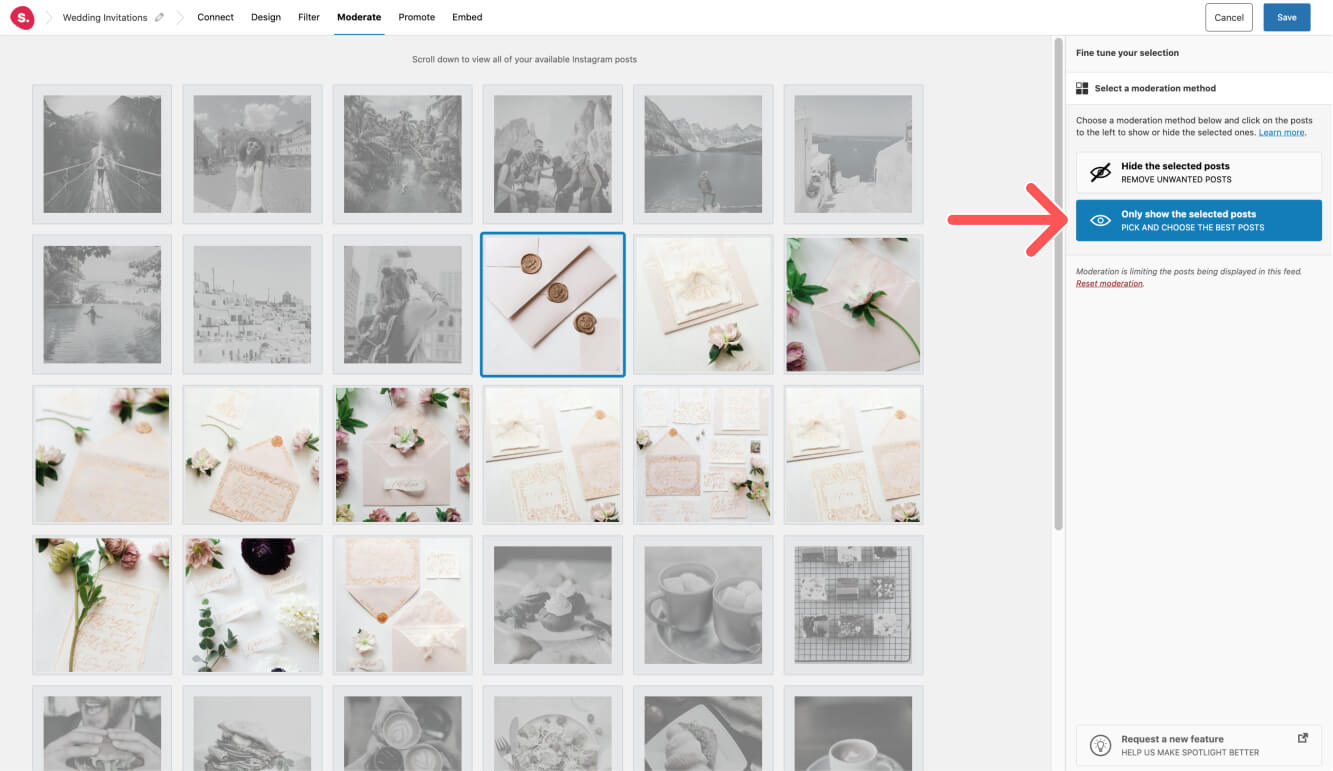
Moderate
Quite similarly, you can choose to display or hide specific posts with the help of the moderation feature.
All you need to do is click on the posts you want to show or hide, and Spotlight will take care of the rest for you.
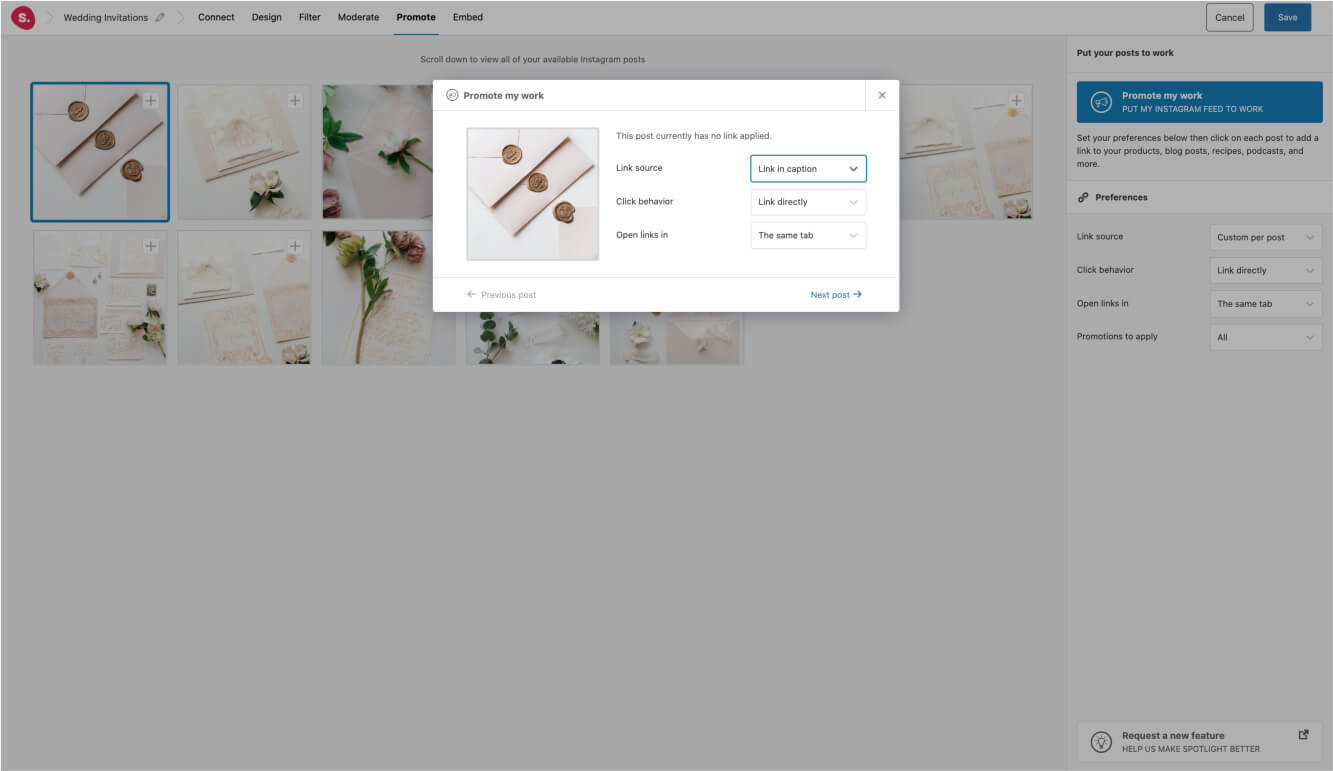
Promote
Spotlight also lets you link your Instagram posts to pages, posts, WooCommerce products, and more.
Simply go to the Promote tab and select a post. Then type in the URL or post/page/product name. Your website visitors will then be able to click on an Instagram post within your feed and be redirected to a specific URL of your choosing.
Conclusion
In this tutorial, we’ve seen how to add your Instagram feed to your website using the Block Editor.
To start increasing your sales, followers, and conversions, download Spotlight PRO here.