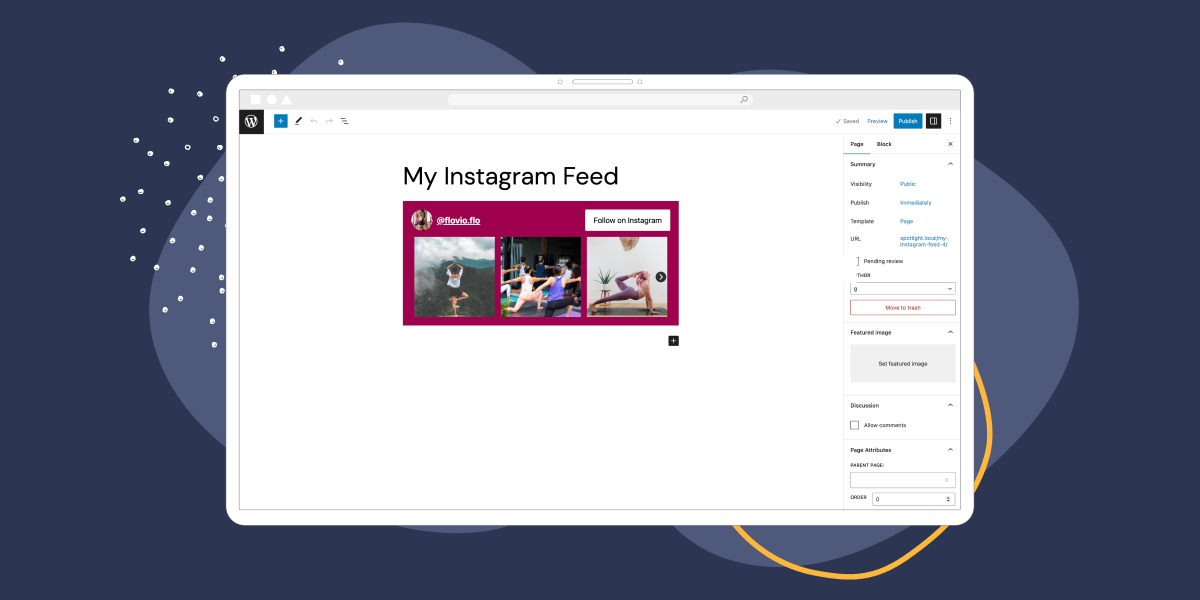
One of the easiest ways to drive traffic between your website and your social media accounts is to display a custom Instagram feed in WordPress. Plus, it’s a great way to make sure your site stays updated with fresh content. However, this can be difficult to achieve manually.
Fortunately, you can use a handy plugin to embed your Instagram feed on your website. Better yet, with the right tool, your feed will update automatically. Plus you’ll gain full control over your feed’s display since you can change the size, colors, and more.
In this post, we’ll guide you through four simple steps to create a custom Instagram feed in WordPress. Let’s get started!
Why it’s smart to feature your Instagram feed on your site
Typically, keeping your site updated with fresh content requires you to manually add new posts or pages in WordPress. However, if you embed an Instagram feed, you’re always able to deliver new content to your visitors with minimal effort.
What’s more, you can even show tagged posts or create a hashtag feed to display photos that other users have tagged you in. If you run an e-commerce store, this can be a useful way to provide social proof and increase sales.
However, it’s important to create an Instagram feed that fits in nicely with the rest of your website’s design. That way, you can create a consistent User Experience (UX) and reinforce your branding.
How to create a custom Instagram feed in WordPress (In 4 steps)
Now that you know how an Instagram feed can benefit your website, let’s take a look at four easy steps to embed a feed into WordPress.
Step 1: Install Spotlight and create a new Instagram feed
The easiest way to create a custom Instagram feed in WordPress is to use a handy plugin like Spotlight Social Feeds. You can install the plugin for free, but a premium plan offers access to lots of extra templates and features.
Once you’ve activated Spotlight on your site, head to the Instagram Feeds tab, where you’ll be guided through the steps to create a new feed:
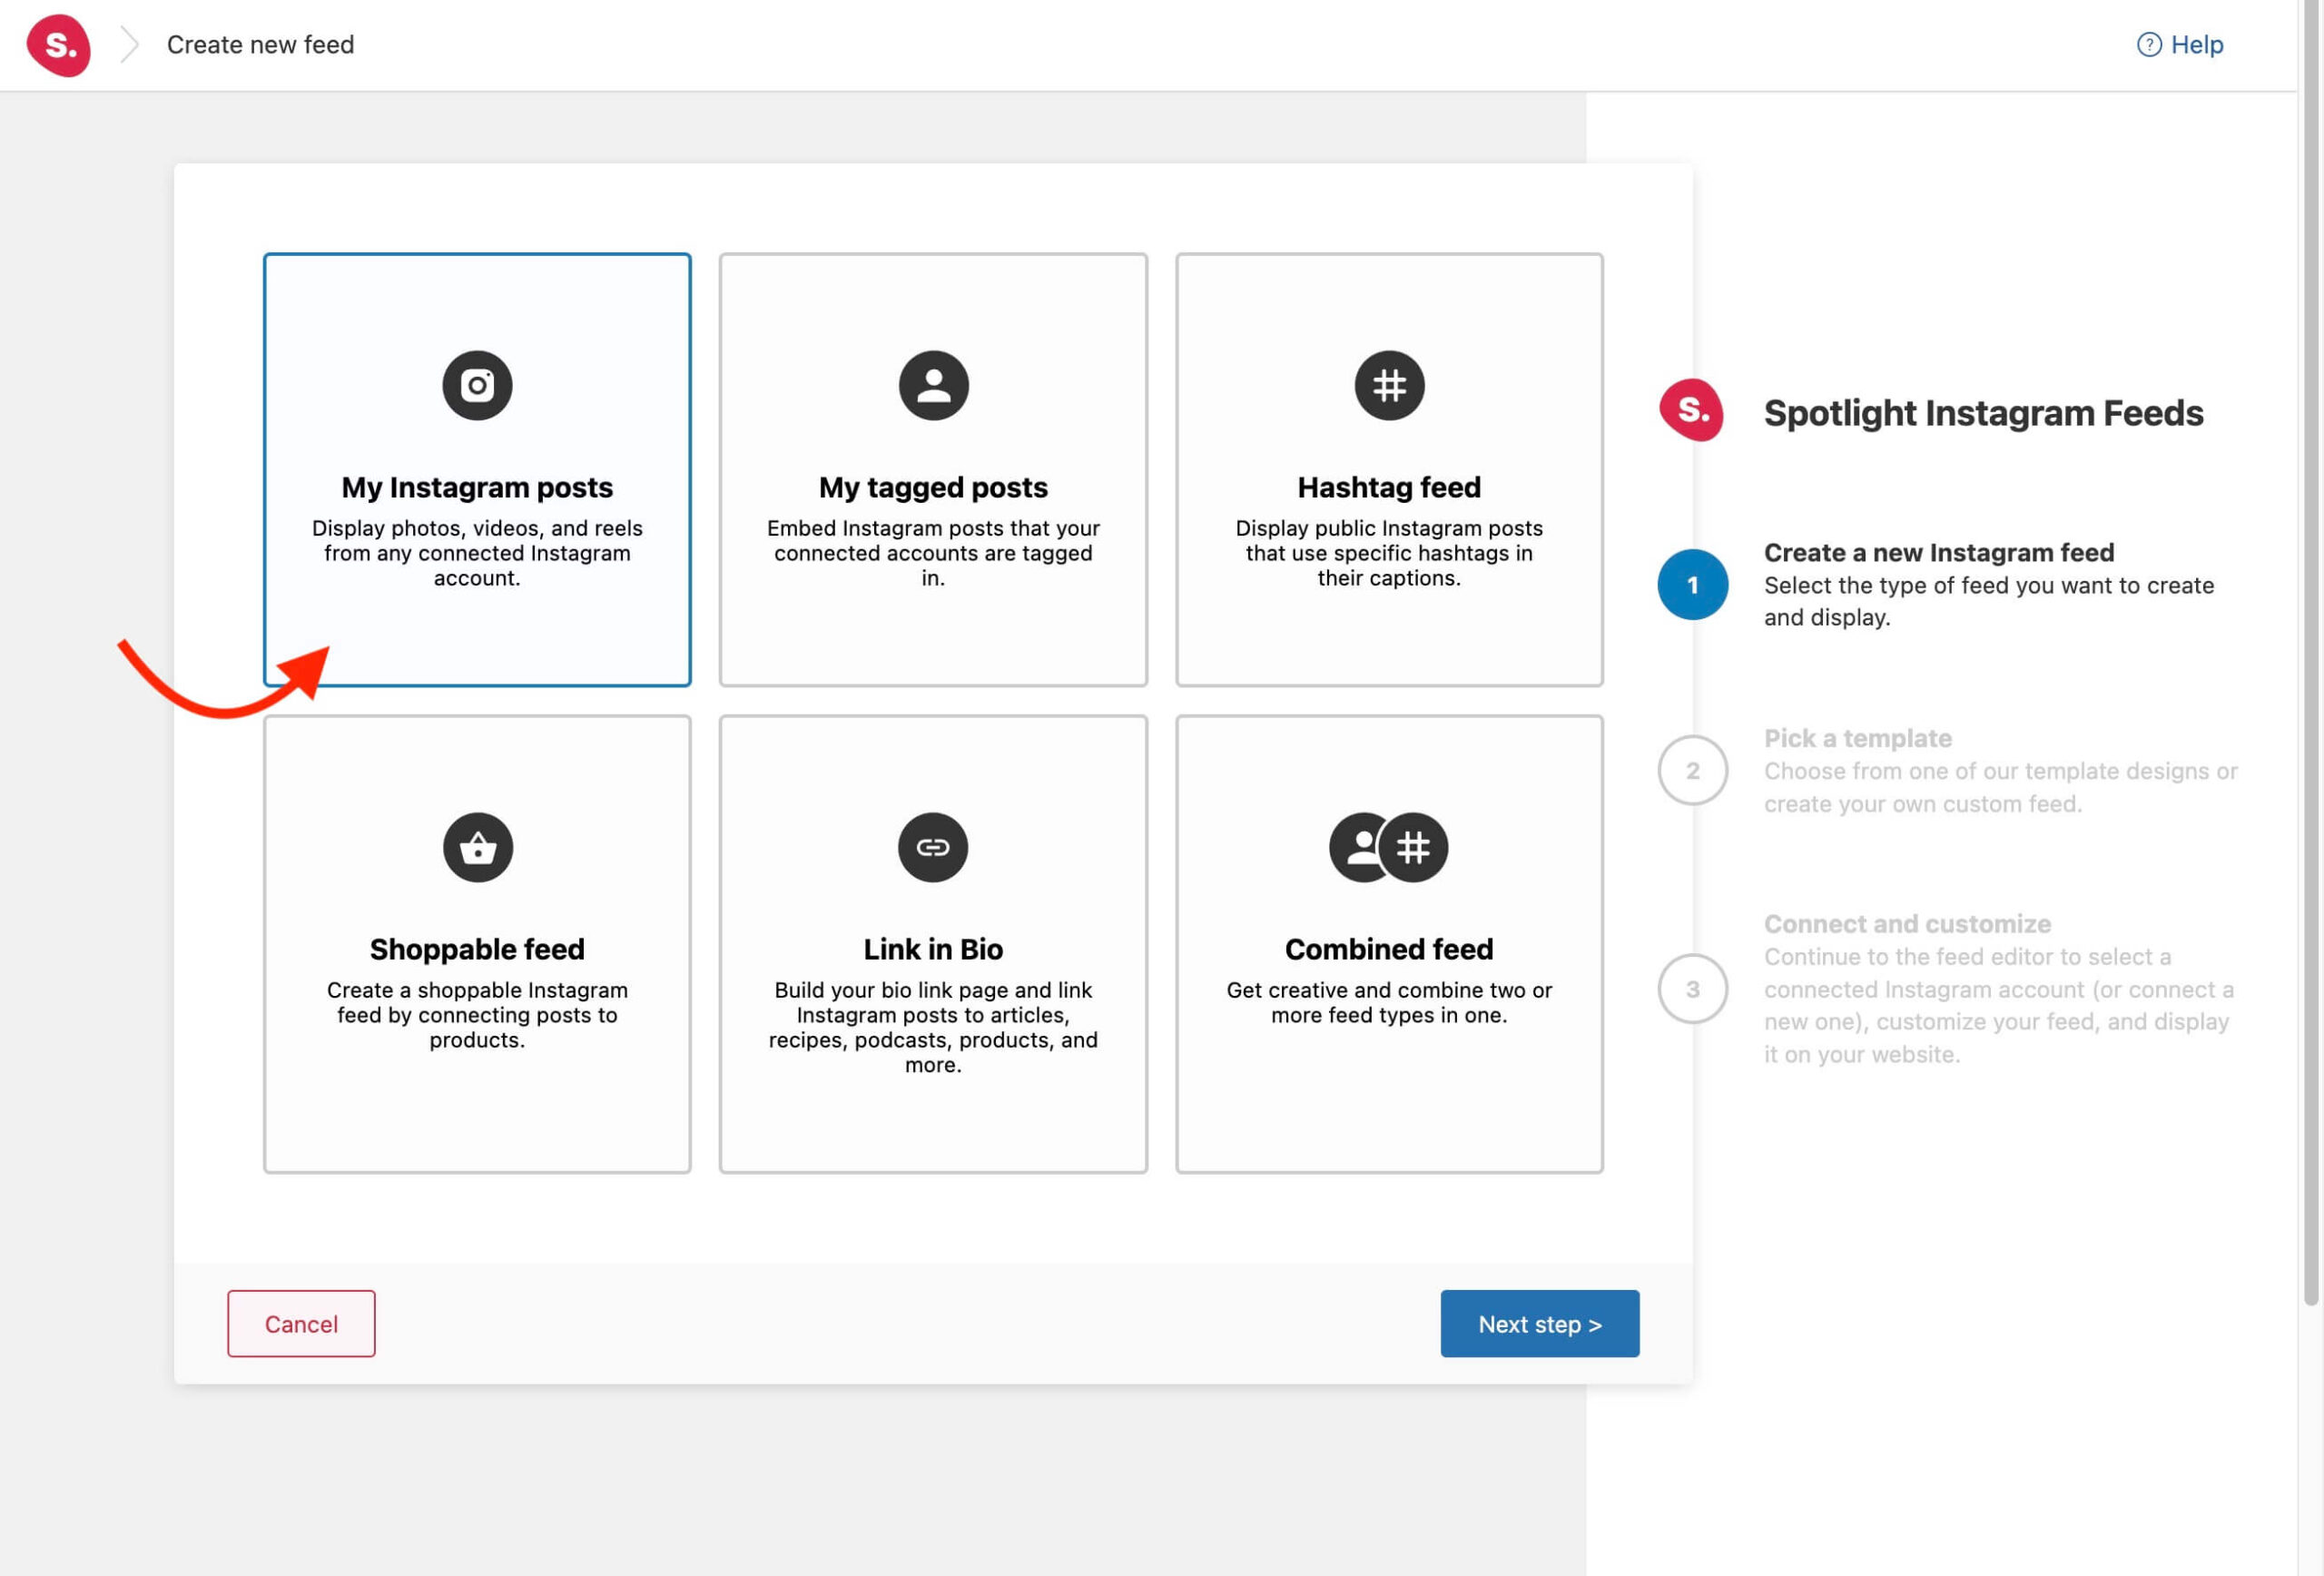
You’ll first be asked what kind of feed you want to create. For example, you can display all of your Instagram posts including photos, videos, and reels. Or you might stick with tagged posts, a hashtag feed, or a shoppable feed. Make your selection and click on Next step.
Next, you’ll choose a design template to structure your feed within, such as a photo gallery or row. However, to create a custom Instagram feed, click on the create your own link beneath the Pick a template section:
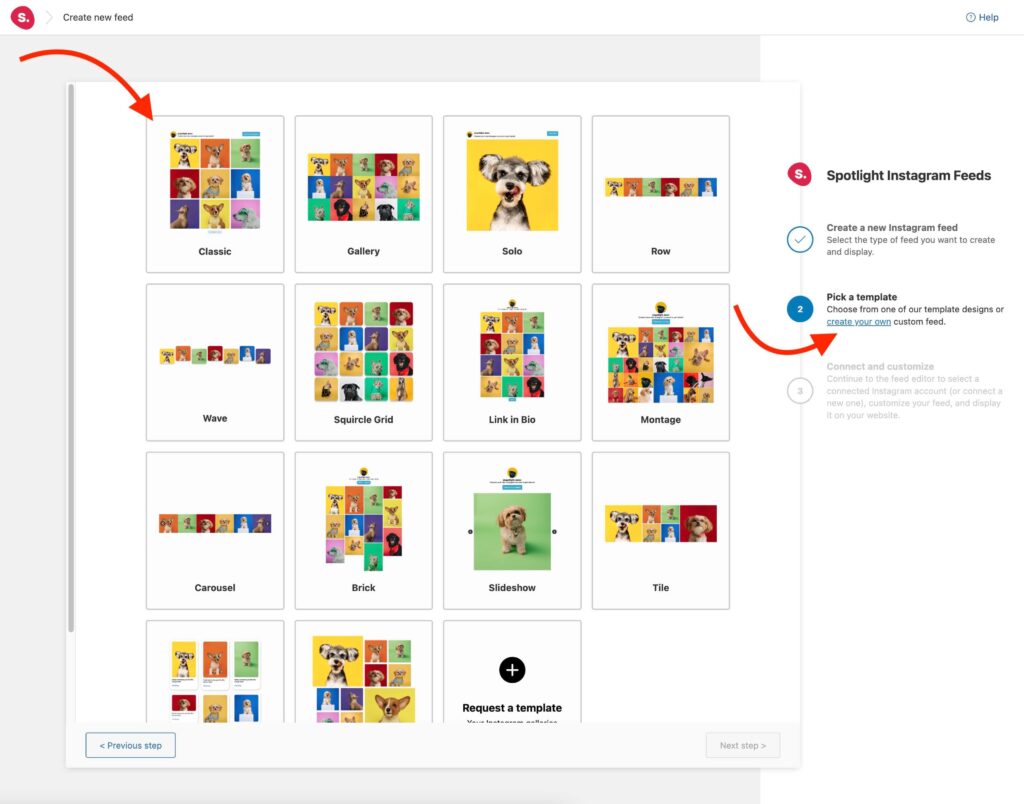
This will take you to the final page of the feed setup before you reach the feed editor. Simply click on Connect & customize to continue.
Step 2: Connect to your Instagram account
Once you’ve clicked on the Connect & customize button, you’ll arrive in the Spotlight feed editor.
Now you can choose what connection method you want to use (Basic or Advanced). Either option requires an Instagram Professional (Business or Creator) account.
Personal accounts can no longer be added since Instagram discontinued its API.
Additionally, if you’re connecting to a client’s account, you can use a unique access token:
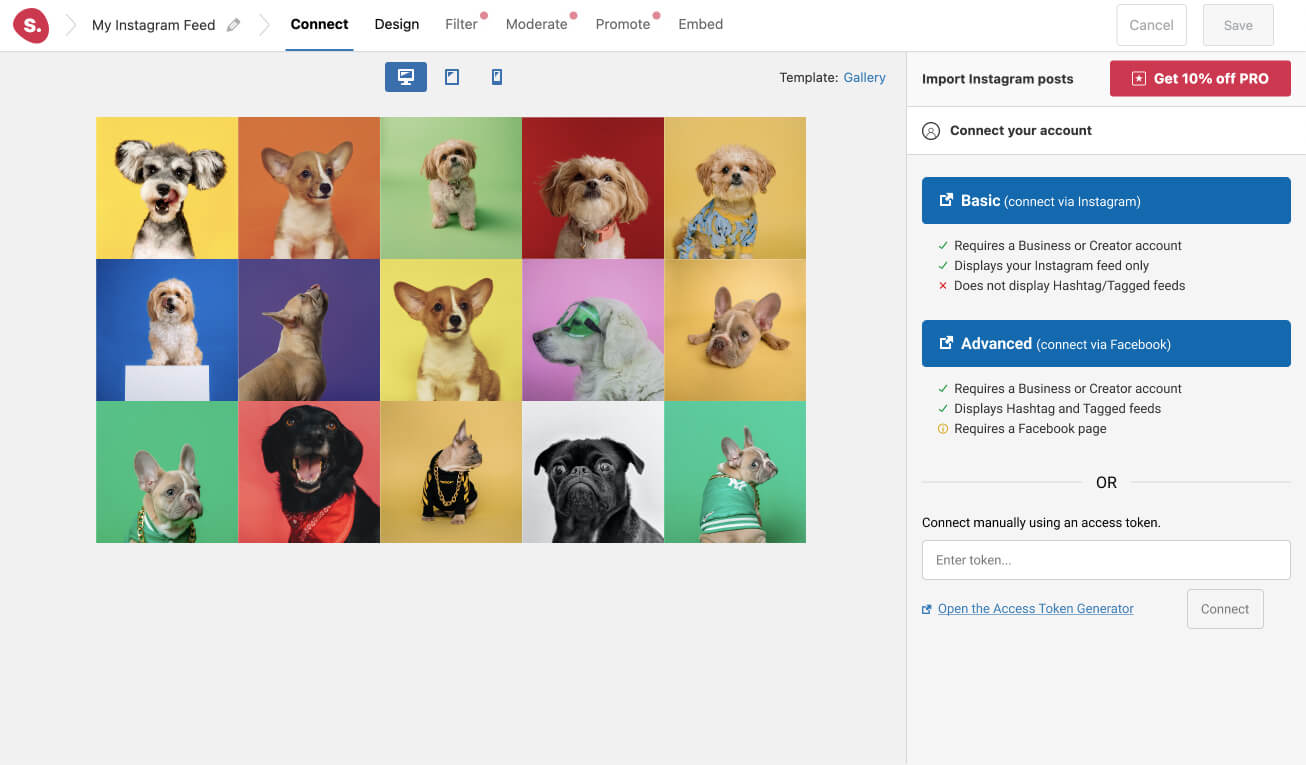
It can take a few seconds to retrieve posts from the Instagram account. Then you should see the correct account appear to the right of the editor. You can also connect multiple accounts by clicking on the Connect more Instagram accounts button.
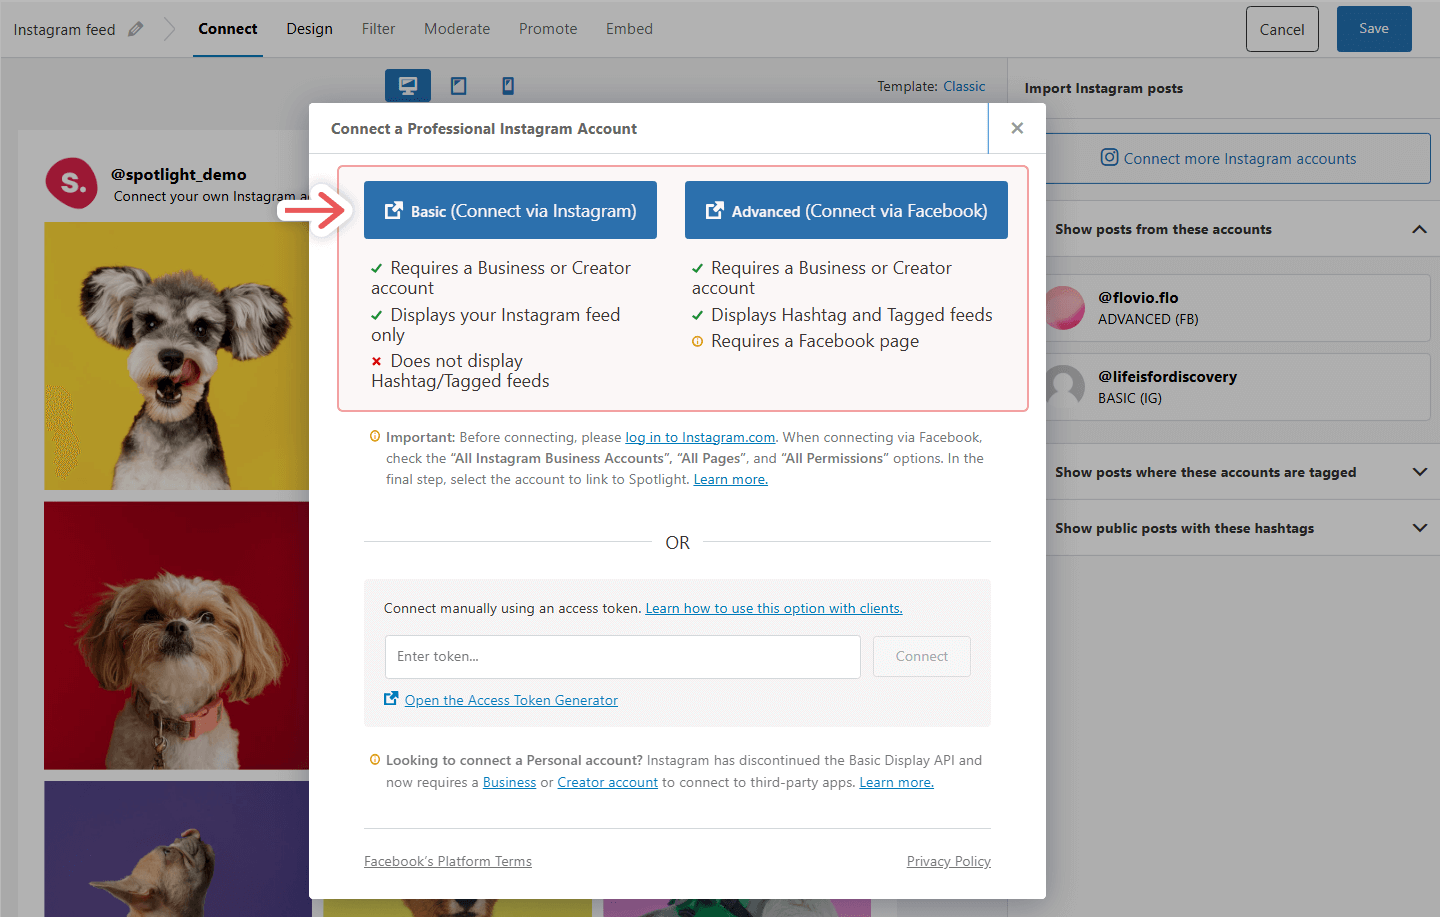
You’re now ready to finish setting up your custom Instagram feed in WordPress.
Step 3: Customize your Instagram feed
Once you’ve connected to your account, you’re all set to create your custom Instagram feed in WordPress. Switch over to the Design tab.
Here you can select a layout for your feed. Plus, you can configure the exact number of posts and columns that you want to display on your page.
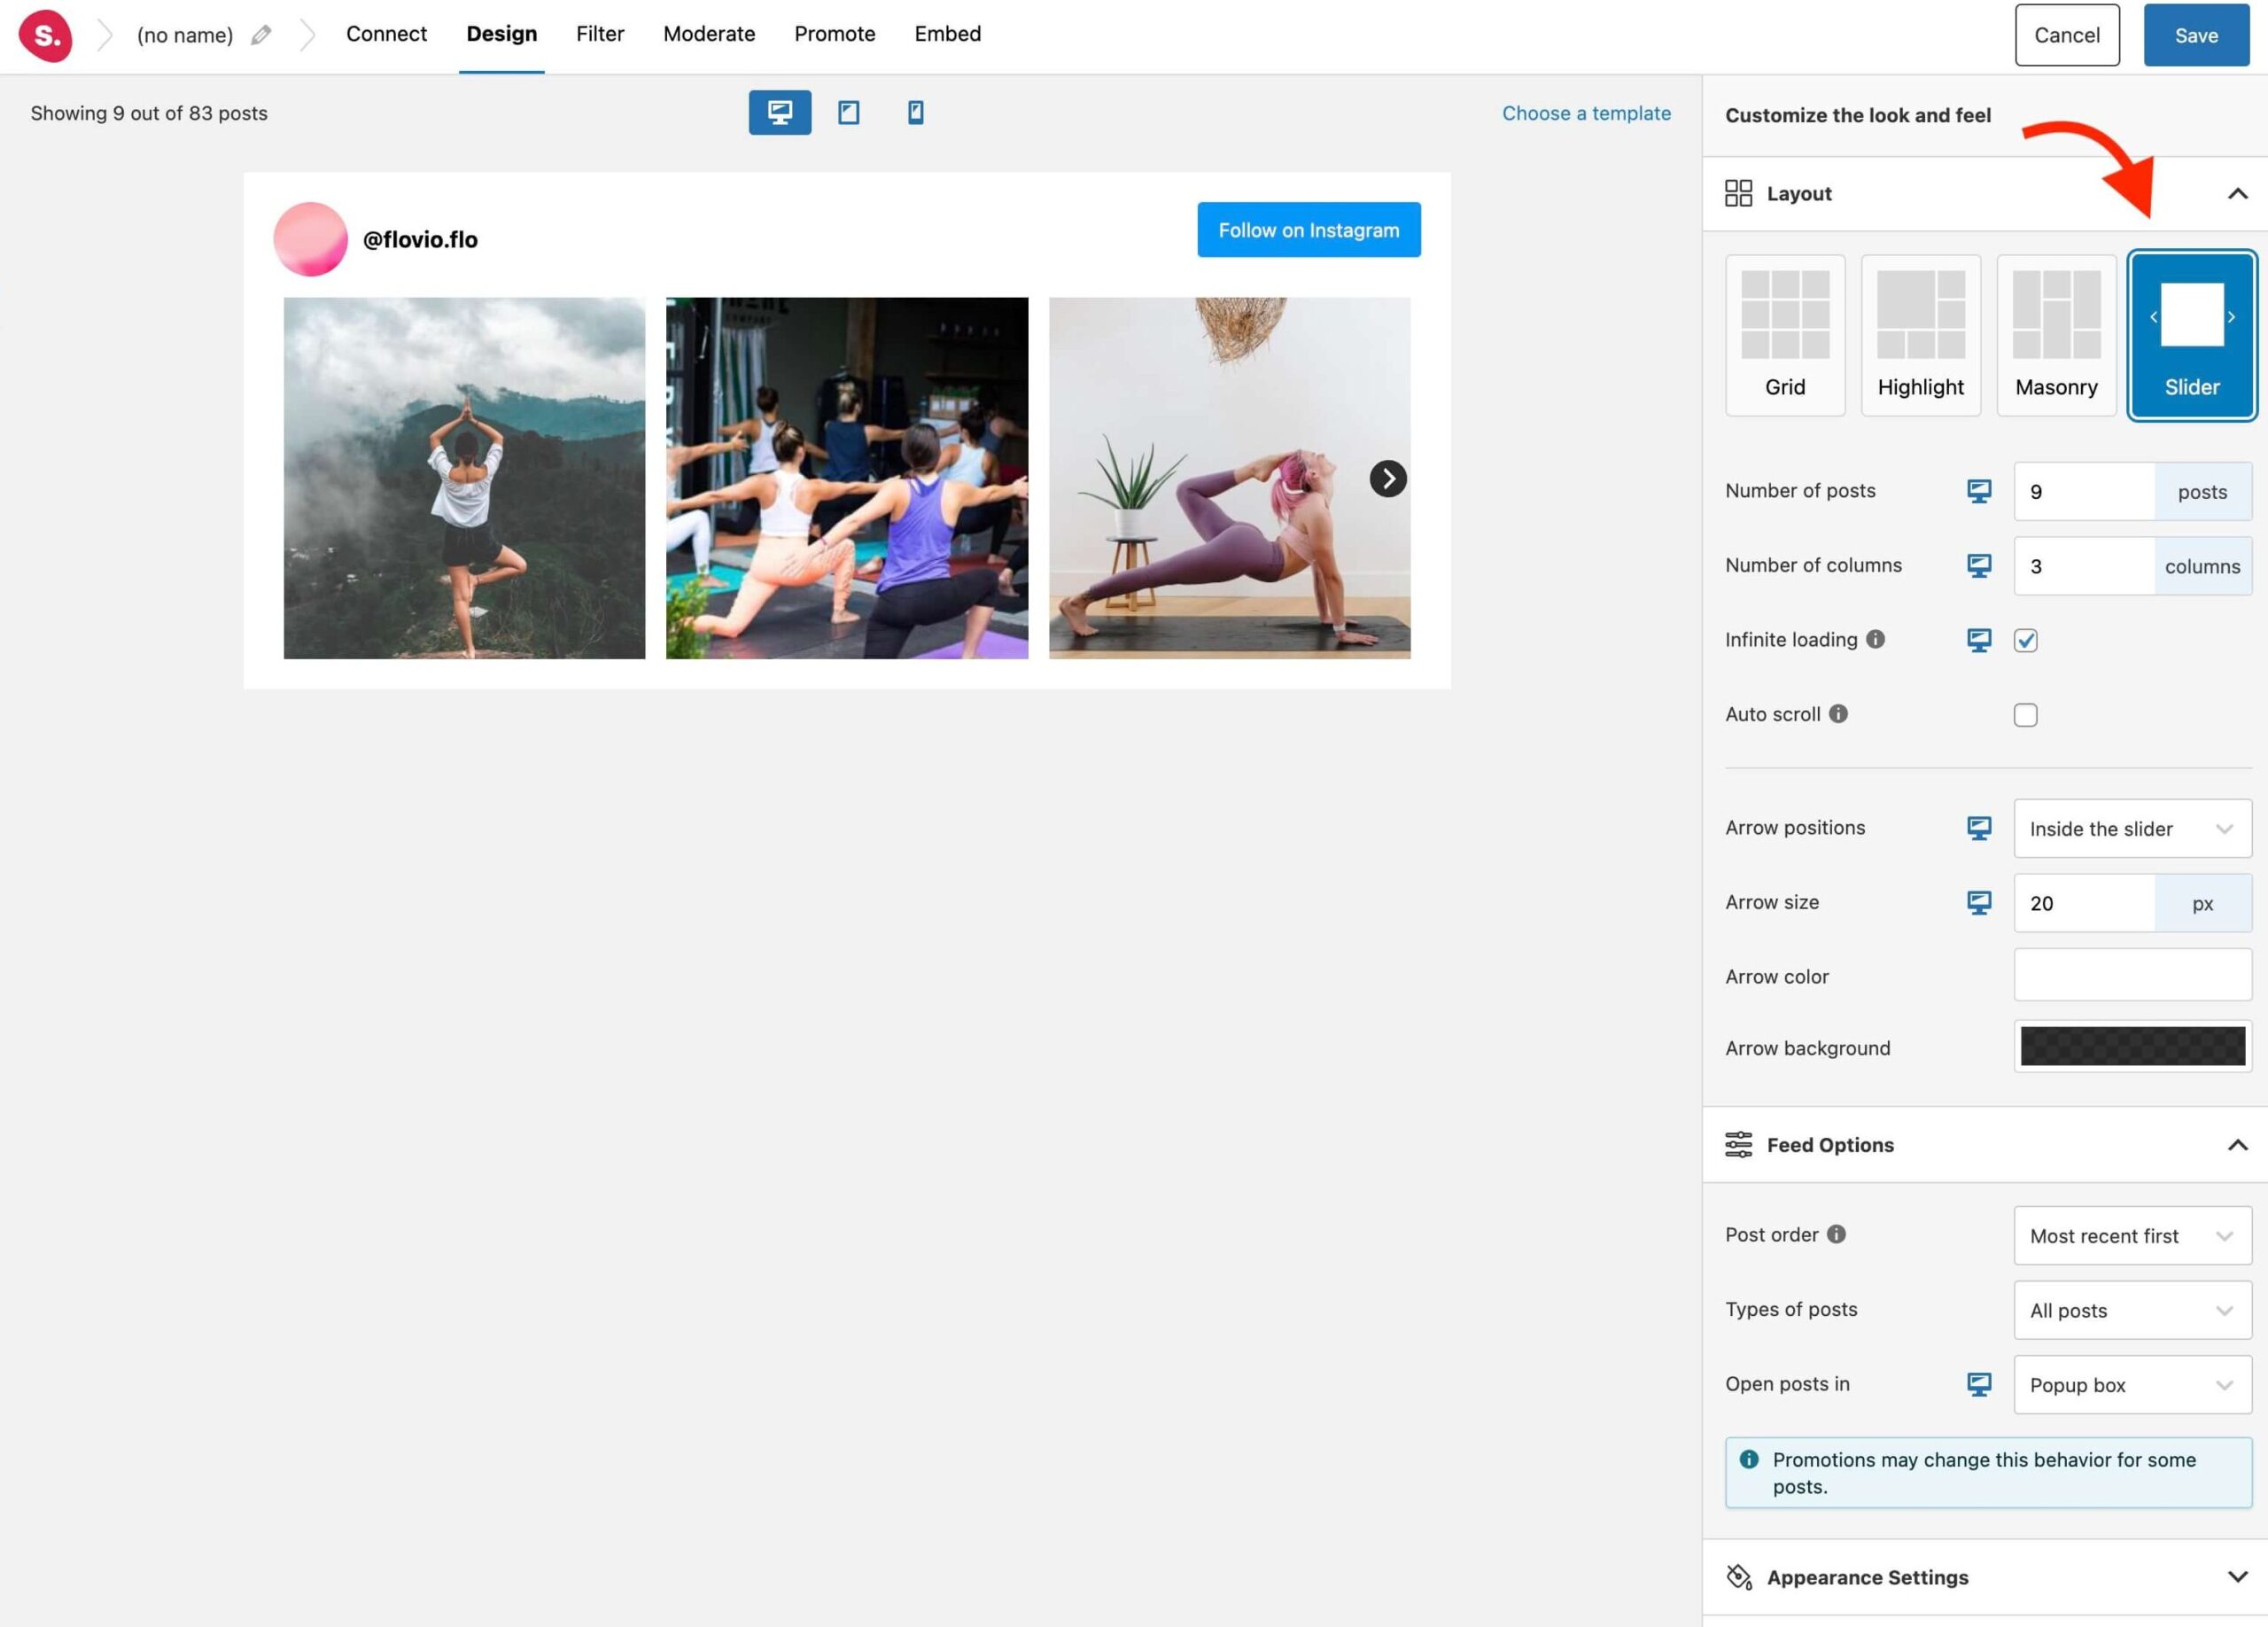
Under Feed Options, you’re able to adjust the post order. For example, you might prefer to show your most recent posts first, or your most popular posts. Additionally, you can decide whether to open posts in the same tab, a new tab, or a popup box.
If you expand the Appearance Settings, you can change the feed width, height, image padding, and text size. Plus, you can apply a background color to the feed:
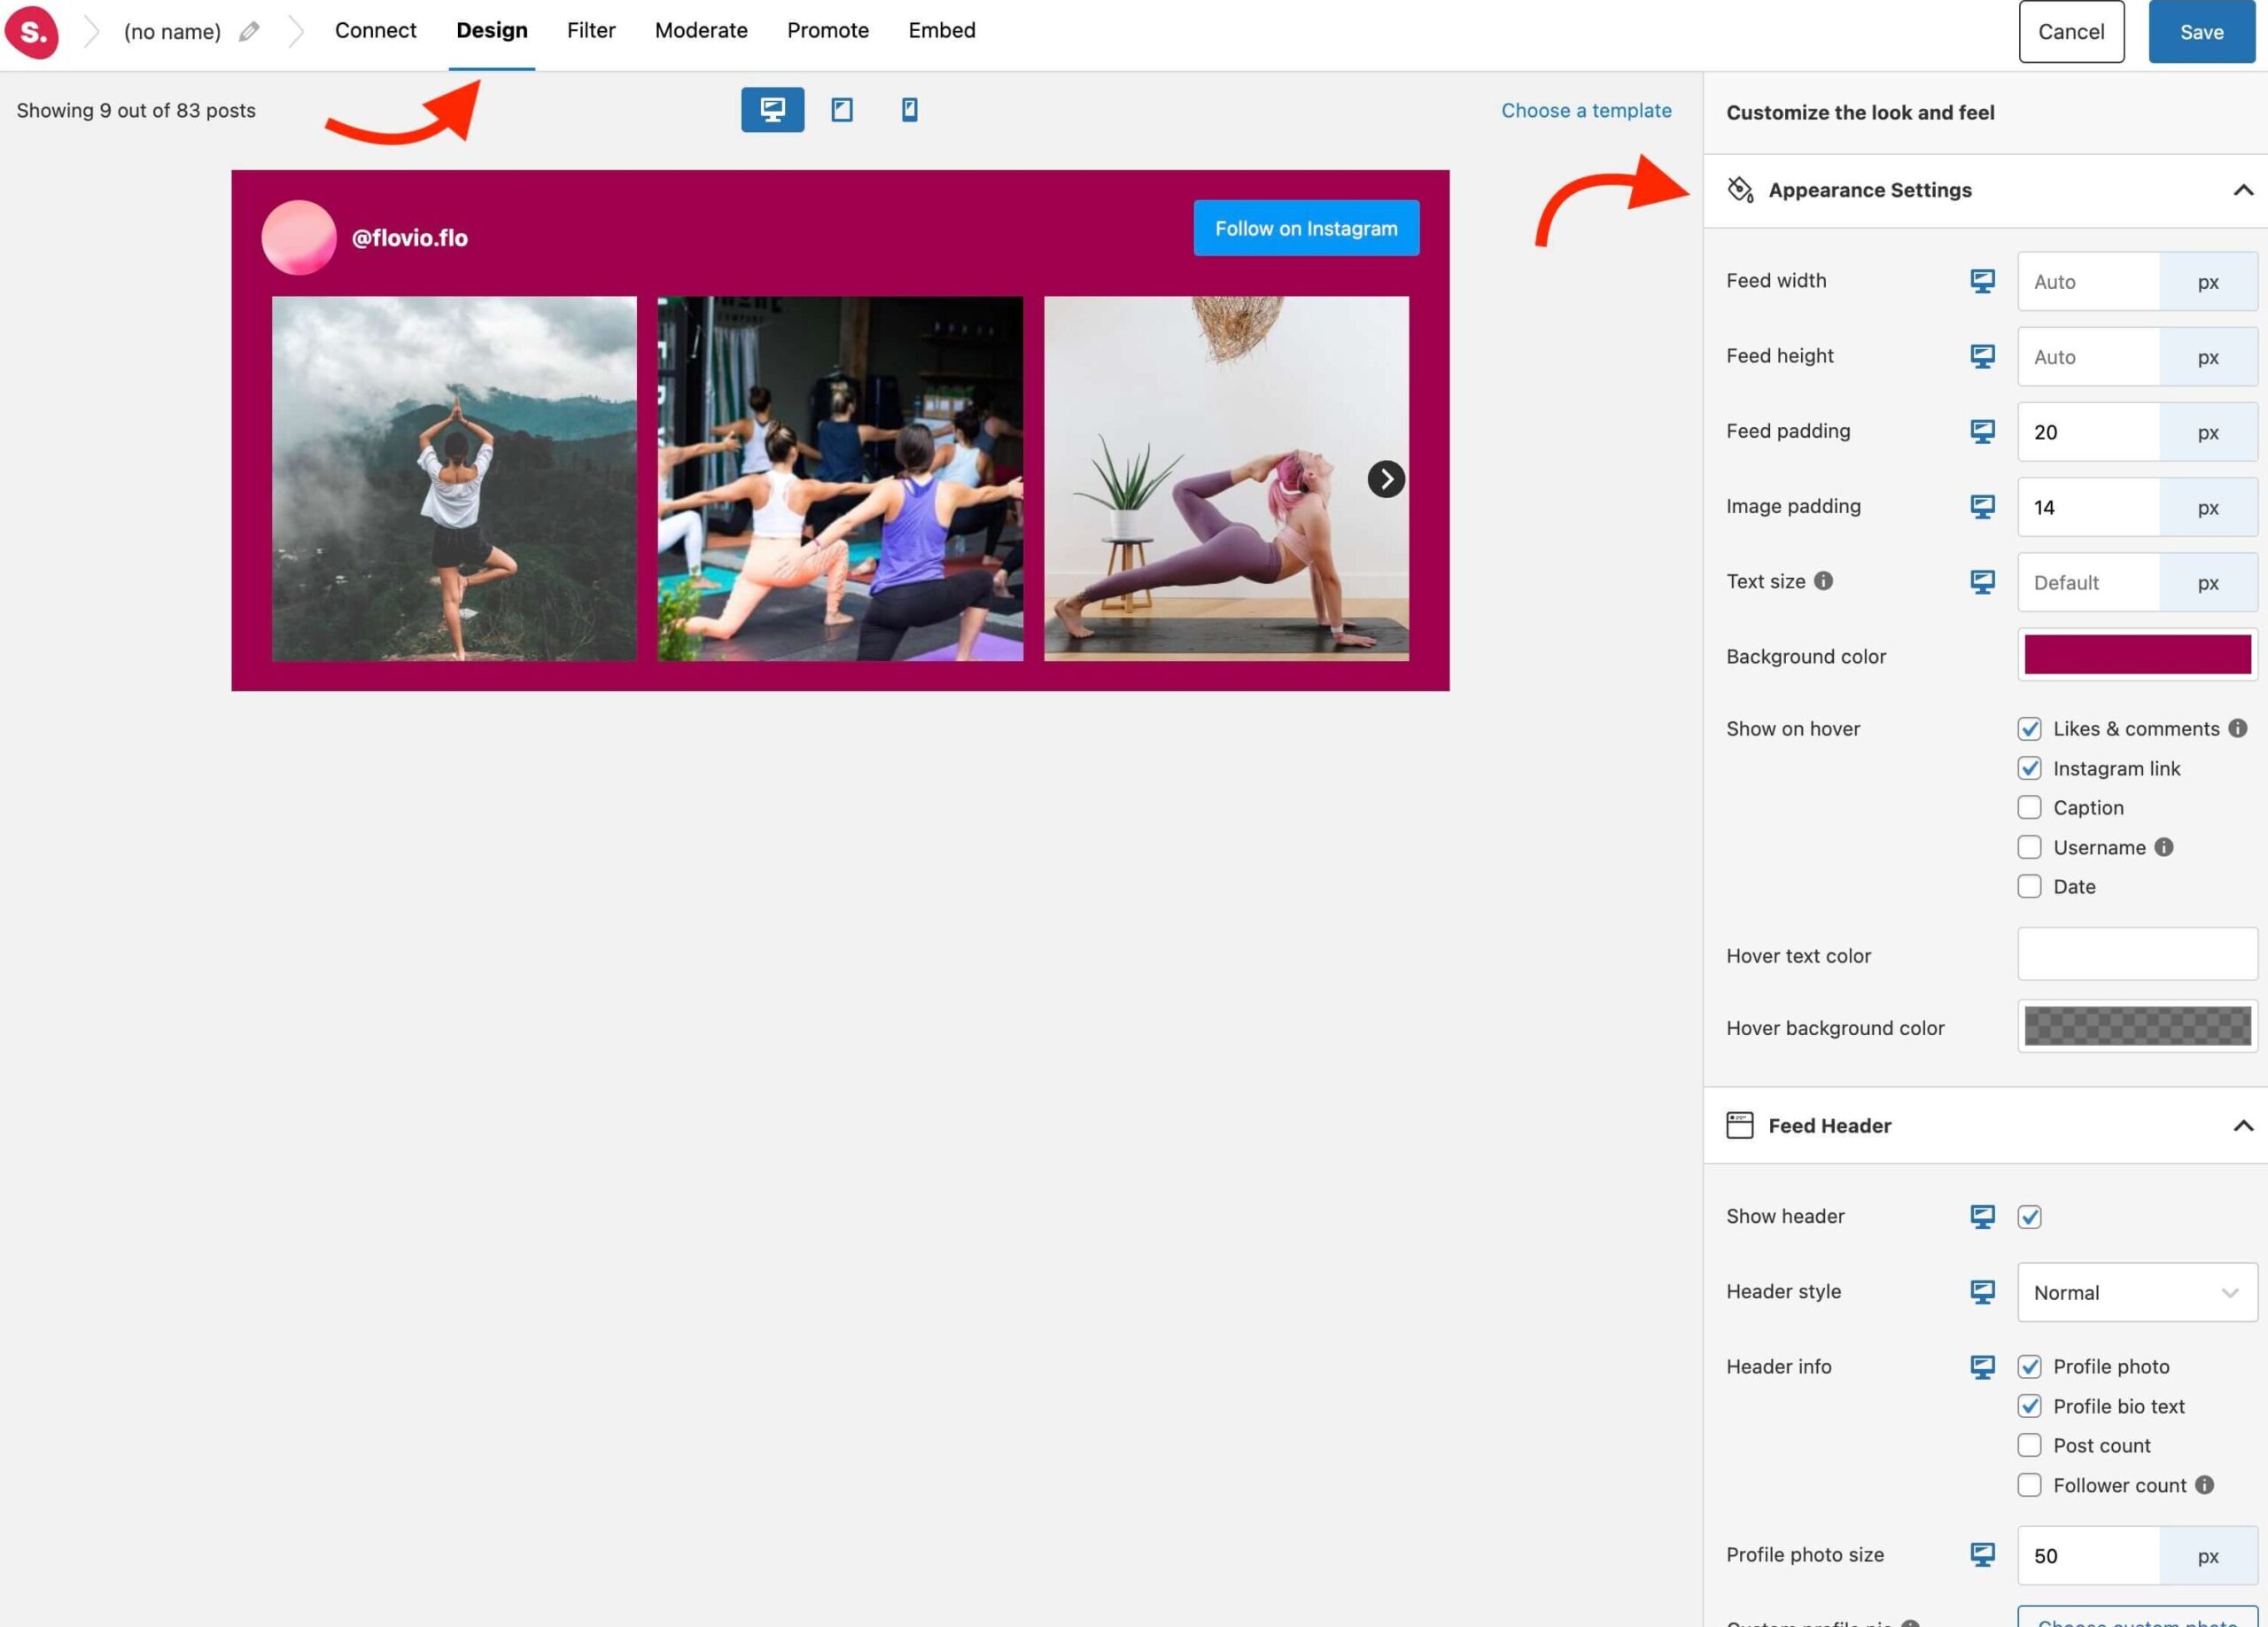
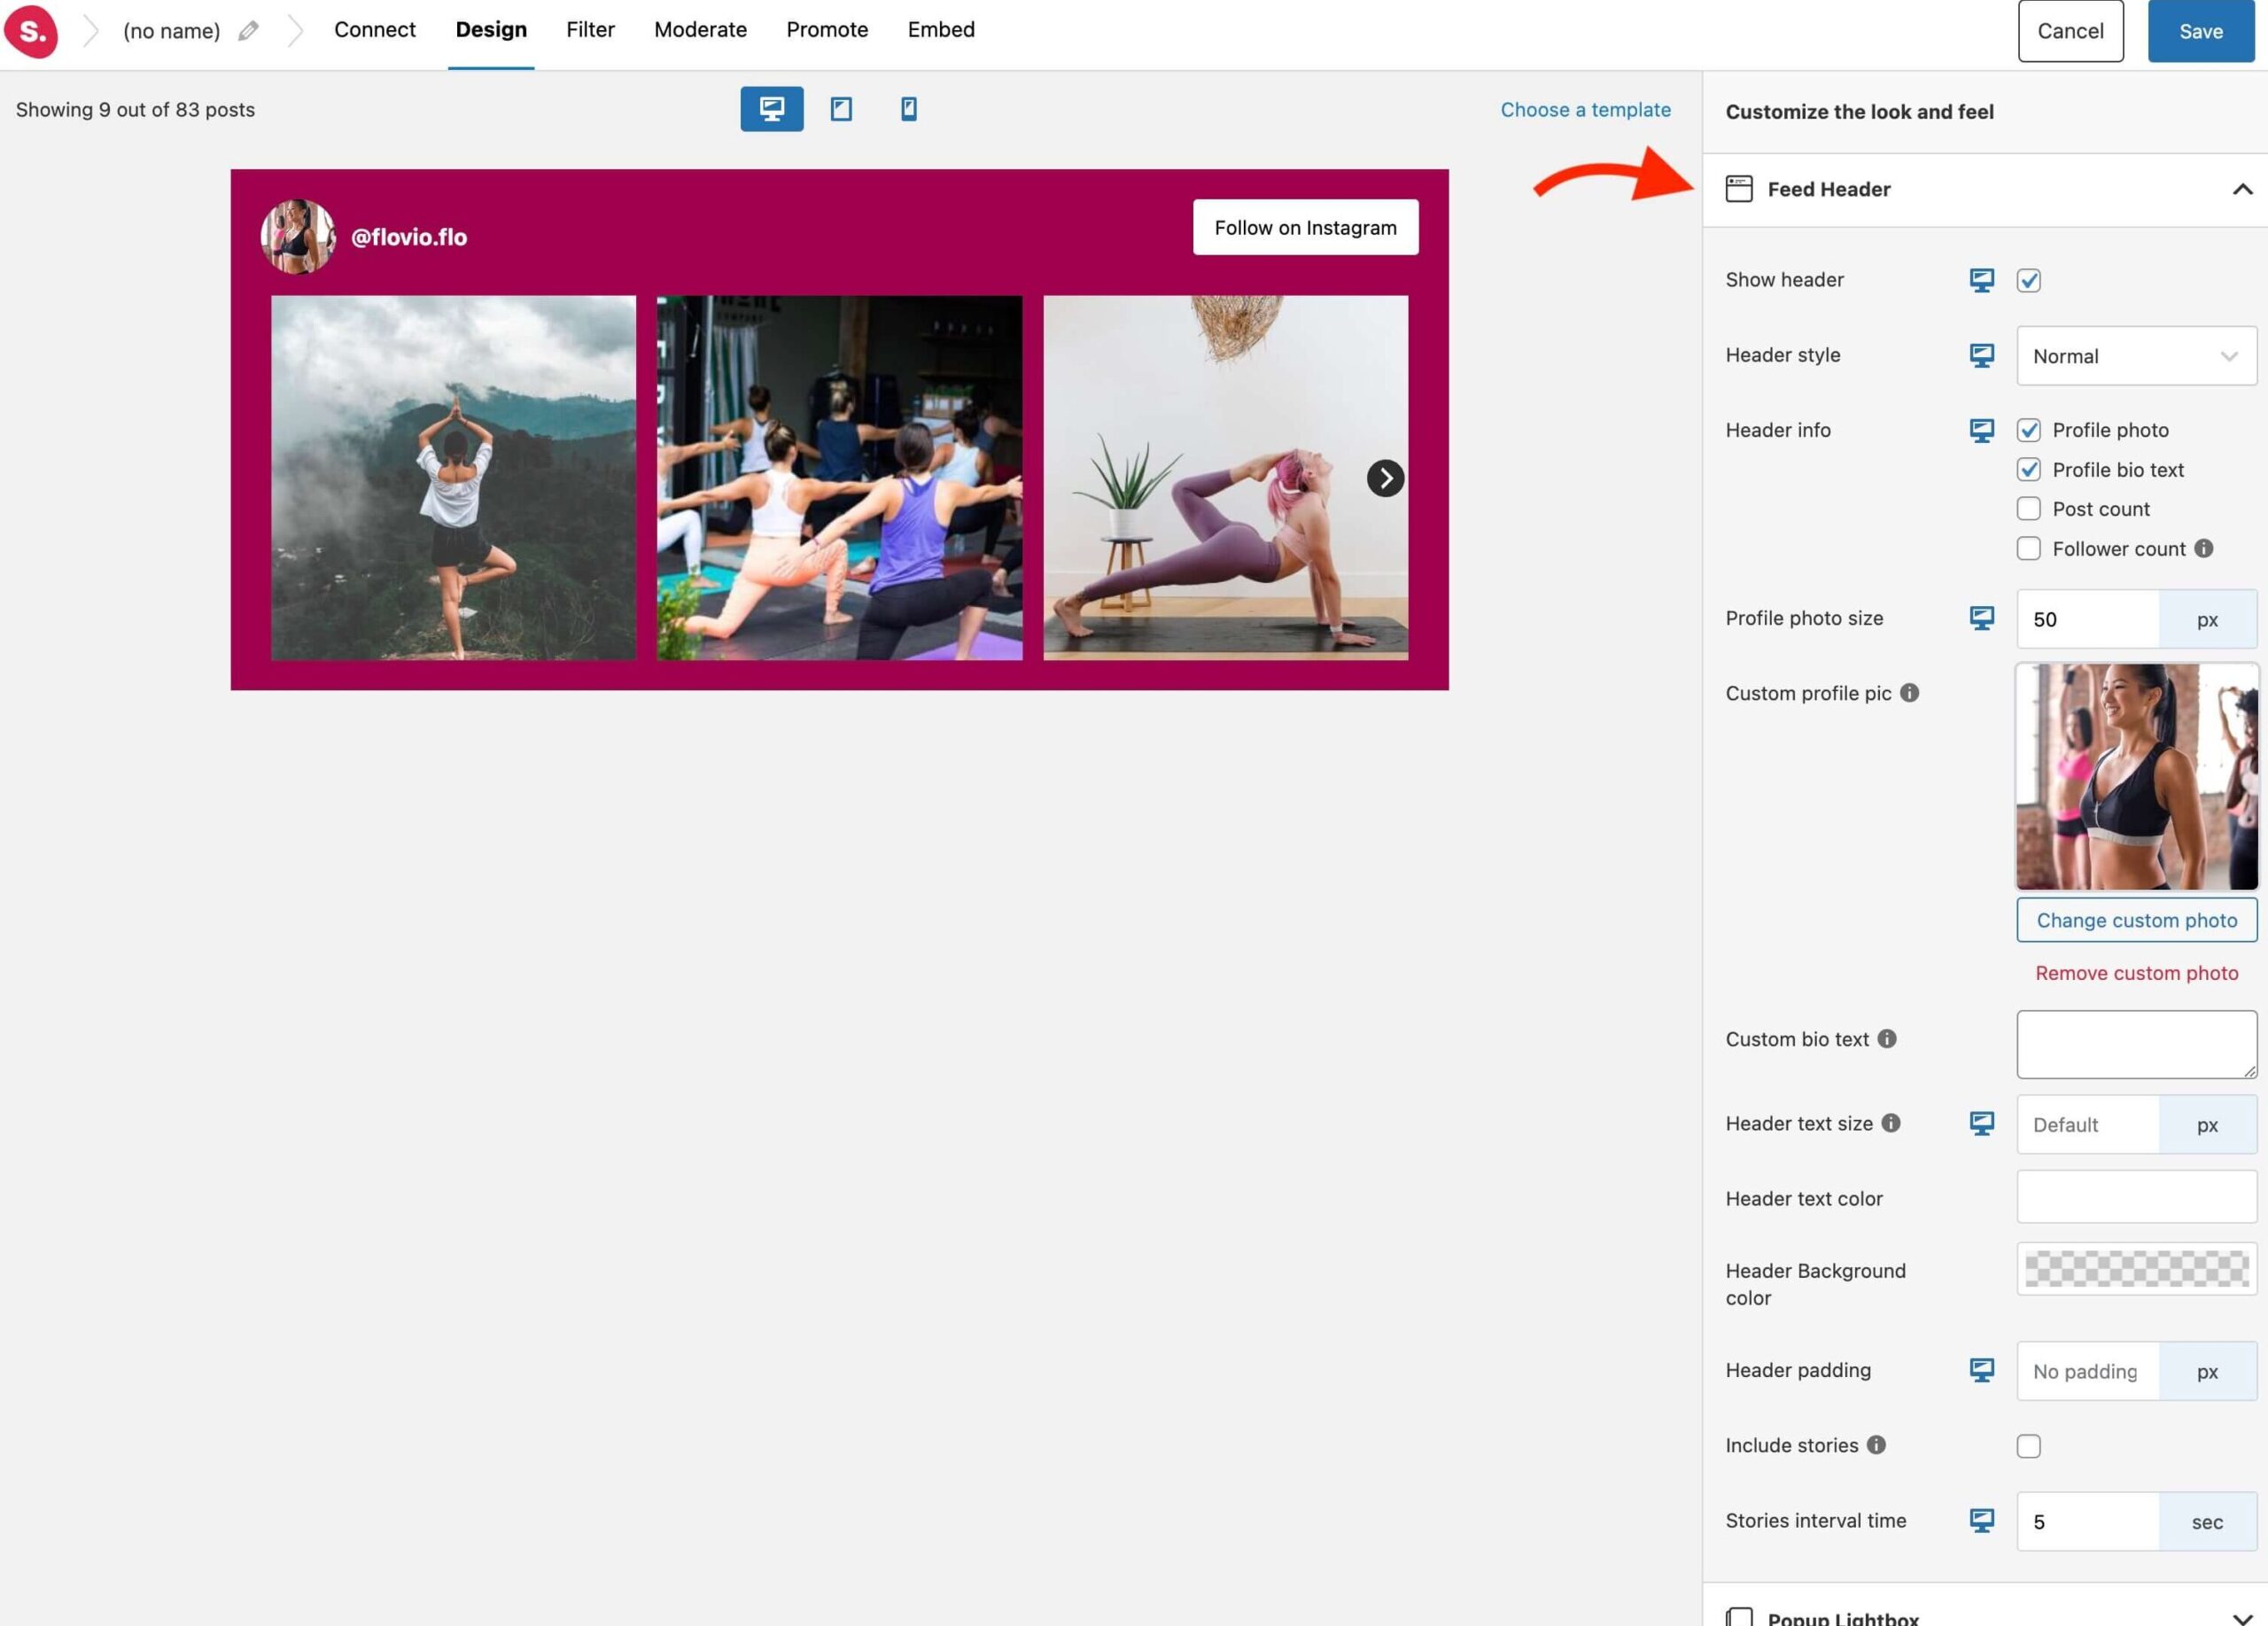
Meanwhile, under the Feed Header tab, you can disable/enable the feed header, upload a profile photo, and customize the profile photo size.
Plus, you can even customize the Follow on Instagram and Load more buttons with your own messaging and brand colors.
Step 4: Embed your custom Instagram feed in WordPress
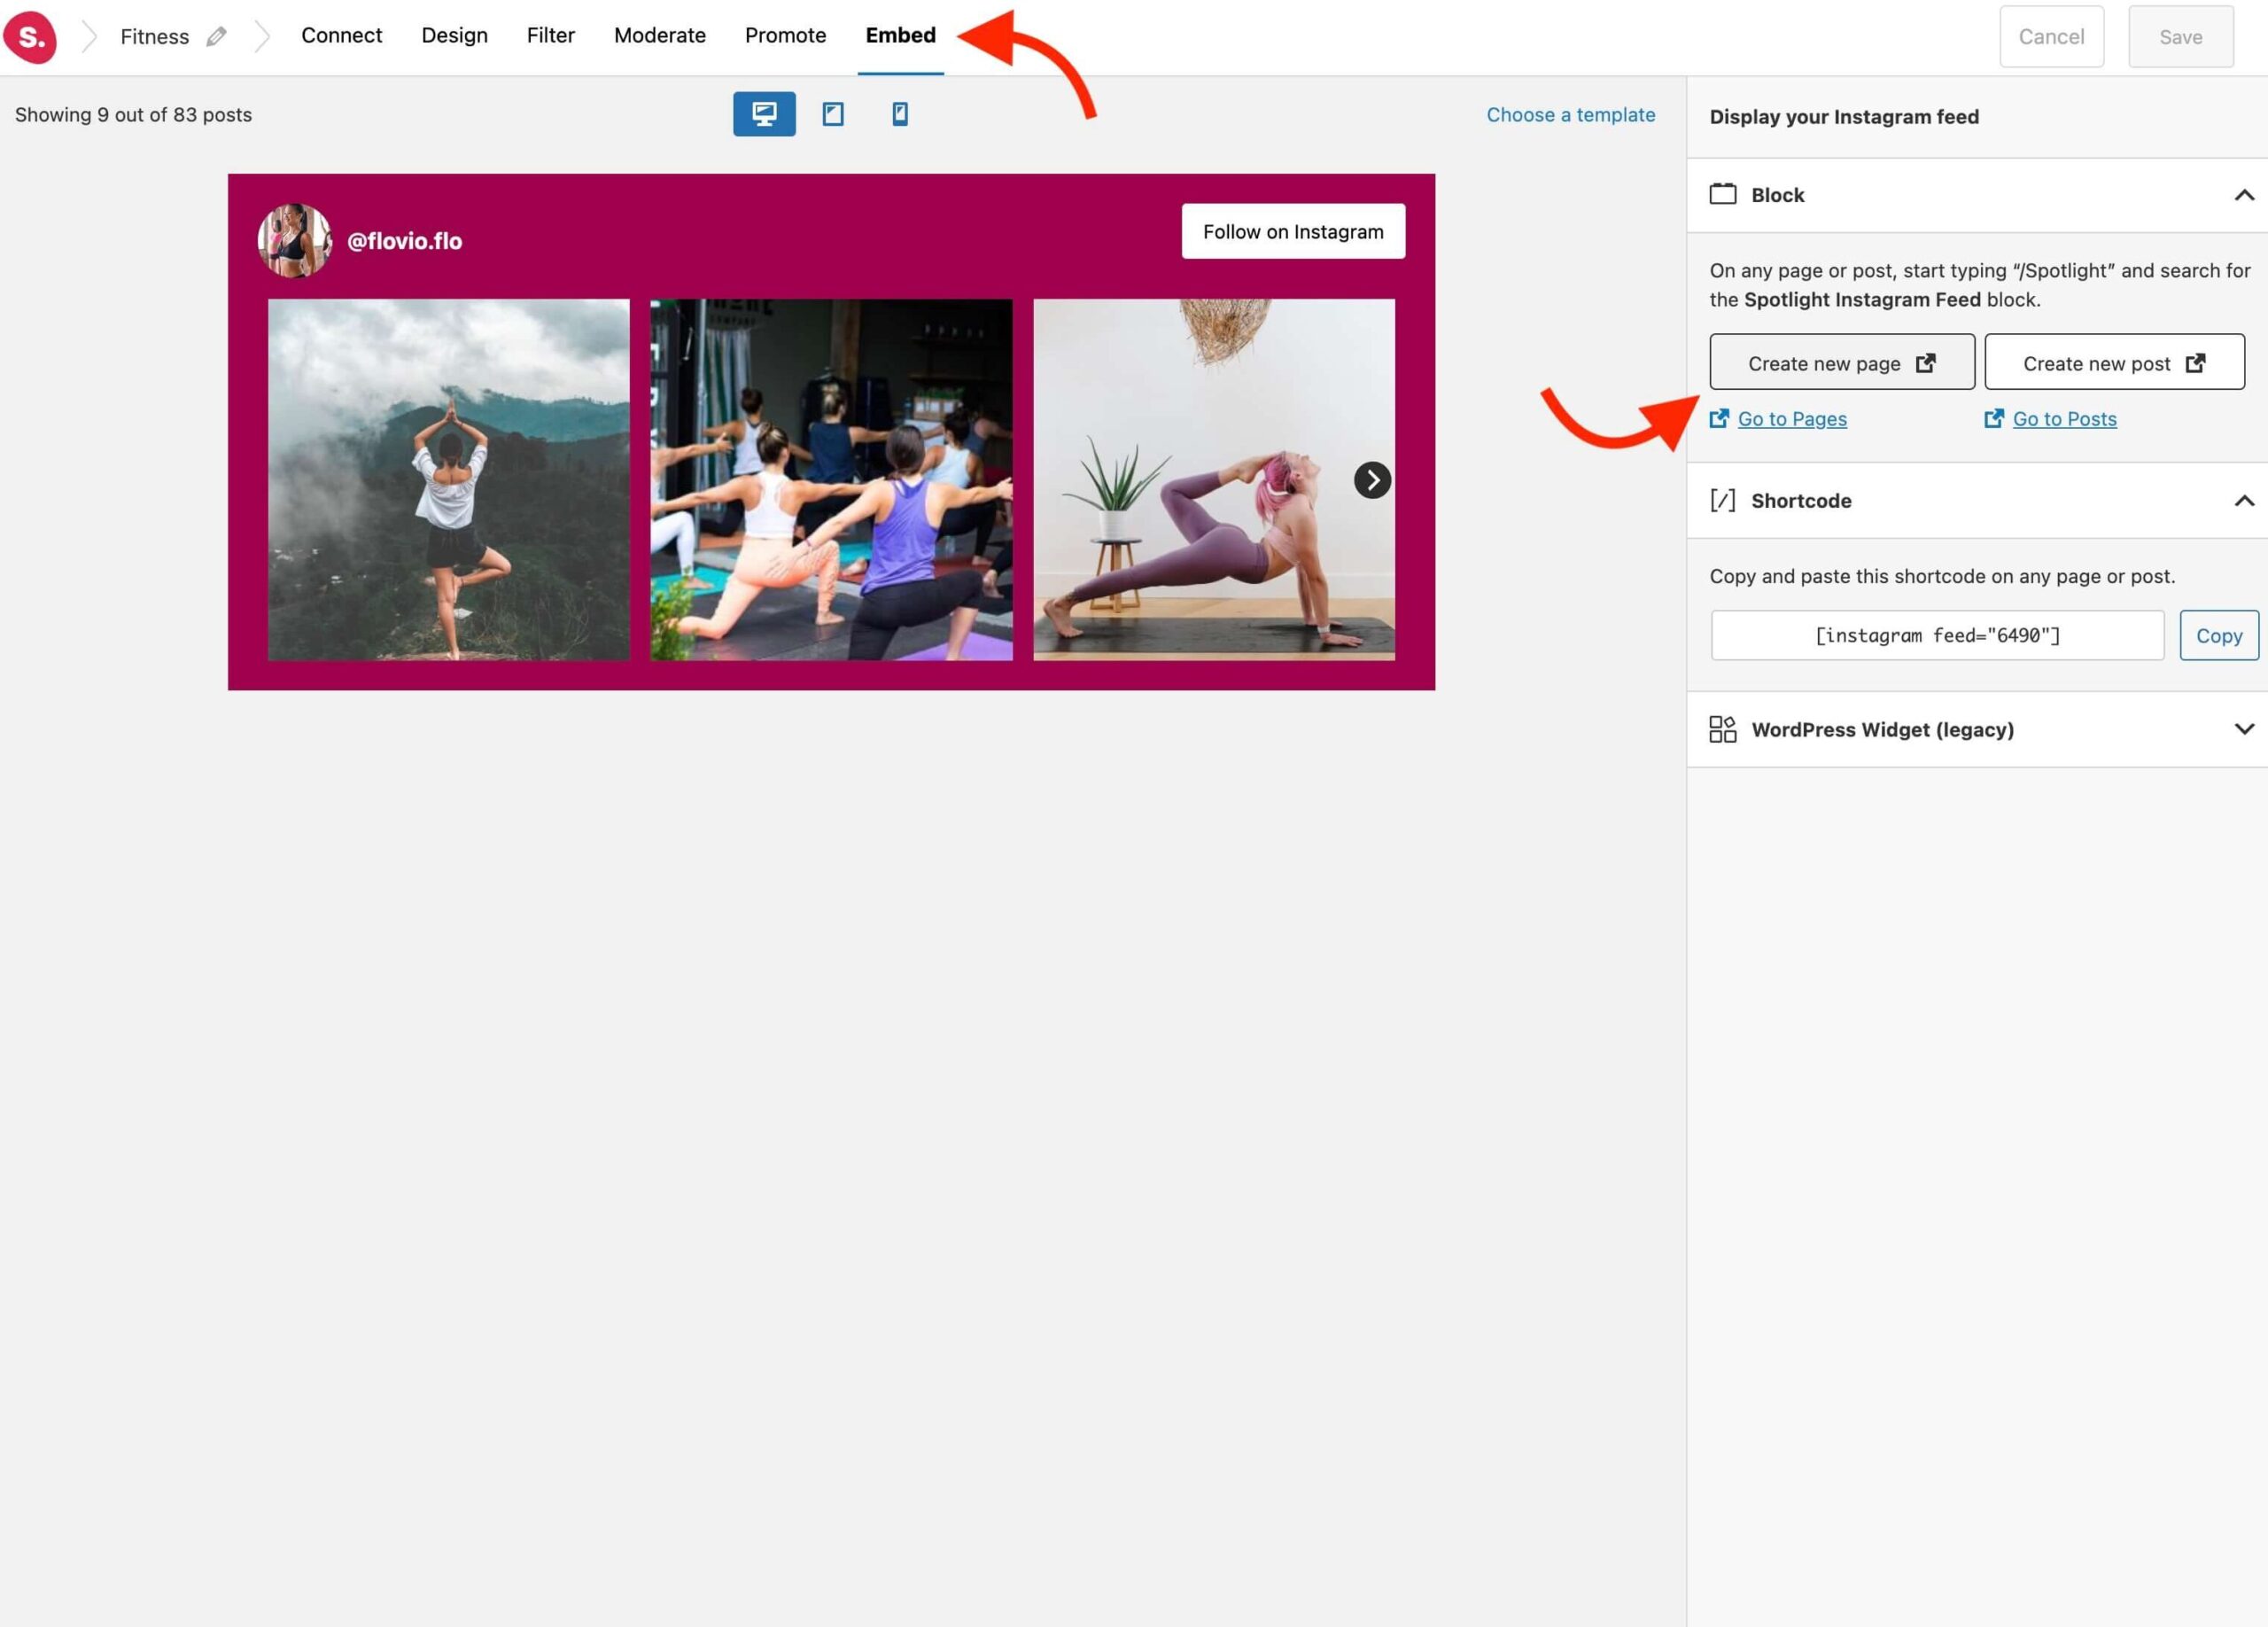
To embed your custom Instagram feed in WordPress, you’ll first need to save it. So click on the blue Save button in the feed editor, and give your feed a memorable name.
Then head over to the Embed tab. There are three ways you can embed your feed. First, you can add it to a new page or post directly from the feed editor by clicking on the relevant link:
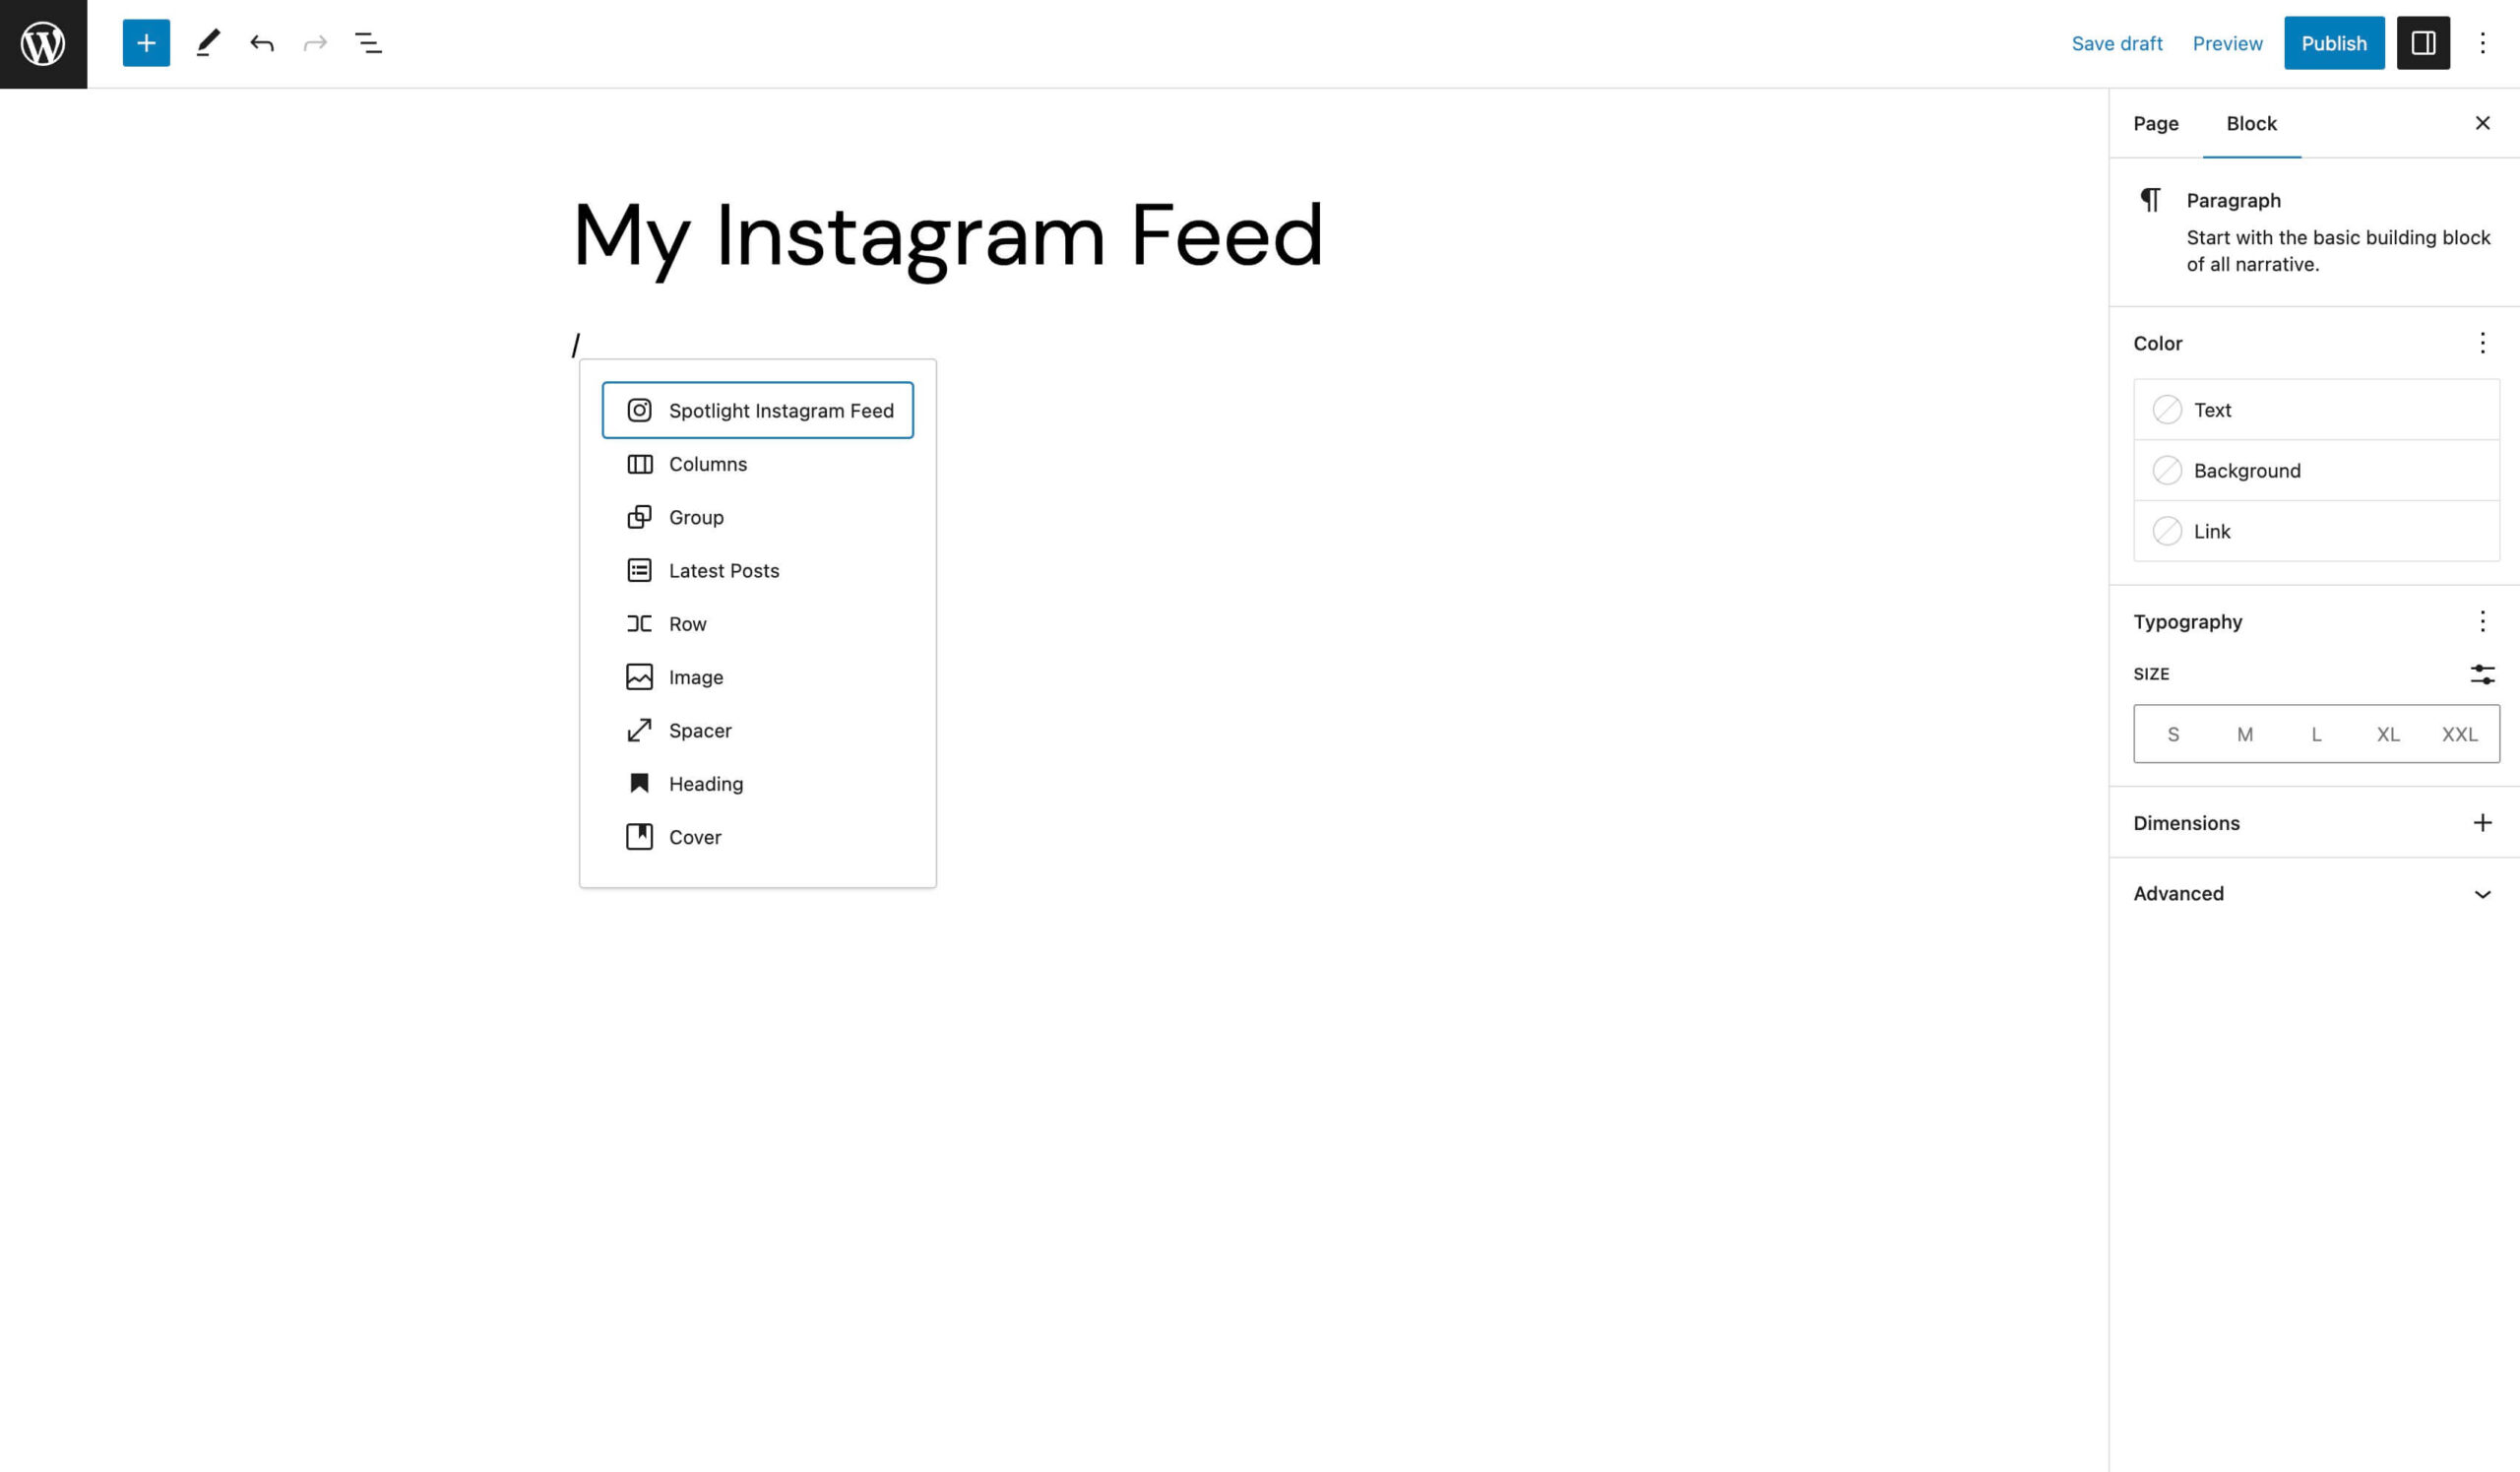
If you want to embed the feed in an existing page/post, simply add the Spotlight Instagram Feed block to your page:
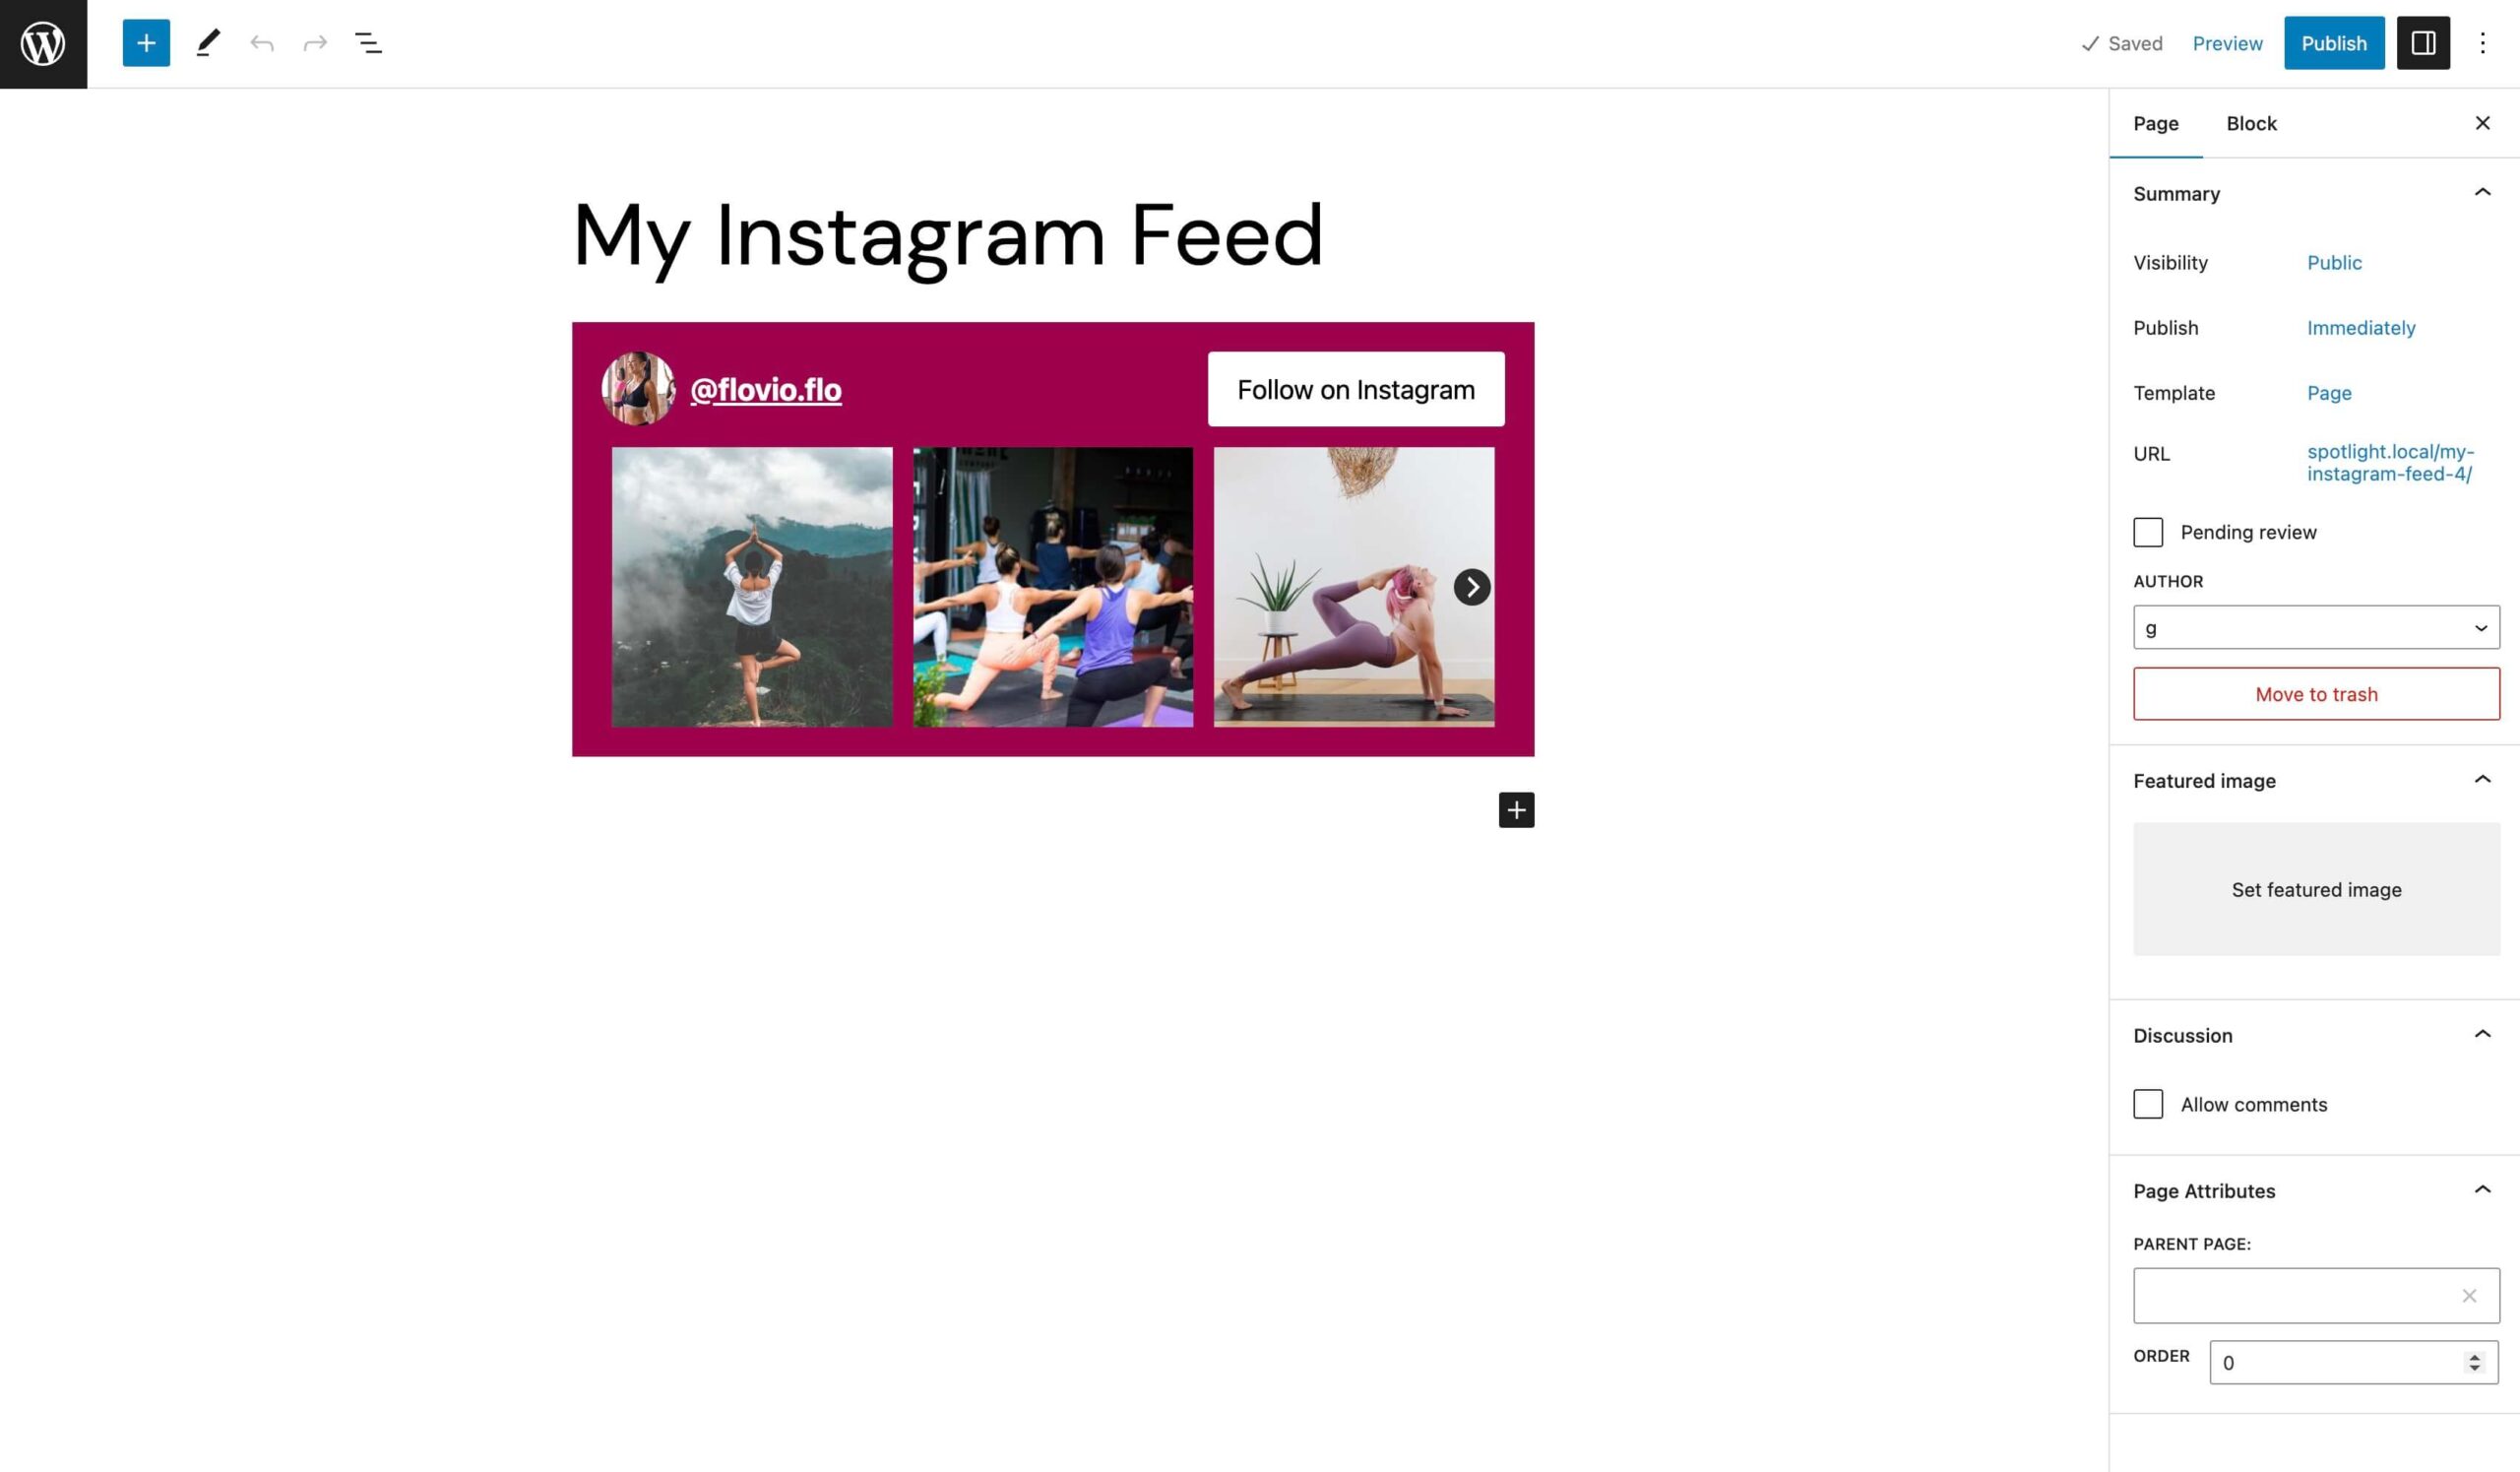
And the feed should display instantly:
Additionally, you can add the Instagram feed to a post or page using a shortcode. All you need to do is copy the shortcode from the feed editor and paste it into a Shortcode block on the relevant page or post.
Plus, you can even embed your Instagram feed in your footer, header, or sidebar. If you’re using a classic theme, navigate to Appearance > Widgets in your dashboard. Then add the Spotlight Instagram Feed widget:
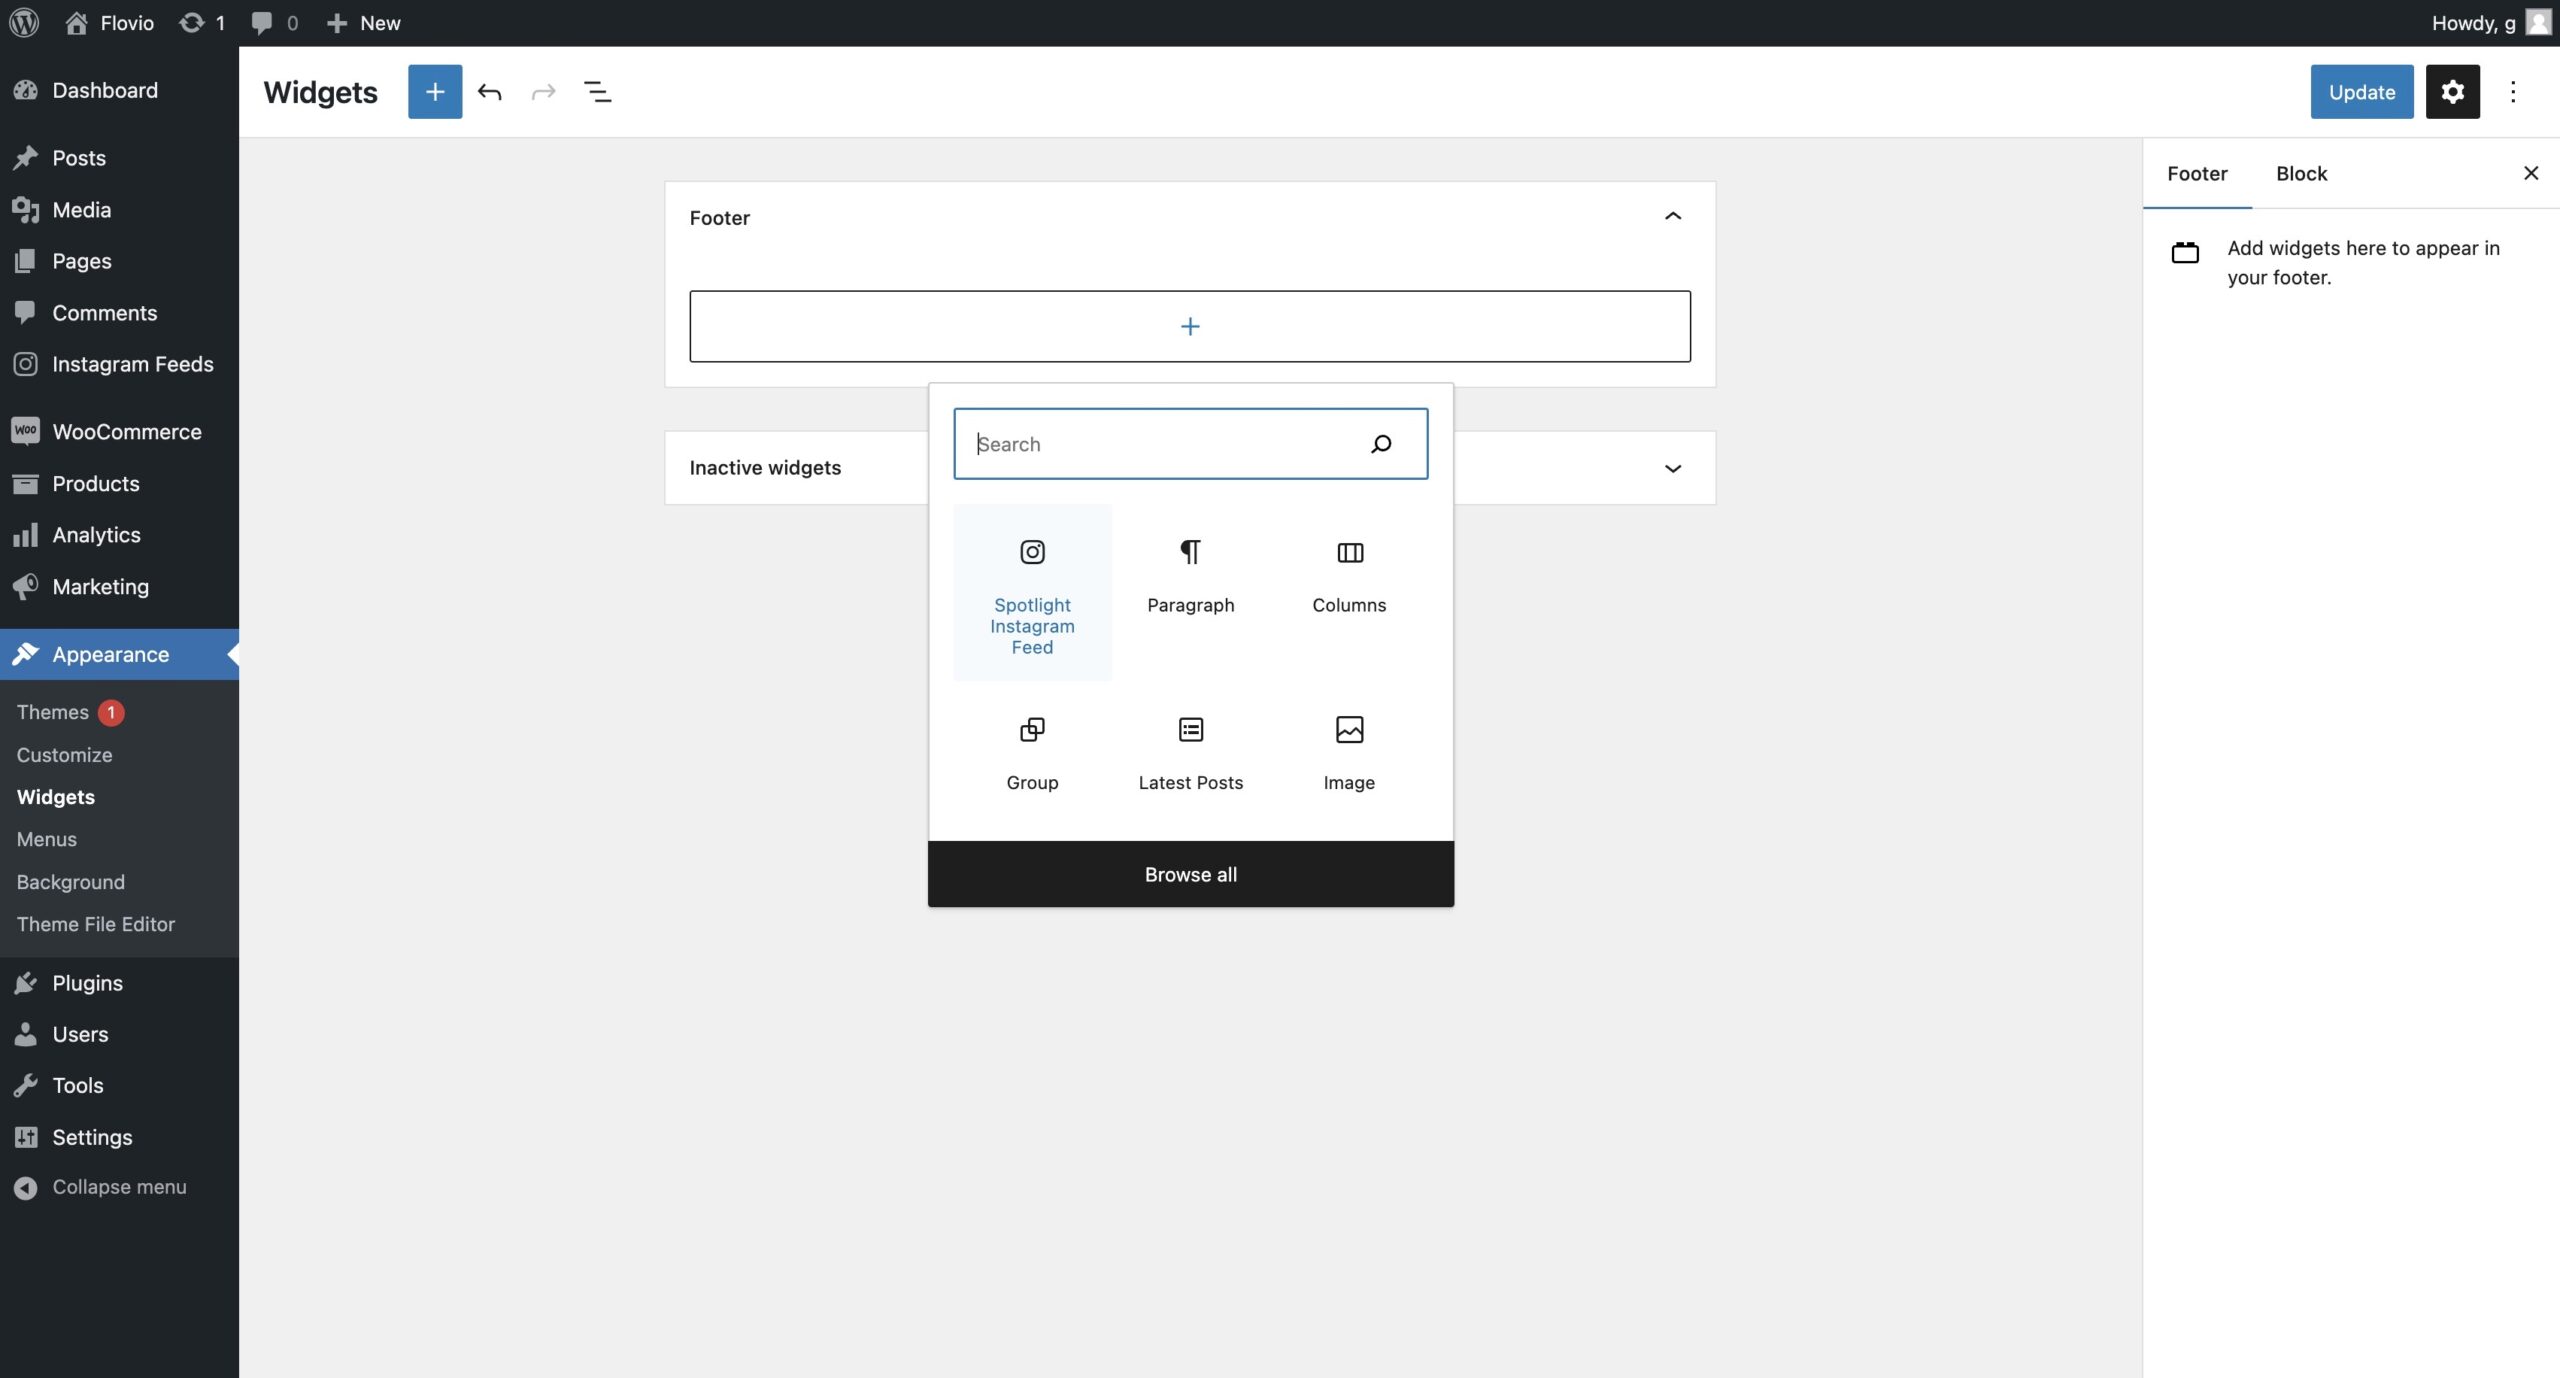
Open your website in a fresh tab to view the change.
However, if you use a block theme, you can embed your feed in a widget area by heading to Appearance > Editor > Template Parts. Choose a template part like your header, sidebar, or footer.
Then add the Spotlight Instagram Feed block:
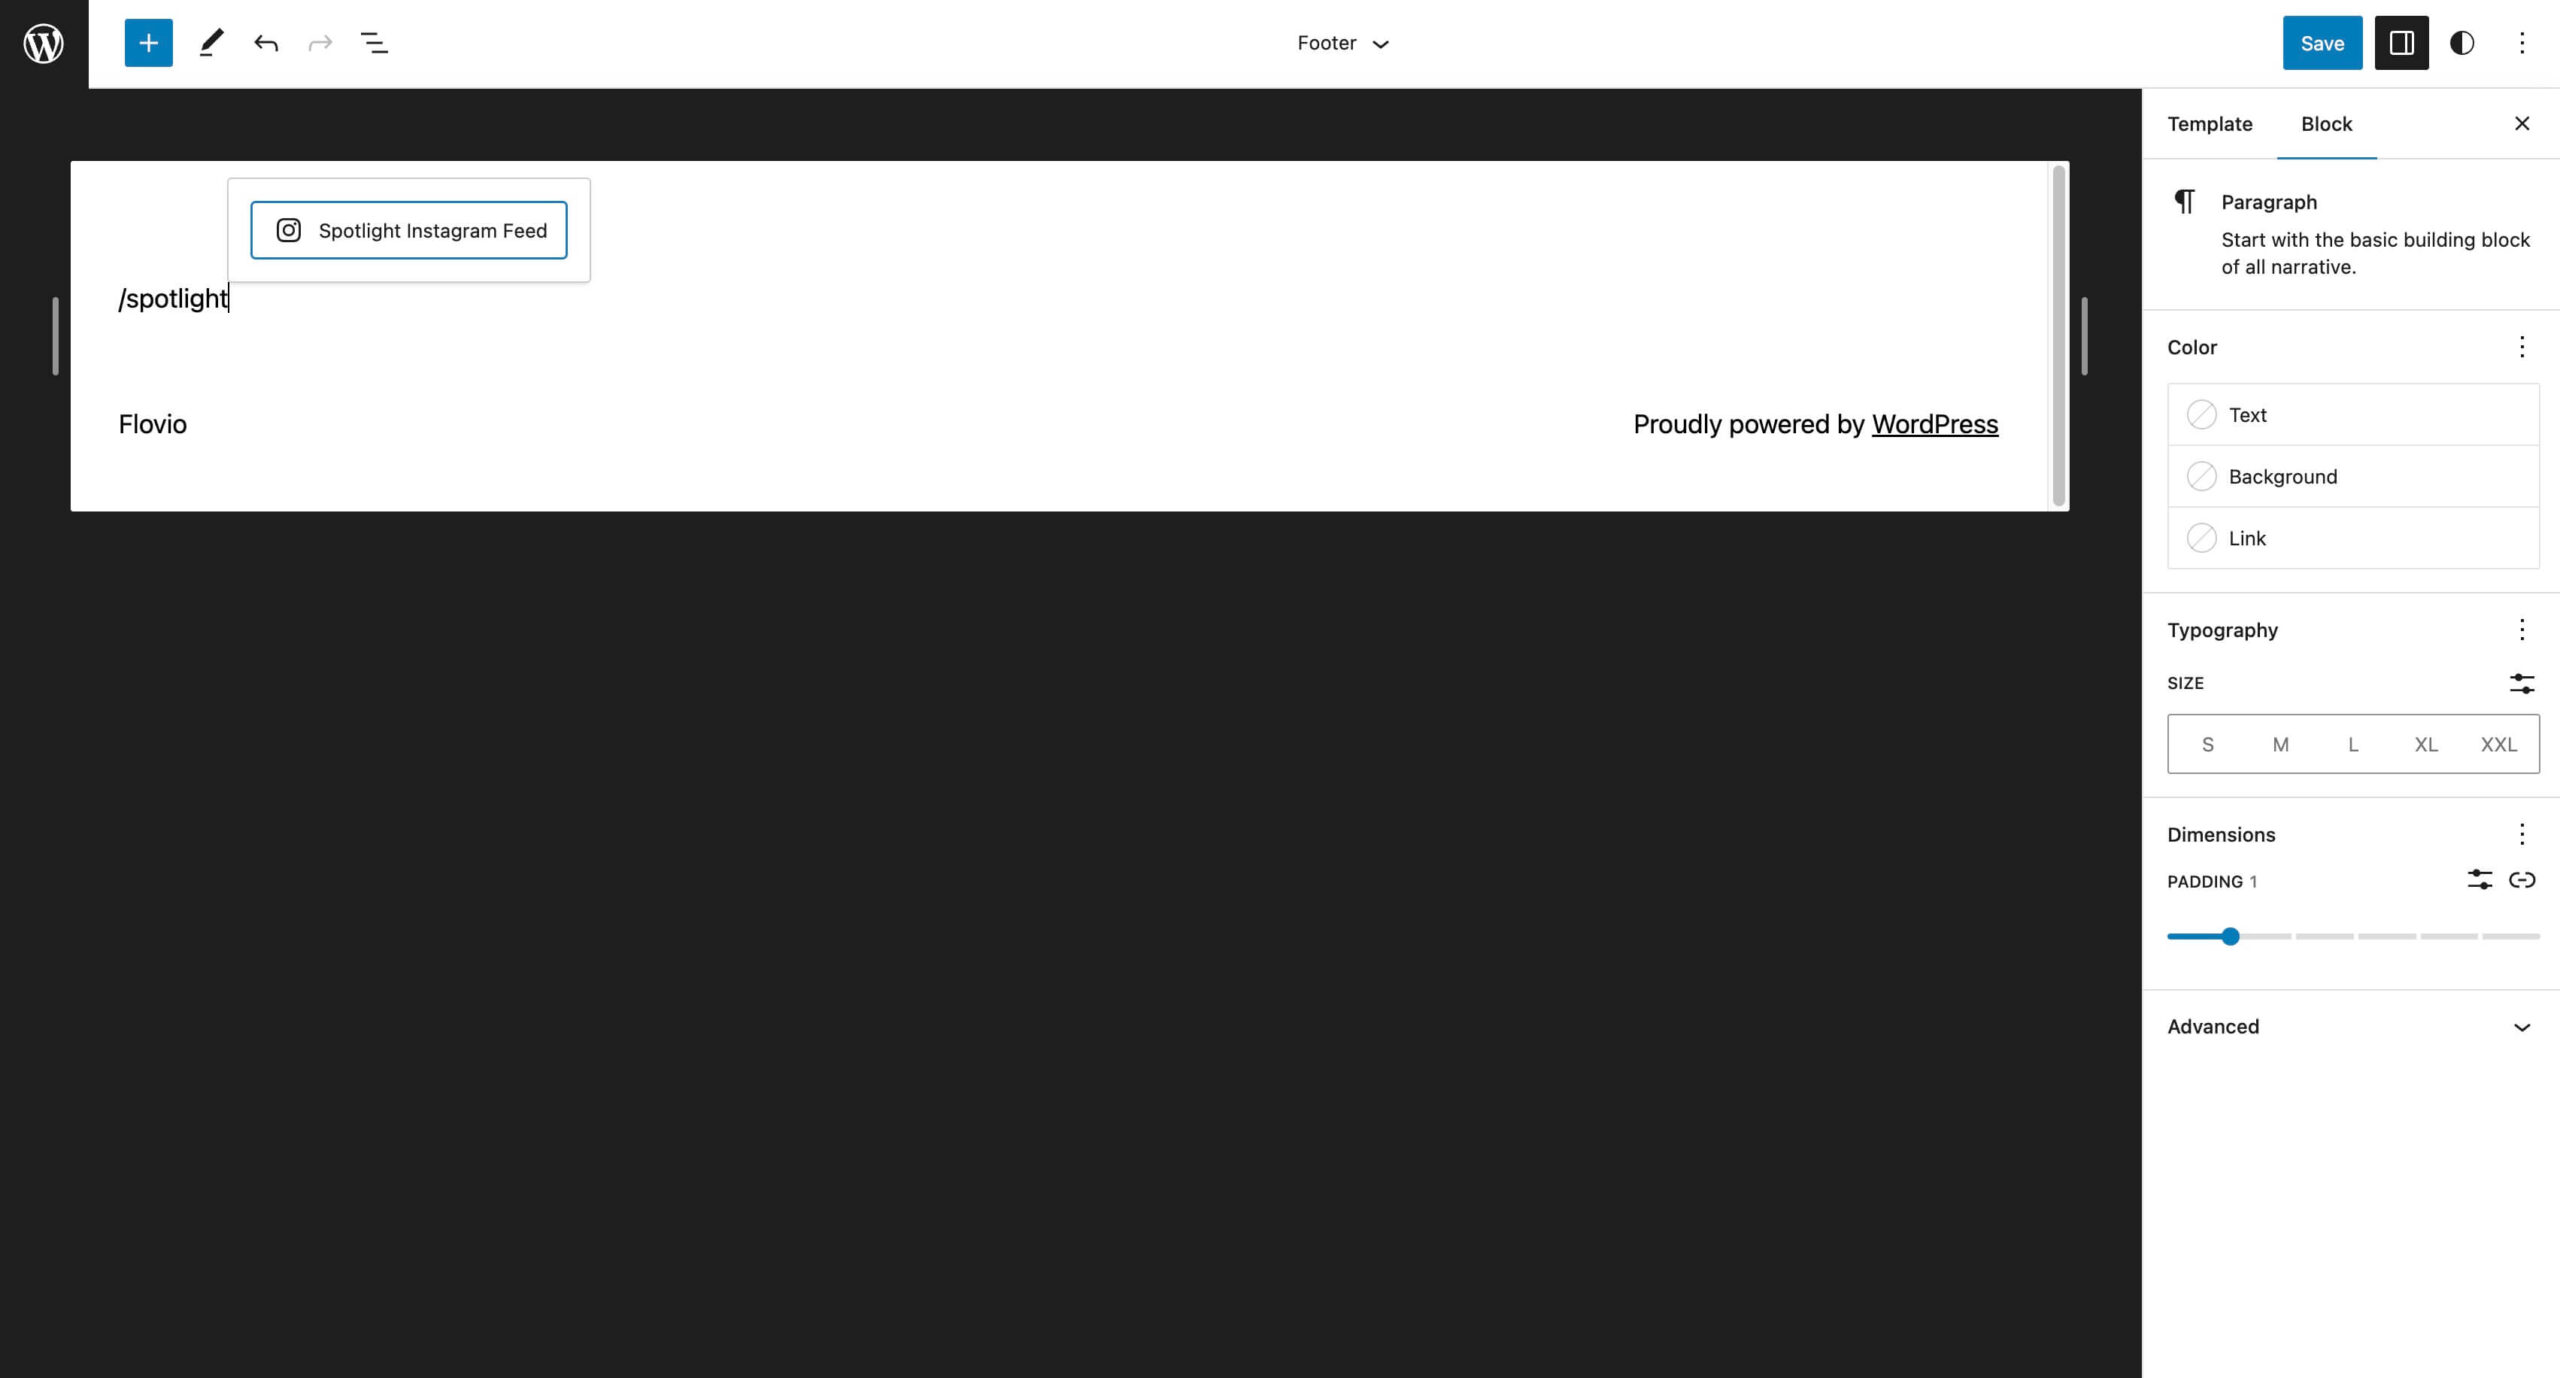
Save the changes and open your site in a new tab to see how your Instagram feed looks on the front end.
If you need to make changes to your feed, return to Instagram Feeds > Feeds and open the feed to make your edits.
Conclusion
A custom Instagram feed is an easy way to keep your site up-to-date with new content. Meanwhile, since you’ll gain full control over your feed’s display, you can ensure it fits in seamlessly with the rest of your website.
To recap, here are four steps to create a custom Instagram feed in WordPress:
- Install Spotlight and create a new Instagram feed.
- Connect your Instagram account.
- Customize your Instagram feed.
- Embed your custom Instagram feed in WordPress.
Do you have any questions about how to customize your Instagram feed? Let us know in the comments section below!

