Does the idea of an Instagram NFT grab your attention? Maybe it does, and quite possibly, the mere concept of NFTs and Web3 makes your head spin. Either way, you’re covered because in this article, we’ll dive deep into NFTs and how to promote them on Instagram and on your website.
First, a quick primer on Web3 and NFTs.
Web3
To understand what Web3 is, it’s essential to comprehend Web1 and Web2.
Web1 was essentially the presentation of media on the internet. You could view it but couldn’t interact with it or easily contribute.
Web2 was the dawning of engagement. Users could interact with websites by commenting, liking, sharing, and even uploading their own content.
Large platforms like Facebook, Instagram, Twitter, and other social media platforms have become part of our everyday lives in the Web2 world. While we can interact with them, they also hold and control our data.
Web3 is the concept of decentralization. Without one company controlling how your data is stored or shared, you have better opportunities to own, share, and even monetize it. A great example of this is NFTs.
NFTs
NFTs, or non-fungible tokens, use blockchain technology, which creates a unique digital token for an instance of media shared on the internet. Because these tokens are unique and encrypted, that instance of media on the web becomes valuable. For example, you can create an image — say a cartoon — and mint it into an NFT on any blockchain you choose.
With the popularity and increasing ease of use of blockchains like Ethereum, NFTs are becoming more accessible for everyone. That’s why Instagram is getting into the action, and you can benefit.
Instagram NFTs
In May 2022, Adam Mosseri announced that Instagram would be testing a new program to allow users to share digital collectibles on the platform. Mosseri said that users can share NFTs they either created or bought somewhere else. At this point, it’s open to a handful of users as they test out the program and get feedback from the Instagram community.
Mosseri also admitted that while NFTs are about decentralization, they realize that Instagram is a centralized platform. However, it’s a massive opportunity for users to take advantage of NFTs on a platform with which they’re already familiar.
While Instagram is testing this feature, you can get yourself ready to share your own NFTs by displaying them on your website. We’ll show you how.
How to display NFTs on your website
The good news is that you can start sharing NFTs on your website with a small budget and without knowing any code. The best solution for this is WordPress. WordPress is a free and open-source CMS used on over 40% of the web today.
Most reputable hosts these days offer managed WordPress hosting, where getting set up is as easy as clicking a button. If you’re already using WordPress, let’s dive right in!
Using NFT Galleries
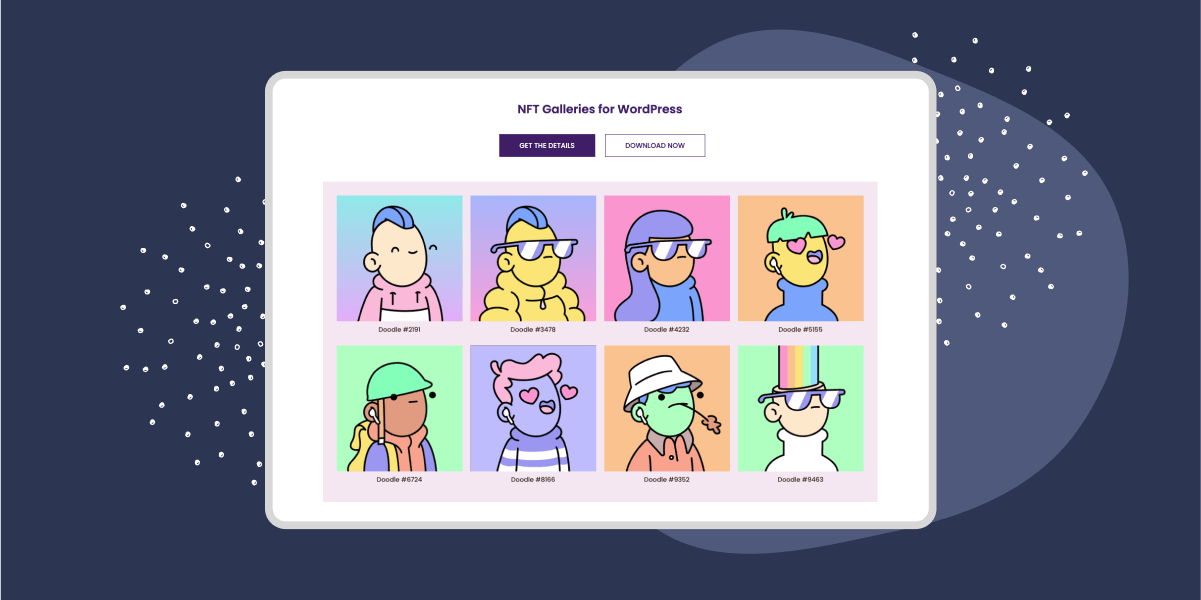
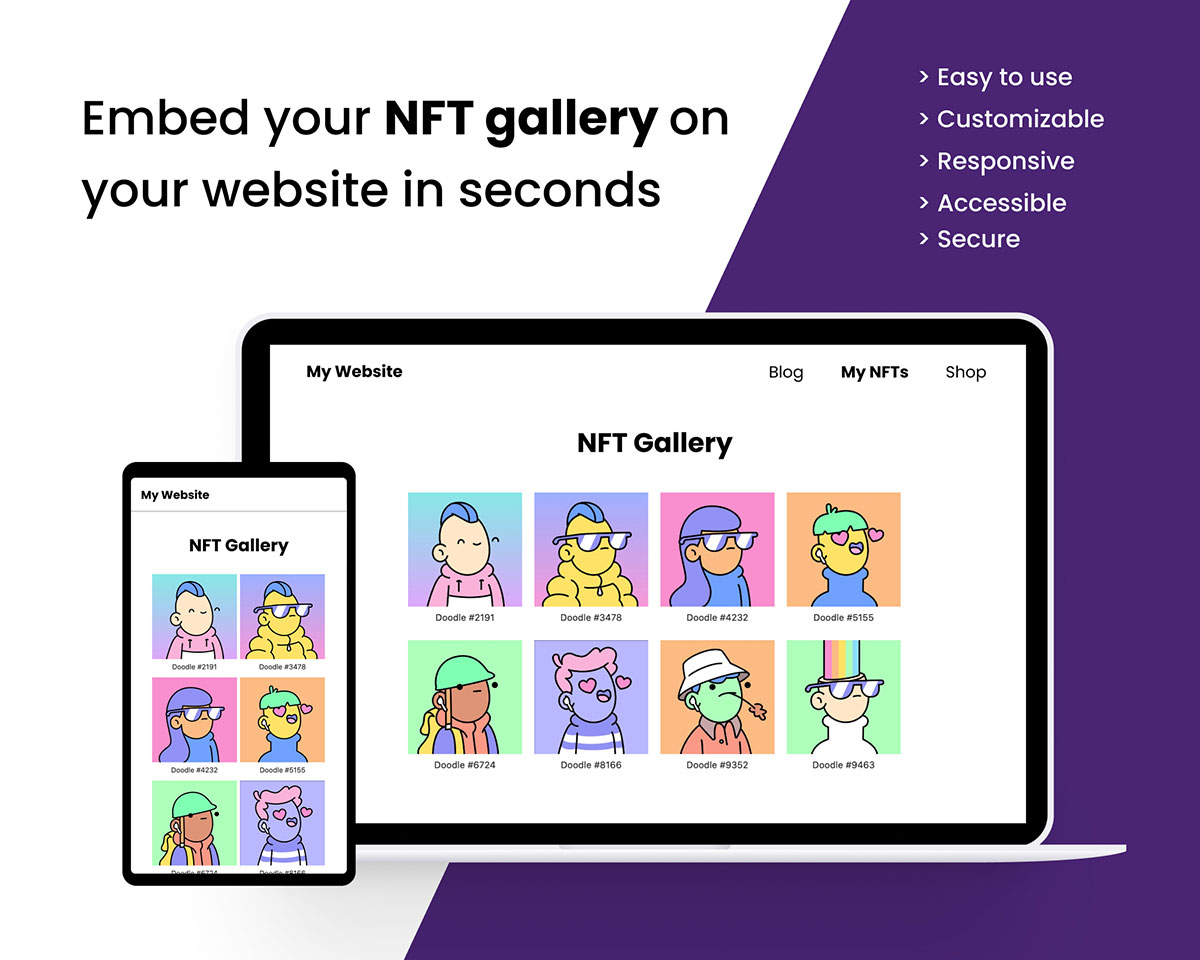
The first thing you’ll need is the NFT Galleries plugin from RebelCode. The plugin will do the heavy lifting so you can display your NFTs on your site. It’s easy to set up, and once you do, you can embed your NFT gallery on any page or post on your WordPress site.
Step 1: Install NFT Galleries
The NFT Galleries plugin is free to install and use. You can download the plugin on the official WordPress plugin page. In your WordPress dashboard, navigate to Plugins > Add New. Click Upload Plugin at the top, and choose the downloaded .zip file from where you saved it on your computer.
Once the plugin is activated, you’ll see a new menu item in your WordPress dashboard called NFT Galleries. Click that, and you’ll be presented with the initial setup menu:
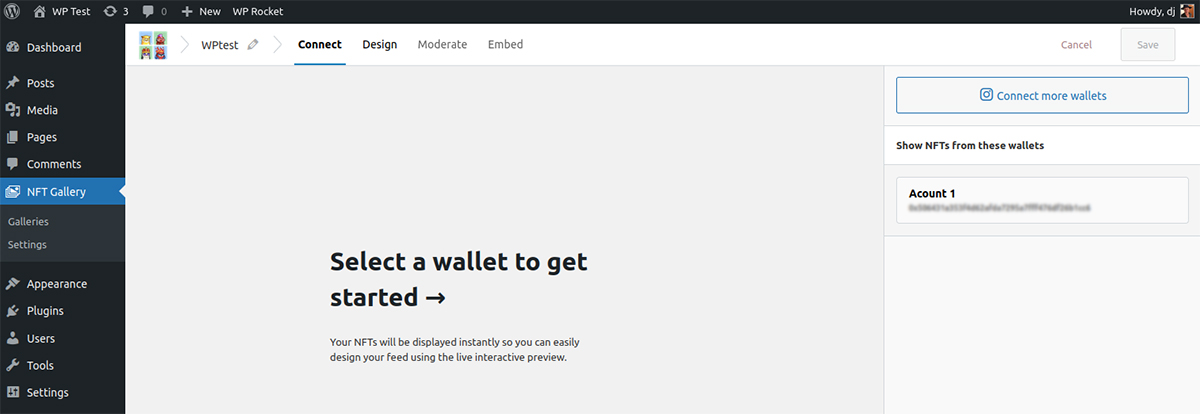
Step 2: Connect to your wallet
If you’re already active in the crypto world, you’re ready to connect your wallet(s). Enter your wallet ID and give it a name. Once you’re connected, any NFTs in your wallet will appear in the window after a few seconds.
If you don’t have any NFTs yet, don’t worry. Skip to Step 3 below, and we’ll review how to obtain them.
If all of this is entirely new to you, then let’s walk through the steps to get you a wallet. We’ll start with OpenSea, a popular NFT marketplace.
Creating an NFT collection on OpenSea
OpenSea is the world’s oldest and largest NFT marketplace. The platform allows you to find, buy, and sell NFTs from around the globe. To get started with OpenSea, you first need a crypto wallet. A crypto wallet is an app or device that allows you to securely store and retrieve your NFTs.
From their home page, just click Explore or Connect. You’ll arrive at a page that asks you to connect to your wallet — except you don’t have one, so you’ll need to create a wallet here.
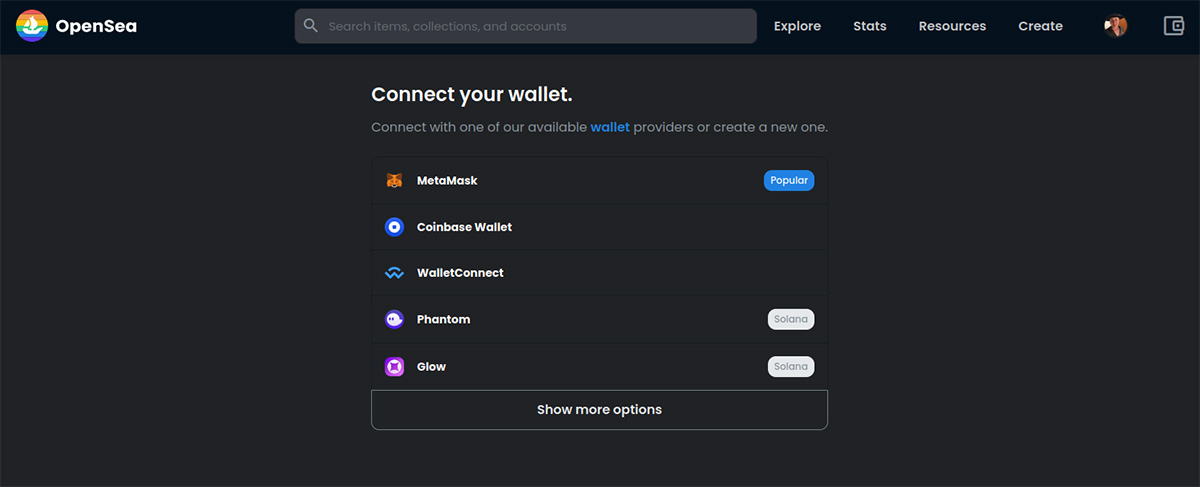
Choose a wallet provider from their list and follow the instructions they give you for setting it up. Typically you’ll need to add funds to your wallet during setup and verify your identity.
Once you’ve done that, you’ll be able to create a profile on OpenSea and start exploring NFTs!
Step 3: Create or Buy NFTs
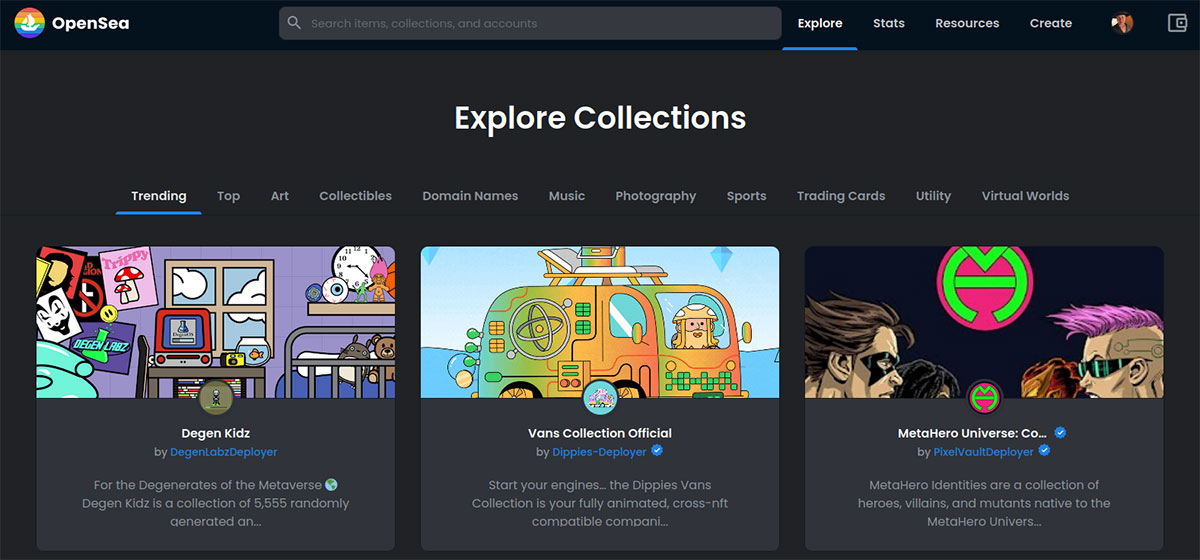
Finding NFTs on OpenSea is super easy. Just click Explore, and you’ll be able to browse collections from all over the world. If you already have some NFTs in your wallet, you can skip to Step 4. But you still may want to read this section as we discuss creating your own.
NFTs have a wide range of pricing — and some are even free. Once you buy an NFT, it’s added to your collection automatically. It’s yours forever or until you decide to sell it.
Interested in creating your own NFTs? It’s as simple as uploading a file. Your NFT can be almost anything; an image, video, audio, or 3D model. When you explore the collections on OpenSea, you can get a good picture of what kinds of NFTs are trending or popular.
Once your file is ready, go to OpenSea and click Create at the top.
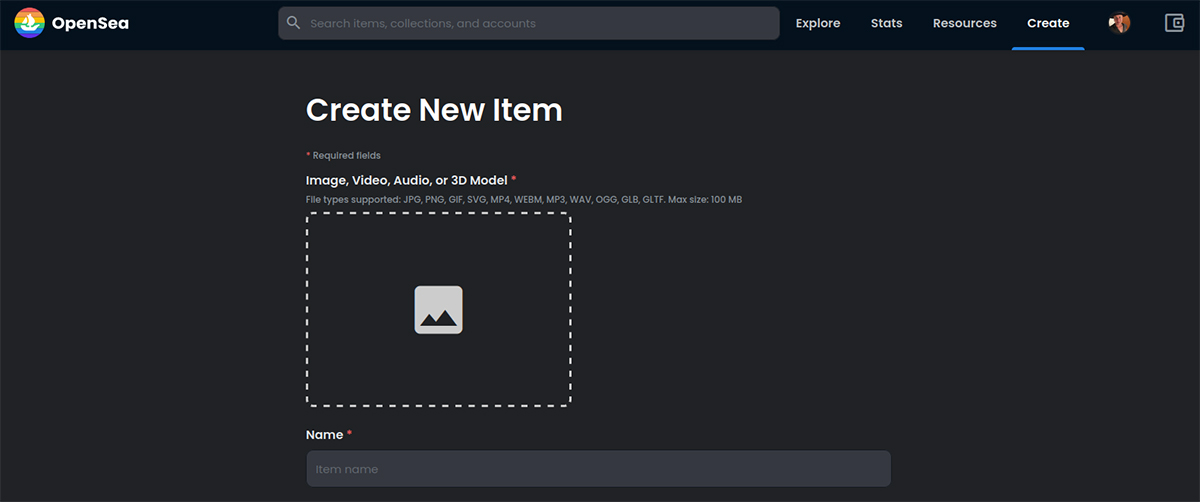
Drag your file into the box on the screen. Give it a name and description, and add it to a collection. Optionally, you can choose settings like Properties, Levels, Stats, or mark it as Explicit & Sensitive content.
As the last step, you’ll need to choose a Blockchain to store your NFT. Ethereum is the most popular, but you may want to select a gas-free option such as Polygon, to save on extra fees in storing your digital item.
That’s it! You are now the proud owner of an NFT that you created. You can always go back and edit your NFT’s details if you like. However, you can’t edit the token ID, contract address, creator fees, or the blockchain. Those details are part of the unique digital token, which is what makes NFTs valuable. If you want to change those settings, you’ll need to delete your NFT and create a new one.
Now that you have some NFTs in your collection, let’s display them on your WordPress site.
Step 4: Display NFTs on your site
You’ll need to navigate to the NFT Gallery menu in your WordPress dashboard. If you haven’t already, follow the instructions outlined in Step 2 above to connect your wallet. Then come back here to learn how to display and customize them.
Design
Once you’re connected and see your NFT(s) displayed in the preview window, let’s design how the gallery will look. Click the Design tab at the top of the menu.
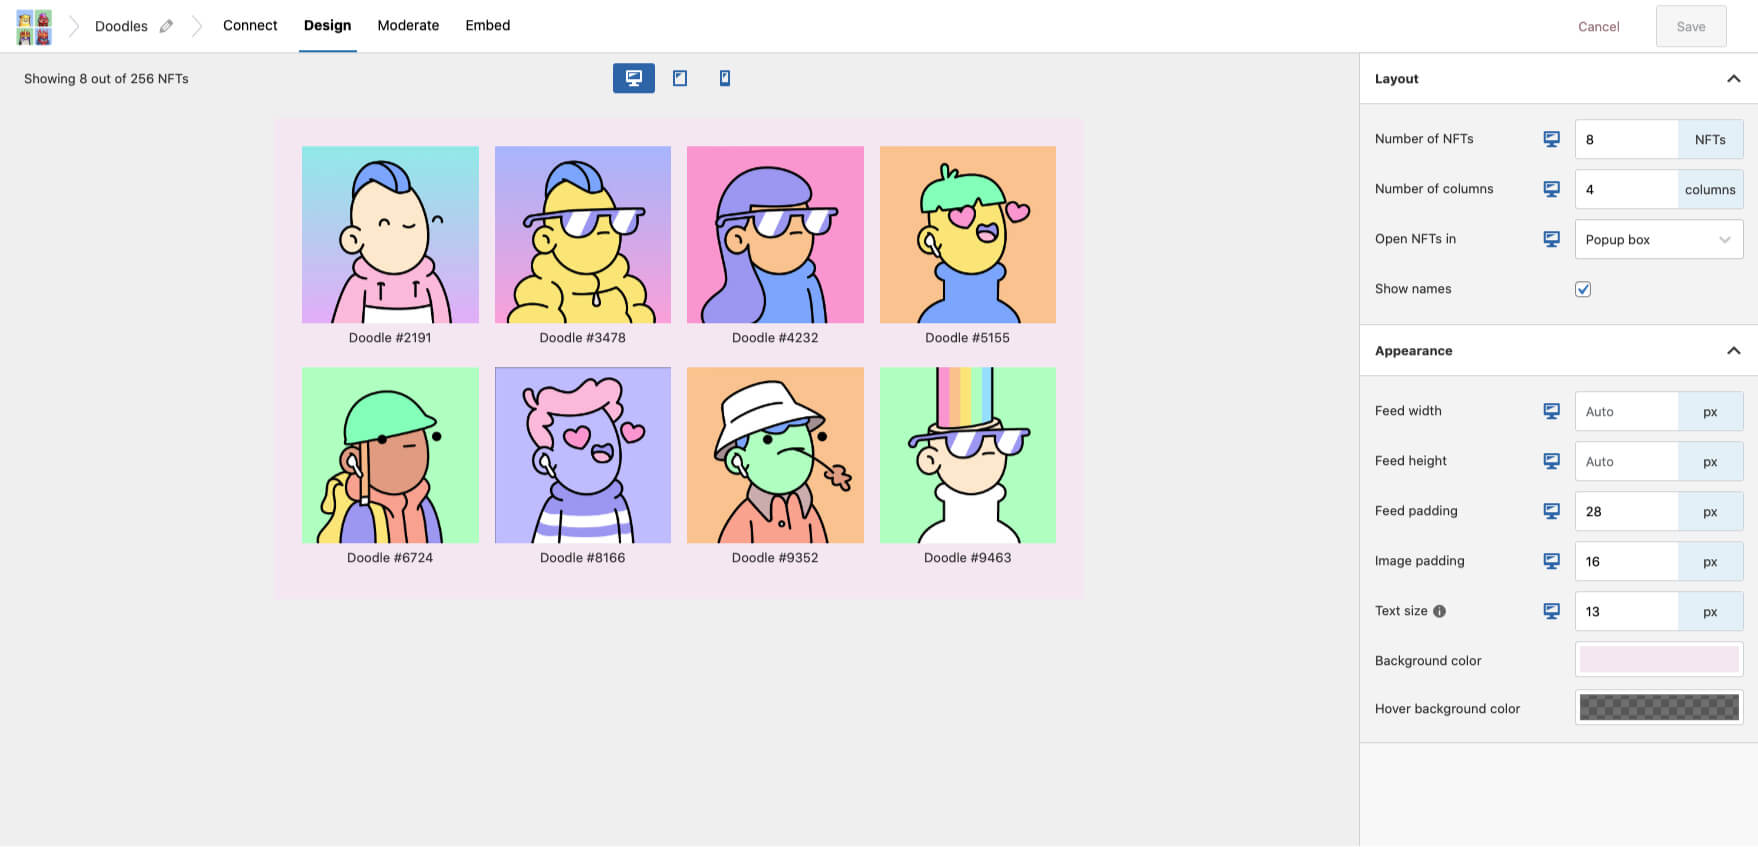
Here you have options for Layout and Appearance. Most are self-explanatory, but one that bears mentioning is the Open NFTs in selection. The popup box simply displays the NFT image in a popup on the page. If you choose Same Tab or New Tab, it will open a link to your NFT on OpenSea.
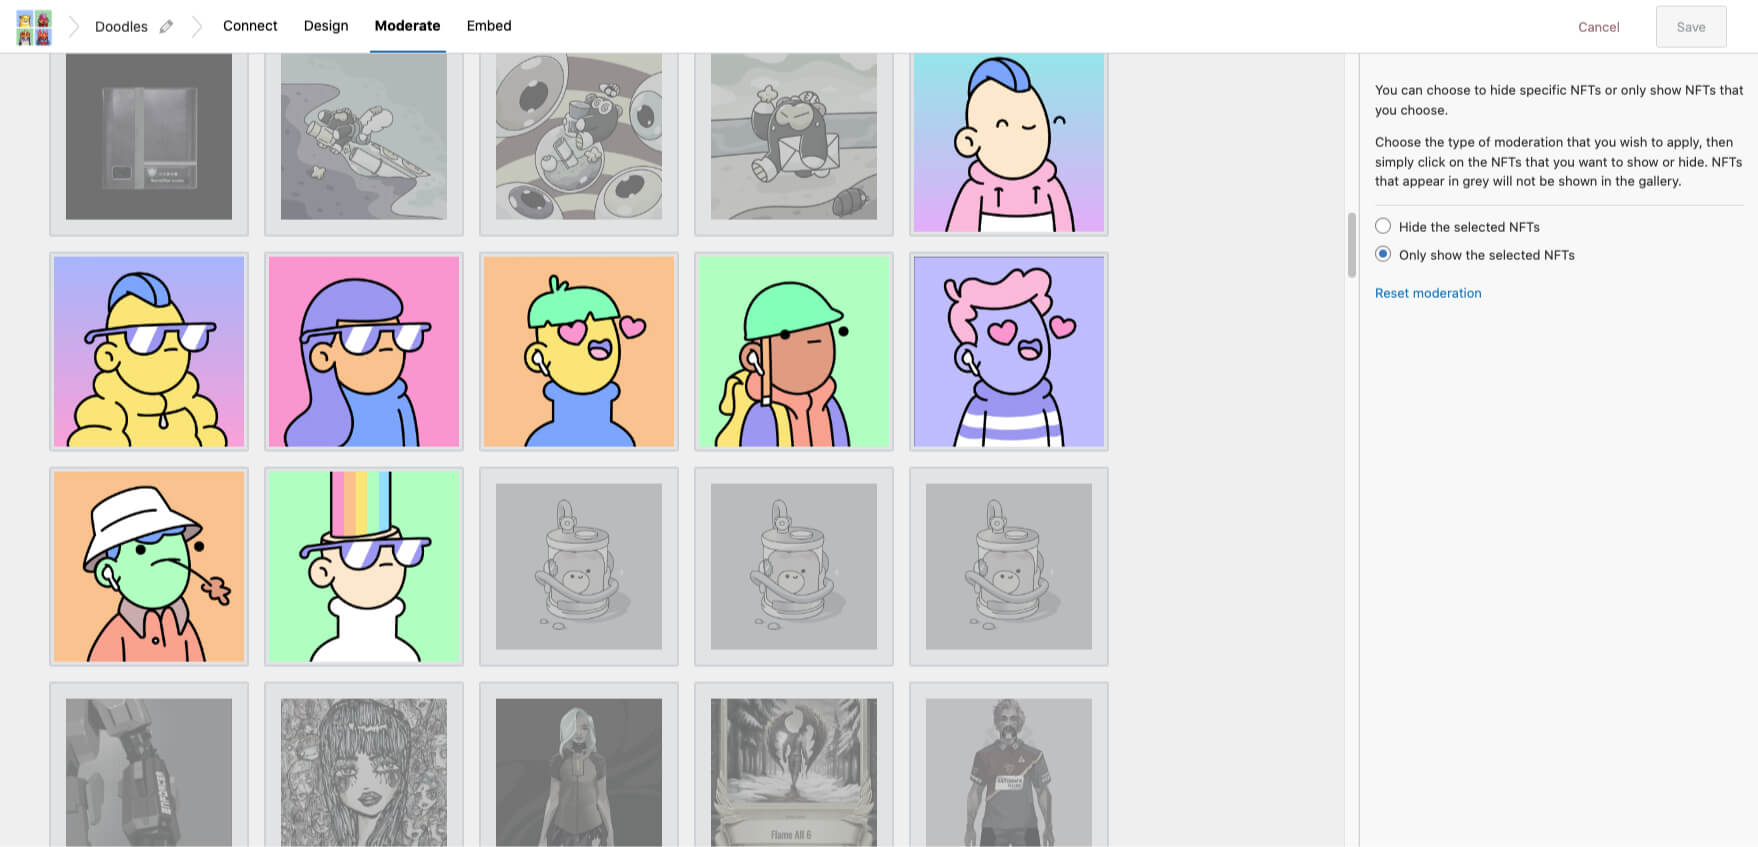
Moderate
The Moderate menu allows you to choose which NFTs appear in the gallery. You can choose to show or hide specific NFTs by selecting them. The NFTs that appear in grey won’t be shown in the gallery.
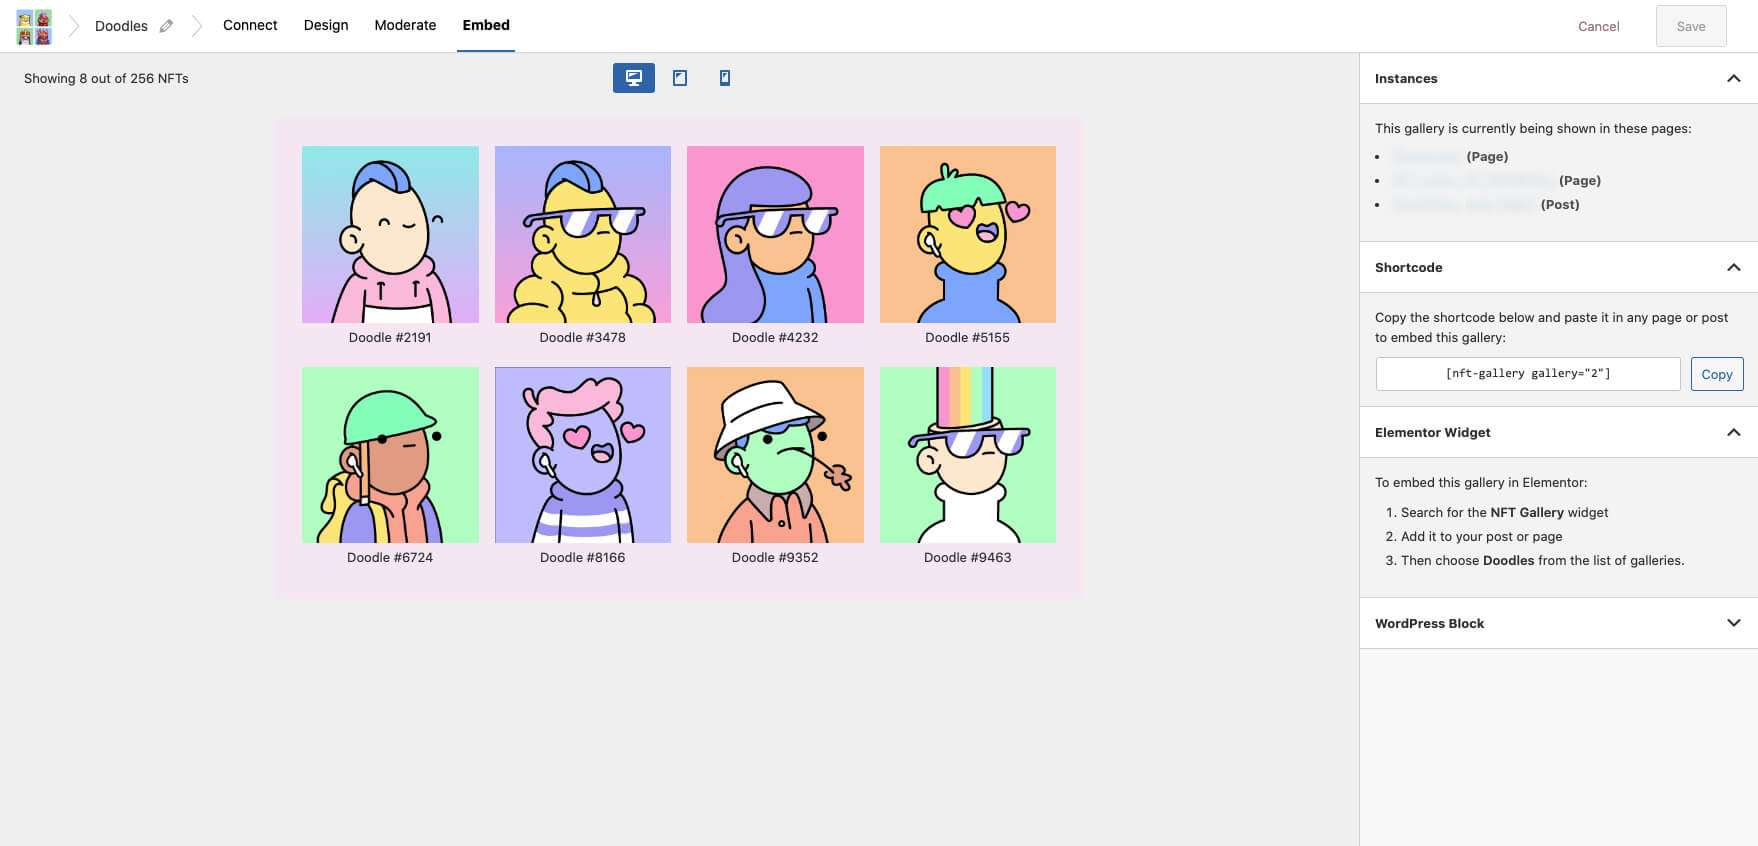
Embed
You have two choices for embedding your gallery on posts or pages: Shortcode and WordPress block. If you choose the block option, you can select which gallery you want to display from the block menu in the editor. There’s also a handy preview to see how your gallery will look on mobile devices.
Displaying multiple galleries
You can show more than one gallery on a page or post. You can connect more wallets or create a new gallery for your existing wallet. If you only have one wallet, this is where the Moderation feature comes in handy.
- Under the Galleries menu, select Create a new gallery. Select your wallet, as before.
- Give the gallery a different name.
- In the Moderation tab, choose which NFTs to show or hide.
Using this method, you can create as many galleries as you like.
Sharing your NFTs is easier than ever
While waiting for Instagram to open up sharing digital collectibles to everyone, you can take advantage of the time to explore NFTs and build your collection on your website. Adding a gallery to your website allows visitors to explore your entire collection in one place. When Instagram NFTs become available, you’ll be ready.
If you want some inspiration, you can explore some demos of NFT galleries. And if you want to keep up with what’s happening in the NFT space on Instagram, there’s an article that lists some accounts to follow that show digital collectibles in action.
NFTs are an opportunity to invest in the future of Web3 and yourself. Using NFT Galleries on your WordPress website is a great way to get involved right now.