The further we progress into the digital age, the more relevant social media platforms like Instagram and Twitter become. In fact, personal and business branding has become nearly synonymous with social media in recent years.
When it comes to showcasing in-demand visual content like photos and videos, Instagram is a go-to choice. But there’s an important factor to be aware of when marketing your brand on Instagram.
Instagram’s key limitation
While Instagram is a robust and powerful social media channel, it comes with one big limitation: The bio link.
As of 2023, you could technically add more than one link in your Instagram bio. However, it’s still not particularly user-friendly or visually appealing. Plus, you’re limited to just five links.
We’ve seen the rise of ‘link-in-bio’ pages since well before this multiple bio link feature. So, are they still relevant? I say yes.
In this post, we’ll talk all about ‘link-in-bio’ pages and how you can use two notable WordPress plugins to create a bio link page (also known as a link in bio page) in WordPress that is high-impact and personalized to your brand.
Understanding bio link pages
Imagine having a digital hub, or a single webpage that encompasses all facets of your online persona or brand. Your audience can use this hub as a single source for everything you do, and you can use it to present your content exactly how you want it to look.
This is what a well-designed bio link page offers.
From social media profiles to blogs, e-commerce stores, podcasts, and more, online personas are distributed more widely than ever. To simplify this landscape for both the creator and the audience, the idea of a centralized digital hub has gained serious traction.
Platforms like Linktree and Beacons have provided this service for years, but they come with some limitations.
Limitations of hosted bio link platforms
- Dependence on the platform. Users are tied to the platform’s availability. If the service goes down, so does your bio link page.
- Lack of ownership. The content you post is on their domain, meaning you’re essentially renting space rather than owning it.
- Limited branding options. While these platforms offer customization, it’s often within a set framework. You might not get the precise colors, fonts, or layouts that align with your brand.
- Limited content type display options. You’re constrained by the platform’s design choices, which might not always align with how you envision showcasing your content.
WordPress: A game-changer for bio link pages
For those seeking more autonomy, brand consistency, and a wider array of content display options, WordPress emerges as a compelling alternative.
Here’s why:
- Total ownership. With WordPress, you’re in control. Host your bio link page on your domain, ensuring no third-party interruptions or advertisements. You own the content, so you retain the freedom to adapt as your brand evolves. No more worrying about third-party platforms changing their terms, flagging or limiting your content, or shutting down.
- Customizable design. Most third-party platforms offer templates, which is great if you’re just getting started. However, this can seriously limit your ability to personalize the page to your brand look and feel. With WordPress, the customization possibilities are virtually limitless. With thousands of themes and plugins, you can design every pixel to represent your brand’s ethos and aesthetics.
- Flexibility in content presentation. Showcase videos, integrate email sign-ups, or even incorporate a mini-blog.
- SEO advantages. When you direct traffic to your website from your bio link page, it has the potential to significantly enhance your site’s SEO rankings. This can do wonders for your visibility in search engines.
- Integration possibilities: WordPress’s vast plugin ecosystem, including gems like Social and Spotlight, allows your bio link page to evolve with your needs. This keeps it dynamic, functional, and not just a gateway, but also a strategic asset.
3 steps to set up your ‘link-in-bio’ page in WordPress
Step 1. Create a bio link page with Social
What is Social?
Social is a WordPress plugin that allows users to create bio link pages right on their websites. This makes Social more SEO-friendly and on-brand compared to hosted solutions like Linktree or Beacons.
Plus, it gives you helpful statistics and meaningful insights about your audience, so you can track what’s getting their attention and driving traffic to your links.
Social is also noteworthy because it offers powerful content integrations that allow you to maximize your page’s utility and engagement. For example, you can:
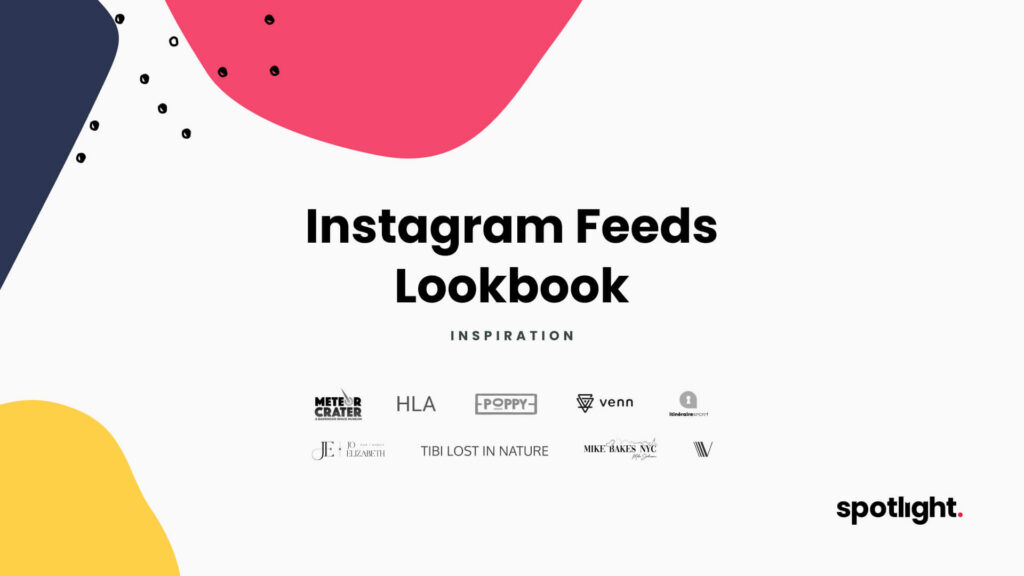
- Embed a Spotlight Instagram feed right on your bio link page
- Collect donations via PayPal
- Showcase your most recent blog posts automatically
Step-by-step guide: Installing and setting up Social
Note: PHP 6.0 or higher and WordPress 5.0 or higher are required to use Social WP. Refer to the Social documentation for more guidance.
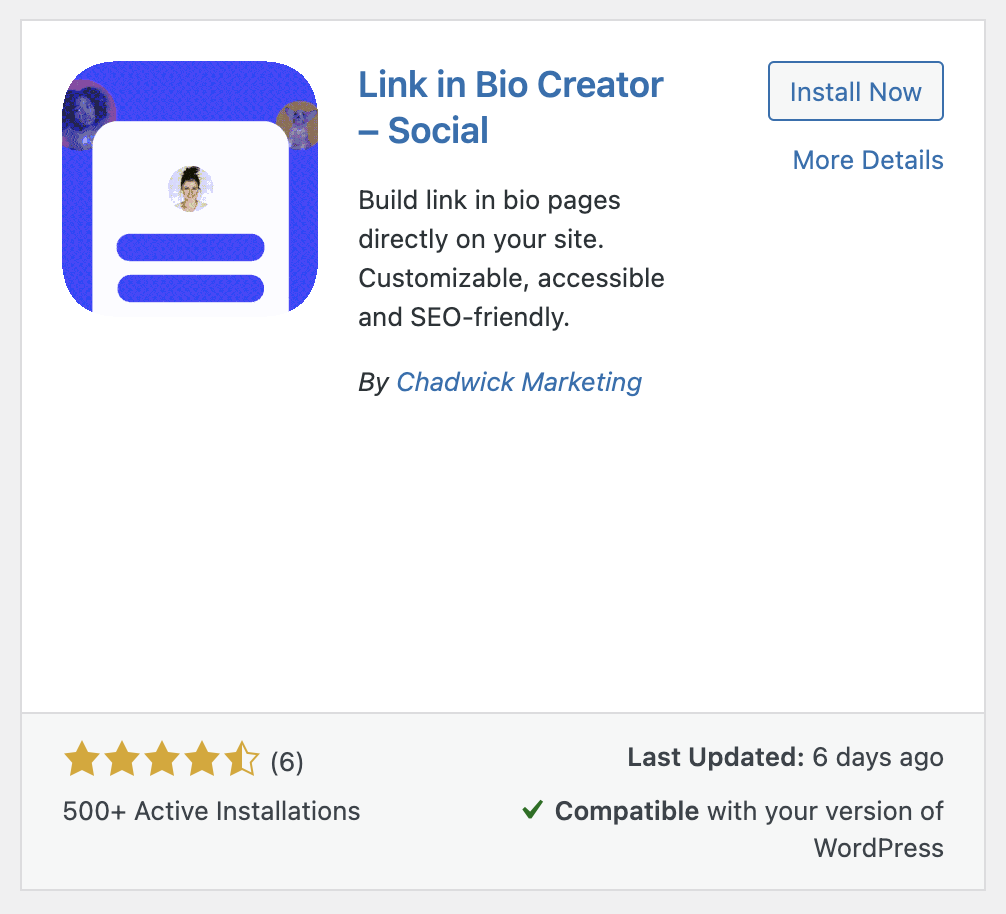
1. Install and activate Social.
- From the WordPress dashboard, navigate to Plugins > Add New.
- Search for ‘Link in Bio Creator – Social’.
- Click Install.
- When it finishes installing, click Activate.
2. Set up your bio link page. You should now see Social on the left side menu in your WordPress dashboard.
- Navigate to Social > Social to start setting up your bio link page.
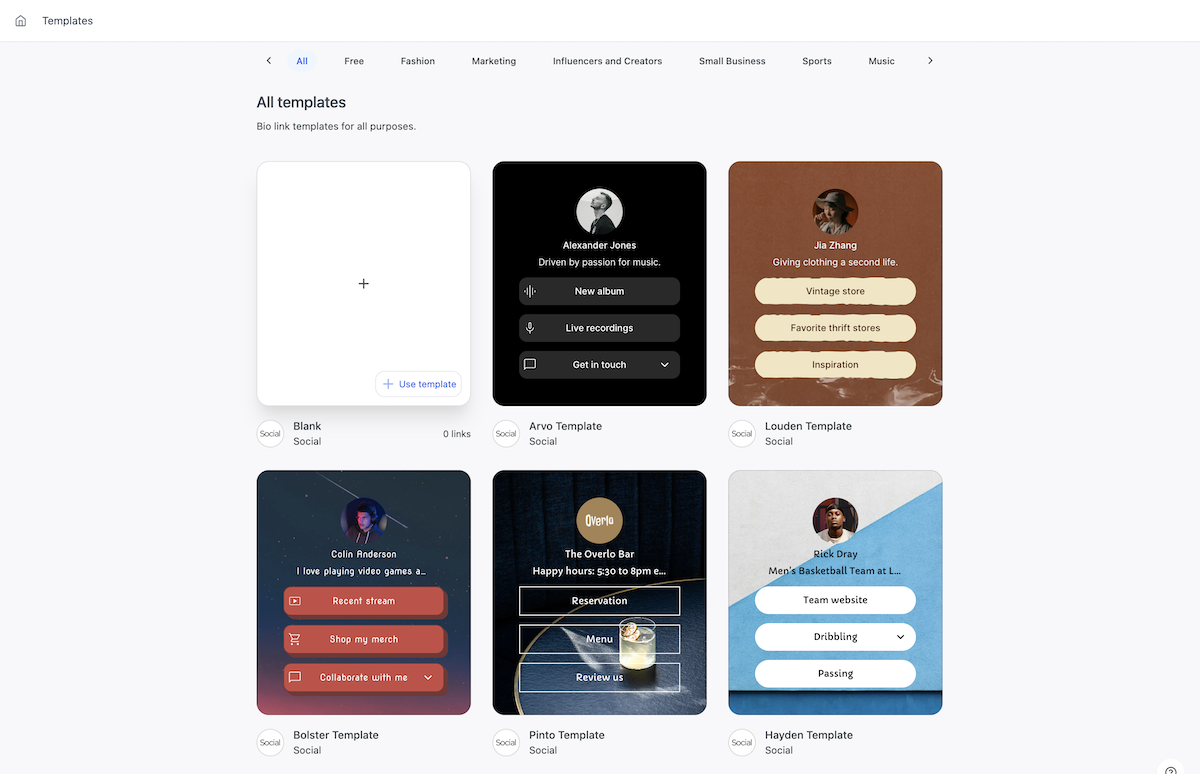
- Choose to either start from scratch or use a pre-designed template.
- If you use a template, choose to either start from scratch or start with the default content.
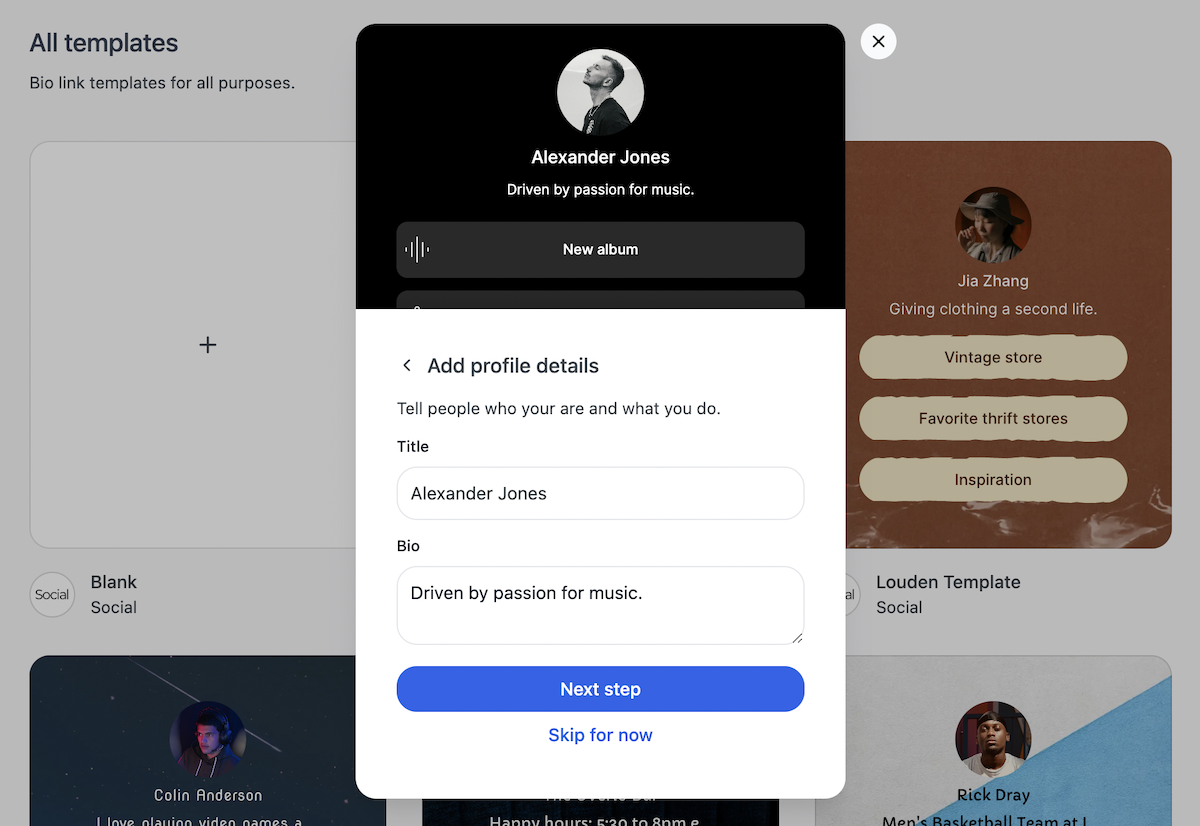
3. Customize your bio link page layout and design. Whether you started from scratch or used a template, you can now:
- Pick a profile image.
- Add profile details.
- Select a theme, or create your own theme with AI (cool!).
- Choose a custom URL for your bio link.
- Continue to the Editor, which is sleek, easy to use, and shows a real-time preview of your changes.
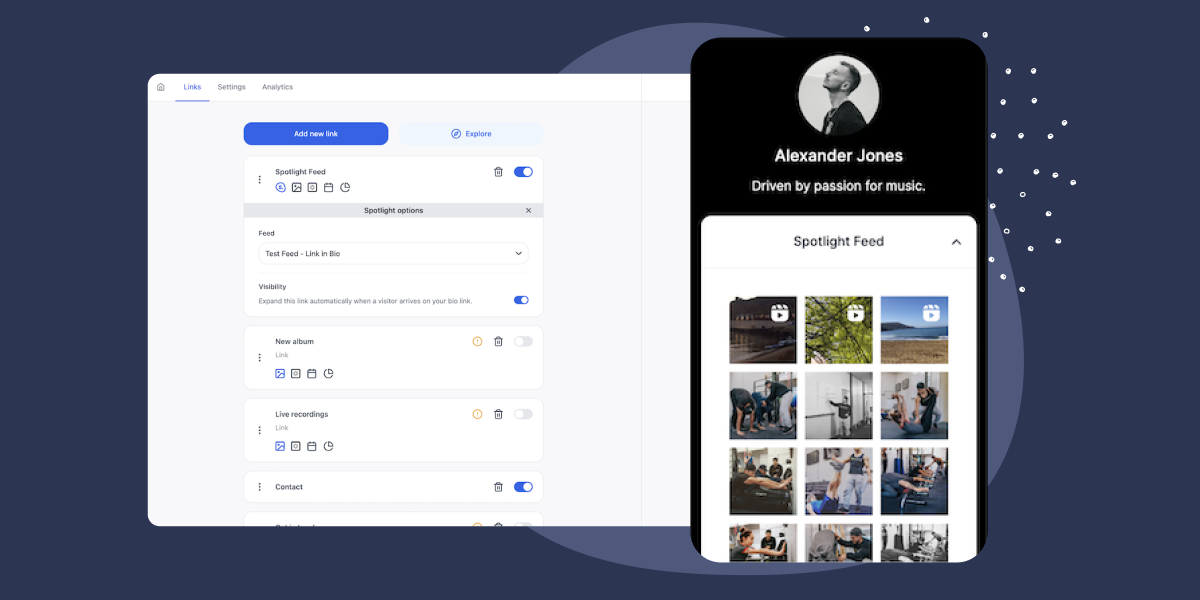
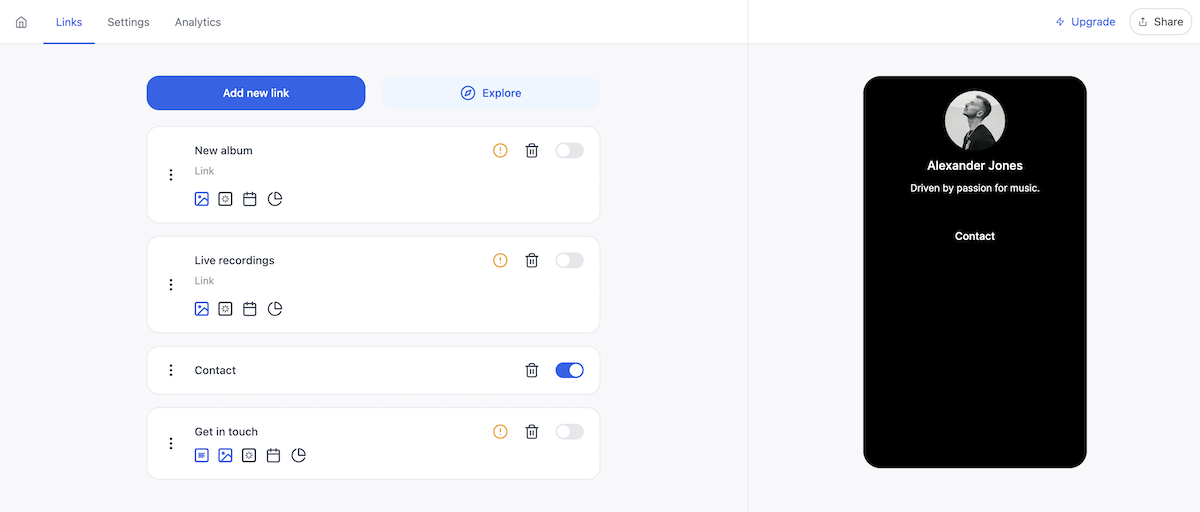
4. Add essential links and buttons. From within the Editor, you’ll see these tabs:
- Links. Here you can add links that:
- Showcase different types of content.
- Help you monetize your content.
- Connect you with your followers (such as contact forms and appointment scheduling).
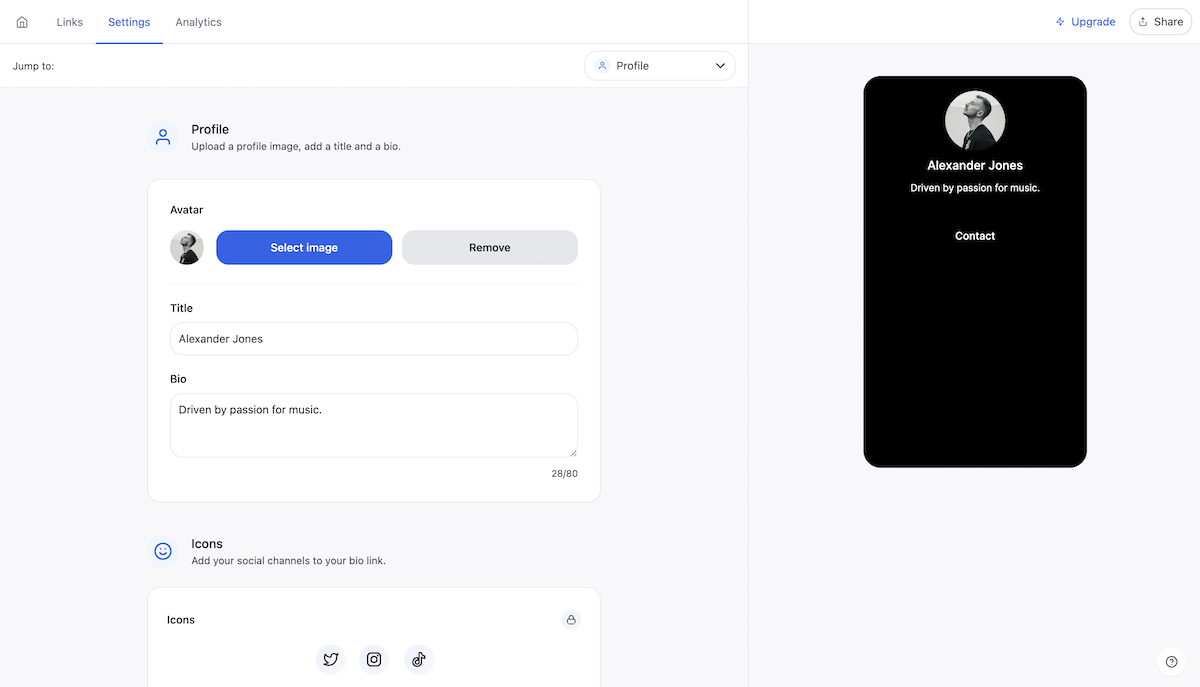
- Settings. Here you can add or edit:
- Your profile image, title, and bio.
- Social media channels and icons.
- Additional links in your footer.
- Your bio link URL and search engine indexing.
- Your theme.
- Background style and colors.
- Button style and colors.
- Fonts.
- The Social badge visibility.
- Analytics. Pro users can access a variety of helpful insights, such as views, clicks, click-through rates, demographics, and more.
Step 2. Enhance your bio link page with Instagram content using Spotlight
Why display your Instagram feed?
Instagram has emerged as a dominant visual platform. By integrating your feed into your bio link page, you create a visually rich experience that connects seamlessly with your Instagram audience.
What is Spotlight?
Spotlight is designed for embedding & tracking Instagram feeds, hashtag feeds, tagged posts, shoppable feeds, link-in-bio feeds, and more on WordPress websites. You can use Spotlight to display your Instagram feed on the bio link page that you’ve created with Social.
Here’s how:
Step-by-step guide: Installing and setting up Spotlight
Note: PHP 7.1 or higher and WordPress 5.7 or higher are required to use Spotlight. Refer to the Spotlight documentation for more guidance.
1. Install and activate Spotlight
- From your WordPress dashboard, navigate to Plugins > Add New.
- Search for Spotlight Social Feeds [Block, Shortcode, and Widget].
- Click Install.
- When it finishes installing, click Activate.
2. Connect your Instagram account
- You should now see Instagram Feeds on your left side menu. Navigate to Instagram Feeds > Feeds.
- Connect your Instagram Business or Creator account to Spotlight using the Basic or Advanced options. This integration allows real-time updates from your Instagram to reflect on your ‘link-in-bio’ page.
- Click + Create a new feed.
- Select the type of feed you want to display and click Next step >.
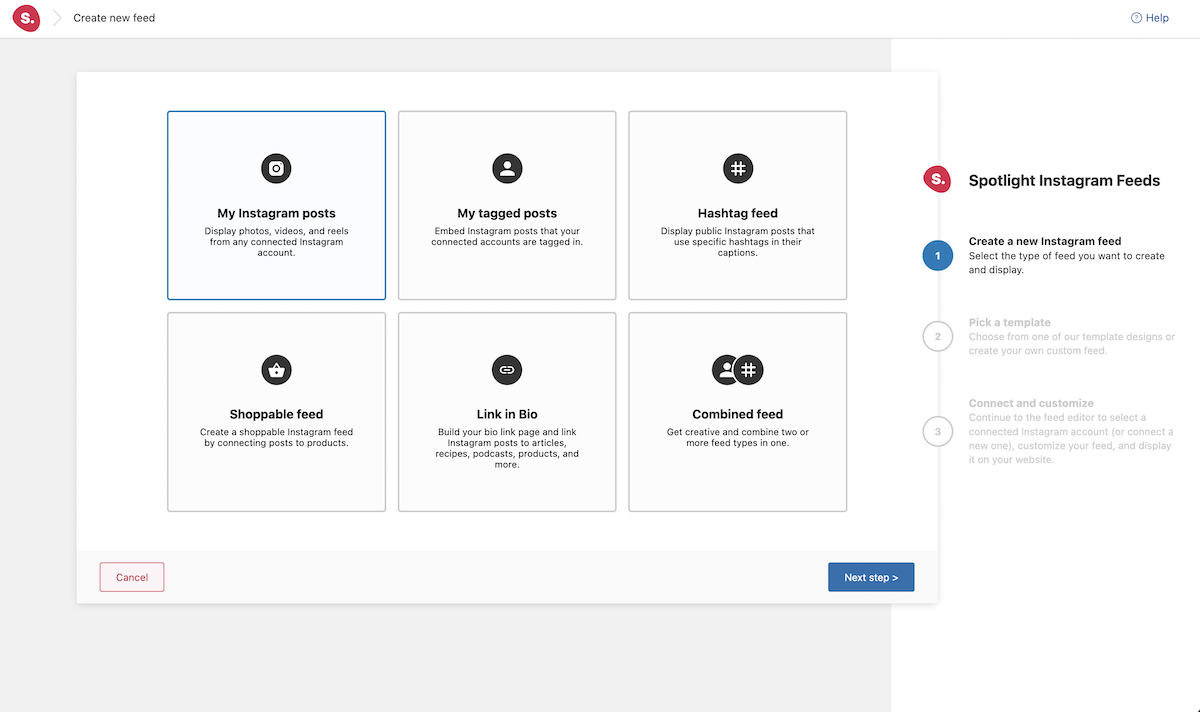
- Choose from a template or create your own feed and click Next step >.

- Click Connect & Customize to be taken to the Spotlight feed editor.
3. Within the Spotlight feed editor, you can customize your look and layout: Choose from diverse layouts – be it a grid, list, or carousel. Customize how your feed looks and behaves, ensuring it aligns with your overall design philosophy.

Step 3. Integrate Social and Spotlight to maximize the impact of your bio link page
Integrating Social and Spotlight together on your WordPress site allows you to display your Instagram content beautifully on your bio link page in just a few clicks.
Step-by-step guide: Integrating Social and Spotlight in WordPress
- From your WordPress dashboard, navigate to Social > Social.
- Select the bio link page you want to edit, or create a new one.
- Click Explore to open a window with different content options for your bio link page.
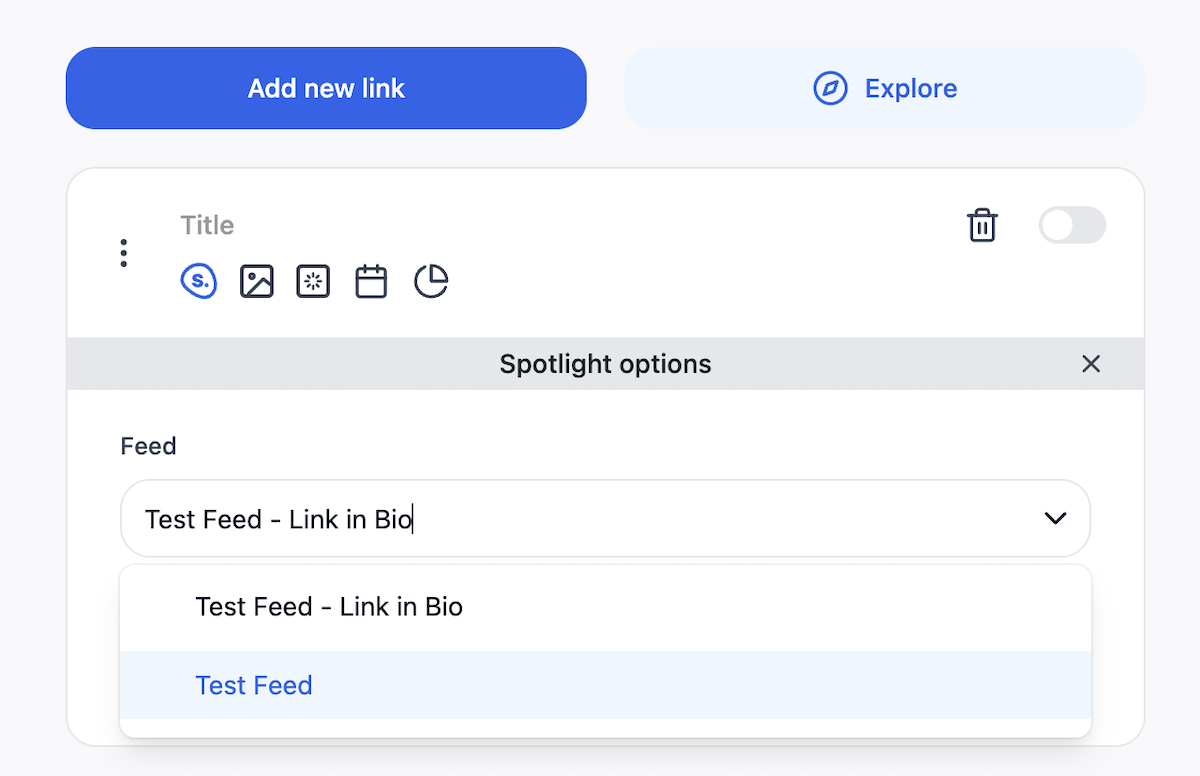
- Under the Share you content section, you’ll see Spotlight. Click Add.

- Once you’ve added Spotlight to your page, click on the Spotlight logo to reveal the Spotlight options.
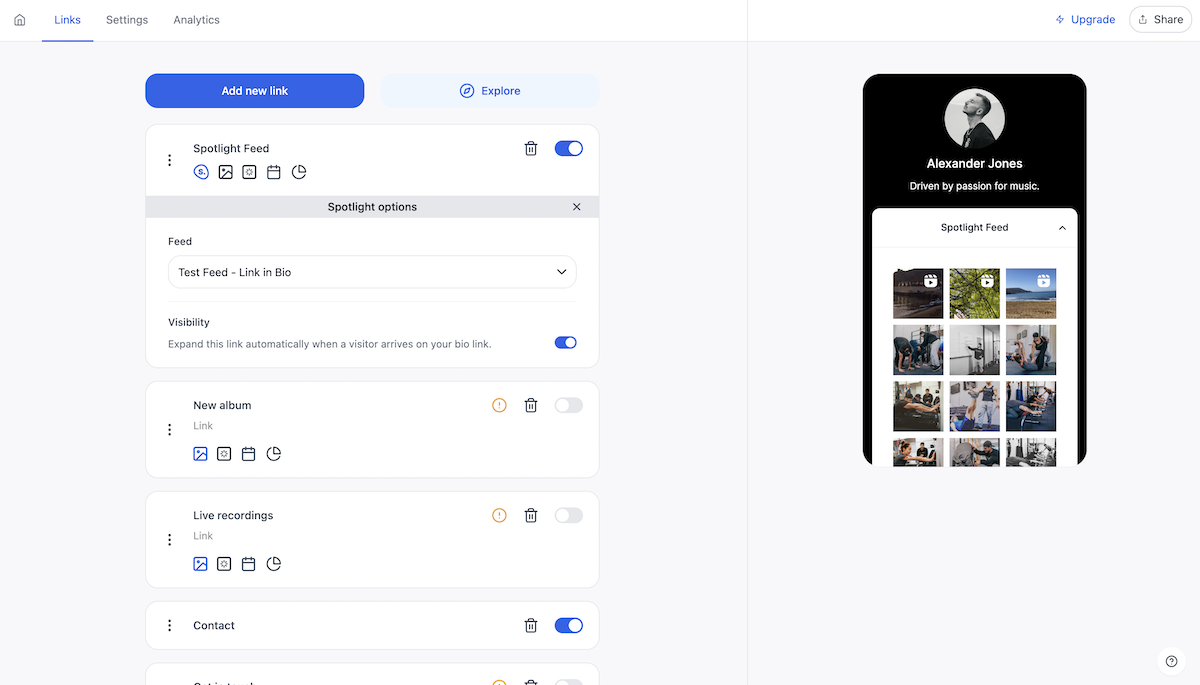
- Select the feed you want to display.
- Now, you should see your Instagram feed on your bio link page.
If you’re having any trouble getting your feed to show up, check out the Spotlight documentation here.
Best practices for an effective bio link page
- Keep your design clean and mobile-friendly. In the “mobile first” age where most users access content via mobile devices, making sure your ‘link-in-bio’ page is mobile-friendly is a must.
- Remember to keep your links updated. Keep your audience engaged with fresh content by regularly updating your links and offerings.
- Integrate your Call-to-Action (CTA) buttons. Effective Call-to-Action buttons can guide user behavior, pushing them towards all kinds of different desired actions. Add CTA buttons to your bio link page to encourage anything from newsletter sign-ups to product purchases and event participation.
- Monitor your traffic to understand user behavior. Utilize WordPress analytics tools to monitor user behavior. Understand where they spend time and which links garner the most clicks, allowing you to optimize the experience further. You can purchase a Social WP pro license to get access to bio link page analytics, and a Spotlight All Access license for further analytics like Instagram insights, post insights, engagement analytics, and performance analytics.
Conclusion
These days, a personalized ‘link-in-bio’ page on WordPress isn’t a luxury—it’s a necessity. It represents your brand, your offerings, and your value proposition and gives your audience a central place to find all of it.
Using WordPress along with plugins like Social and Spotlight gives you maximum freedom and ownership over your content while simplifying and enriching the user experience at the same time.
Embrace the autonomy, flexibility, and integration capabilities they offer and start creating your own robust bio link page in WordPress today.