Have you ever thought about the power of a simple tag or mention? These little actions can create a web of connections and boost your profile’s visibility.
Tags and mentions are like direct conversations. Whether you’re tagging a friend or a business, it’s a way to show appreciation. For businesses, it’s a clear sign that what you’re doing is making waves. So why not make the most of it?
Using Instagram can elevate your brand’s image. People trust each other’s opinions about brands. That’s why businesses embed tagged feeds with positive user-generated content. This content can boost your sales and build visitor trust.
In this article, we’ll see how Spotlight can help you display your tagged feeds on your website in no time.
Let’s get started!
What is Spotlight?
Imagine a world where showcasing Instagram content on your website was as easy as slicing bread. That’s exactly what Spotlight brings to the table. This plugin is your right hand for curating posts and embedding tagged feeds with specific hashtags or mentions.
Spotlight is a good solution for you to embed your business’s Instagram feed on your website. You can choose to display your normal feed or display your Instagram mention feed. Spotlight has several stand-out features:
- Customization
- Efficiency
- Engagement Boost
- Mobile Responsiveness
Through these features, you’ll be able to filter through the content you would like to display with little effort. This plugin can become your go-to tool to curate and display Instagram tags and mentions.
Benefits of using Spotlight to embed tagged feeds
Let’s break down how these features can seriously amp up your business:
Efficiency: Who has time for endless content creation? Let your followers do the talking! With Spotlight, your content stays fresh and updates in real time, so your website visitors see the latest user-generated posts immediately.
Customization: You’re in control here! Decide what posts fit your website’s look and feel. You can select them manually or set up filters to eliminate unwanted posts instantly.
Engagement Boost: Having your Instagram feed on your landing page is like a red carpet for visitors to discover your profile. More visitors mean more followers and likes. Plus, your followers get a shot at fame on your site – who wouldn’t love that bragging rights?
Mobile-Friendly: Whether it’s a big desktop or a tiny smartphone, this plugin ensures your Instagram feed looks great on any device. It provides a smooth user experience all around.
In a nutshell, Spotlight seamlessly slots those tagged Instagram posts right into your website. Real-time magic, endless customization, content control, and brilliant design.
Now, let’s dive into the plugin installation process so you can embed tagged feeds yourself!
How to embed your tagged Instagram posts with Spotlight
Step 1: Connect your Instagram account to Spotlight
First things first, you need to link your Instagram account to Spotlight to be able to embed tagged feeds.
Select the Advanced (connect via Facebook) option. Keep in mind that you’ll need an Instagram Professional (Business or Creator) account to be able to connect successfully.
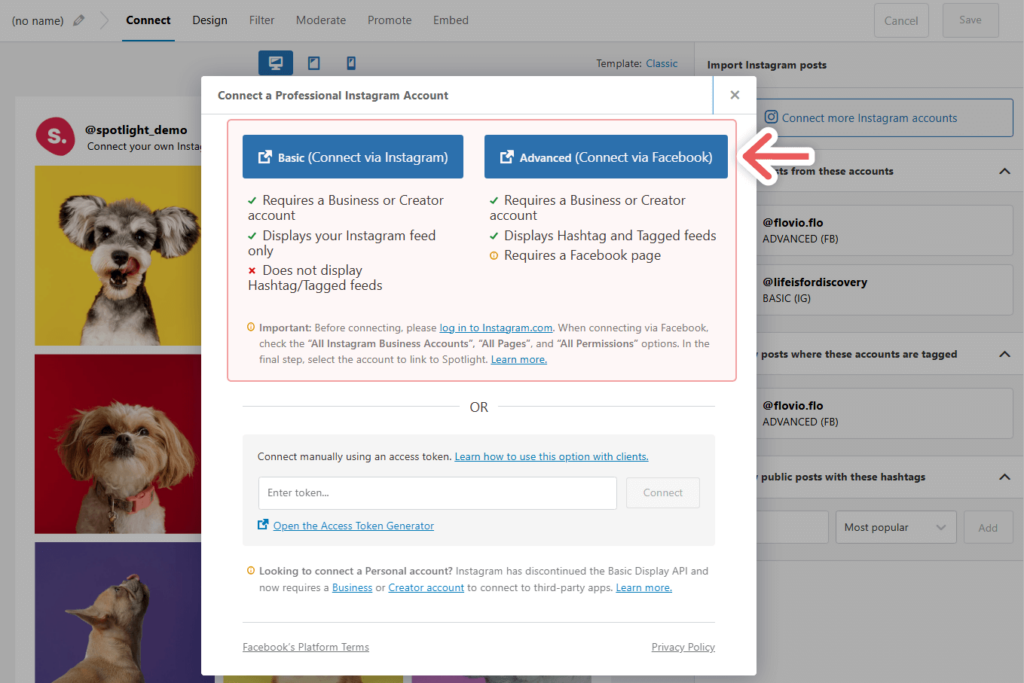
While the Basic account can connect to a Business or Creator account, its direct connection to Spotlight through Instagram does not support hashtag or tagged feeds. As such, cannot be used in this instance.
If you’re connecting on behalf of a client using an access token, you can learn how here.
Once you’ve clicked connect, give it a few seconds for your Instagram feed to load on Spotlight.
Step 2: Import tagged Instagram posts
Now, let’s move on to the next step – importing those tagged photos you want on your website.
Assuming you want to show off your tagged photos, here’s what you do: Once the images load, click on Show posts where these accounts are tagged and choose the right profile. Don’t forget to deselect the profile from the Show posts from these accounts section; otherwise, you’ll be bringing in your own Instagram posts too.
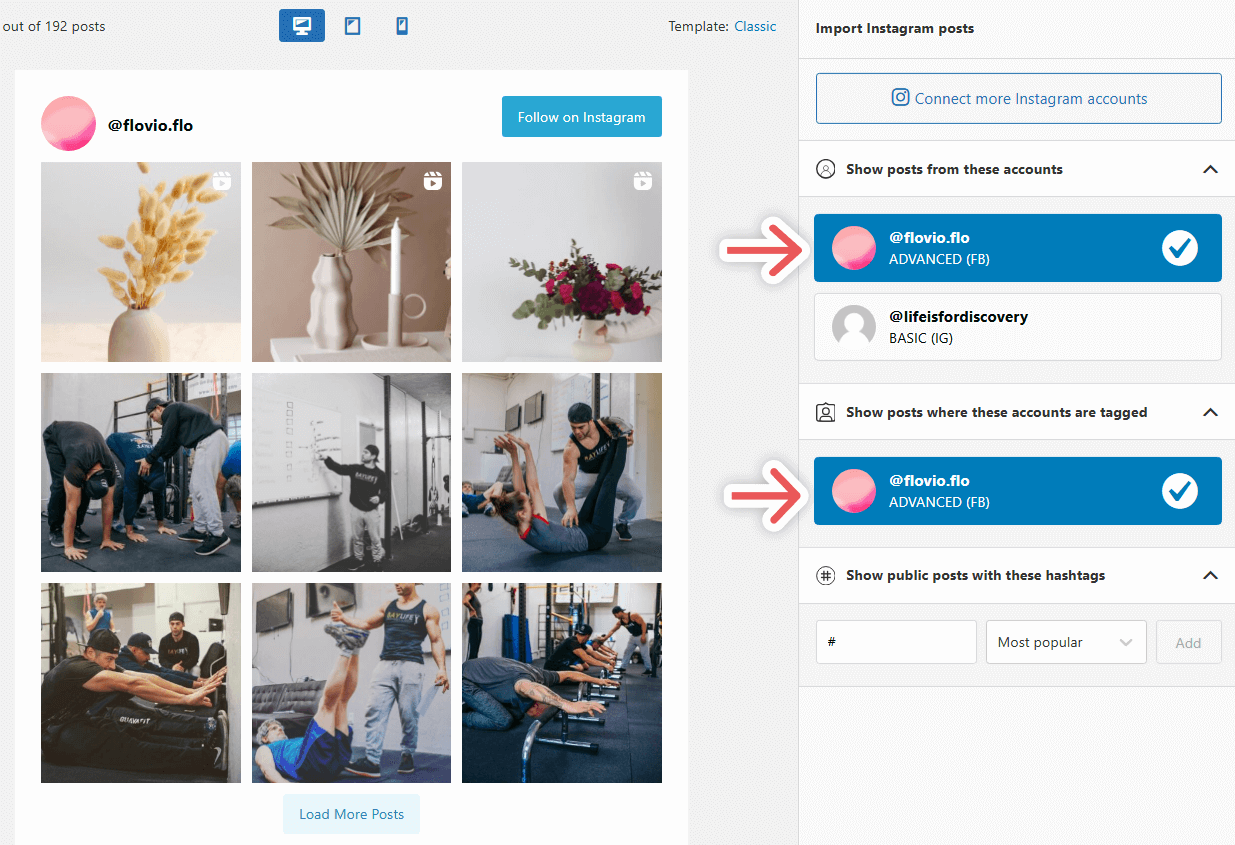
At this point, you should have a grid with all your tagged posts on your screen.
Step 3: Customize the appearance of your feed (optional, but recommended)
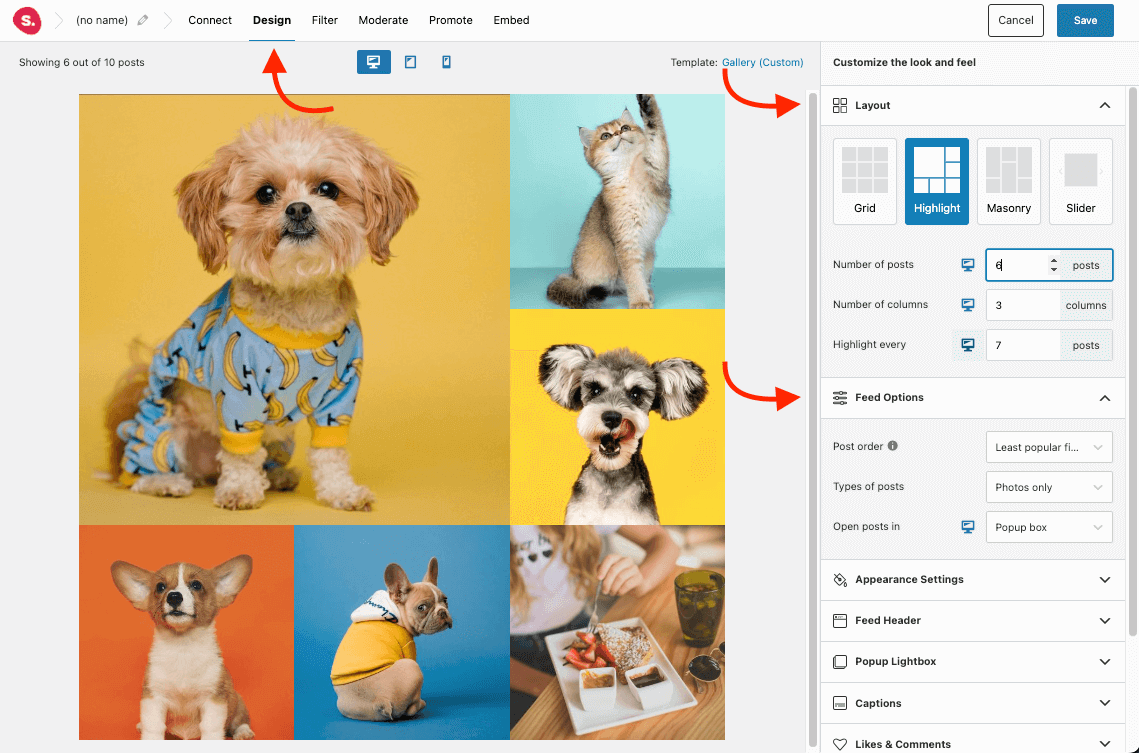
Once you’ve got your tagged posts imported, it’s time to go to the Design tab.
Take a look at the various layouts in the Layout tab. Pick the one that suits your desired style. You can even specify the number of columns and posts you want.
Now, check out the Feed Options tab. Here, you get to decide how your posts are sorted. Want the most engaging ones up top? Or maybe you prefer the latest tagged posts.
If you’re into appearances, dive into the Appearance Settings. You can tweak image width, height, padding, and text size. Match the background color to your brand’s vibe.
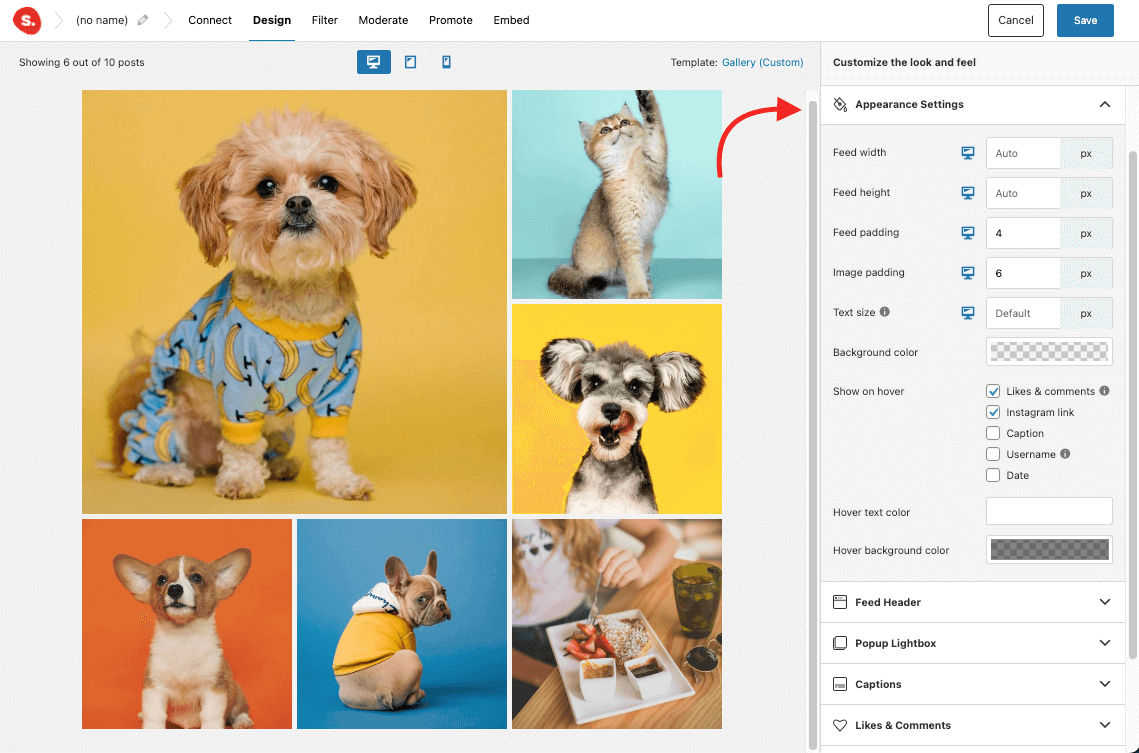
And here’s the fun part – depending on the layout you’ve chosen, you can display Instagram likes and comments. You can also customize the load more button. Change the text, play with the text color, and make that button pop!
Step 4: Filter and select the tagged posts you wish to display
Spotlight makes it easy to filter and moderate the content of your feed.
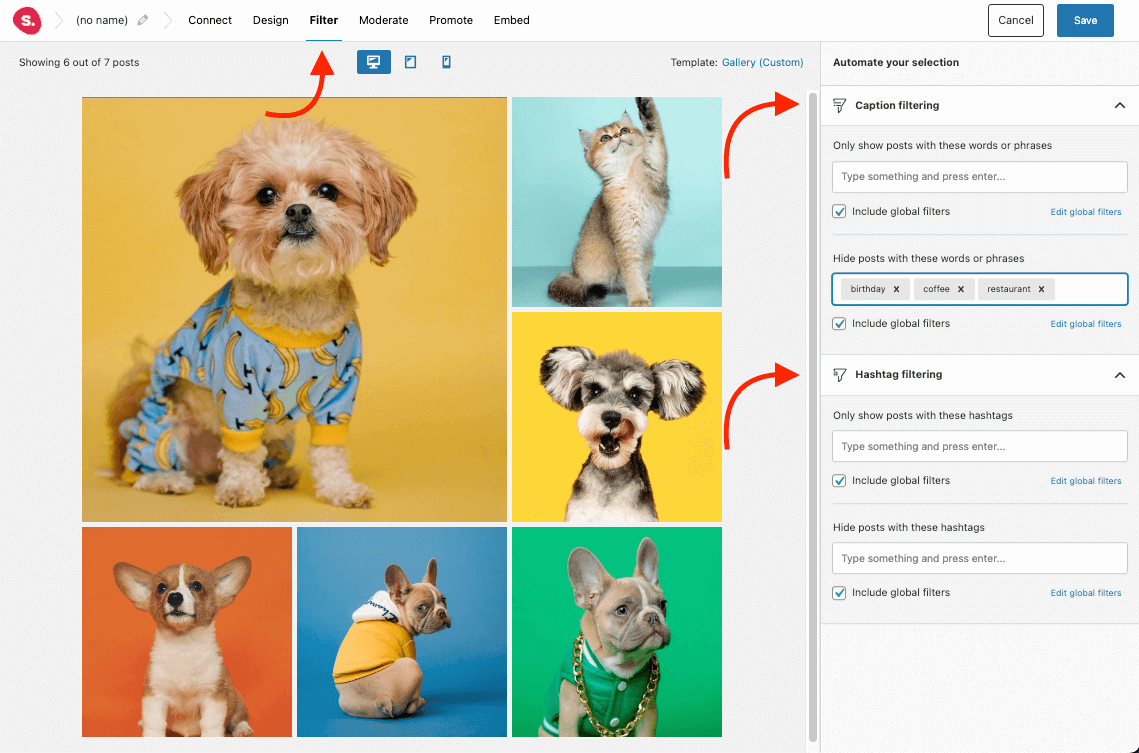
To filter through hashtags and keywords, head to the filter tab.
On the right-hand side, go to Caption filtering. You can enter the phrases you want to show or hide on your feed. The same goes for hashtags.
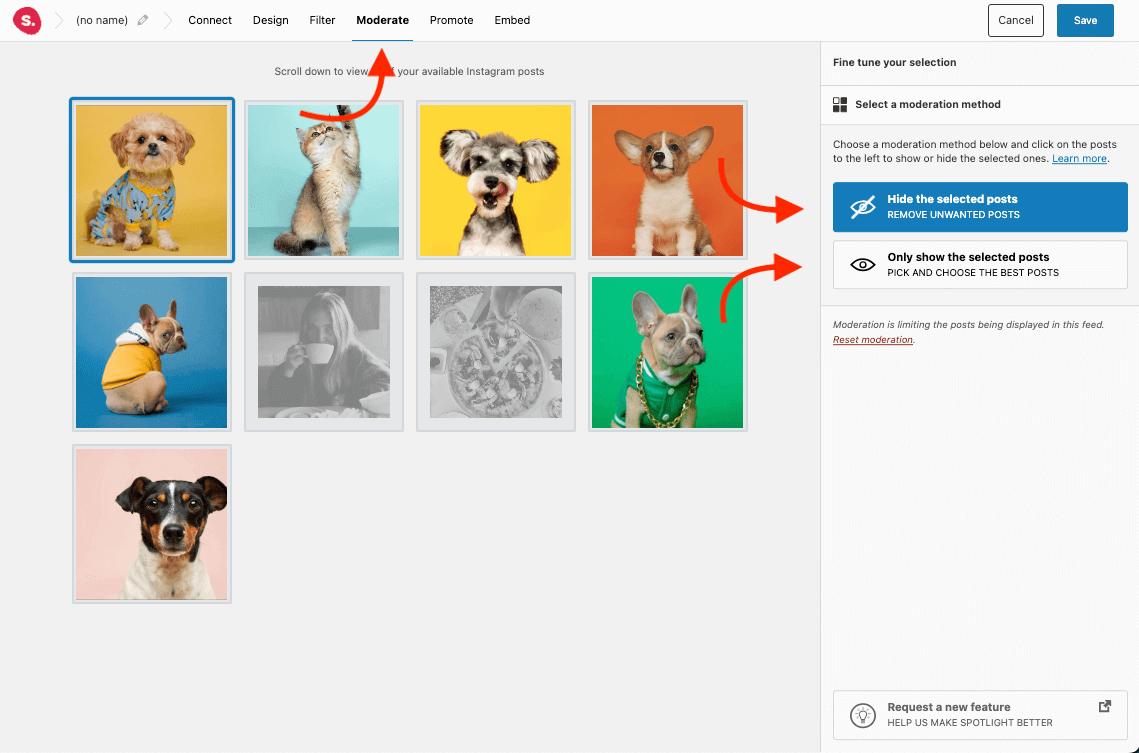
If you prefer the manual approach, go to the Moderate tab. Here, you can handpick the posts you want.
For instance, in the image below, the grayed-out posts have been hidden. To do this, click Hide the selected posts and select the posts you want to disable. Alternatively, you can decide to display only the posts you’ve selected by hitting the button below.
Step 5: Embed the feed on your website
Once you’re satisfied, it’s time to embed it on your website. Don’t forget to hit save before you start.
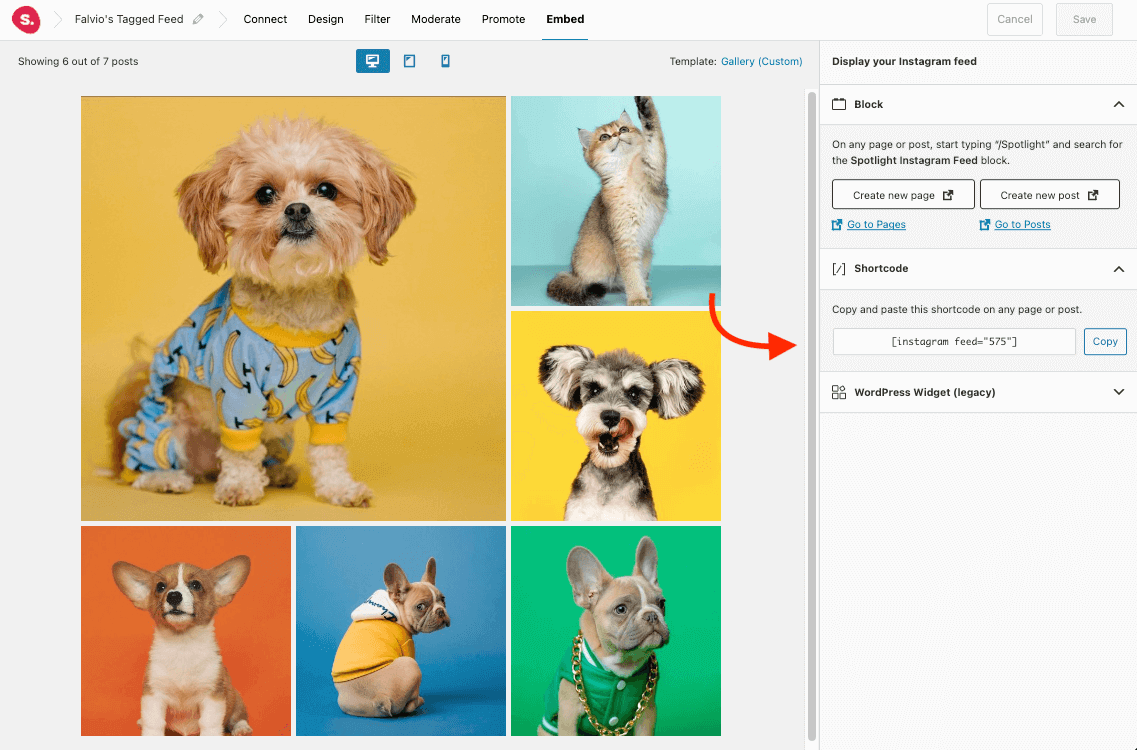
After saving, give your feed a catchy name, then click on the embed tab to begin. You should land on this page:
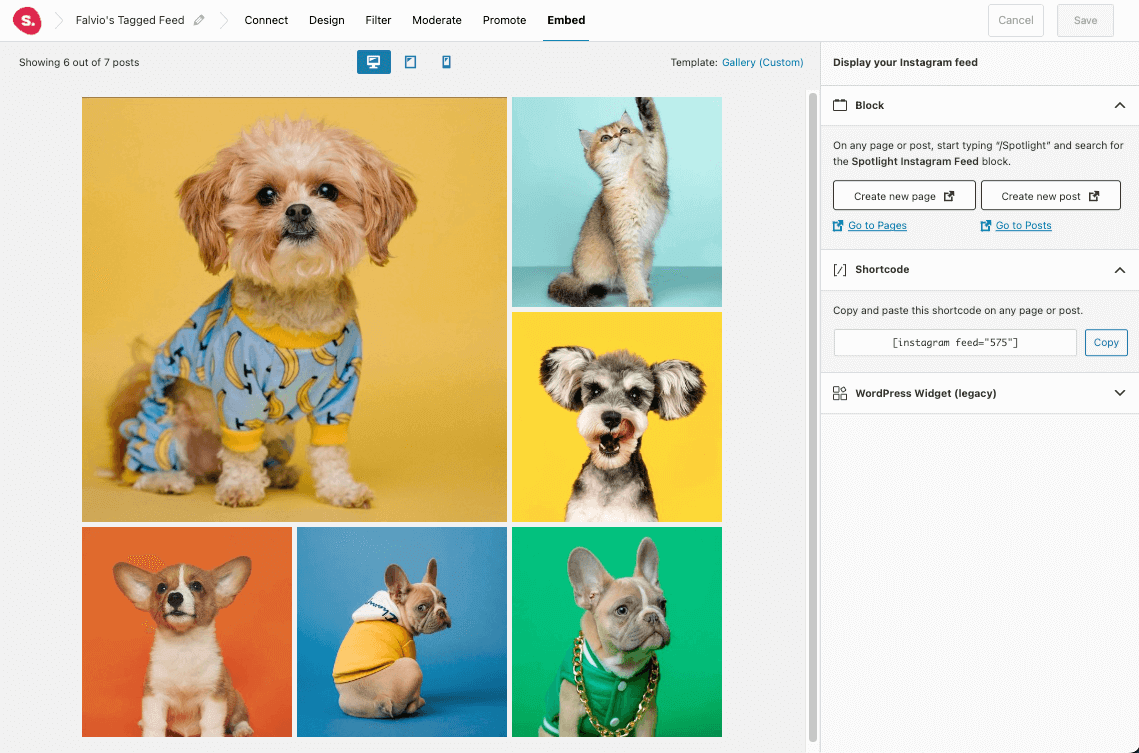
You can embed tagged feeds in three different ways:
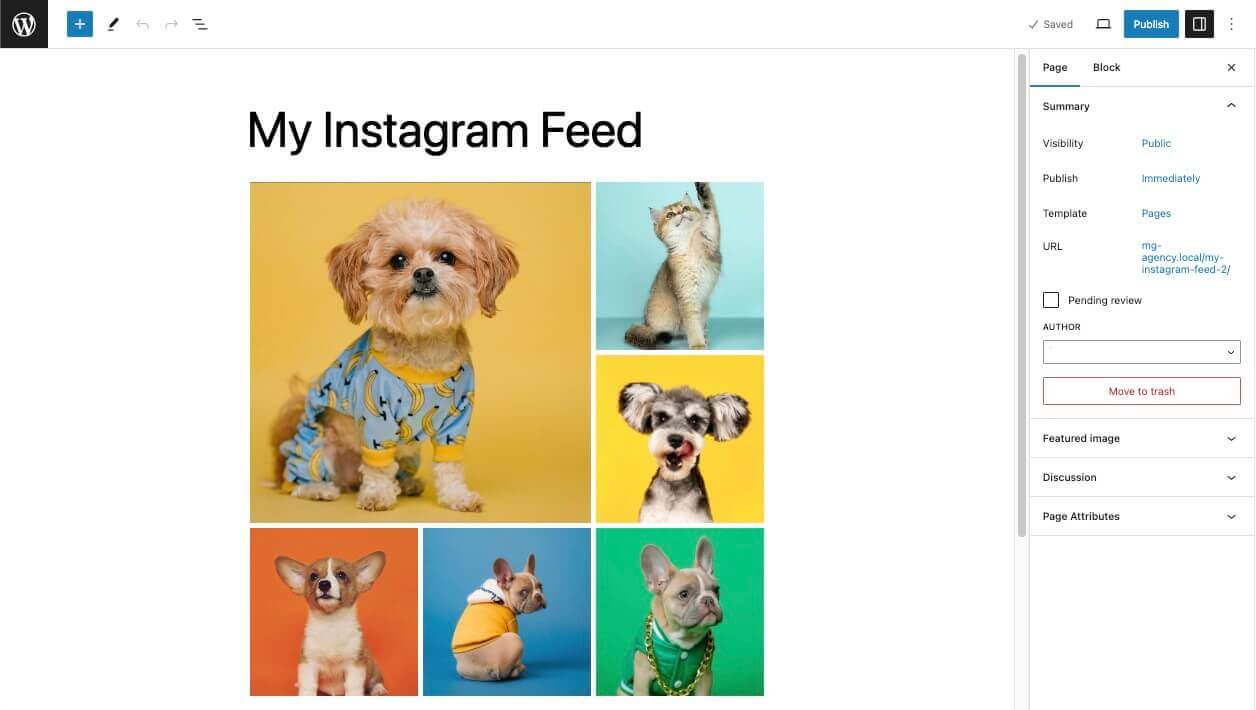
Option 1: Create a new page or post. Click the Create new page or Create new post button, and Spotlight will set up your page, including your Instagram feed, instantly.
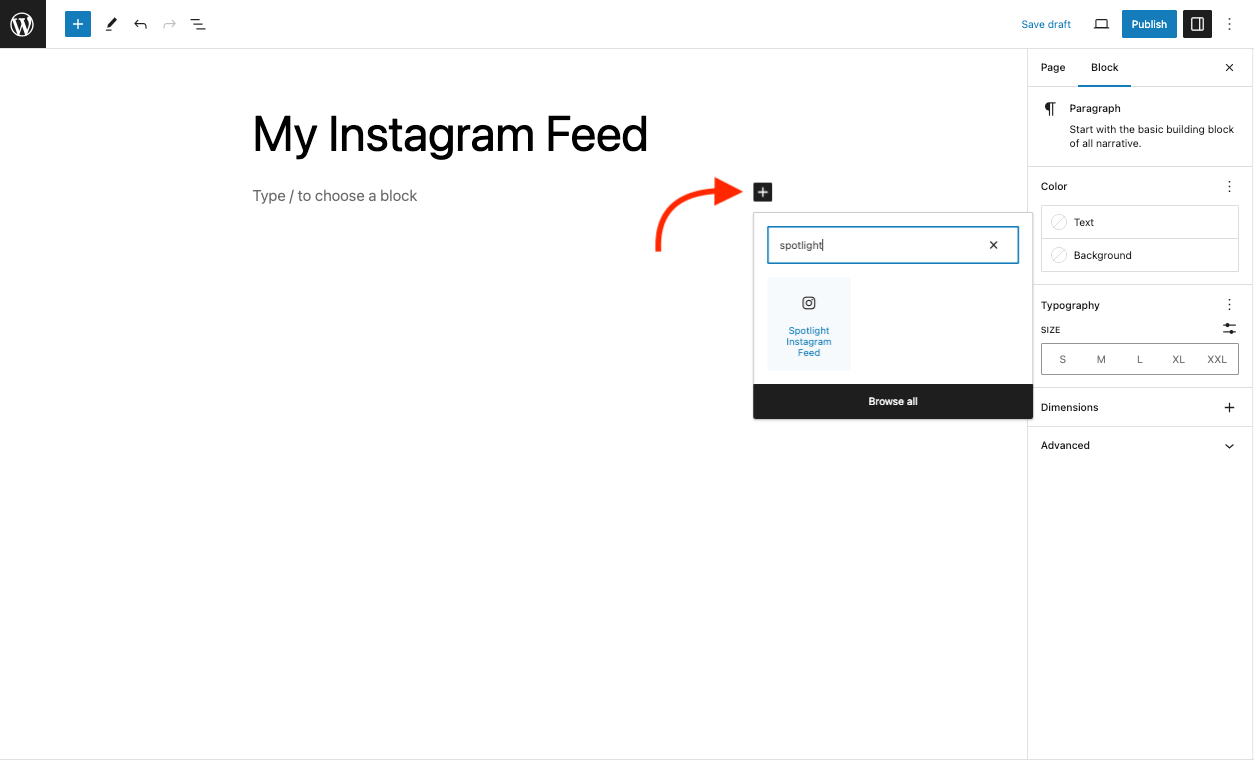
Option 2: WordPress block. Embed tagged feeds into an existing page by clicking the plus sign and searching for the ‘Spotlight Instagram Feed’ block to add to your page.
Option 3: Use a shortcode to embed tagged feeds. Copy the shortcode from the feed editor and paste it into a shortcode block on your page or post.
Conclusion
Alright, let’s sum it up. Spotlight offers some cool perks when showing your tagged Instagram posts. You get to style your feed as you like, automate what shows up using filters or moderation, and boost website engagement and trust. Plus, it adapts perfectly to any device.
Why not give Spotlight a shot and experience the difference firsthand? It’s a game-changer for your ability to embed tagged feeds from Instagram! Check out the different plans Spotlight has to offer.