Video has become the most sought-after type of content on the internet, and with Instagram Videos, you can push your audience engagement to the next level with both short-form and long-form videos that keep viewers coming back for more.
But if you want to take full advantage of the videos you produce, displaying them on your website is a must.
Cross-promoting your content across platforms gives your brand a significantly broader reach – growing your audience and ultimately boosting your sales. In short: This means more impact for your efforts!
In this tutorial, I’ll show you how you can quickly and easily display Instagram videos on your website.
Let’s get to it!
How to Embed Instagram Videos on Your Website
If you’re looking to just embed a single Instagram video on your website, it’s a pretty simple process.
If you’d like to display multiple Instagram videos without manually embedding each one – which you can do very easily with Spotlight – skip to the next section.
In this example, we’ll add a single video to our home page.
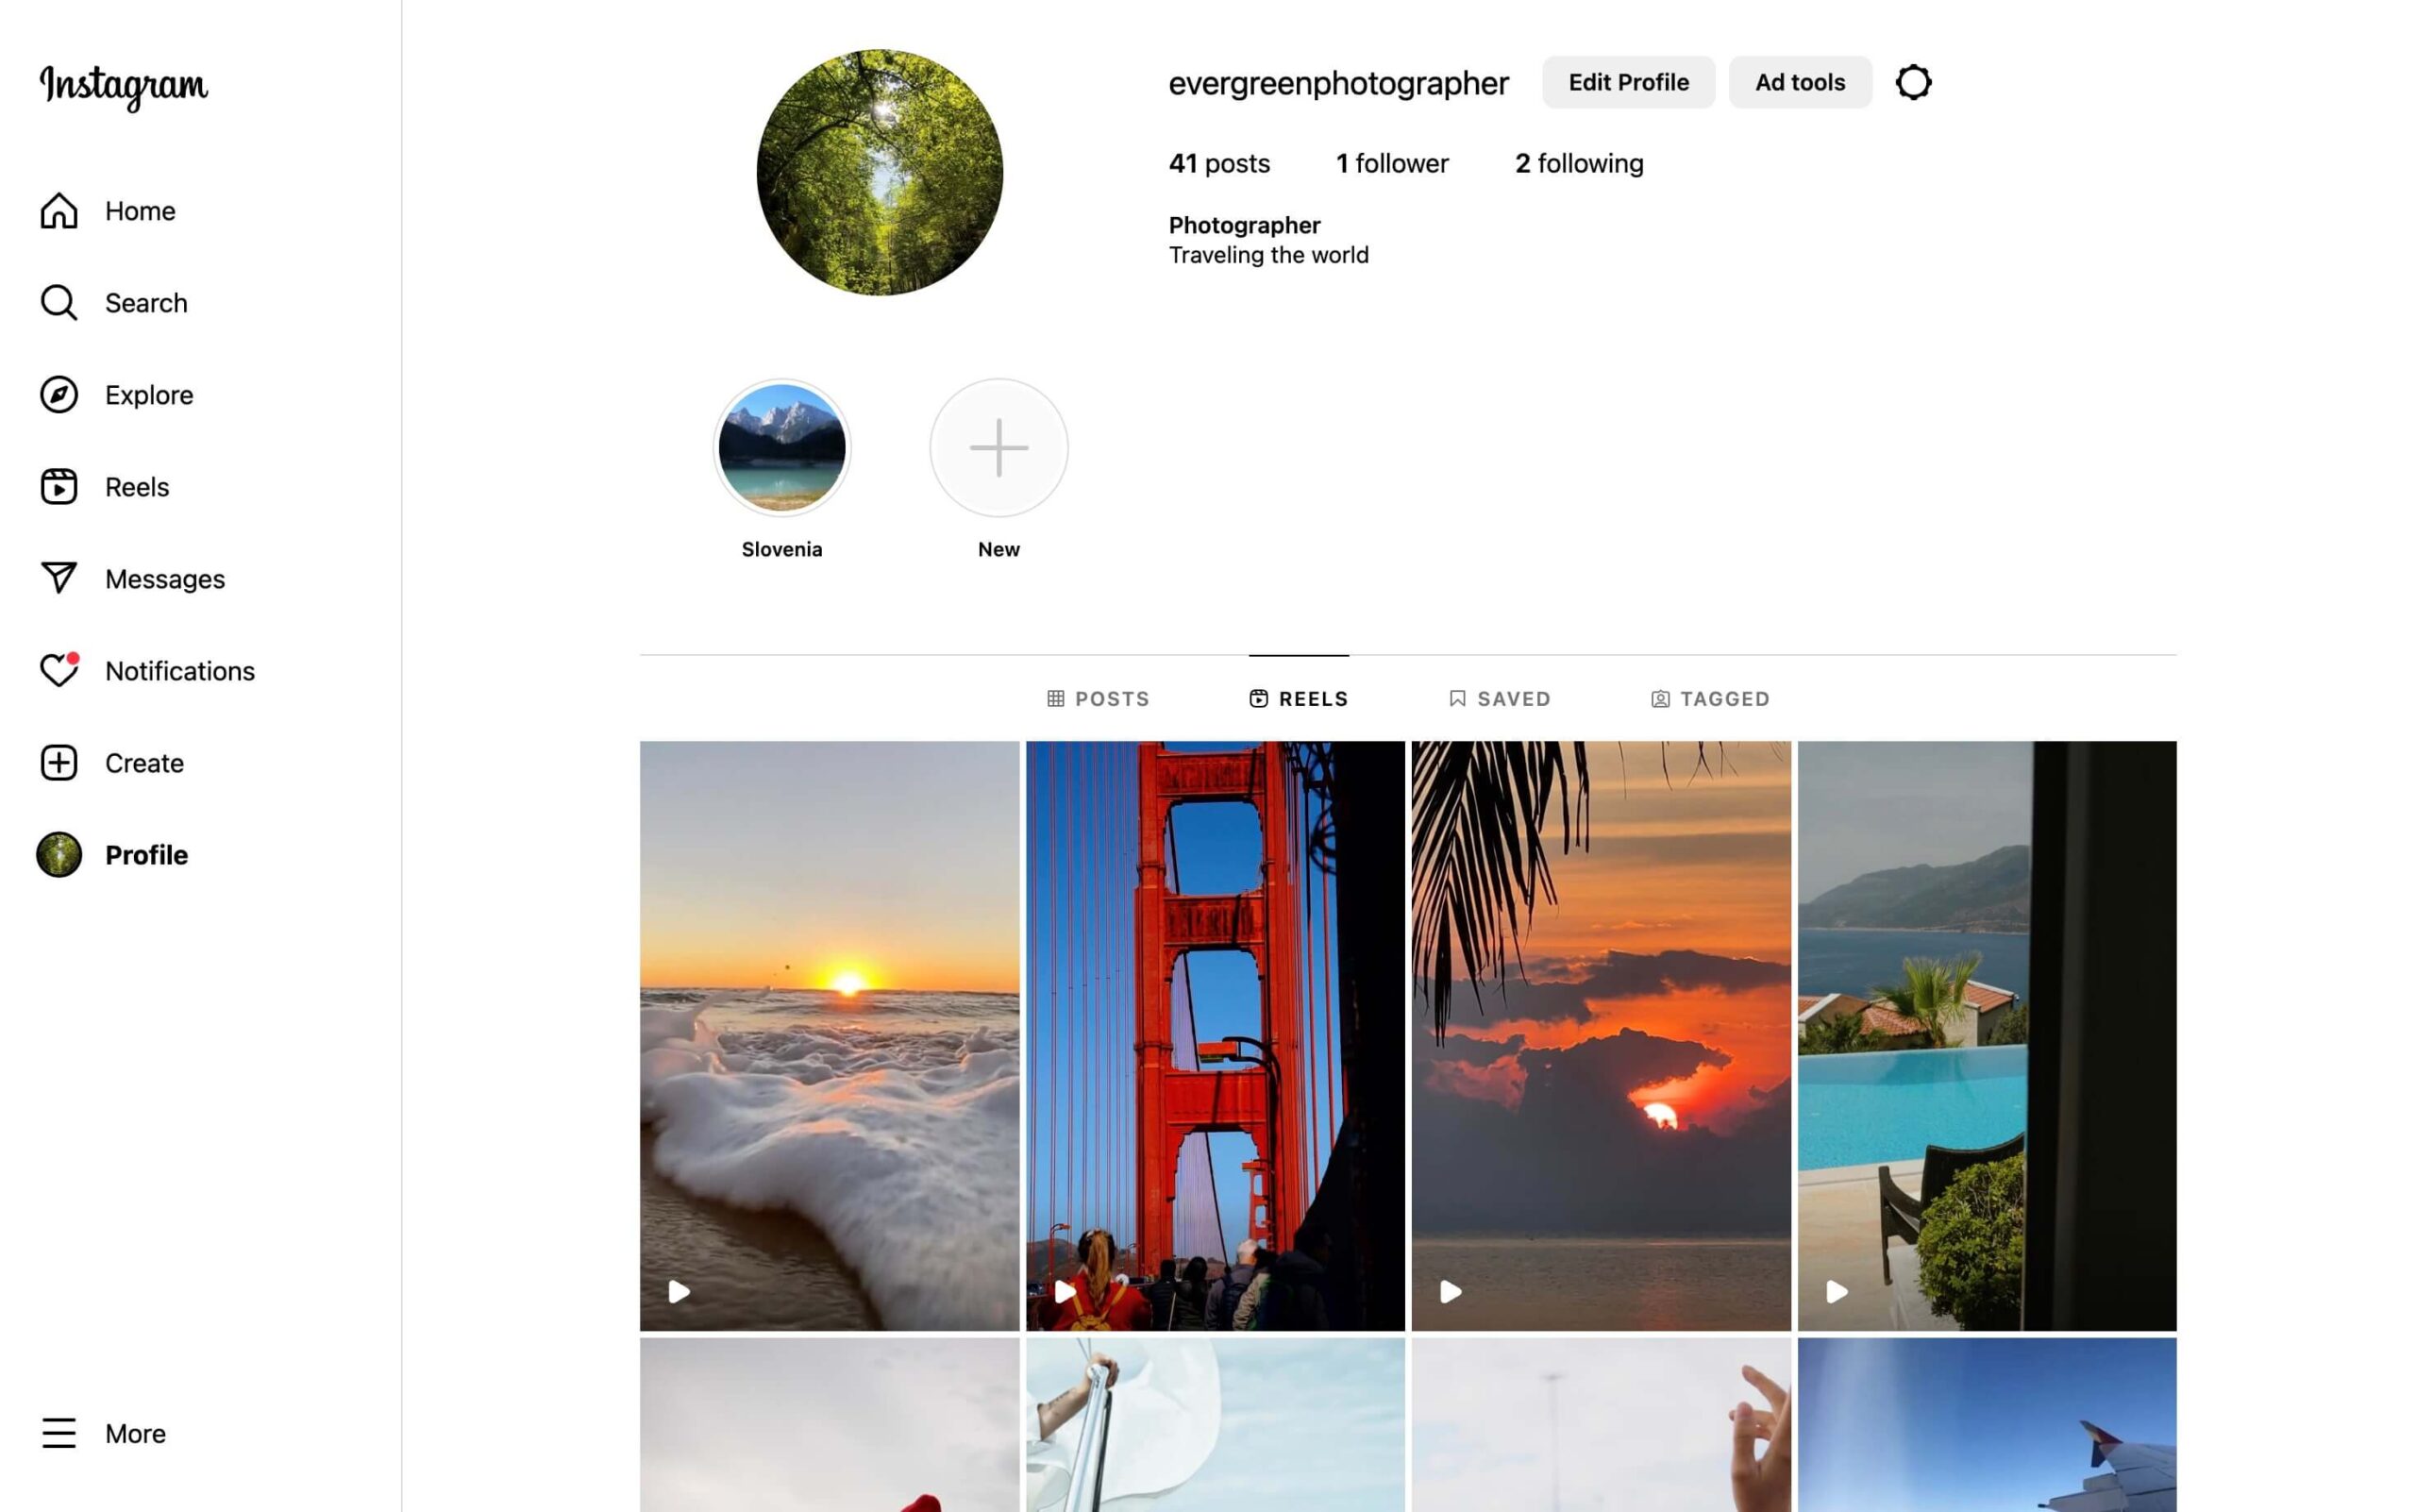
In order to do this, go to your Instagram profile from your desktop. As long as you’re logged in, you will be able to navigate to the Reels section and from there, find the specific video you want to embed.
Note that as of late 2022, Instagram combined normal video posts and reels into a single tab called “Reels”.
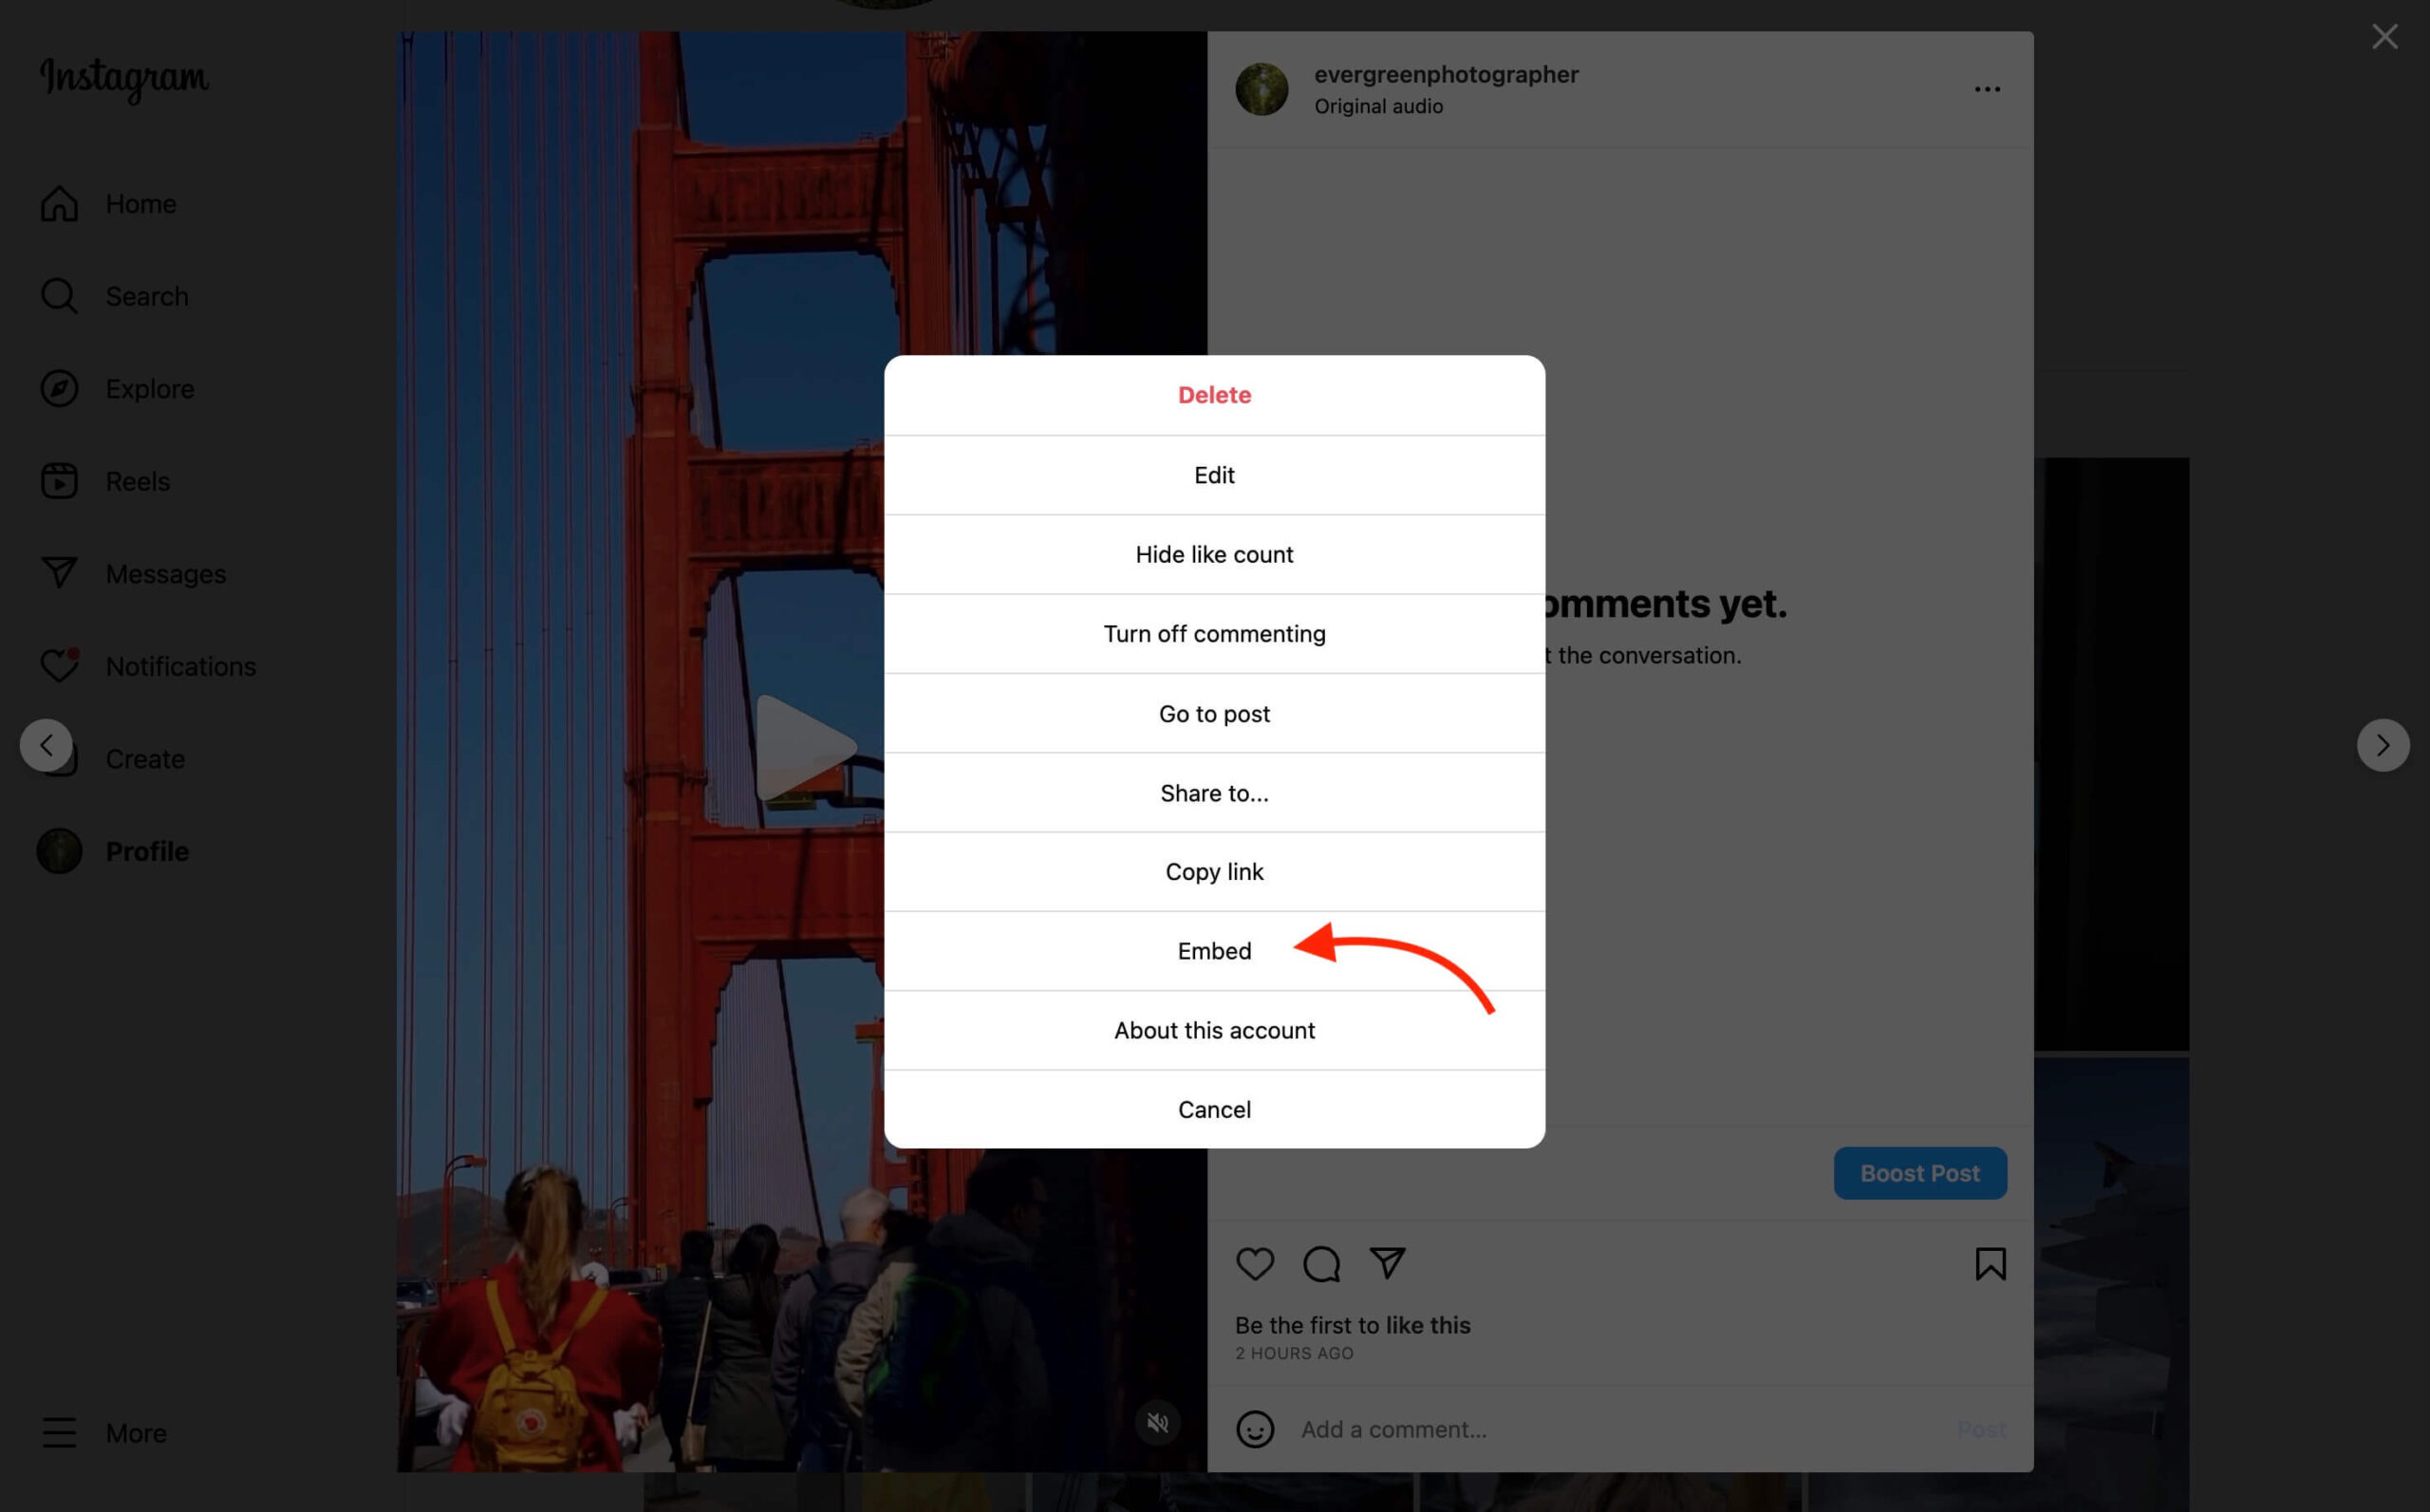
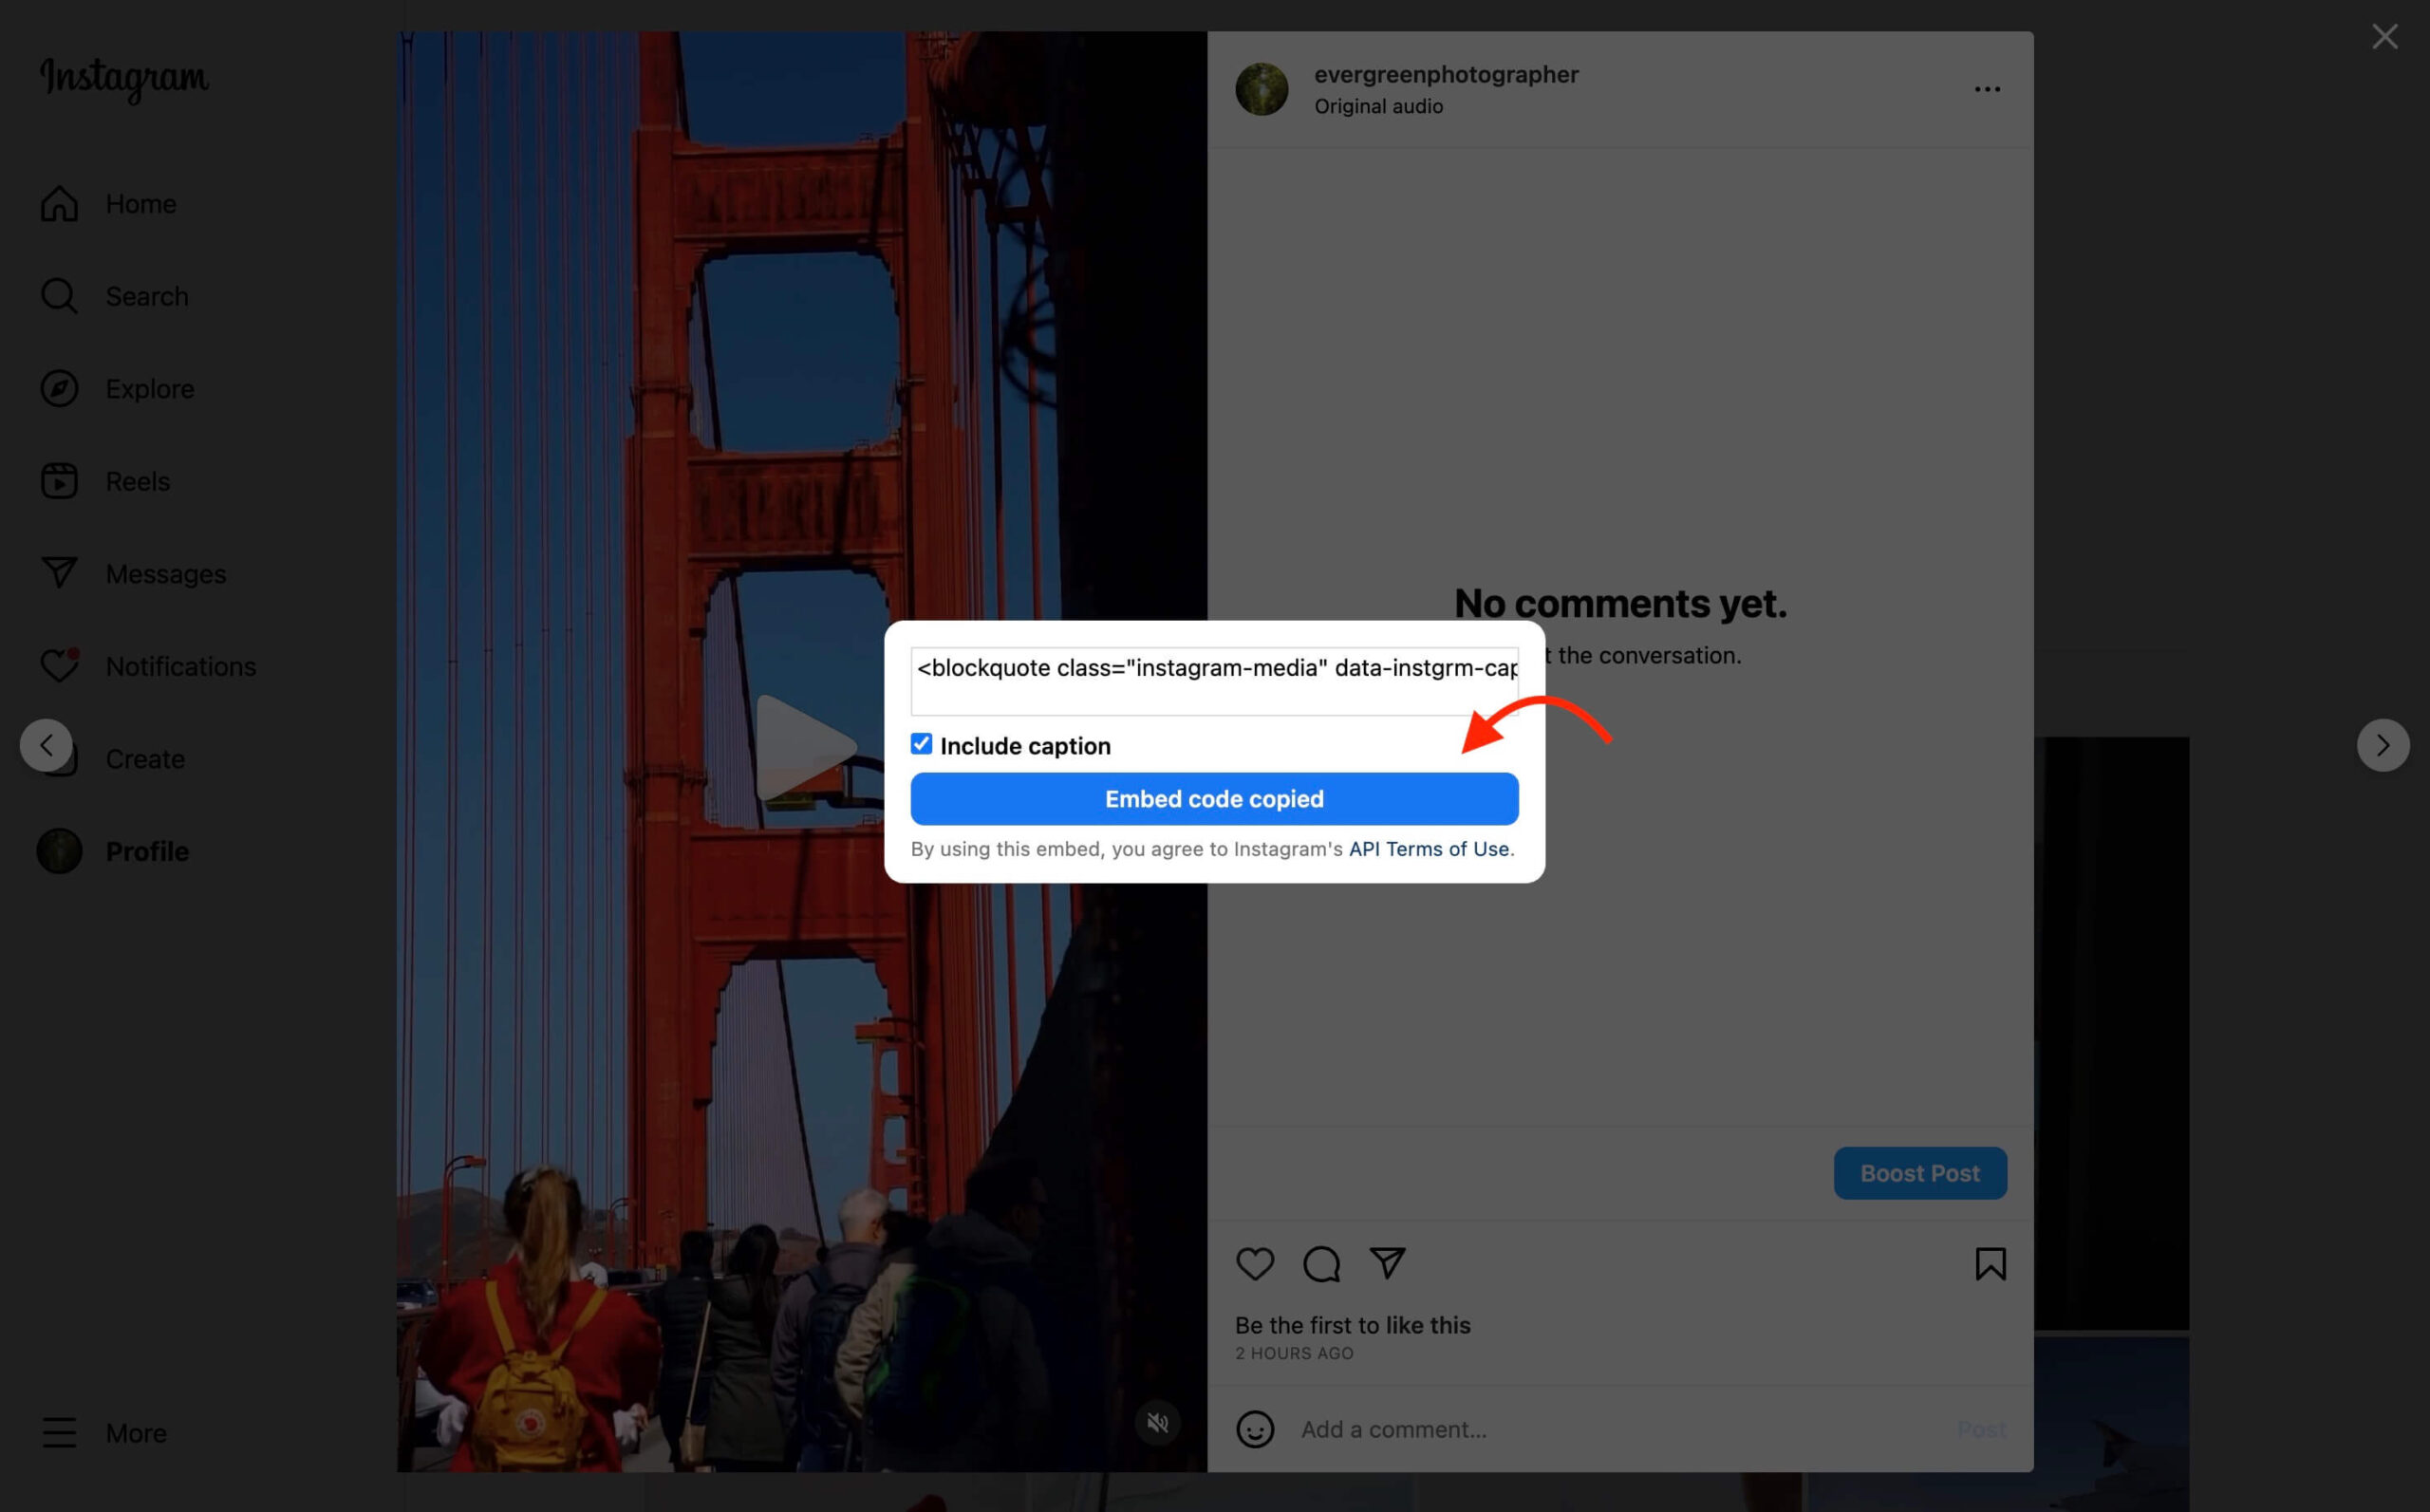
Next, click the three-dot menu in the top right corner of the post, and choose “Embed”.
Note: At the time of writing this tutorial, I was only able to generate Embed codes for public profiles.
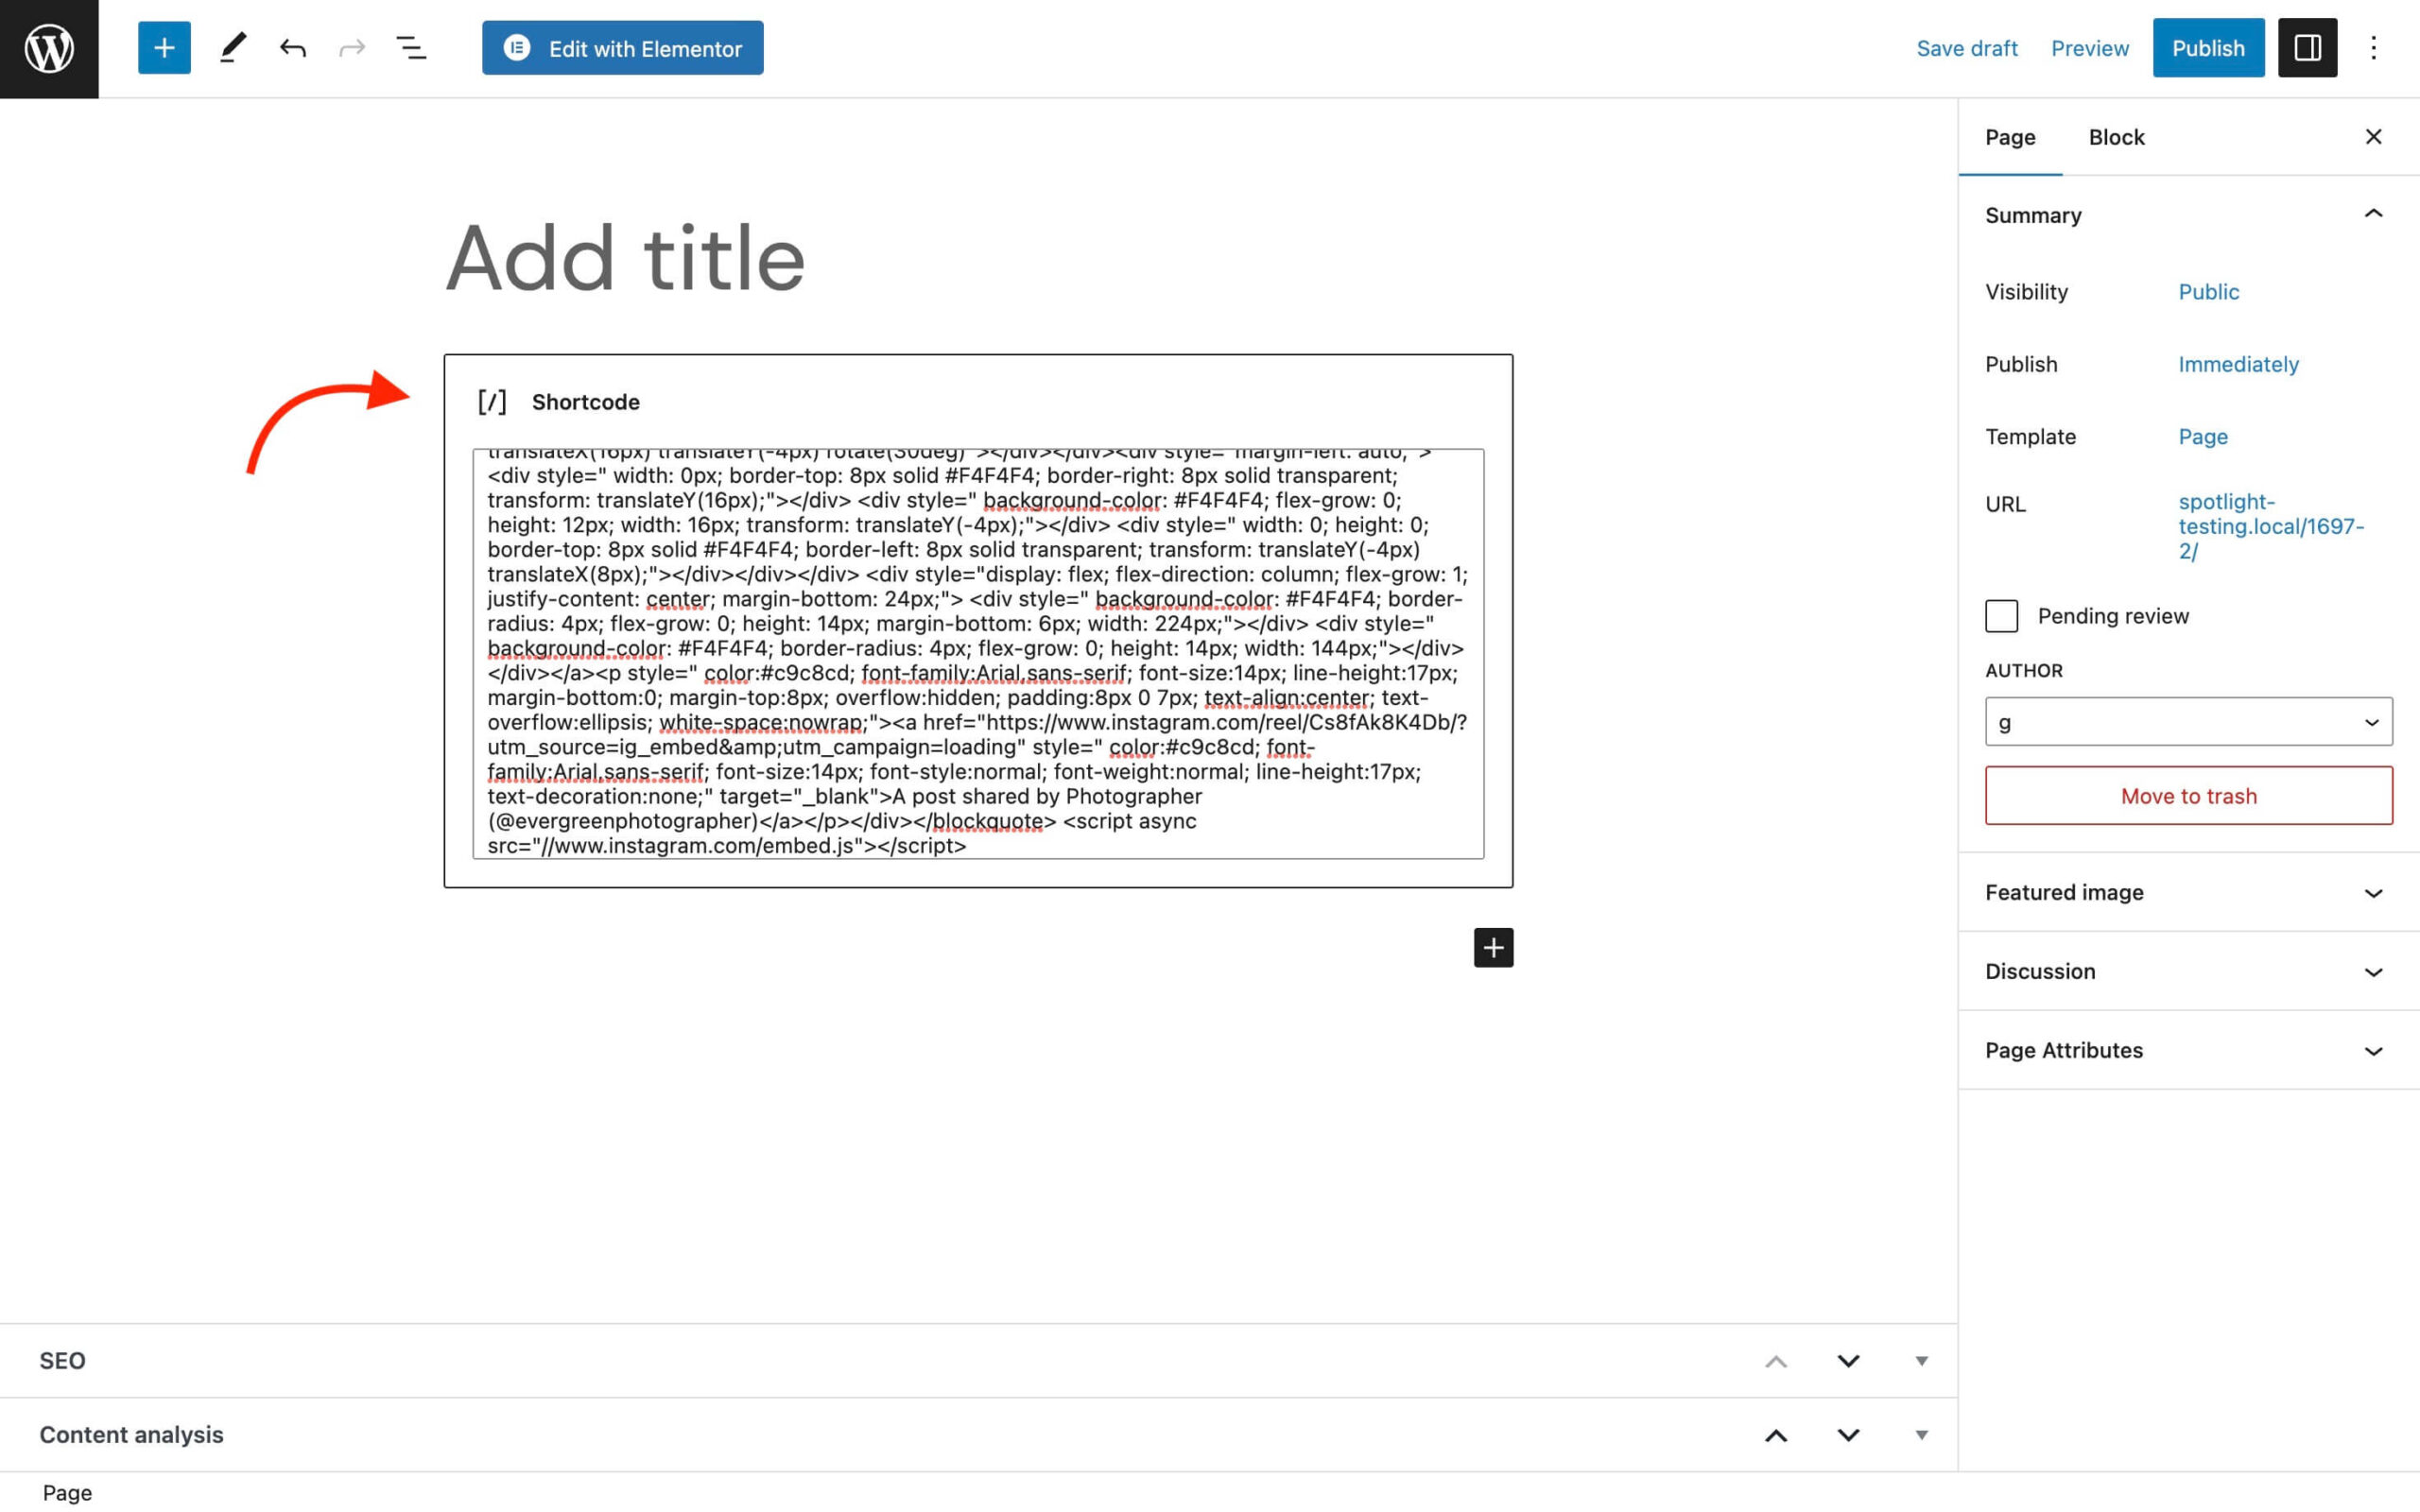
Then, you can easily copy the embed code and paste it into your website’s shortcode block.
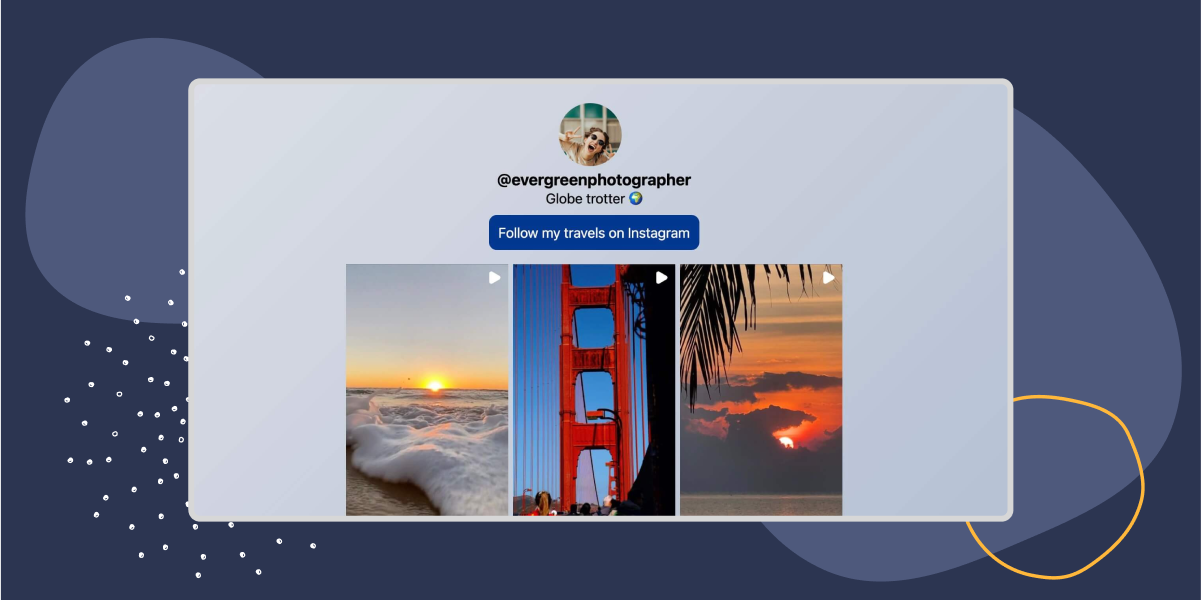
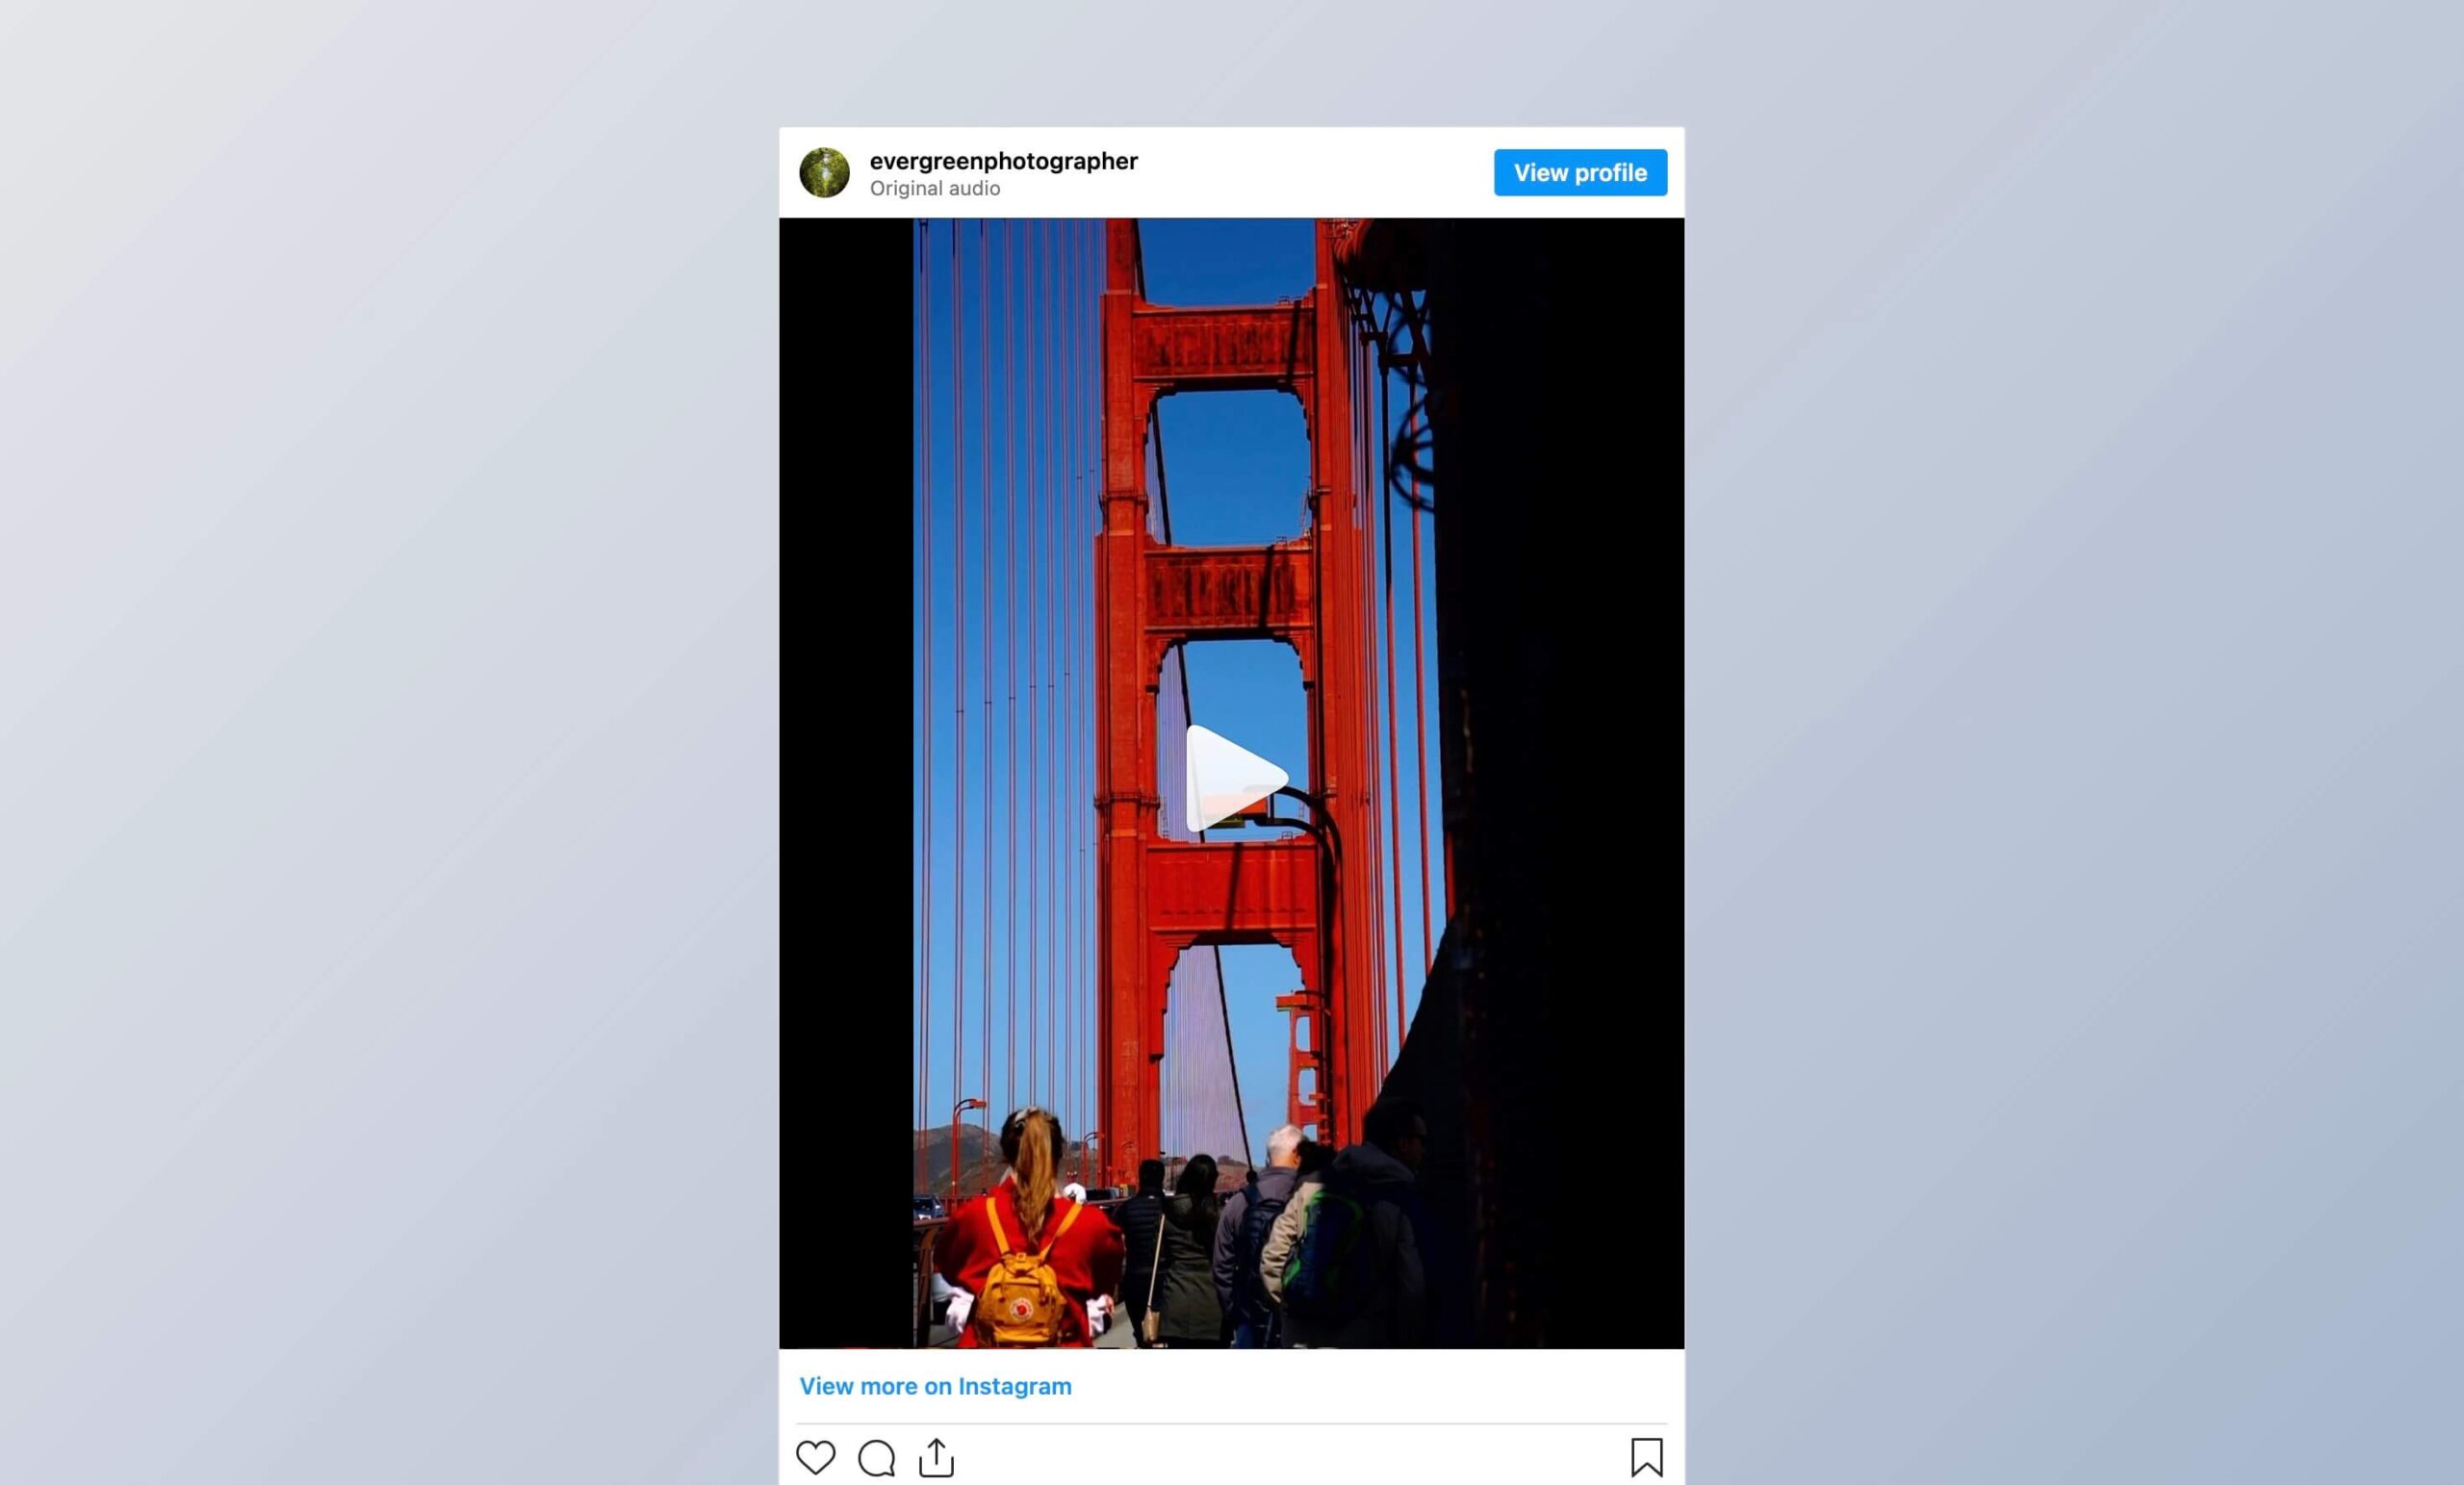
The final result looks like this:
Now, let’s talk about how to embed multiple Instagram videos!
Step 1: Connect your account
If you’ve got Spotlight PRO installed and activated on your WordPress website, you’re ready to go!
Navigate to Instagram Feeds > Feed to get started.
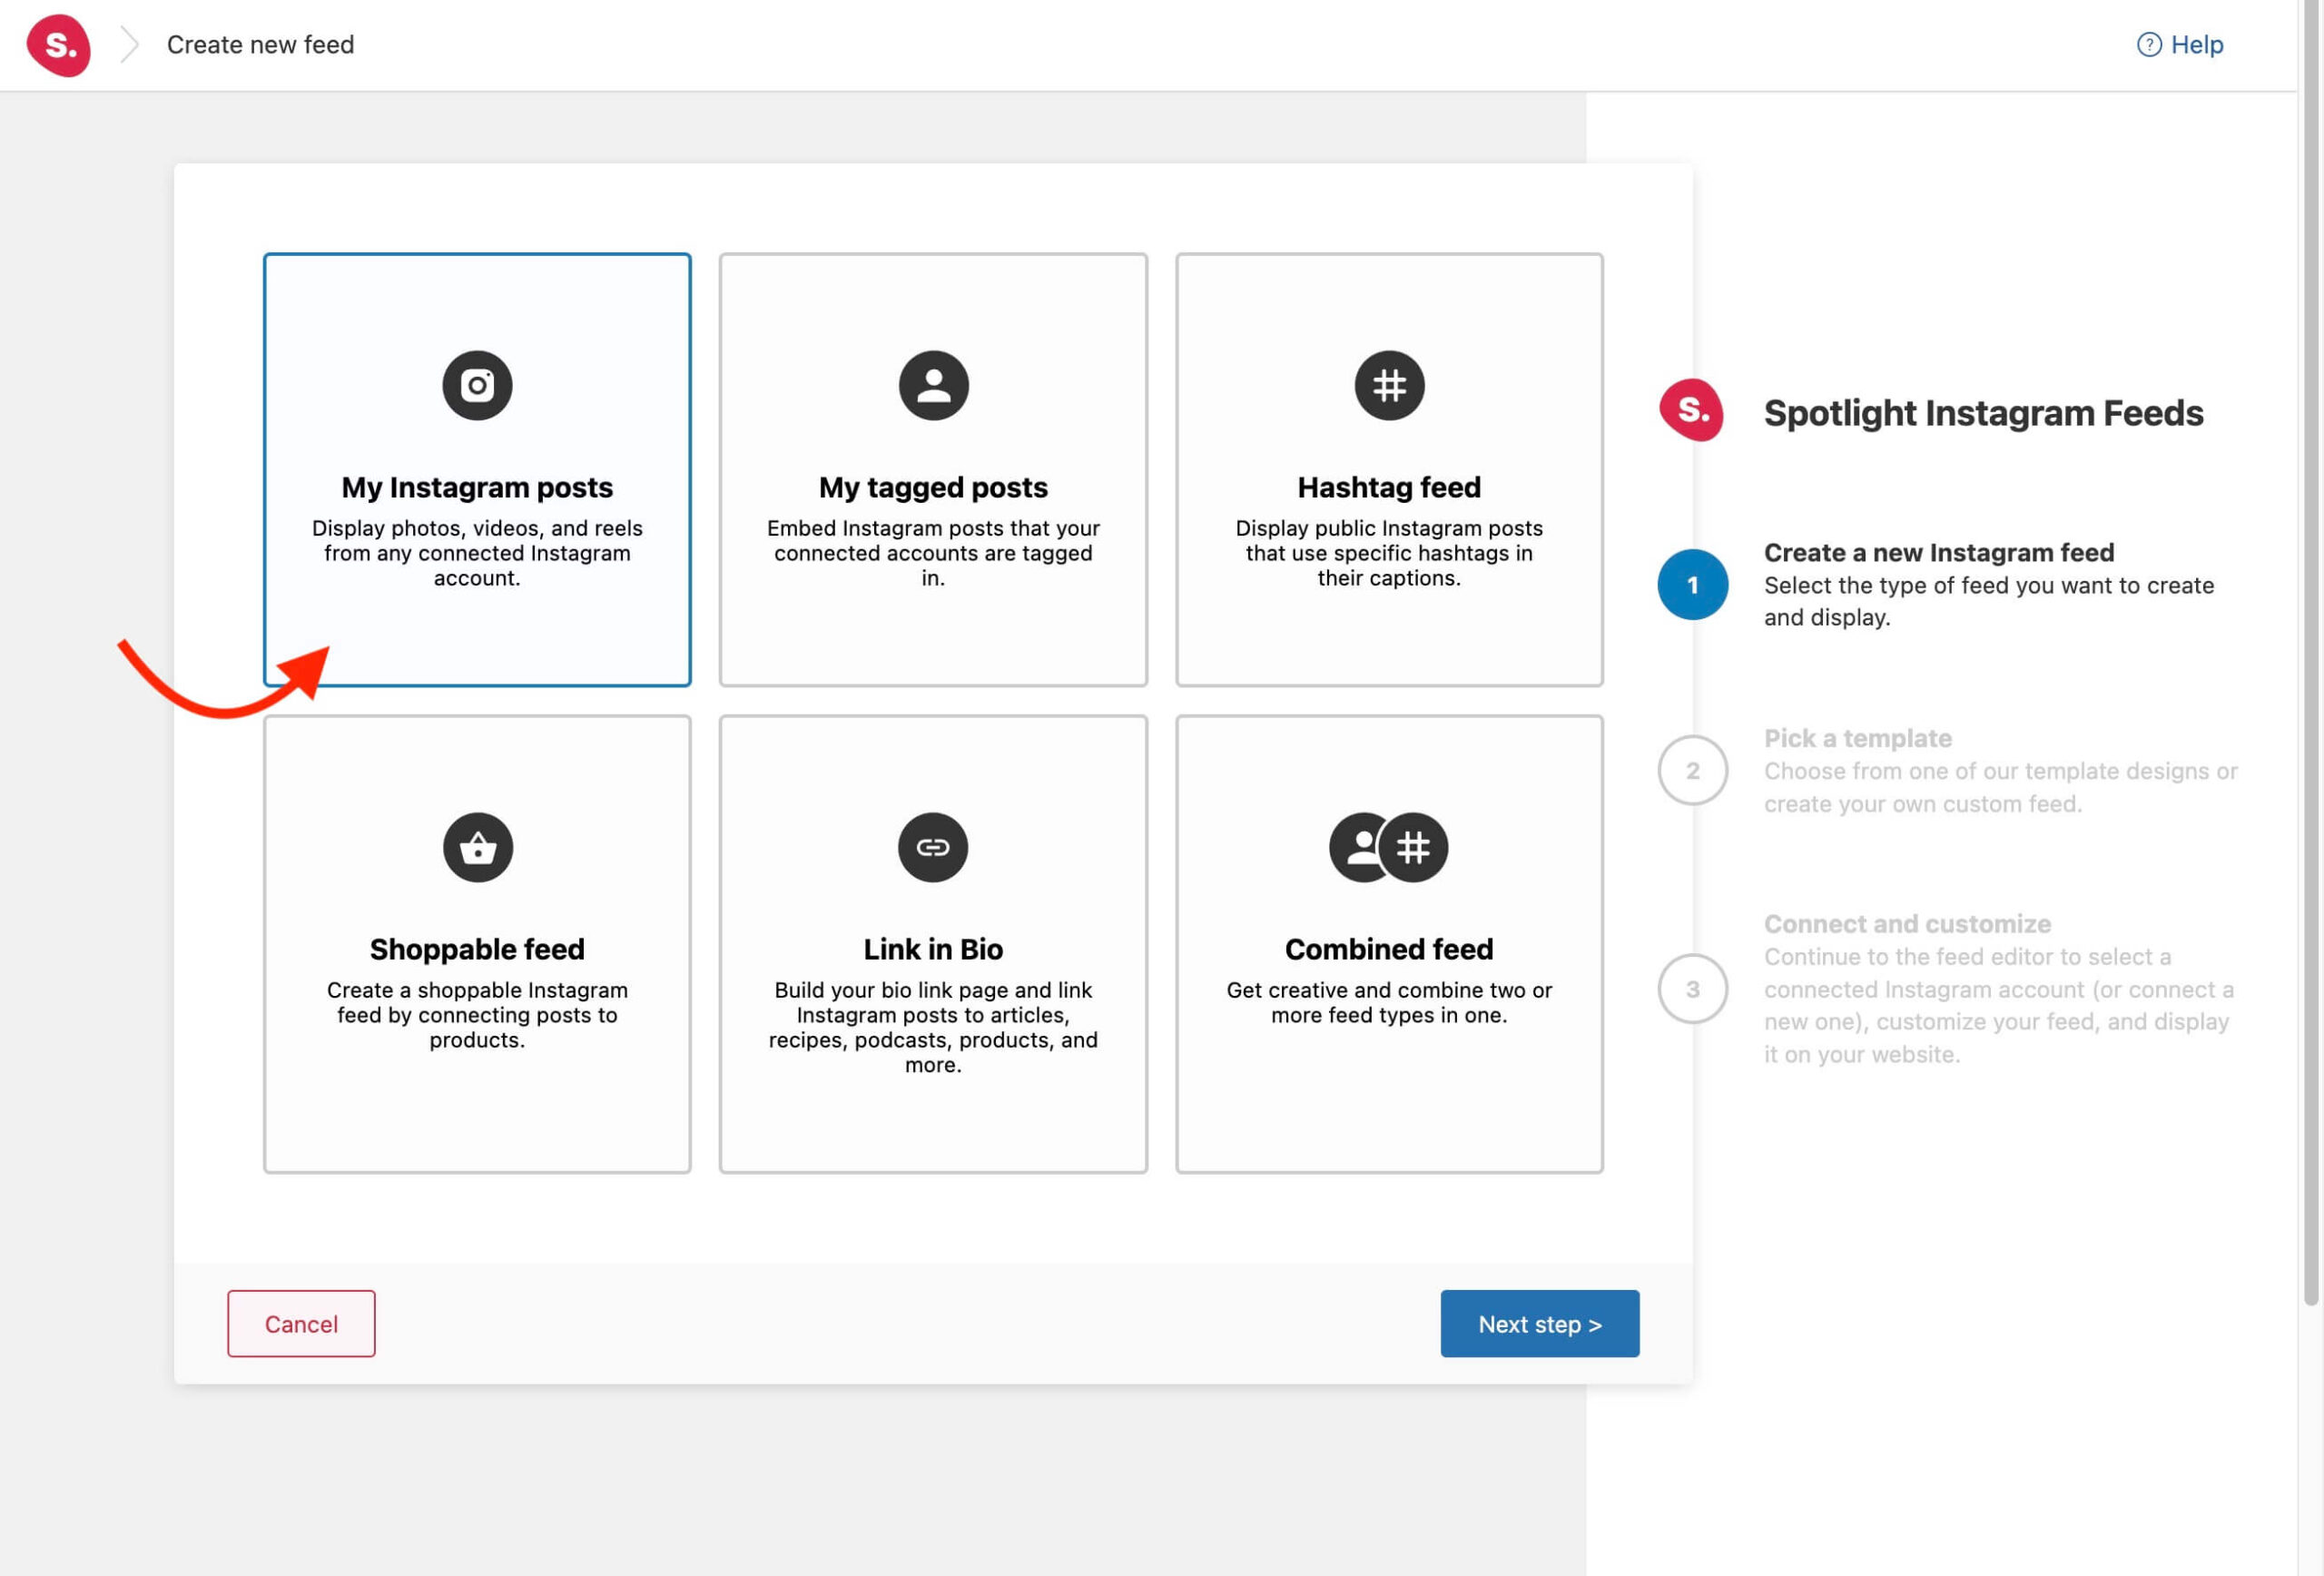
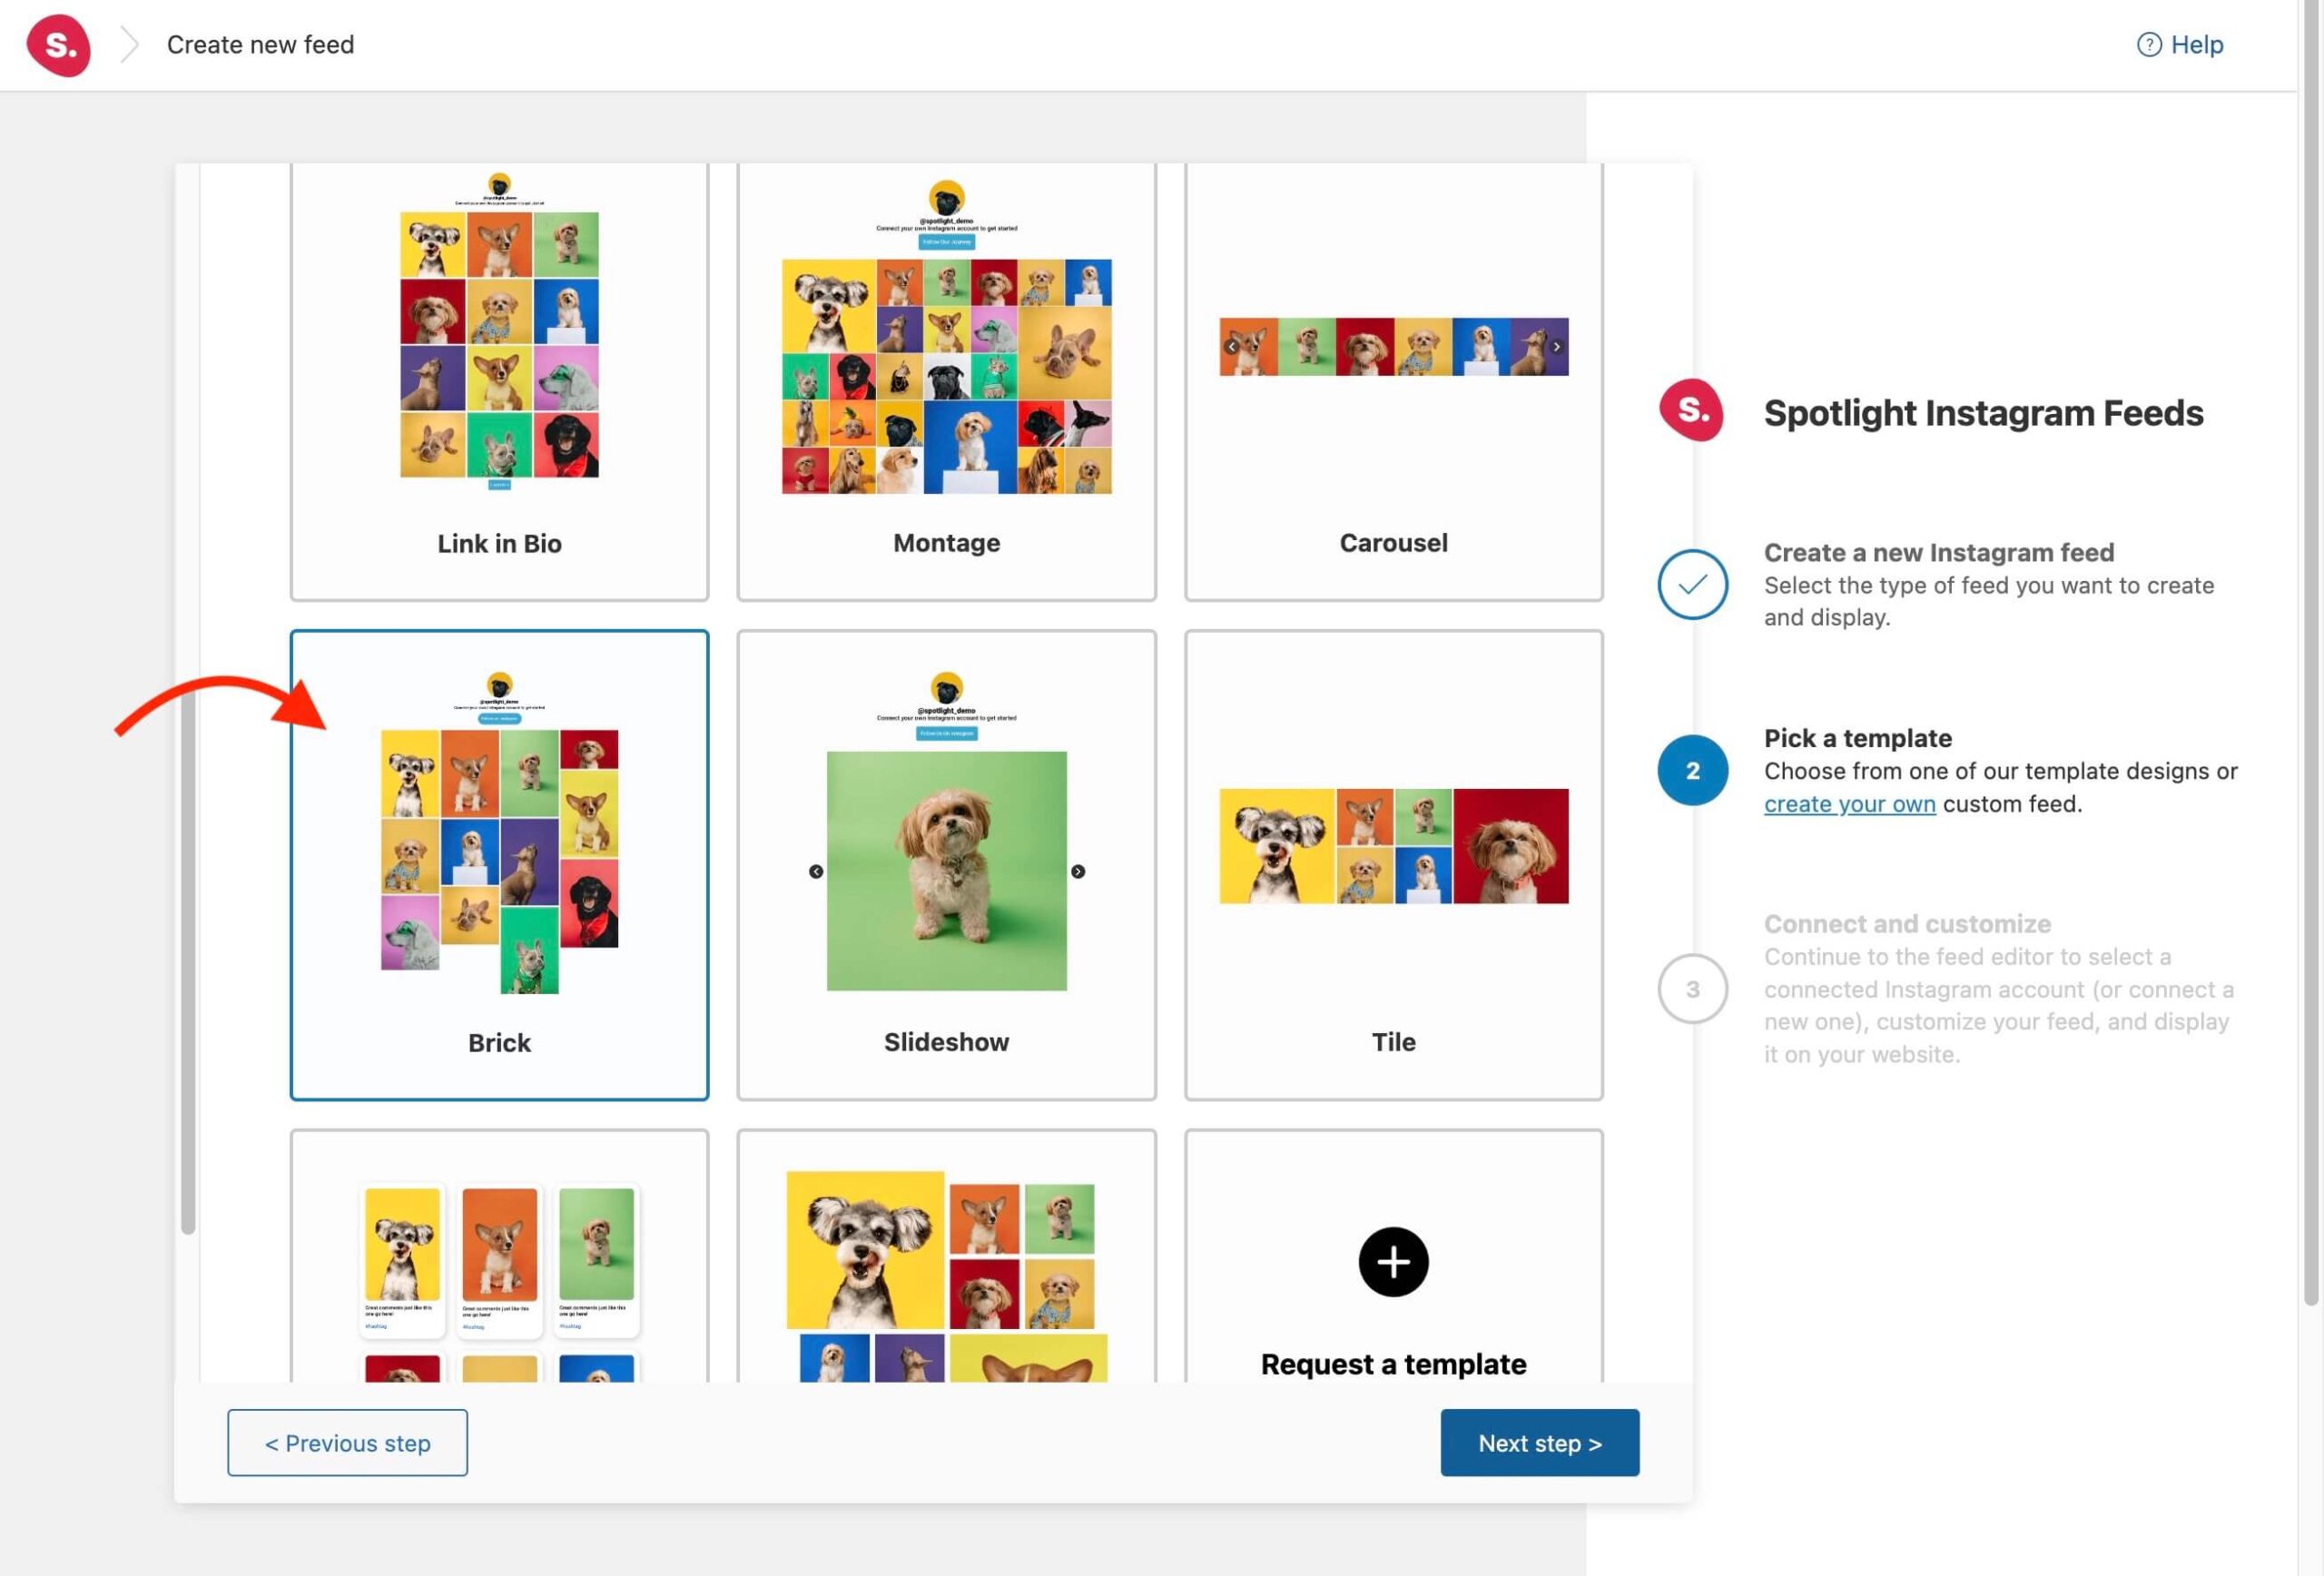
After selecting what content you want to display in your feed, Spotlight will allow you to choose from one of the pre-made templates. You can also choose to design your own feed.
In this case, I chose the Brick template.
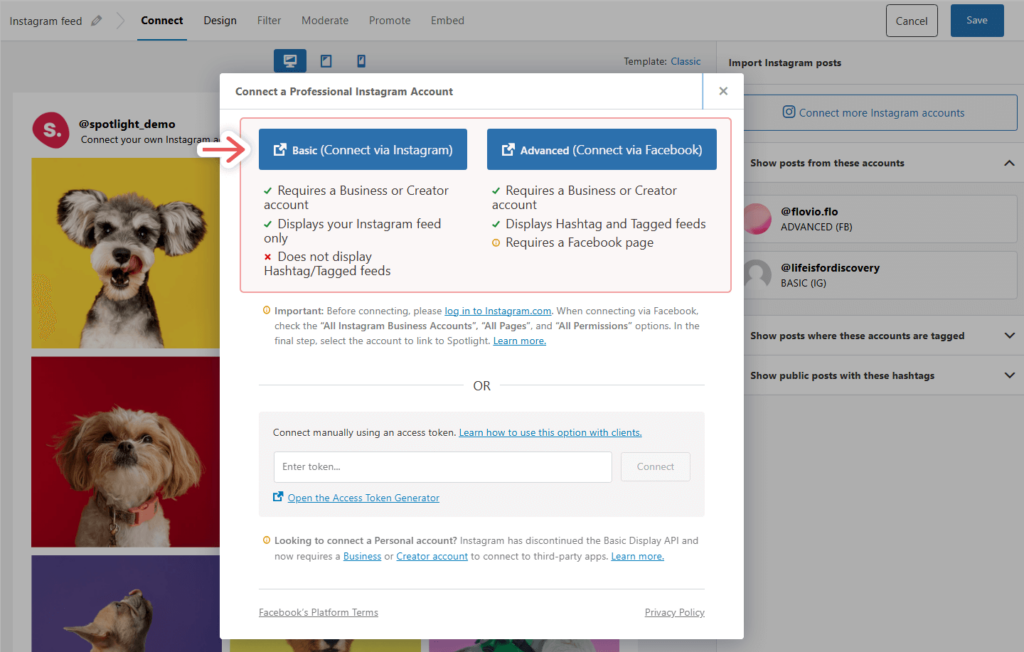
Next, it’s time to connect your Business or Creator account unless you’ve already done so.
There are two ways to do this, using the Basic or Advanced connection. The difference between both types is that a Basic account connects your professional account directly to Spotlight through Instagram, doesn’t require a Facebook Page, but doesn’t support hashtags or tagged feeds.
In contrast, an Advanced account requires your professional Instagram account to be linked to a Facebook Page before connecting it to Spotlight.
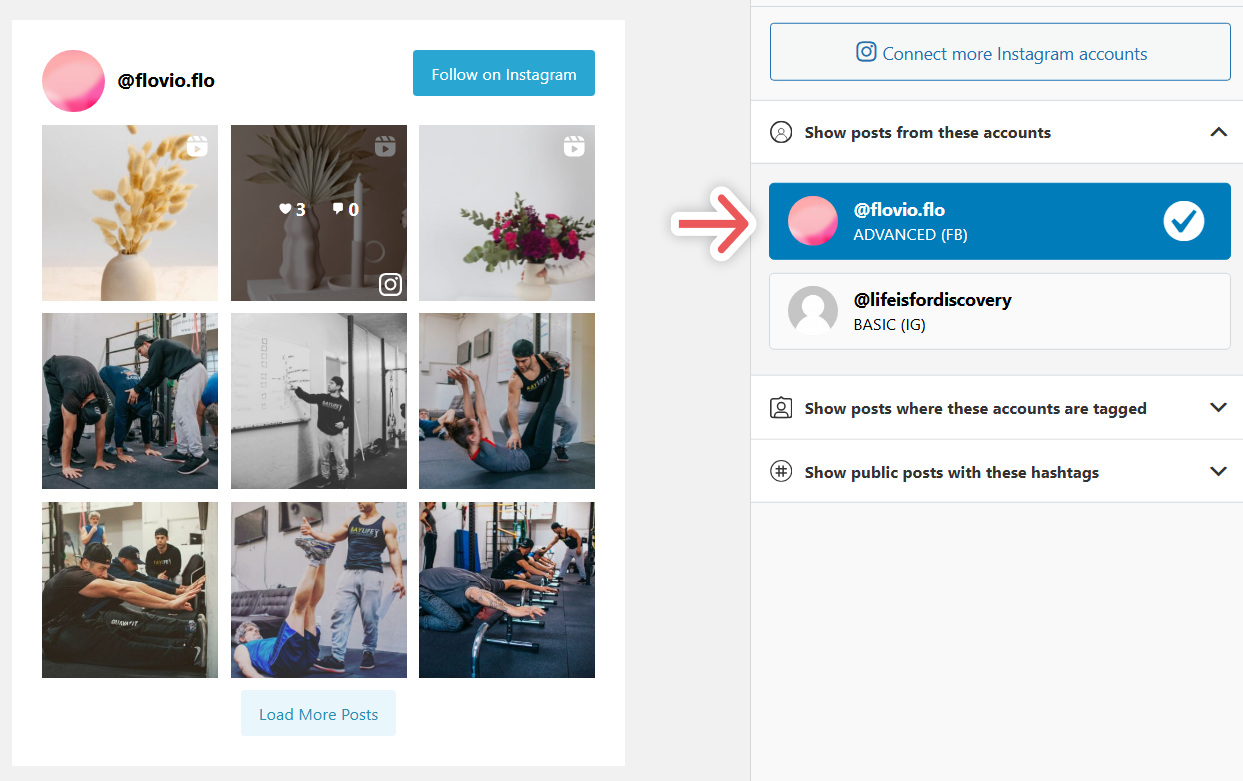
Once you’ve allowed access for Spotlight to bring in your Instagram posts, you’ll want to select the account you’re going to use from the “show posts from these accounts” section. Your Instagram posts will populate within a few seconds.
Next, you’ll want to navigate over to the Design tab.
Step 2: Design your video feed
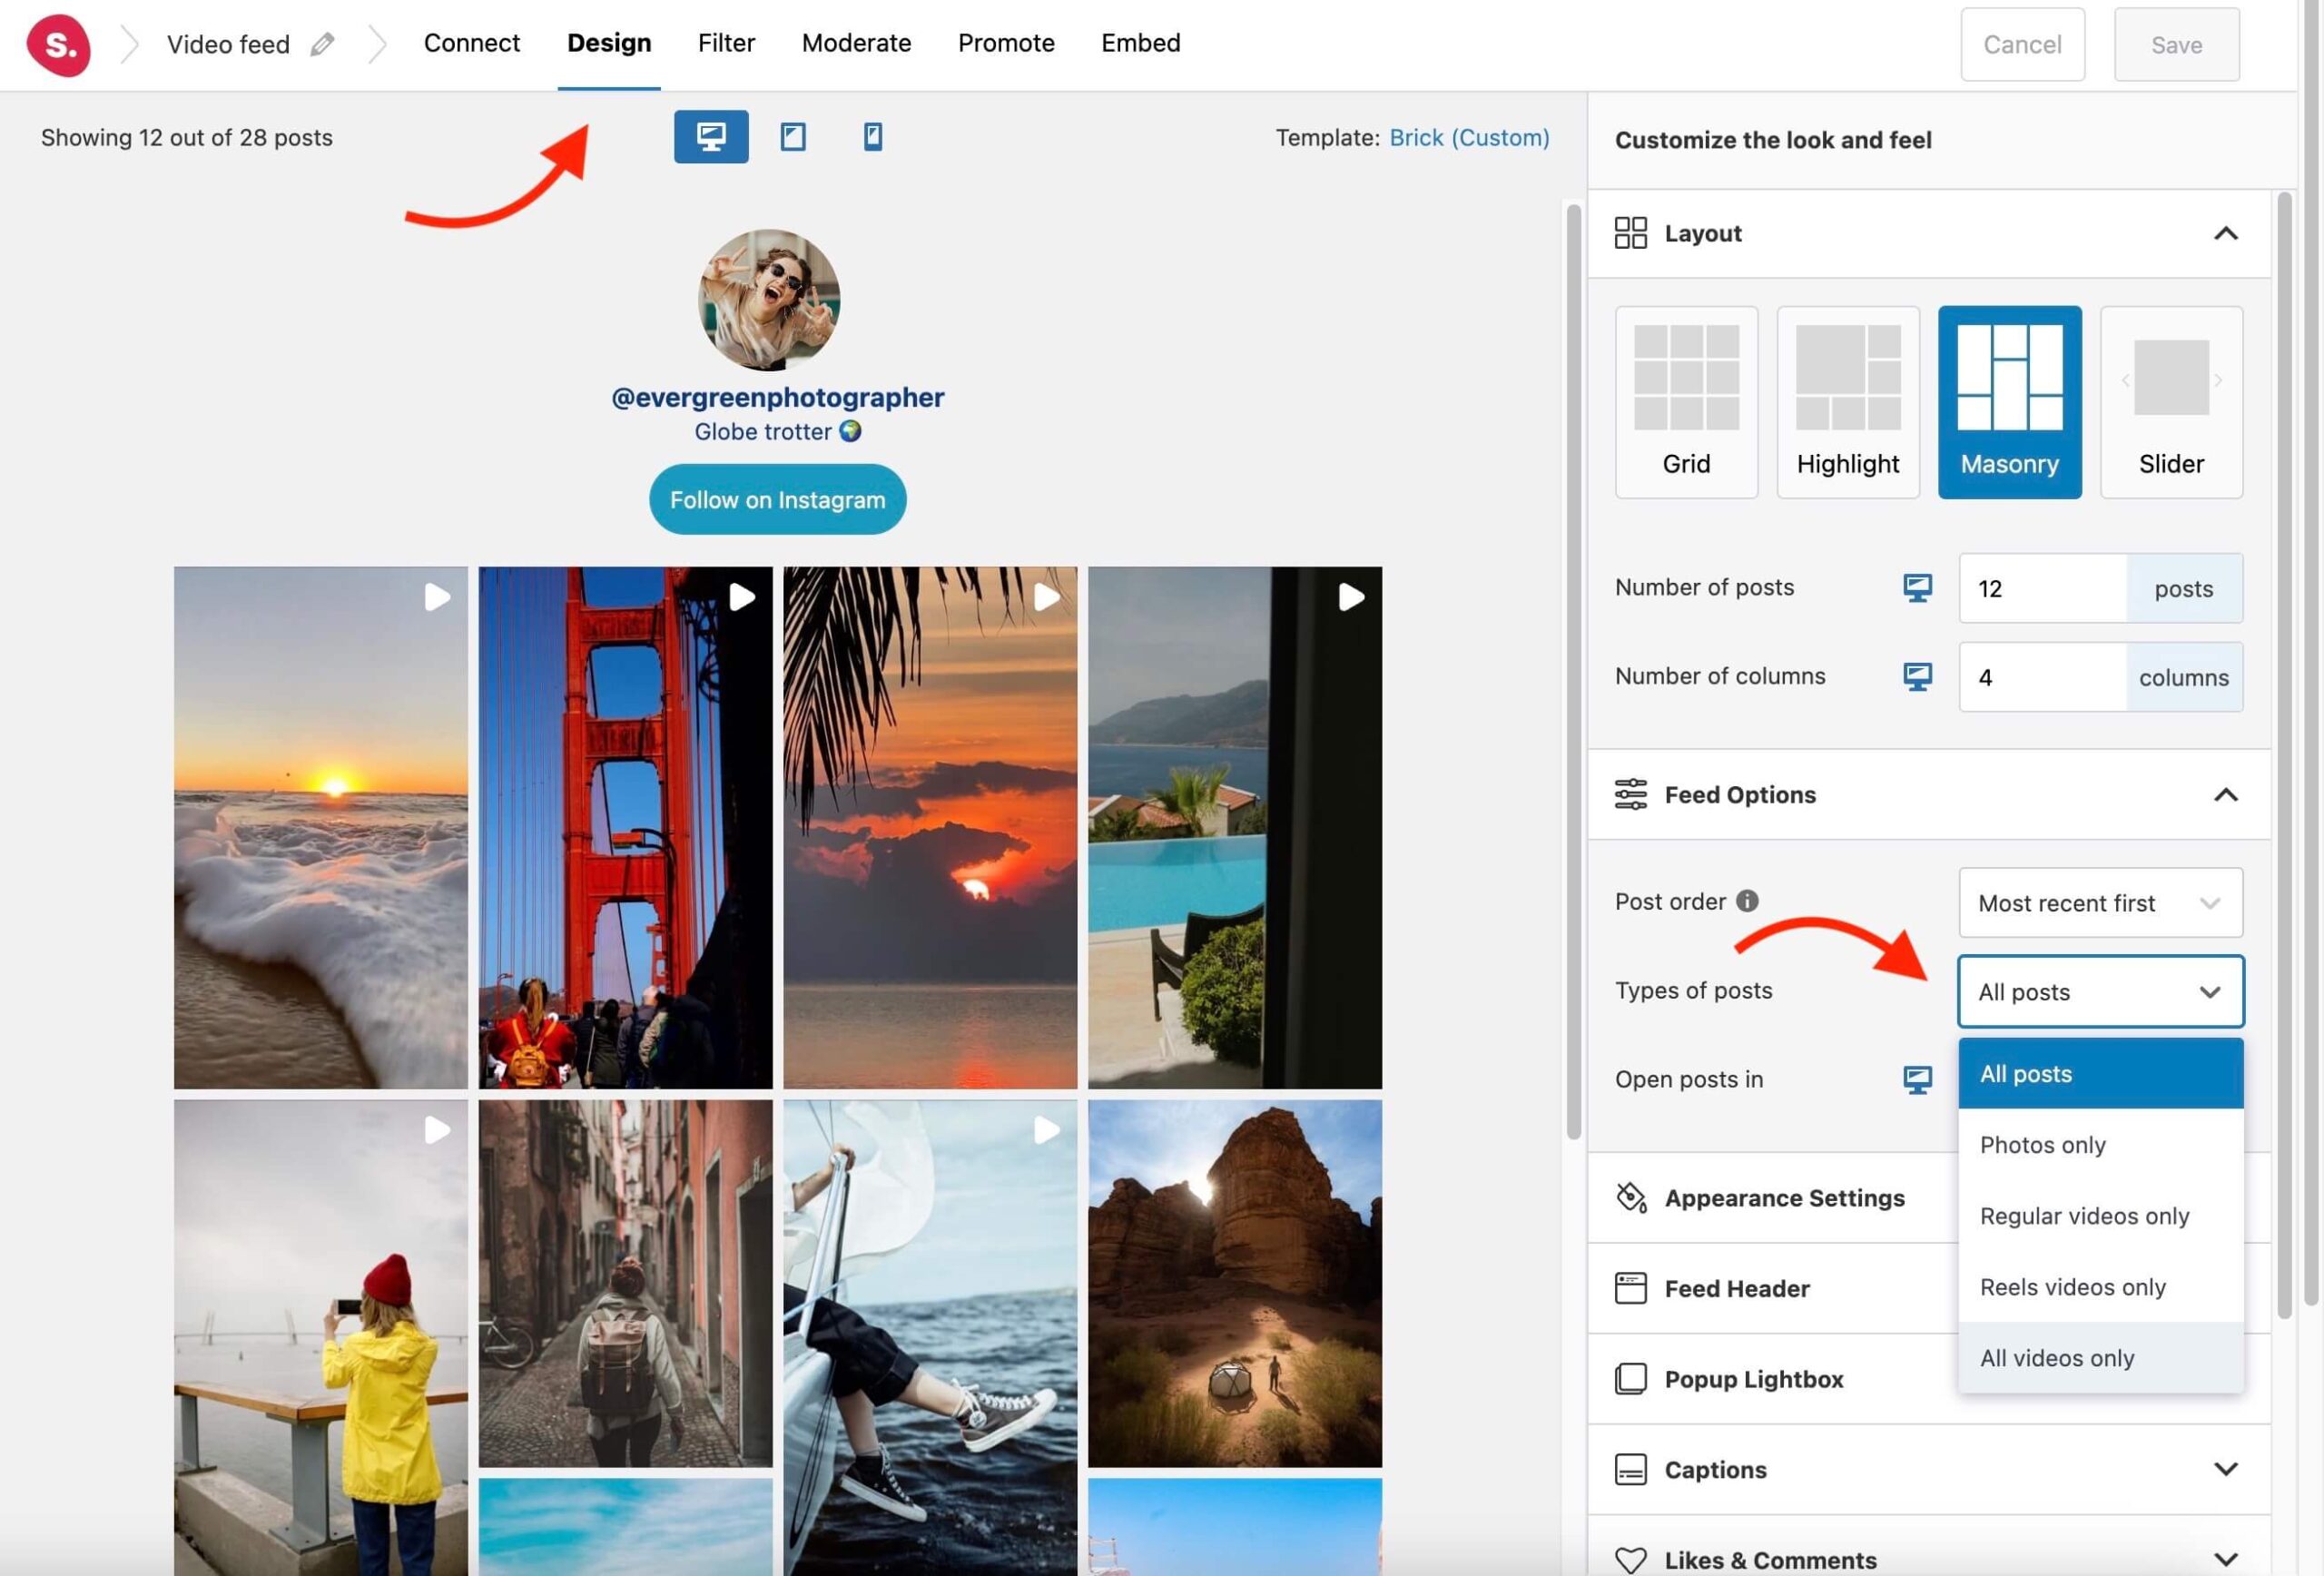
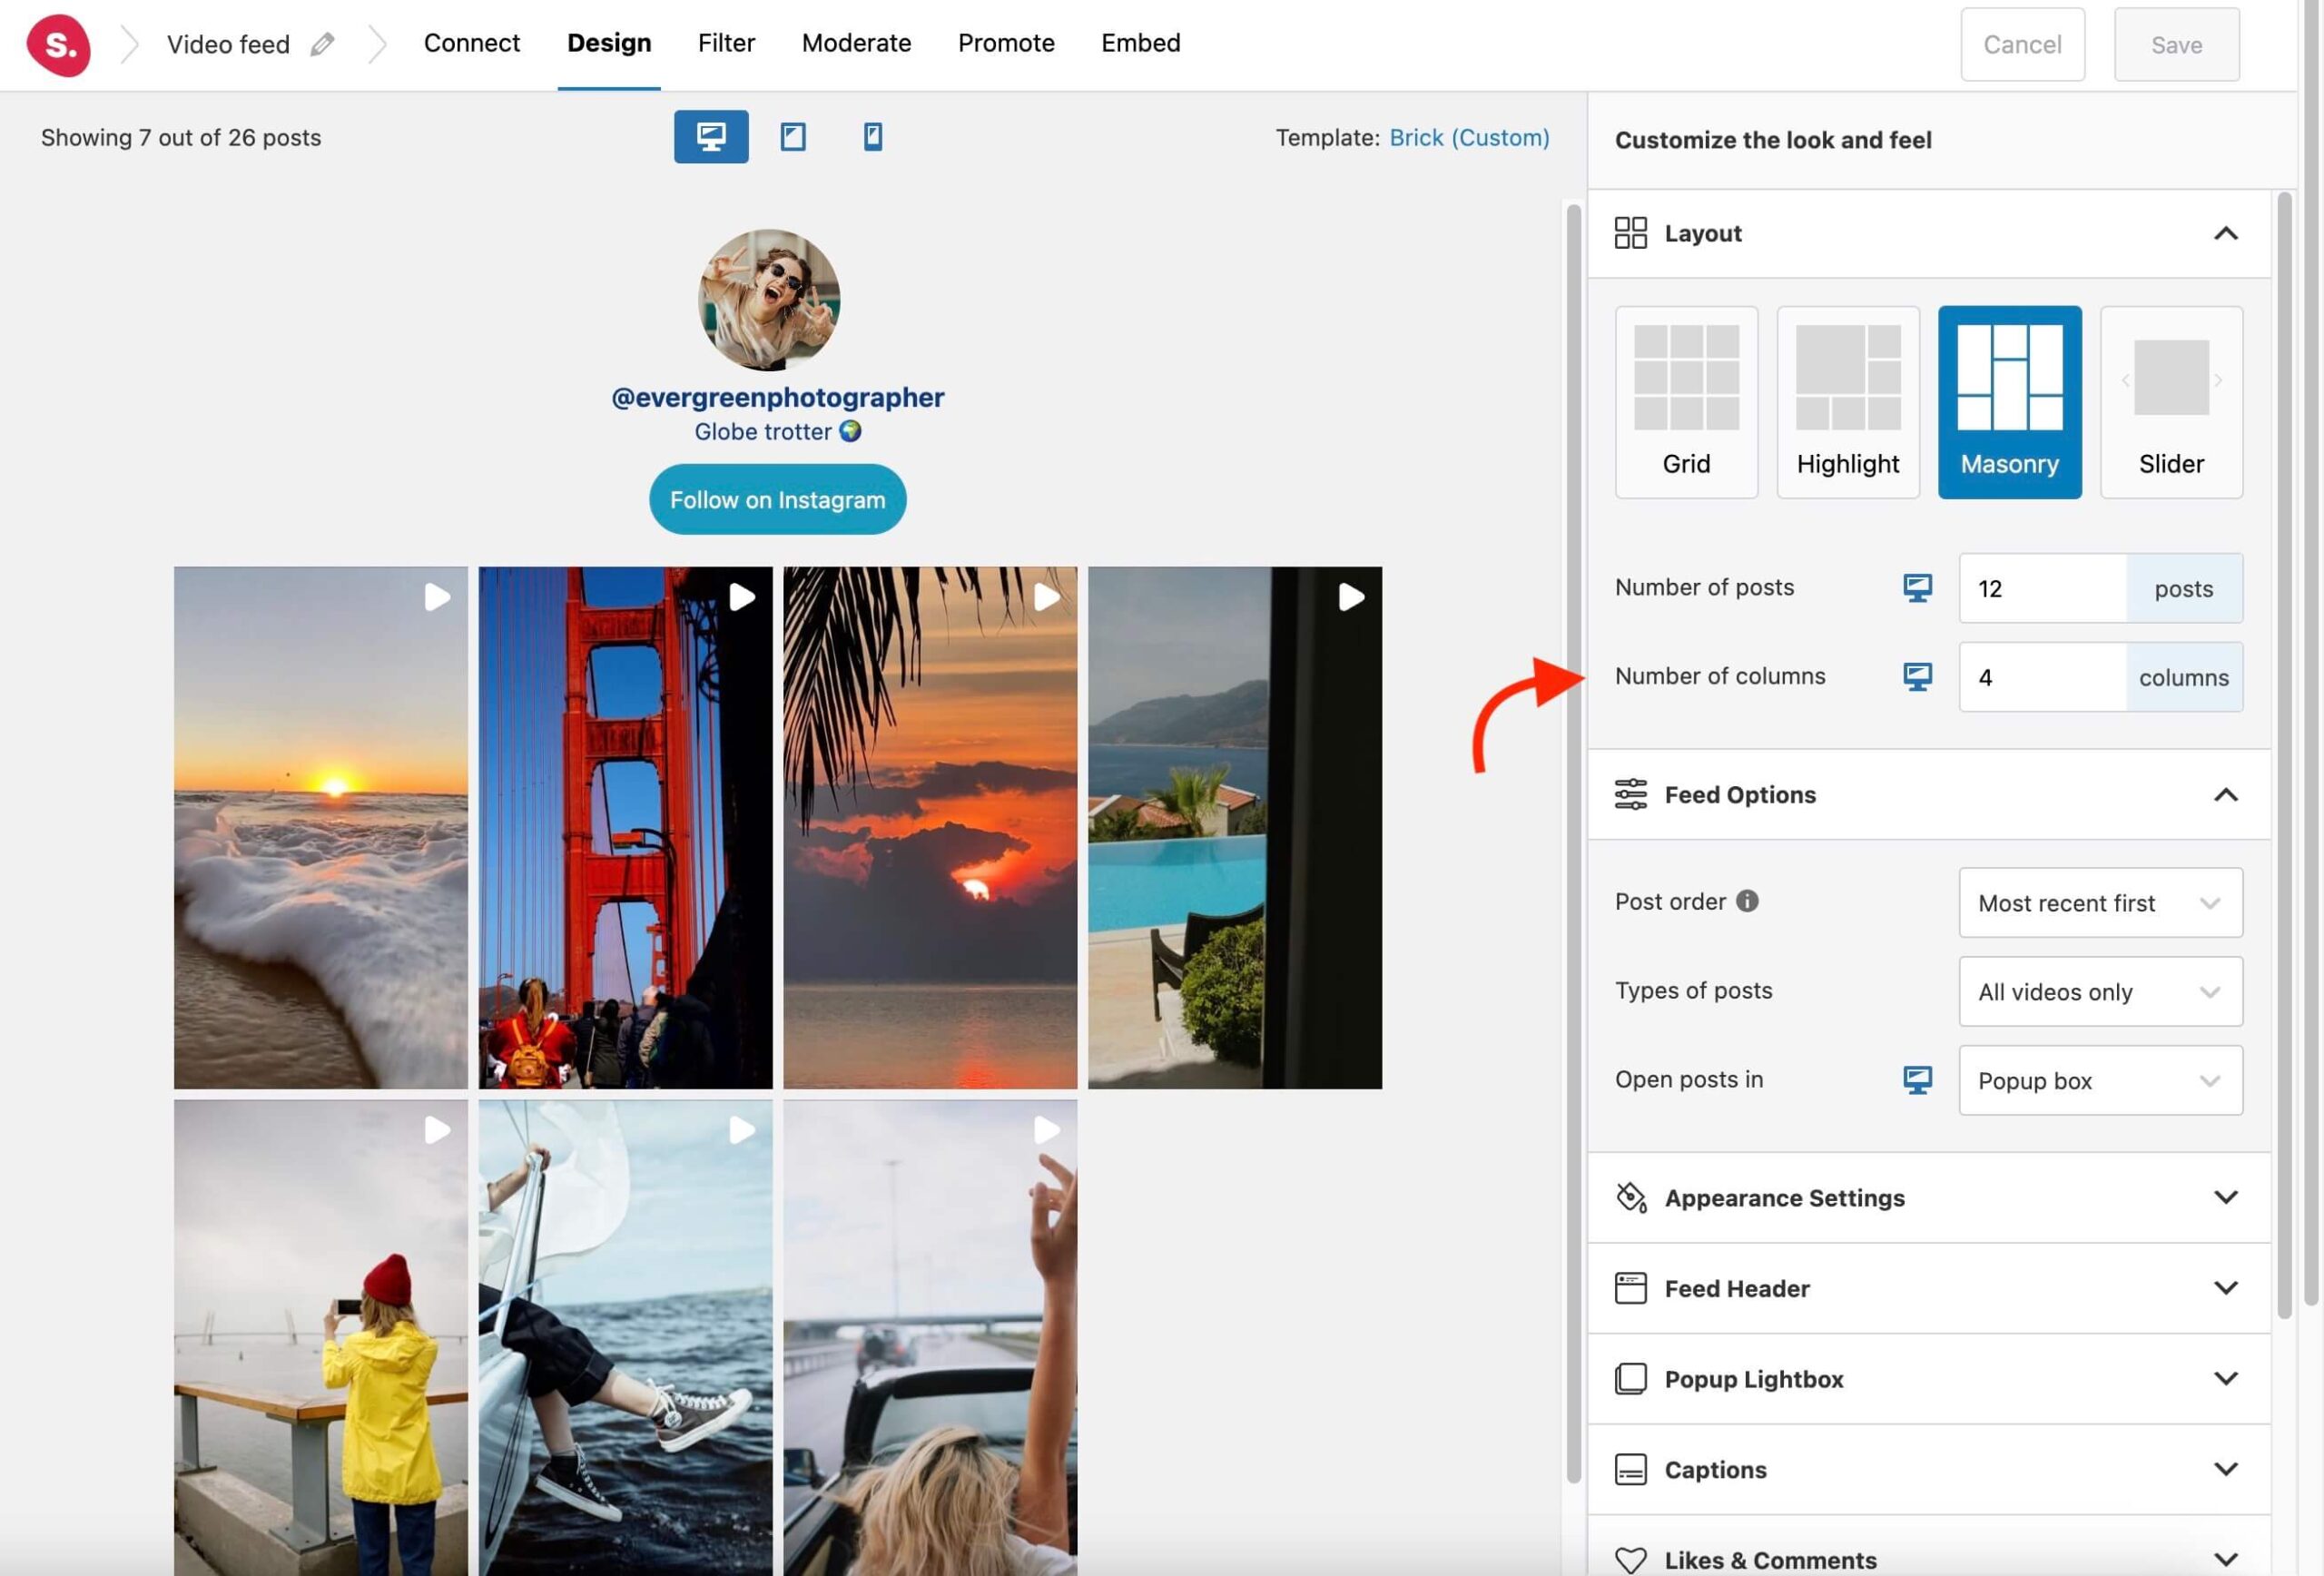
Here you can modify the design of your feed. You can choose from slider, grid, or other layout types to display your videos according to your needs.
The Masonry layout (enabled when I chose the Brick template) adapts to show each video in its full size – whereas Slider, Grid, and Highlight display all posts as squares.
To show your video content exclusively, head over to the Feed Options tab and choose between:
- Regular videos only (to display video posts that can be played in a popup lightbox on your website),
- Reels videos only (to display reels), or
- All videos only (a combination of regular videos and reels).
If you want your video posts to open up in a lightbox select Popup box in the next option.
To adjust the number of columns, scroll up to Layout > Number of columns and make your changes.
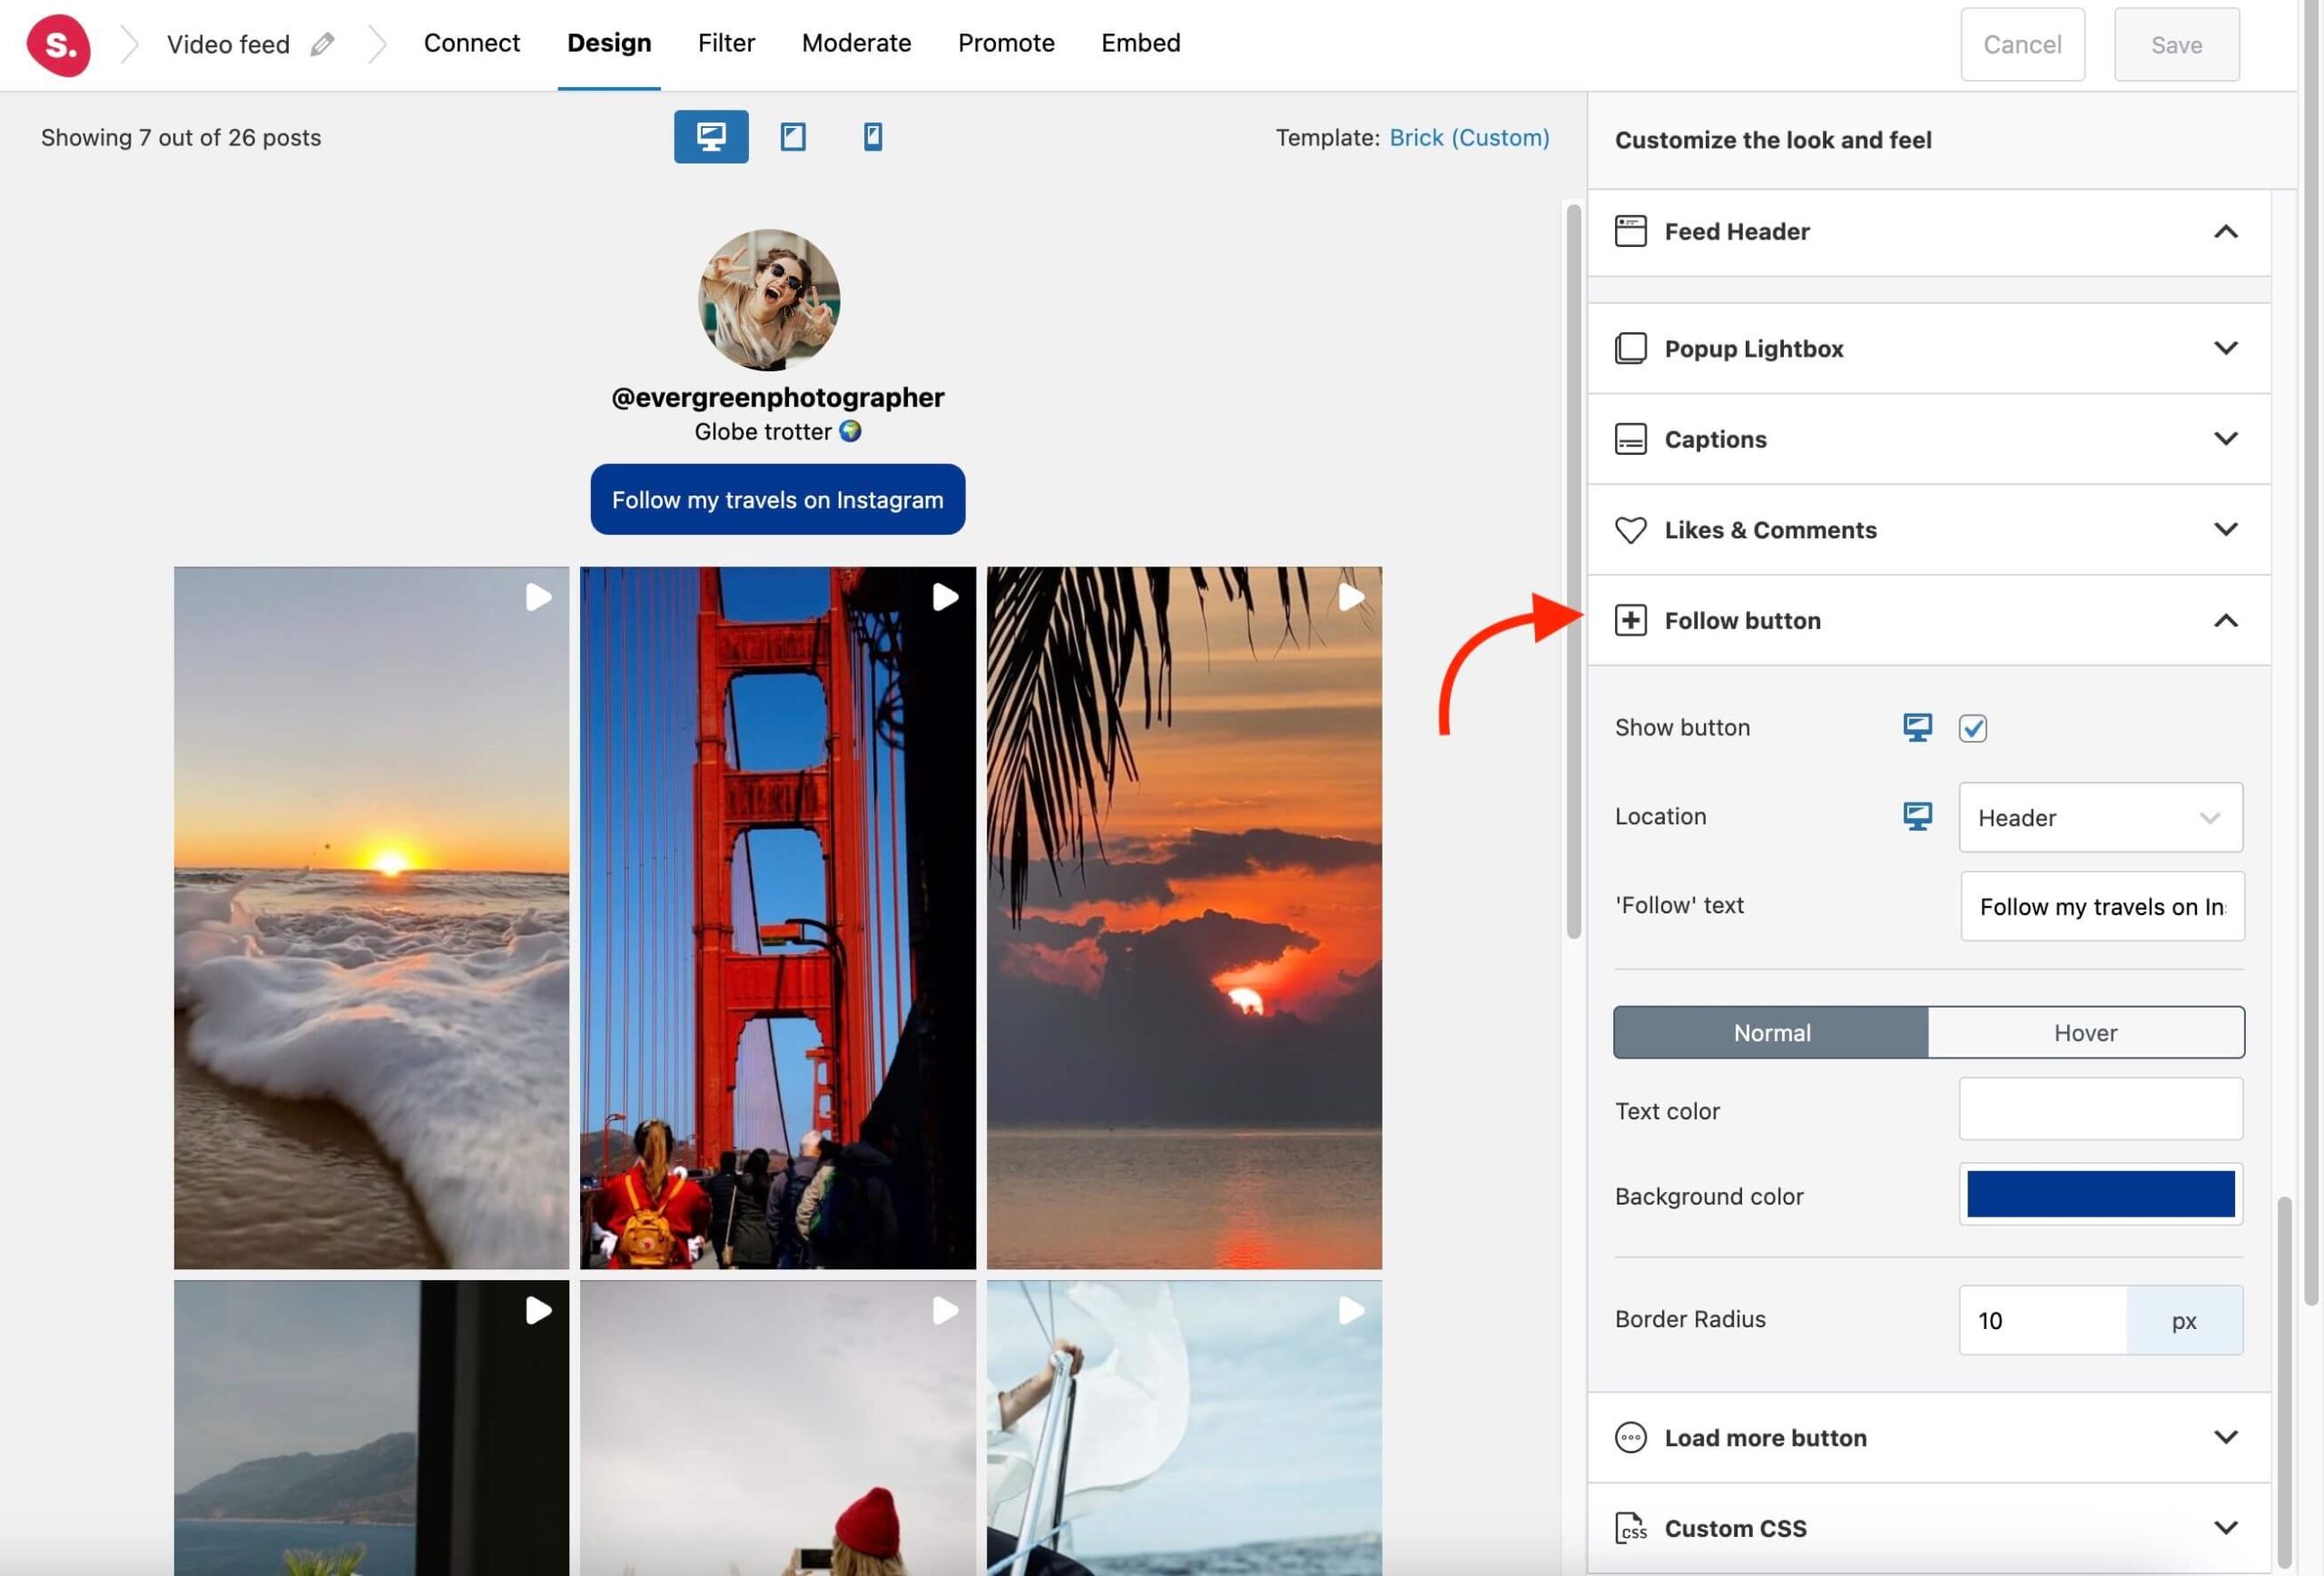
Next, you can adjust the button styling by going to the Follow button tab.
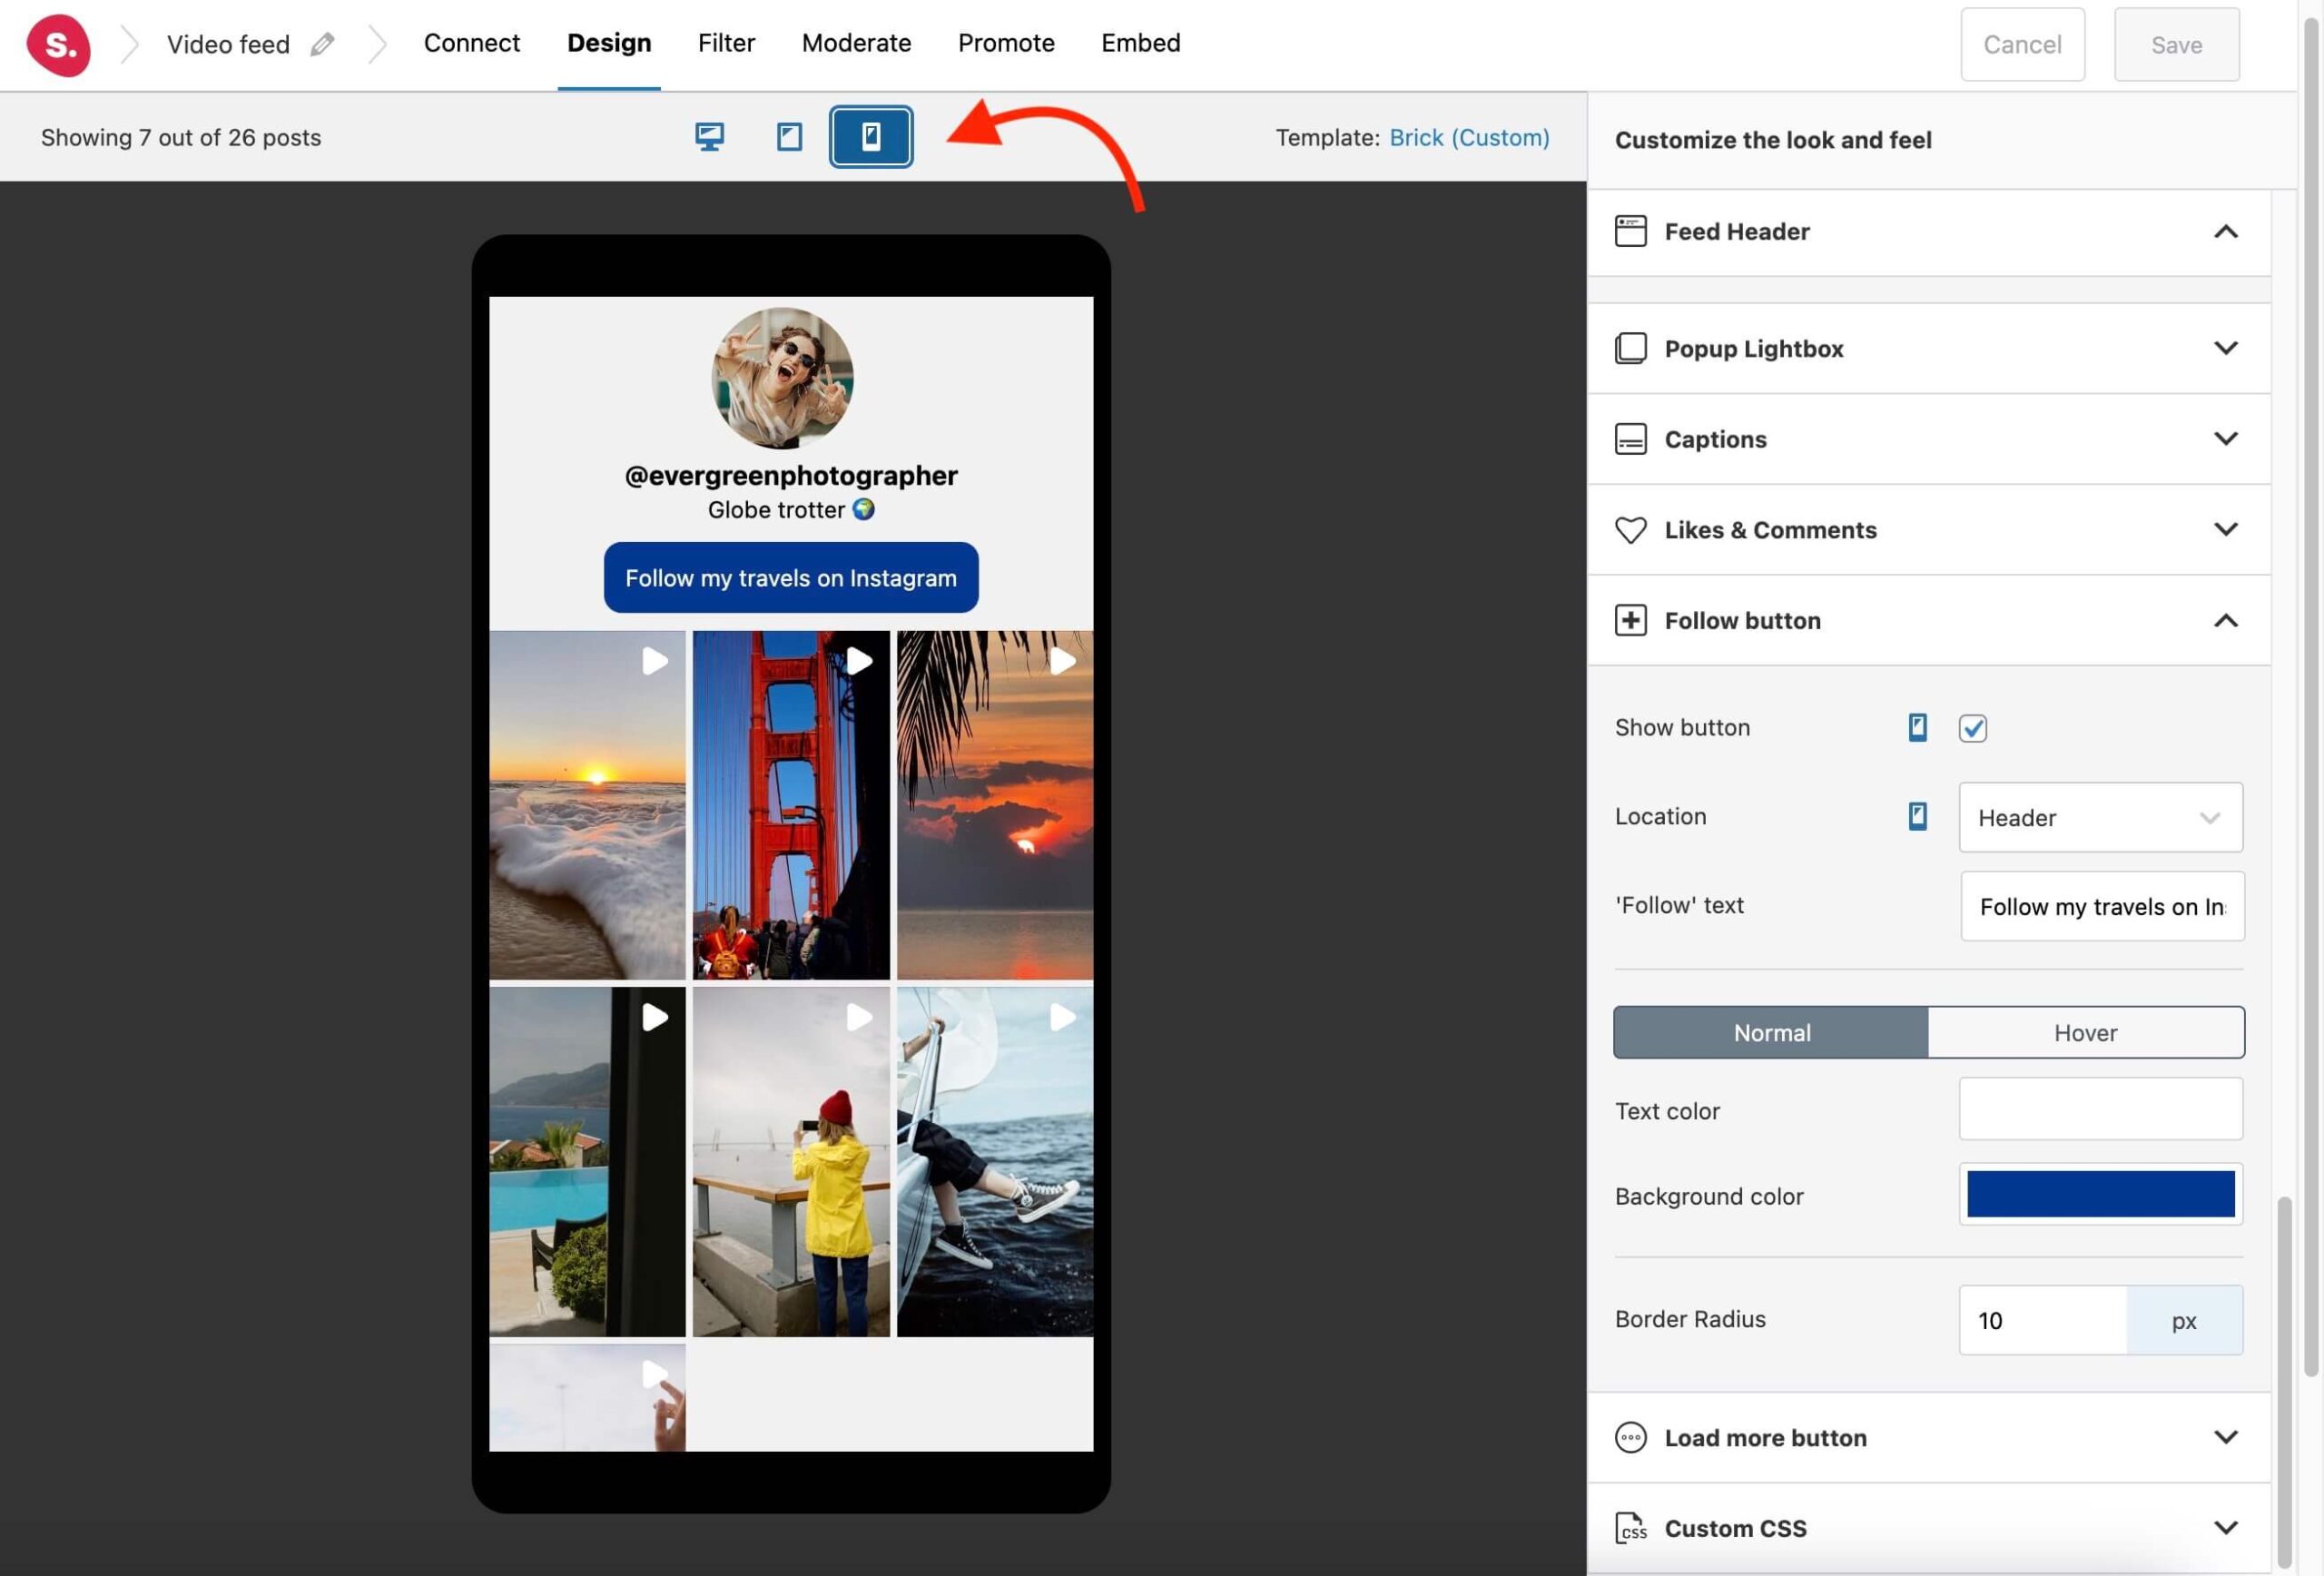
Now I am going to look at filtering and moderation, but before I do that, I’d like to make sure my feed is ready for tablets and mobile devices.
Spotlight is completely responsive by default, but it also lets you choose specific layouts for different devices.
At the top of the Design tab, select the icon for the device you want to adjust. The live preview customizer will adapt to the screen size to give you a preview of what your layout will look like.
Step 3: Filter and moderate your video feed
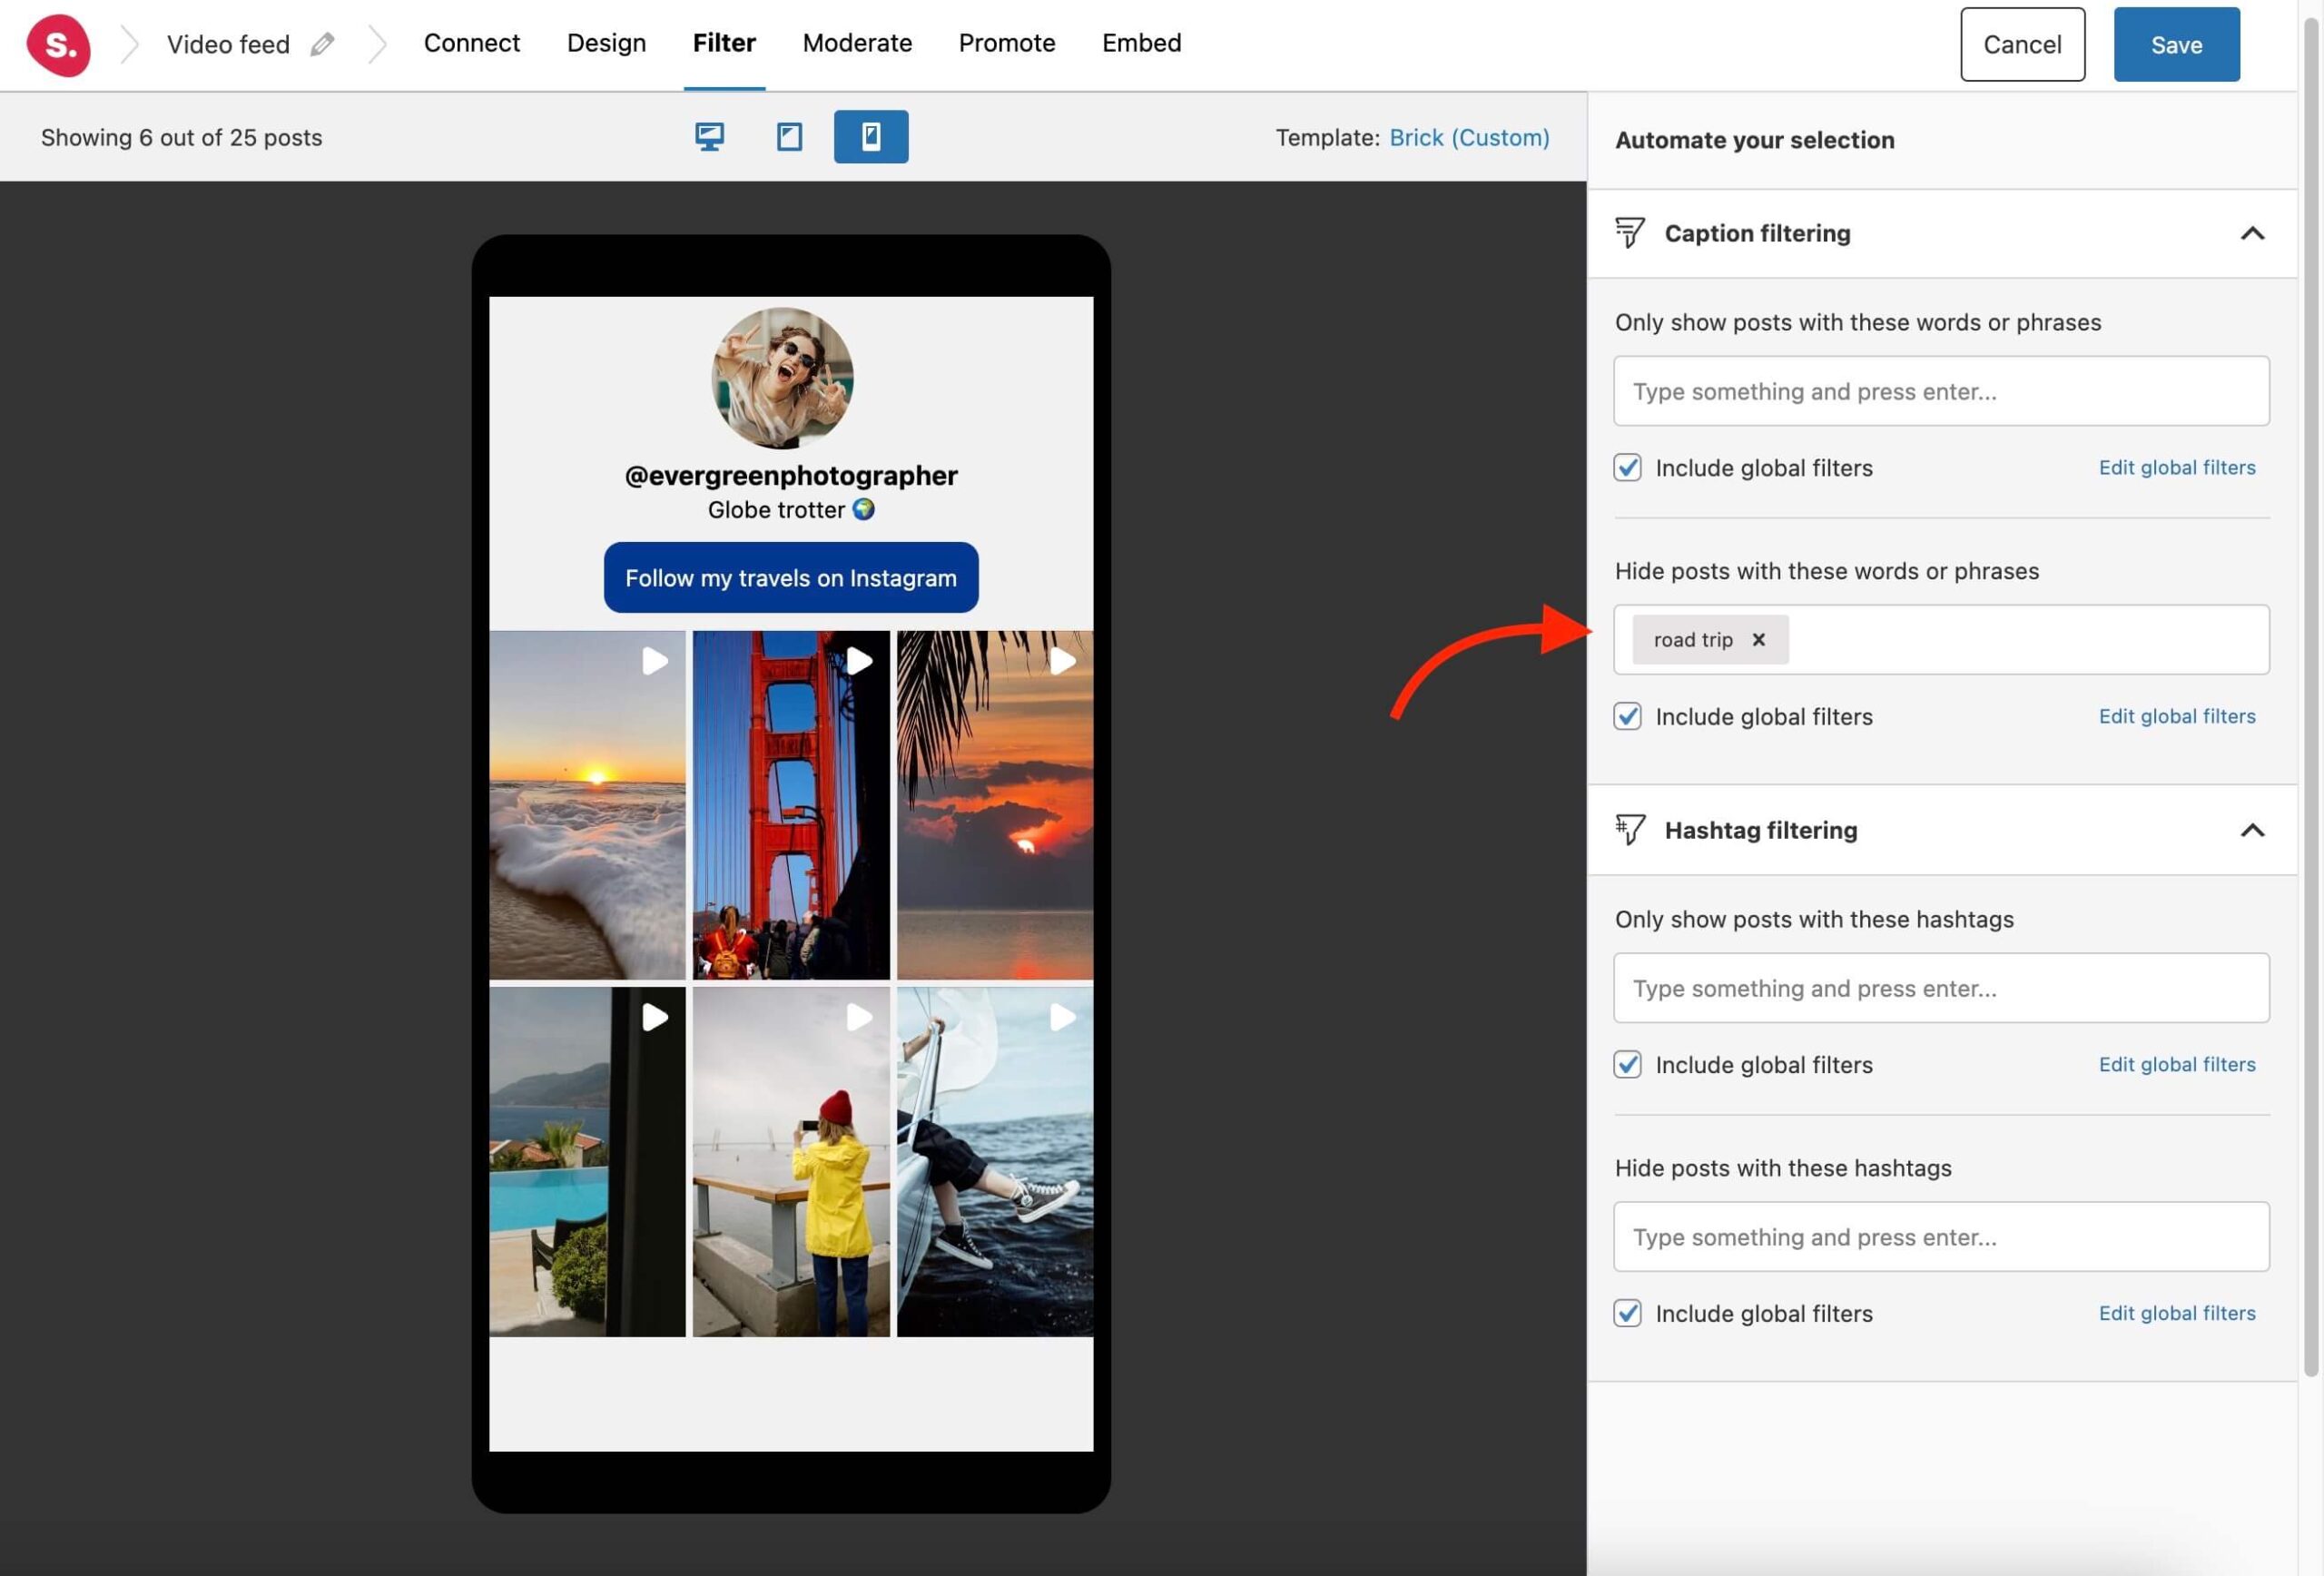
One of the best things about Spotlight PRO is an absolutely essential feature: Filtering and Moderation. This lets you filter your feed to make sure only the content you choose gets displayed to your site visitors.
In this case, I’ve chosen to hide videos with the word “road trip” in their caption.
Now, if you click on the Moderate tab, you can scroll through your feed to select the posts you want to display. In this case, I’ve selected ‘Hide the selected posts’ in order to remove the ones I want to exclude from the feed.

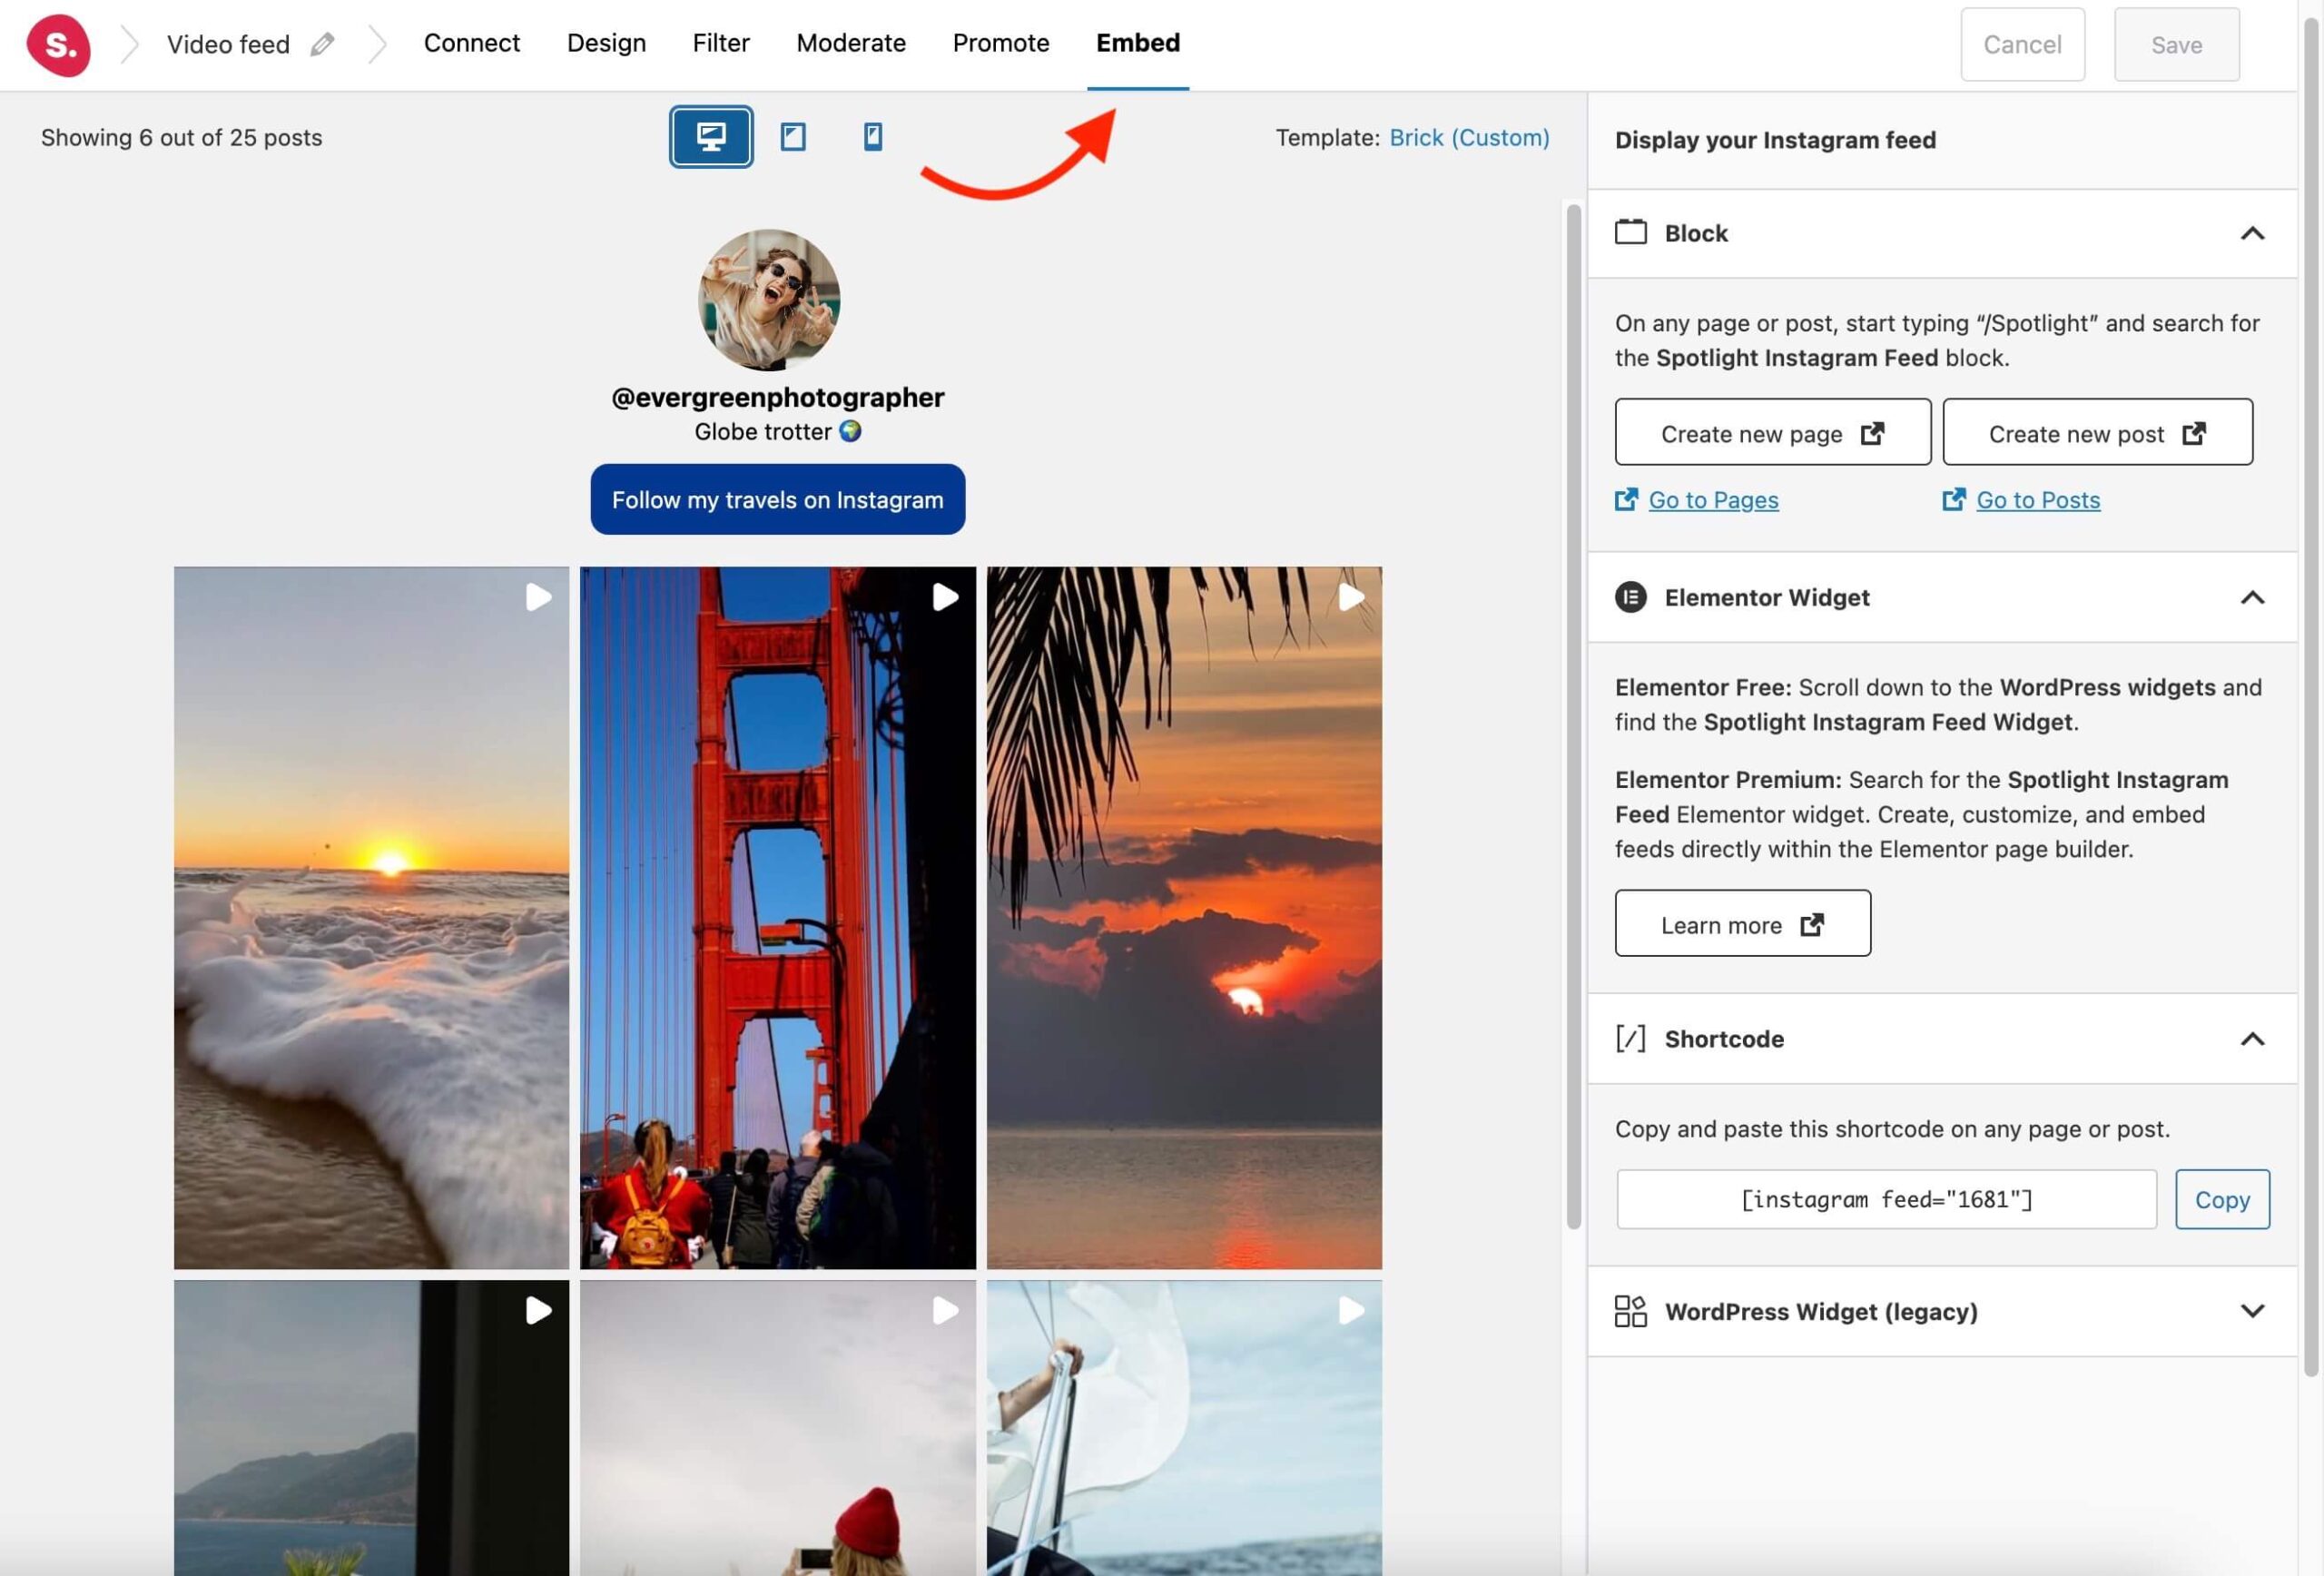
Step 4: Embed your video feed
The only thing left to do is embed your feed! Use the generated hashtag or the dedicated block to do this, and you’re good to go.
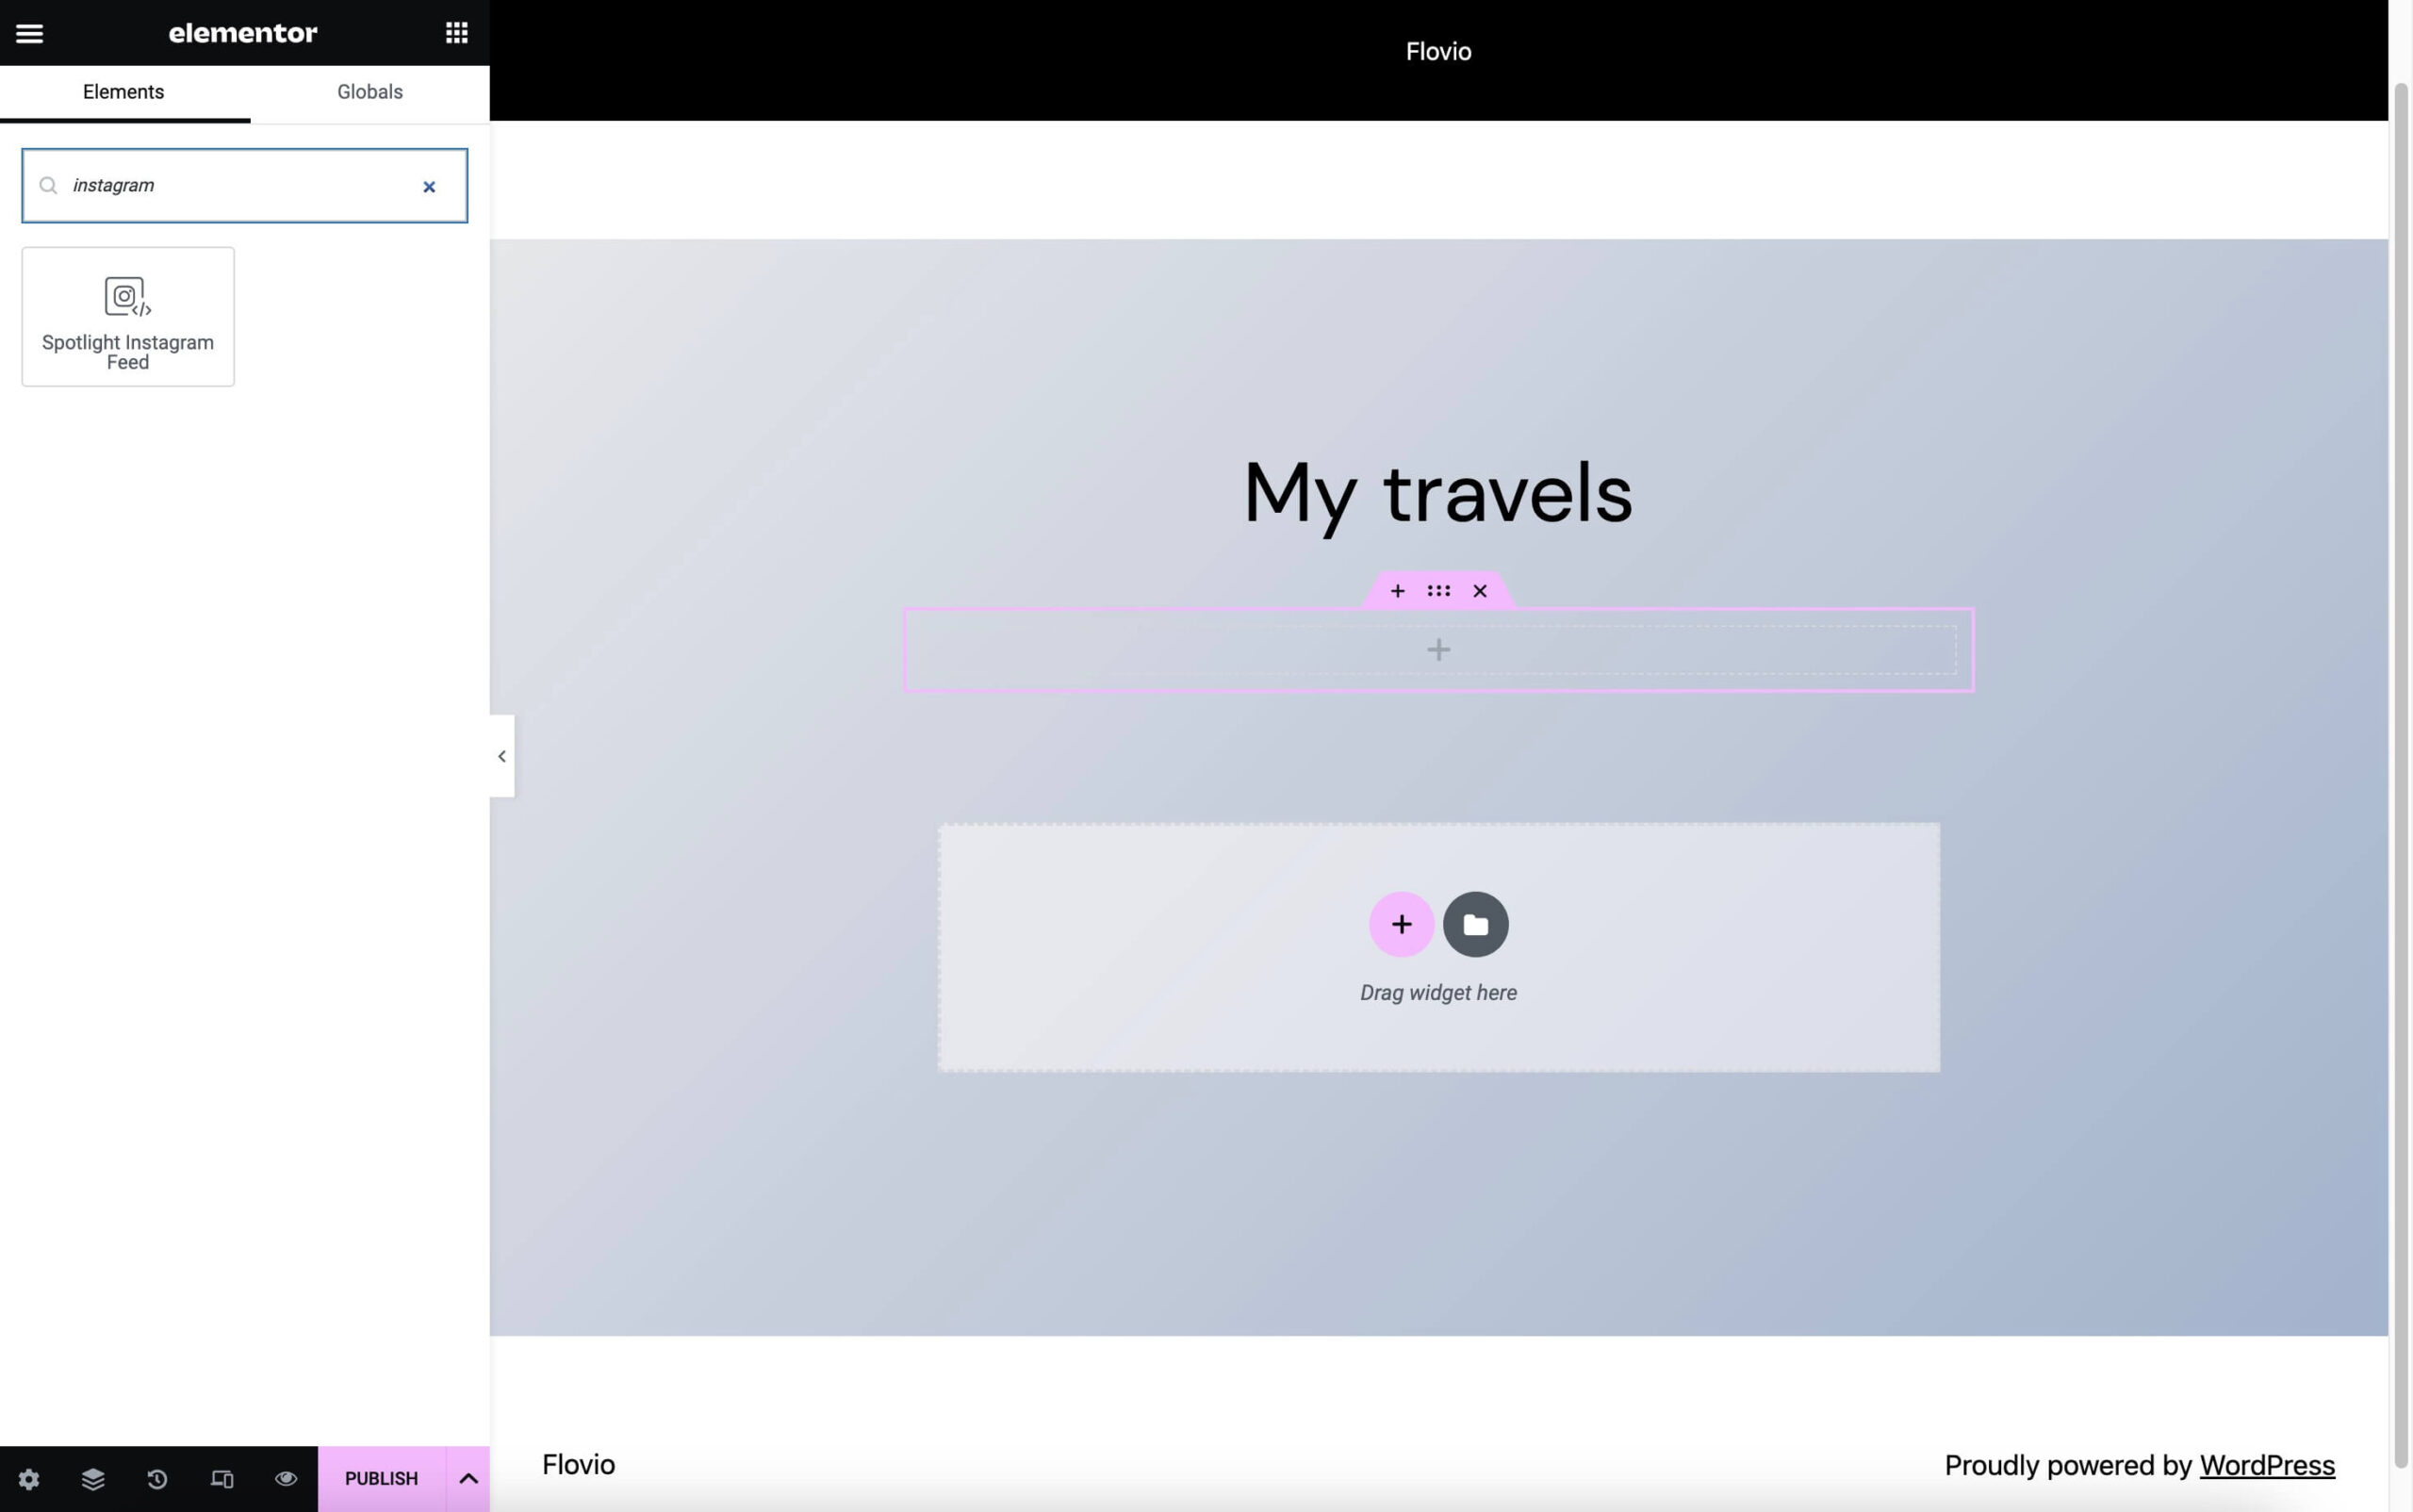
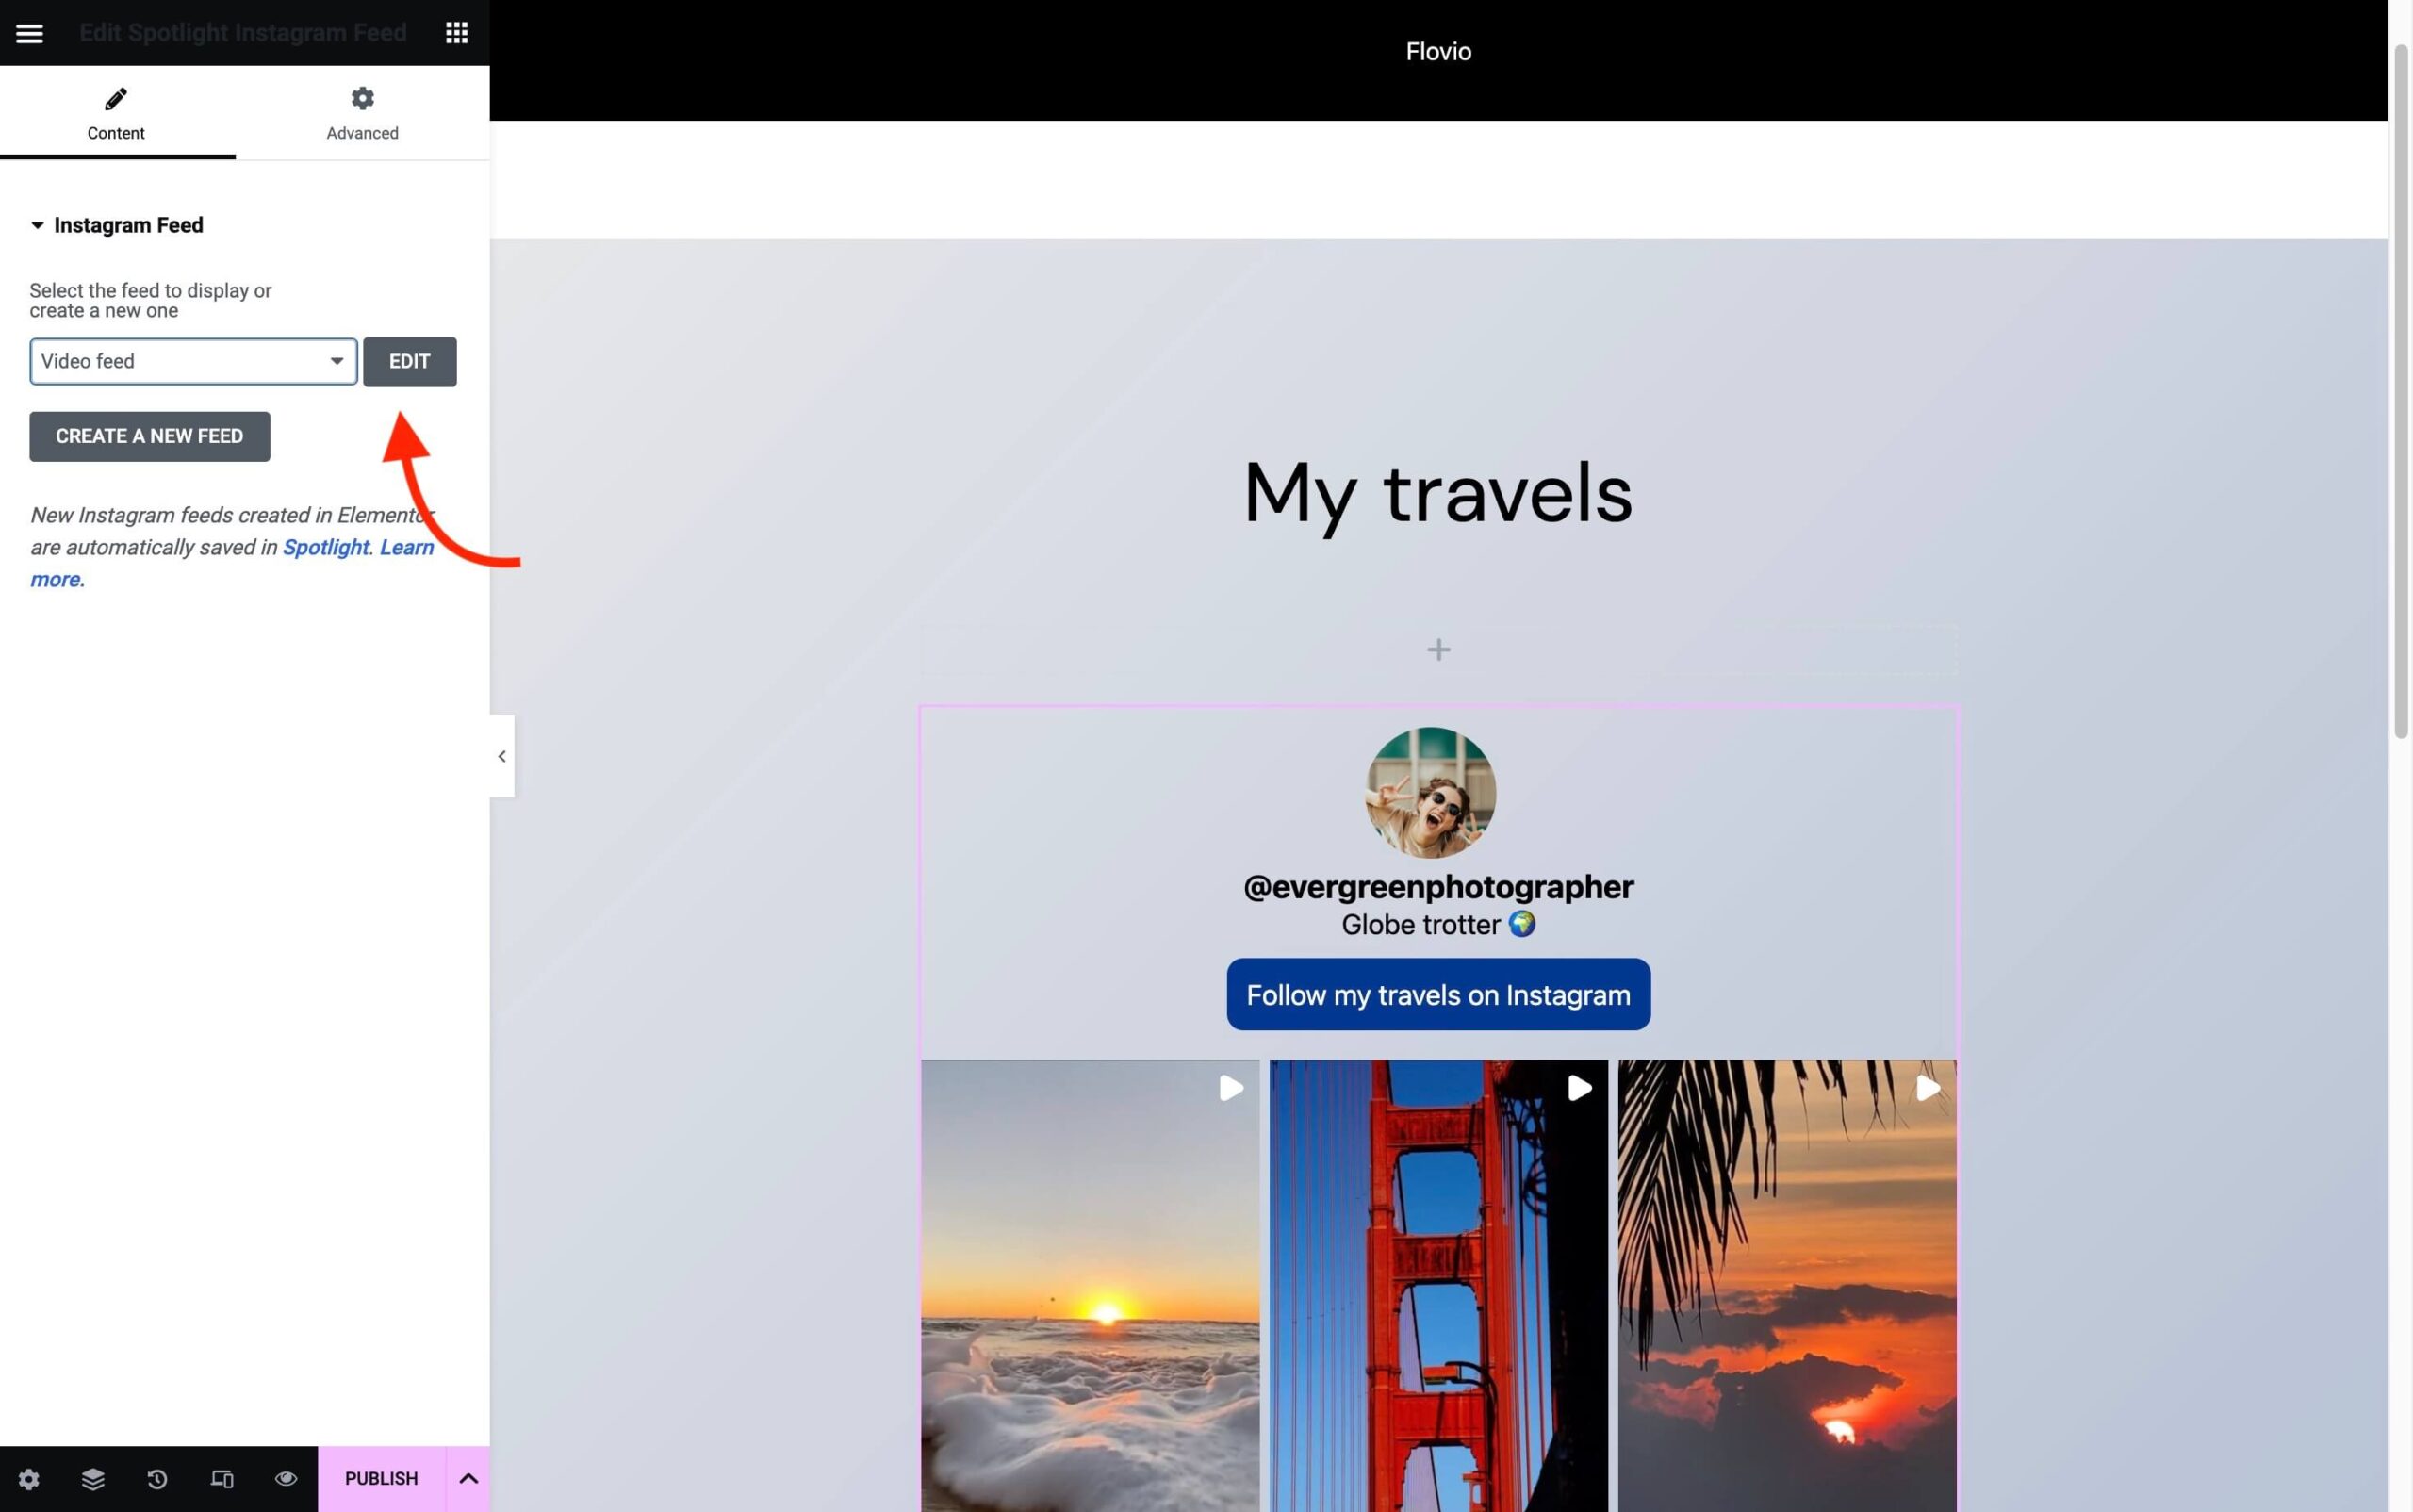
For my site, I’m using the popular page builder Elementor, which integrates perfectly with Spotlight. To add a feed to any section, all you need to do is use the dedicated widget and drag and drop it to the desired location. Next, simply select the feed you want to show from the dropdown menu.
You can also edit the feed at any time without switching to the WordPress backend by clicking the Edit button.
The end result
There you have it! The feed is now live and completely responsive.
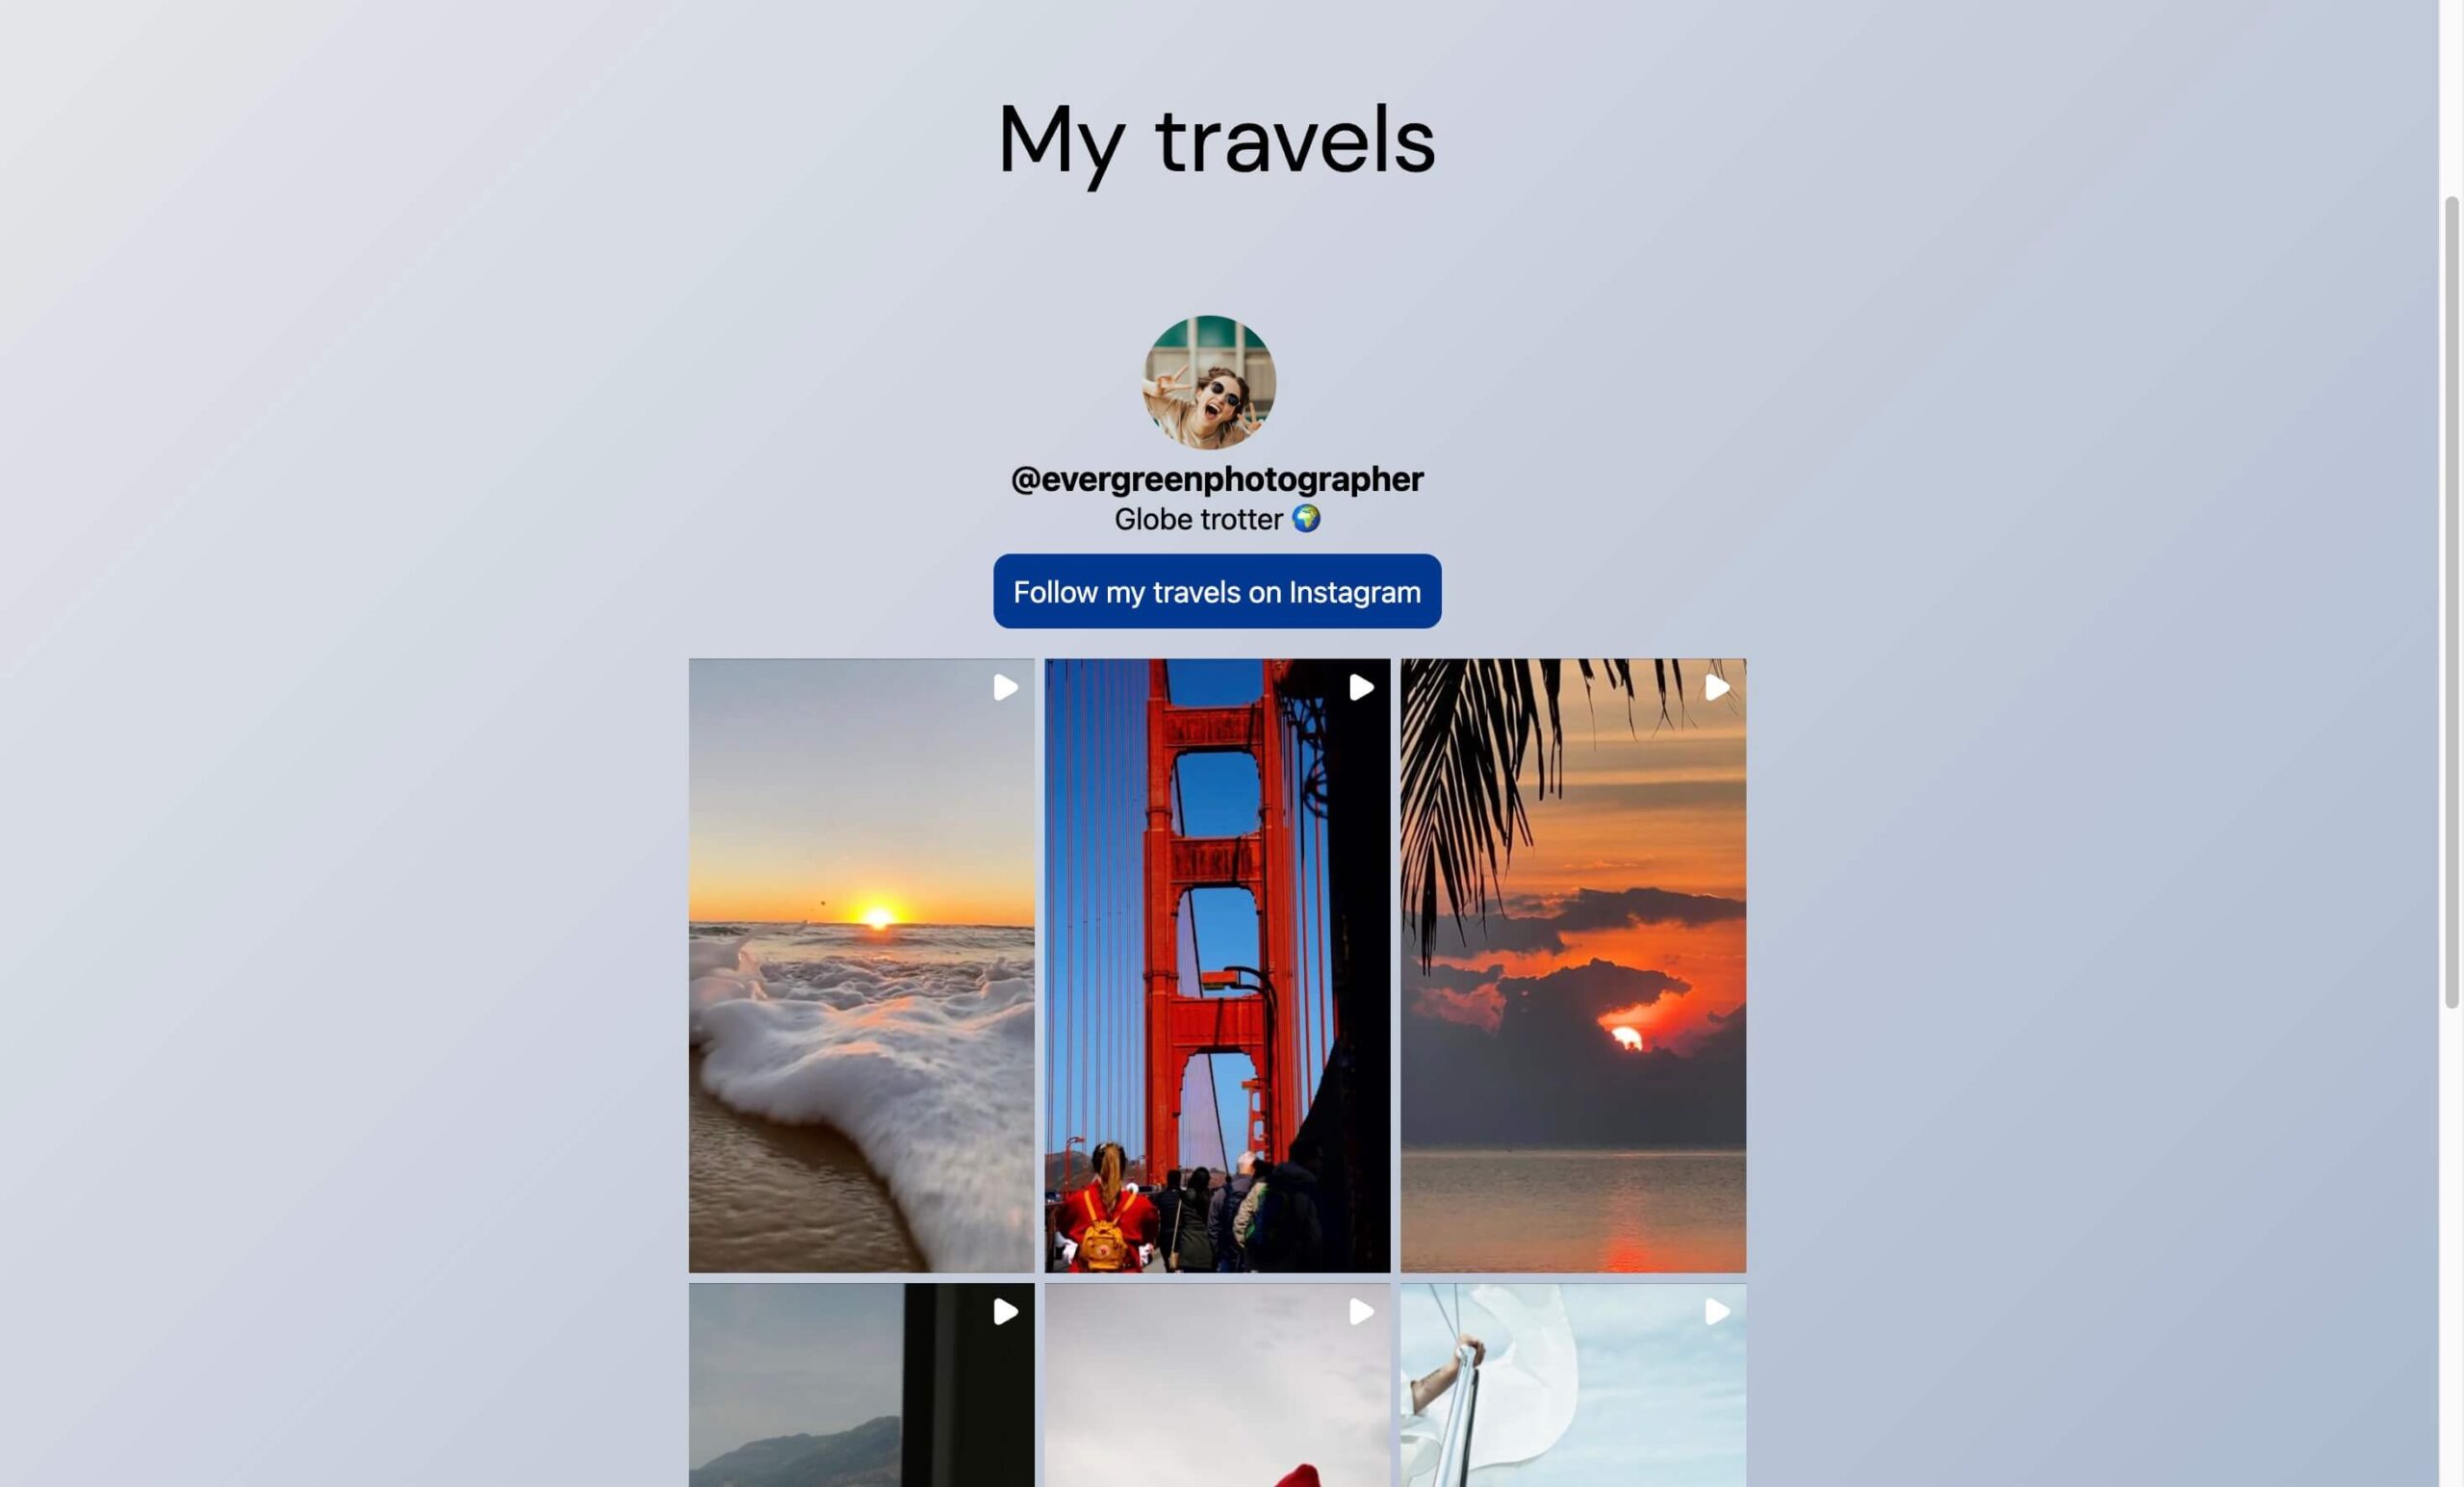
Clicking on a specific post opens up the video in a lightbox.
Conclusion
Videos are some of the most engaging types of content out there, and showcasing them on your website lets you make the most of the content you produce.
Video posts are already more high-impact, so why not take advantage of this? Plus, broadening your reach by embedding them on your website ultimately leads to more sales.
With Spotlight PRO you can now showcase your videos on your website in no time at all.