Attracting new customers to your business can be challenging, especially since most potential clients are naturally skeptical about trying out a new business. Before they decide to make a purchase, they need proof that your product or service is worth their trust and money.
This is where testimonials come in as a crucial part of your marketing strategy. Happy customers are the backbone of any successful business, and if you have a database of satisfied clients, you’re in luck! Positive reviews in the form of testimonials can do wonders for your brand.
Testimonials come in various forms, and with the growing popularity of Instagram among users and businesses, it has become a valuable resource for marketers. Instagram’s unique visual storytelling format makes it an excellent platform for showcasing your product or service in action.
In this article, I will guide you through the process of creating and displaying an Instagram testimonial feed on your website with Spotlight. Let’s get started!
How to display Instagram testimonials on your website
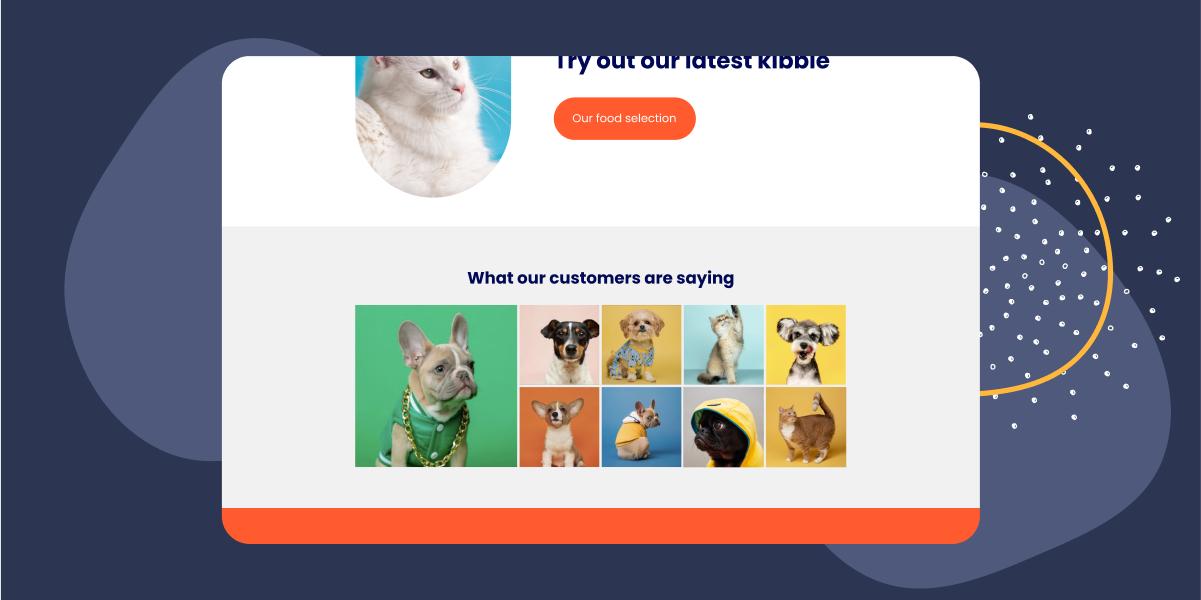
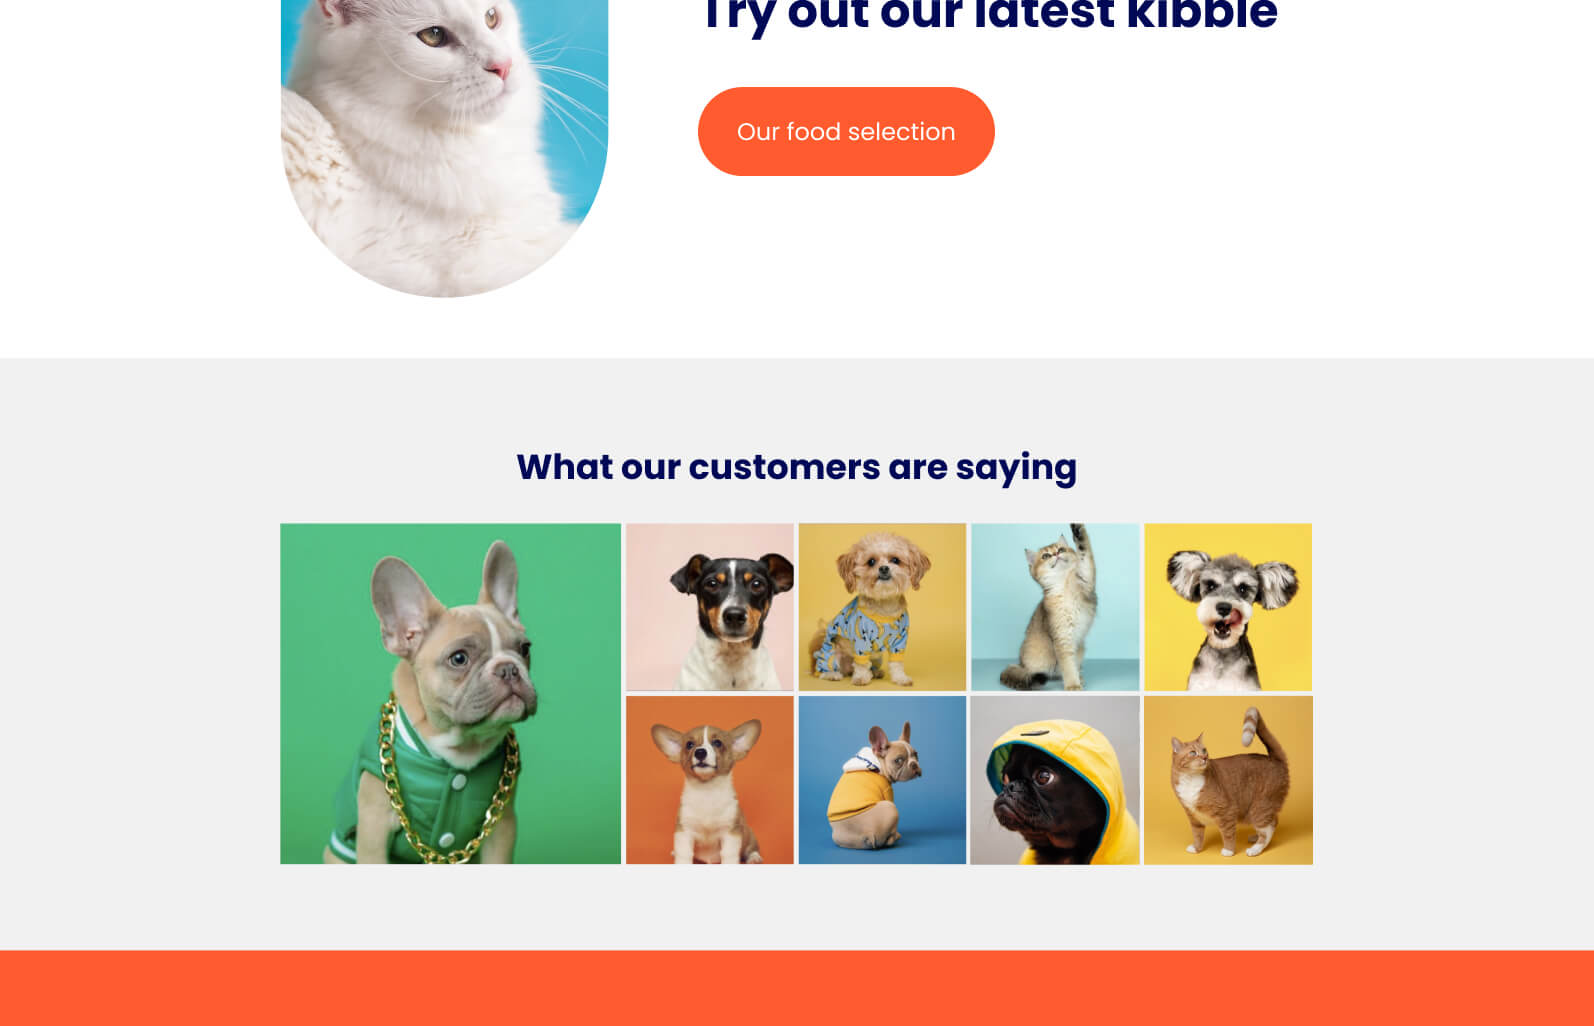
The focus of this tutorial is to integrate Instagram testimonials into the pages of my Pet Shop website.
To encourage my clients to share their experiences with my products, I have added some bio text to my Instagram profile. This text invites them to post photos or videos of their happy pets and tag my account.
Next, we need to get to work creating and displaying my testimonial feed for my products and services.
1. Connect your account
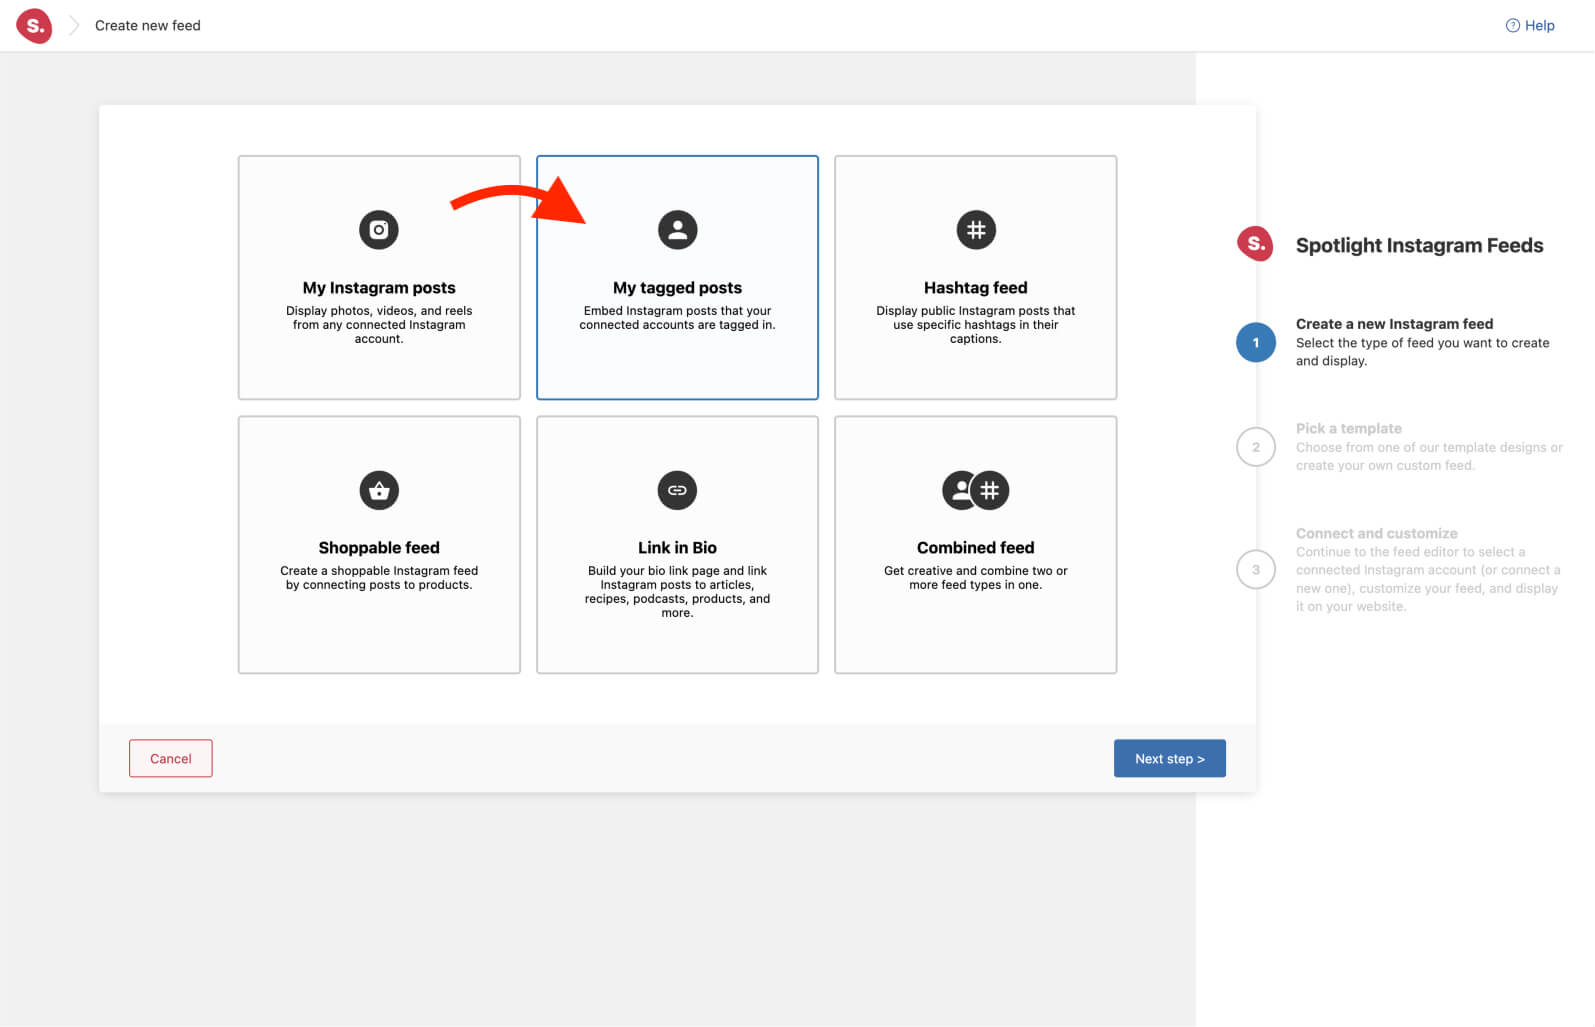
Once you’ve got Spotlight installed and activated on your WordPress website, you need to first create a new feed.
Go to Instagram Feeds > Feeds and select My tagged posts to bring in Instagram posts that your accounts are tagged in.
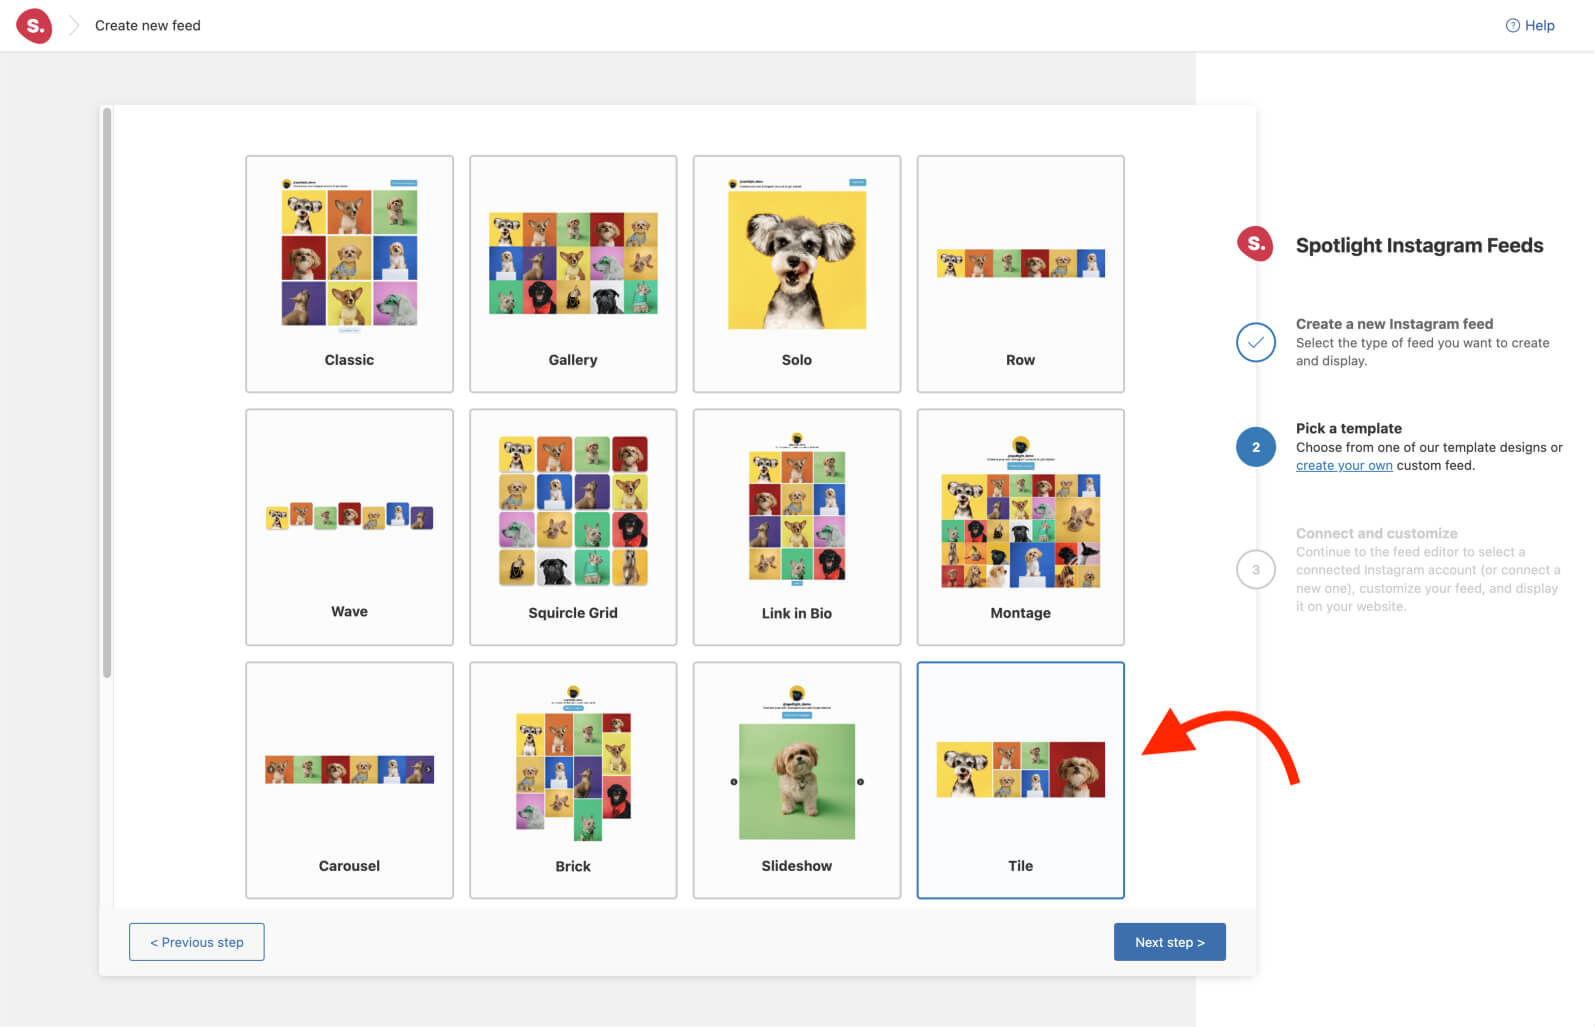
Next, select a template. In this example, I’ve opted for the Tile layout which is perfect for horizontal areas in your site, such as the footer.
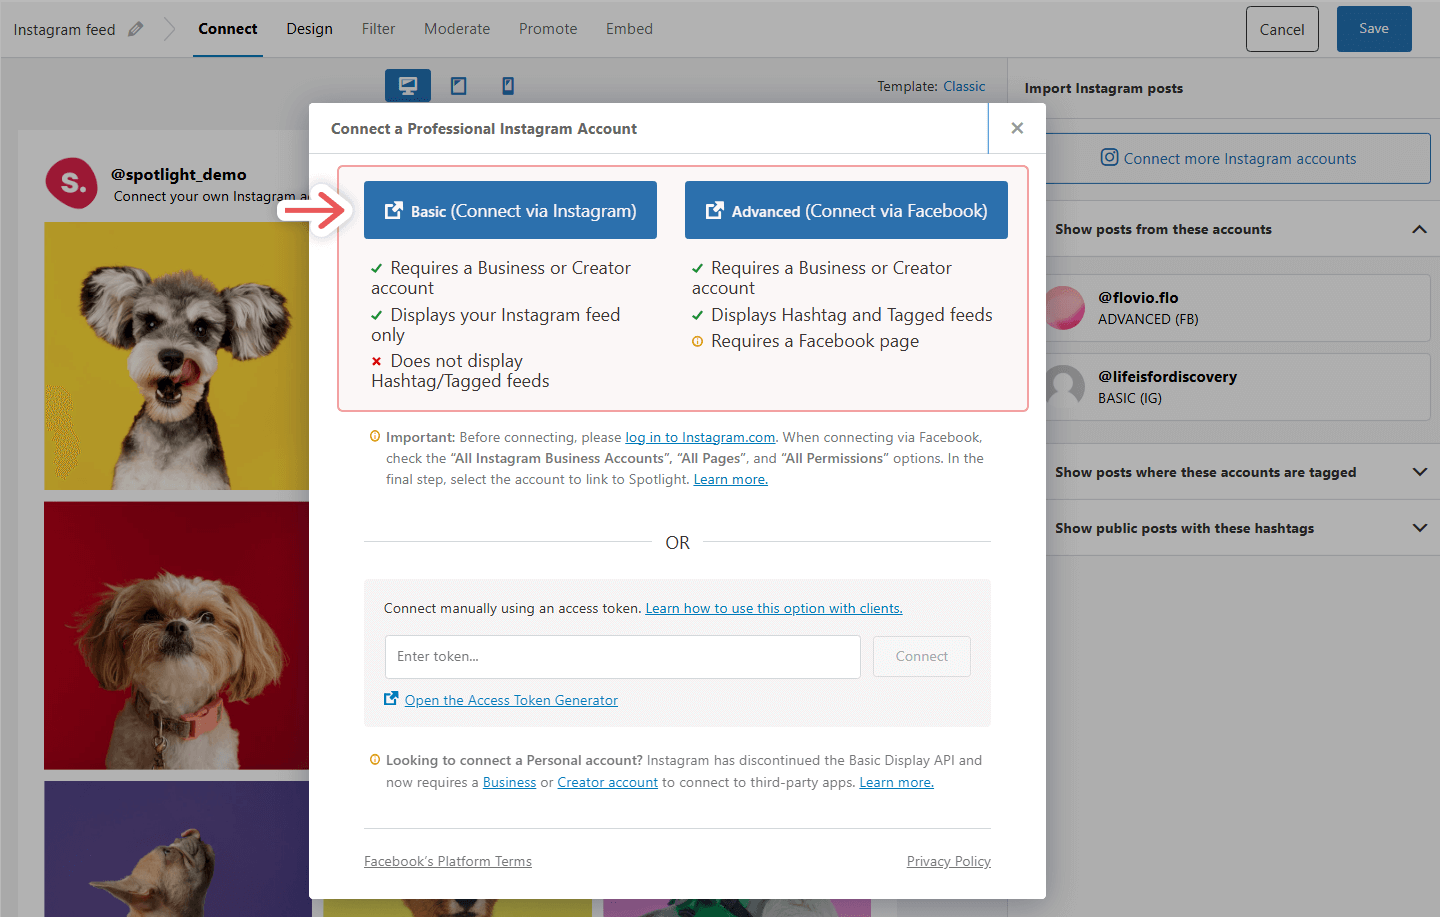
Spotlight will then take you to the Connect tab to connect your Instagram Business or Creator accounts using the Advanced option. Once you connect and select your account, your Instagram testimonials will load in a matter of seconds:
2. Design your Instagram feed
Head over to the Design tab where you’ll find over 40 customization options. Here you can adjust everything from the number of columns to image padding. In this example, I’ve increased the number of posts and highlight to 9 to achieve one larger post on the far left.
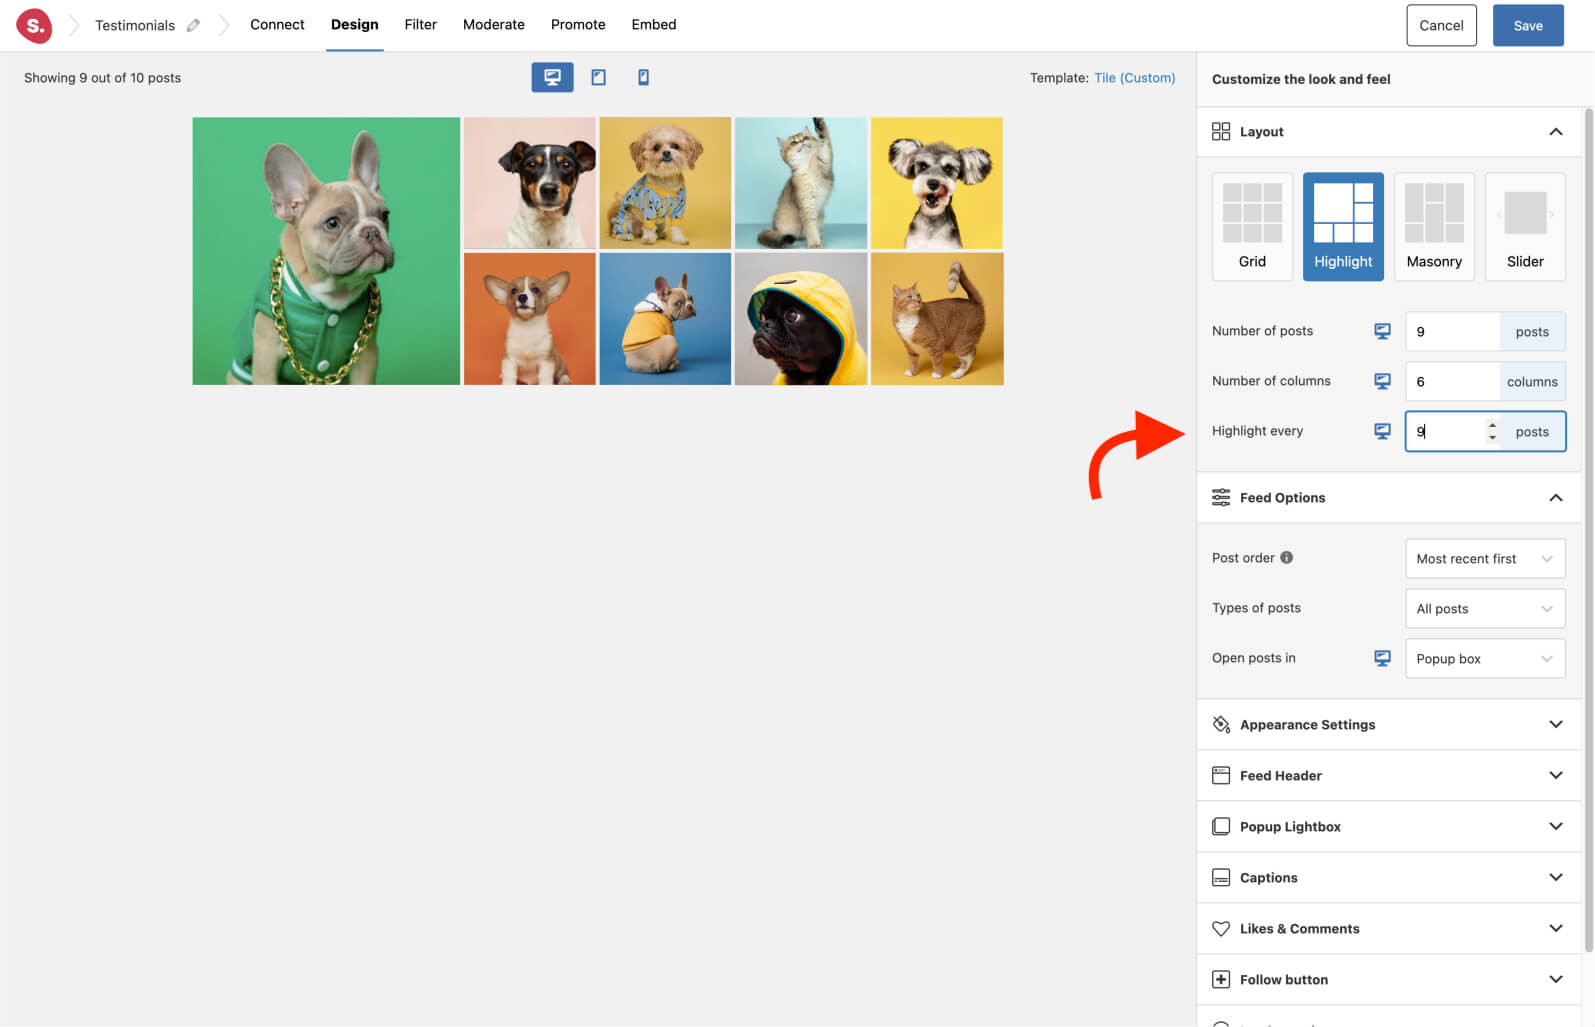
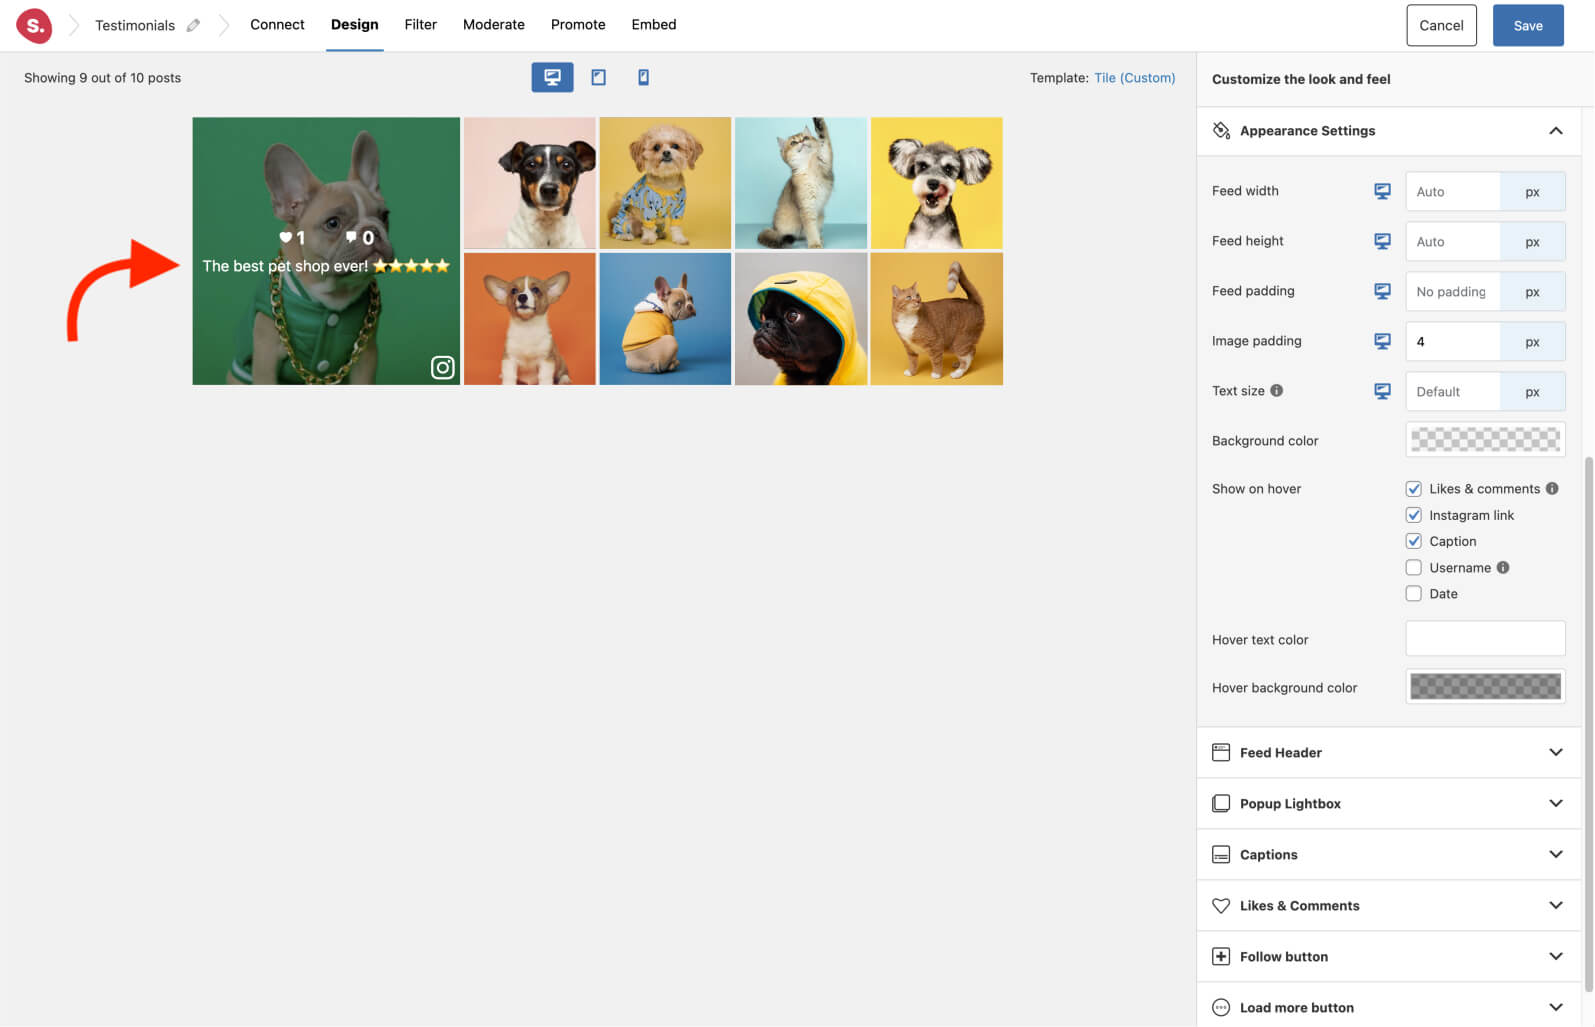
Now, for the important part! I really want to spread the message that my clients love my products. It’s therefore essential to me that the like and comment counts are shown on hover, as well as my clients’ captions.
To do this, scroll down to Appearance Settings > Show on hover and select the items you wish to see.
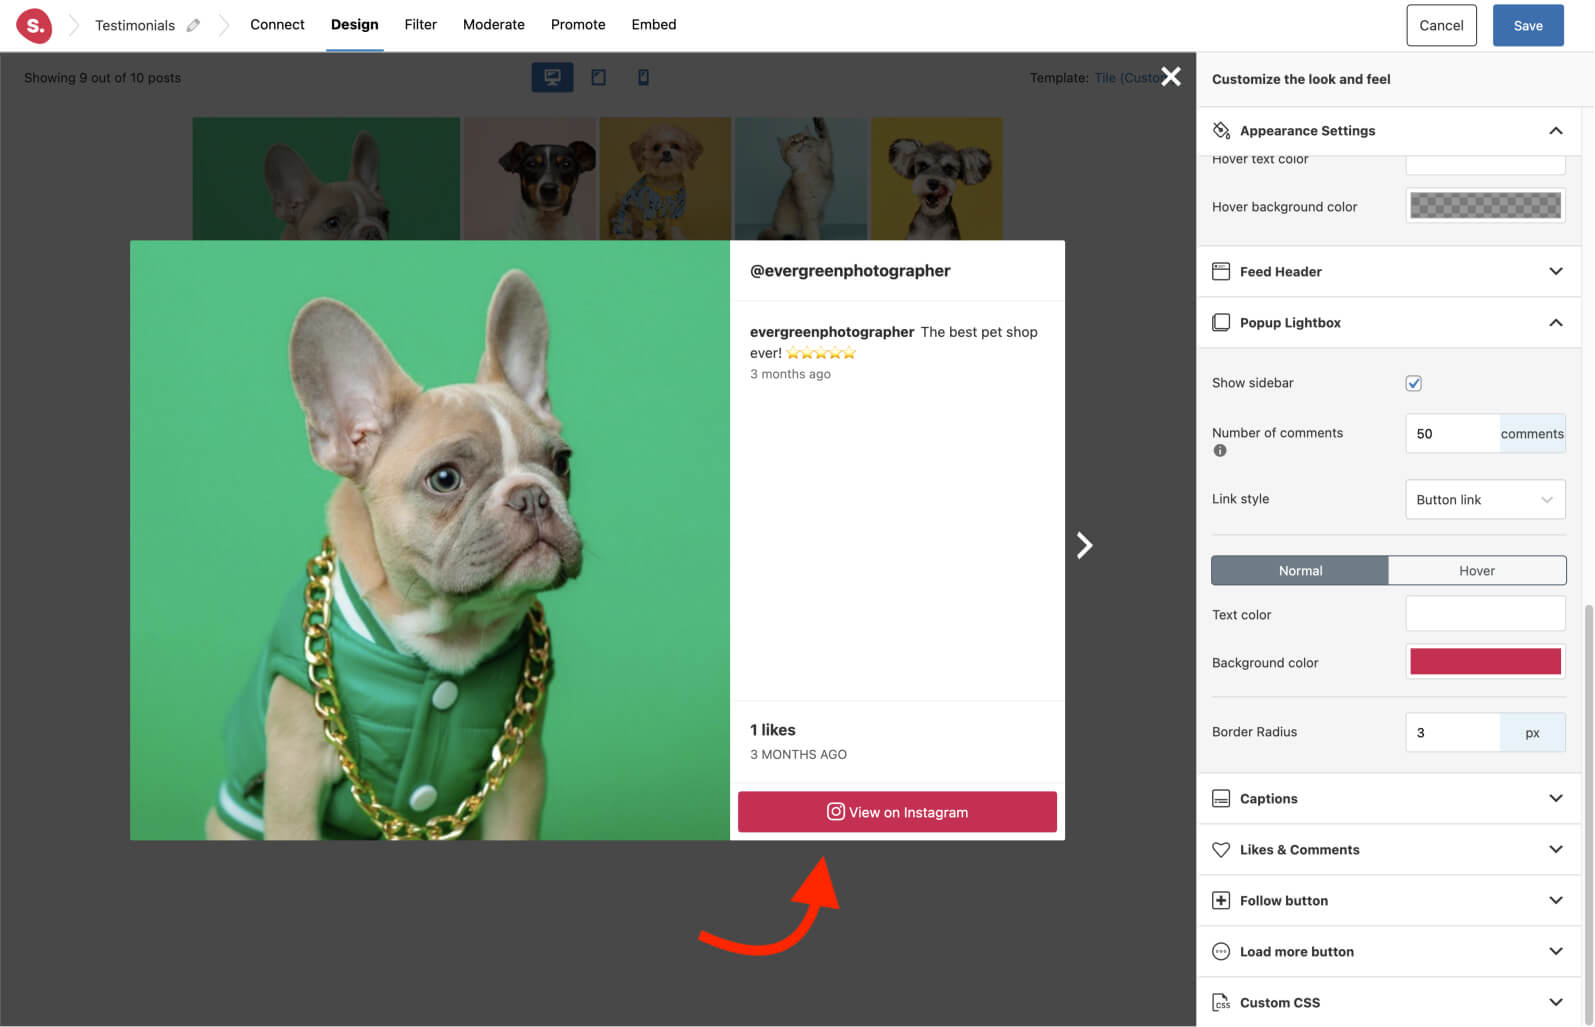
I also want the posts to open up in a popup lightbox with a sidebar showing the caption. This will act as our written testimonial. To enable this, scroll down to Popup lightbox > Show sidebar. I’ve also changed the link style to Button link to be able to create easy CTA buttons for my products.
Before we move on to filtering and moderation, there’s one last important step – designing your feed for tablet and mobile devices. Spotlight is completely responsive, however, it also lets you customize your feed for each device.
Select the device icon at the top of the Design tab. The live preview customizer will adapt to the selected screen size to give you a preview of what your layout will look like.
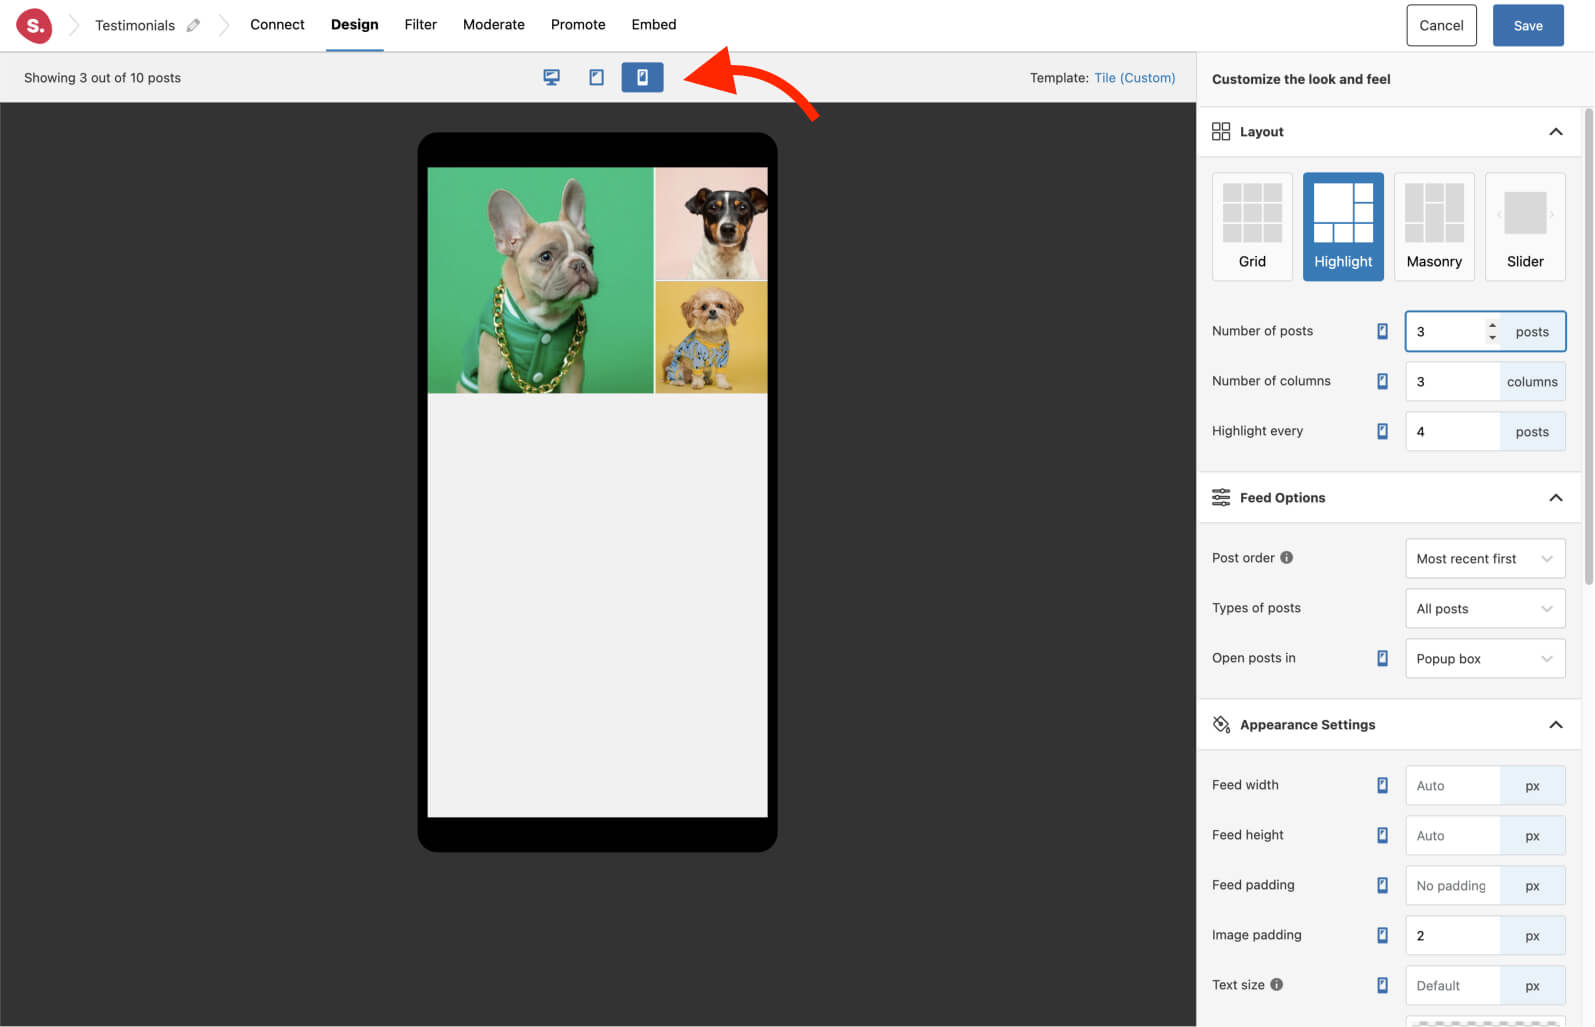
In my case, having many columns results in extremely small images on mobile. While the Highlight layout works well on tablets, the mobile layout will need to be changed slightly. I’ve opted for a 3-column layout with 3 posts.
3. Filter and moderate your Instagram testimonails feed
This essential feature is one of the main reasons to upgrade to Spotlight PRO. The premium plugin lets you filter through your feed to weed out any images you don’t want to show your visitors.
In this case, I’ve switched over to the Filter tab and then chose to hide posts with the words “fish” and “plants” in the caption.
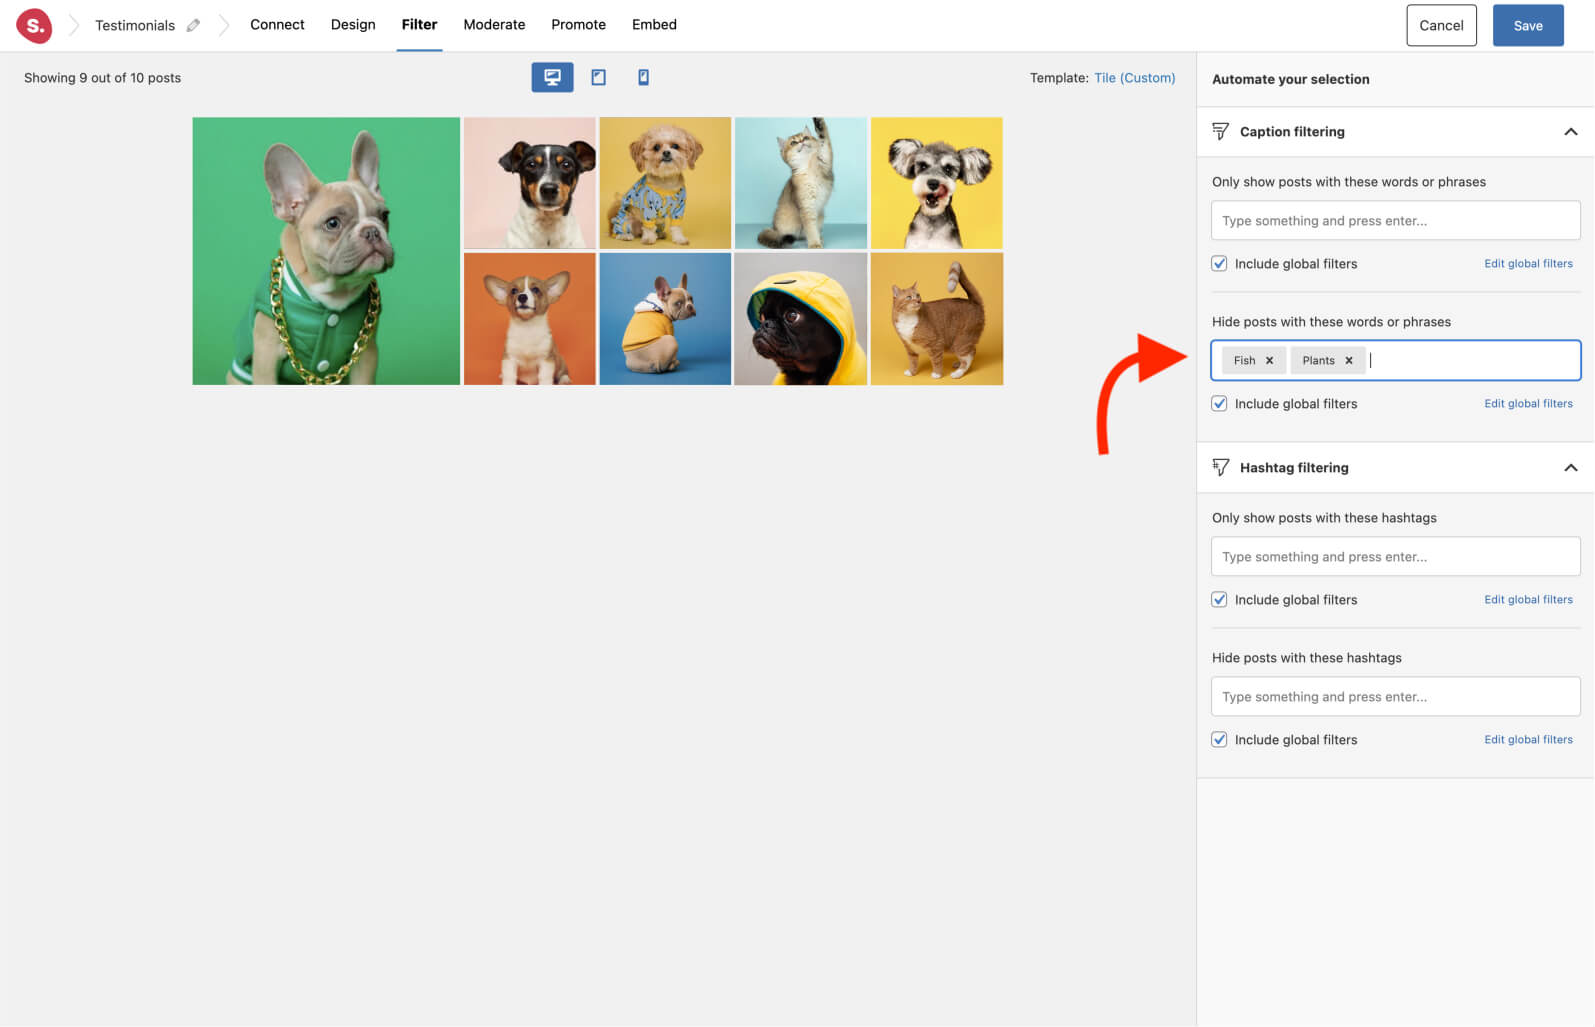
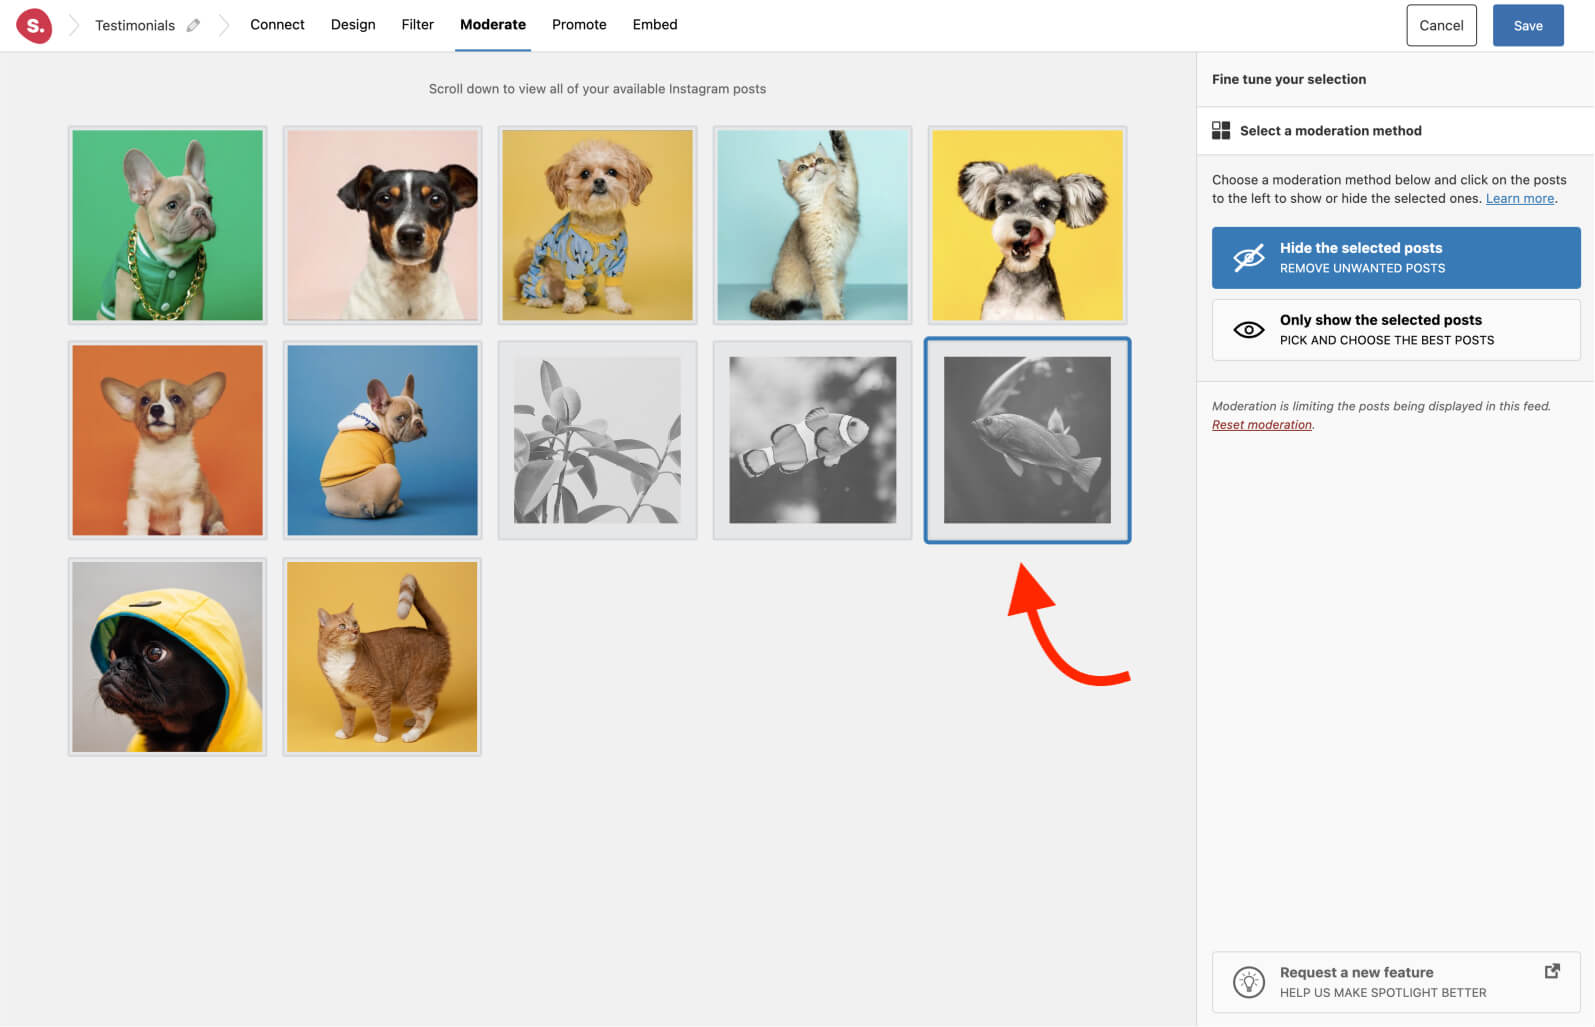
Moving on to the Moderate tab, I can manually select those images I want to hide.
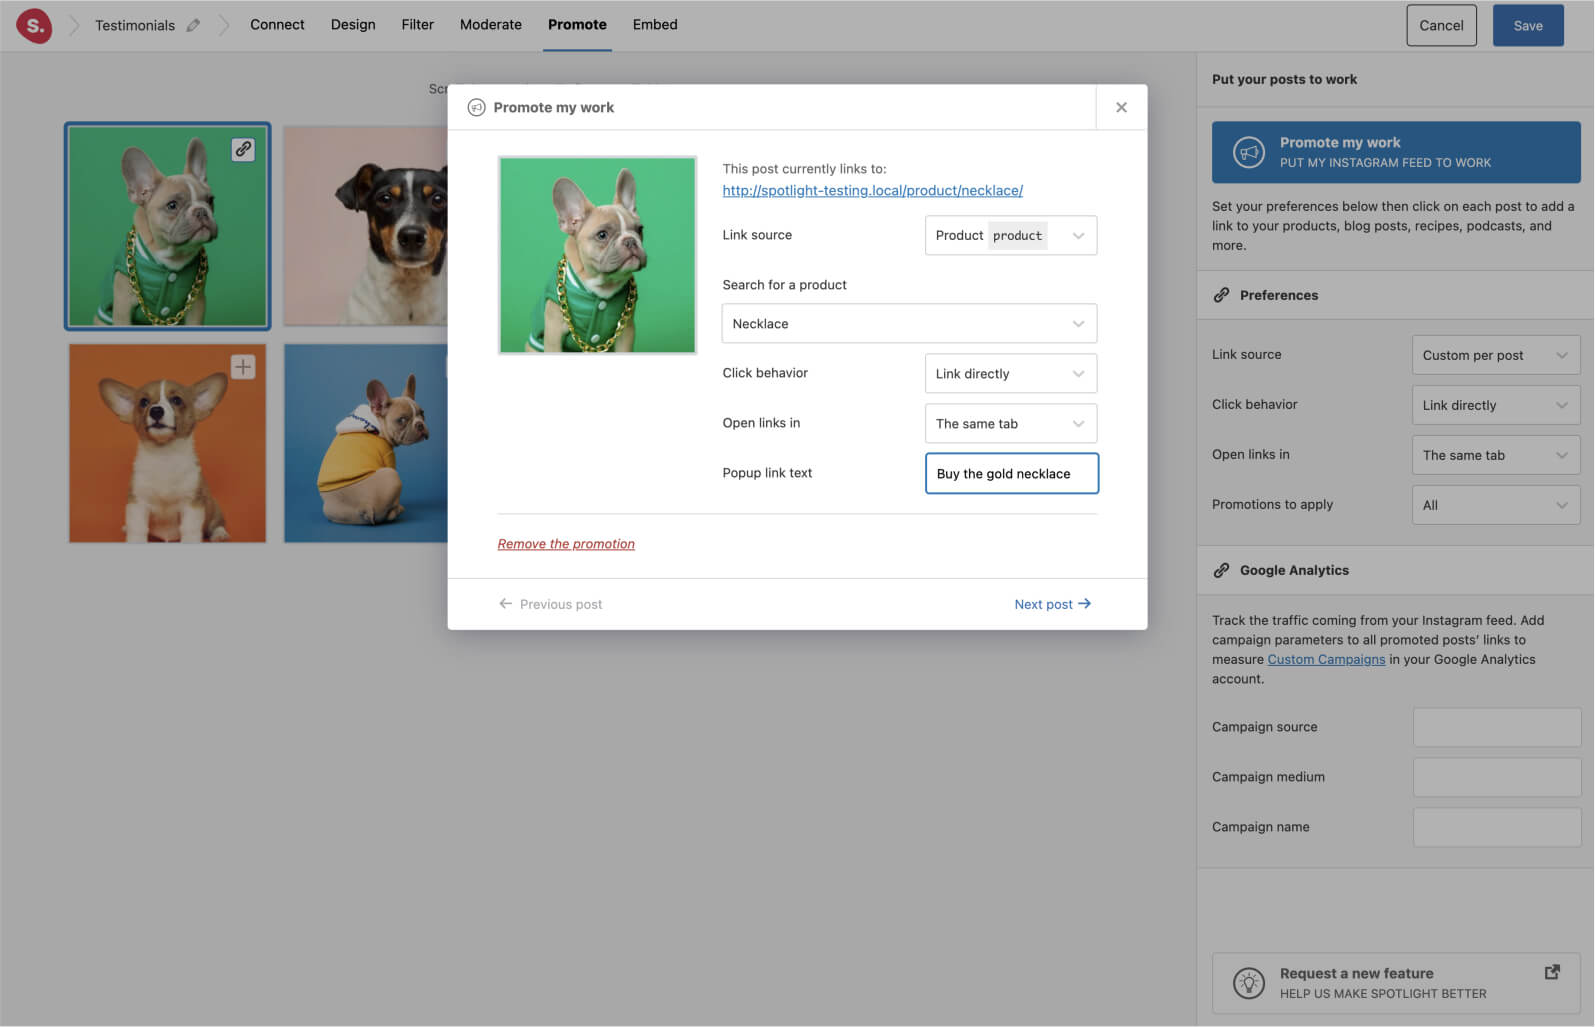
4. Link Instagram testimonials to your products
Before we go ahead and embed our feed, there is one important step to help you get the best ROI on your Instagram feed. Spotlight lets you link your Instagram testimonial posts to your products!
In this example, I’ve linked my Instagram posts to the featured WooCommerce products with corresponding button text for each one.
5. Embed your feed
You’re done! All you need to do now is to embed your feed. This can be done using the generated shortcode or the dedicated block.
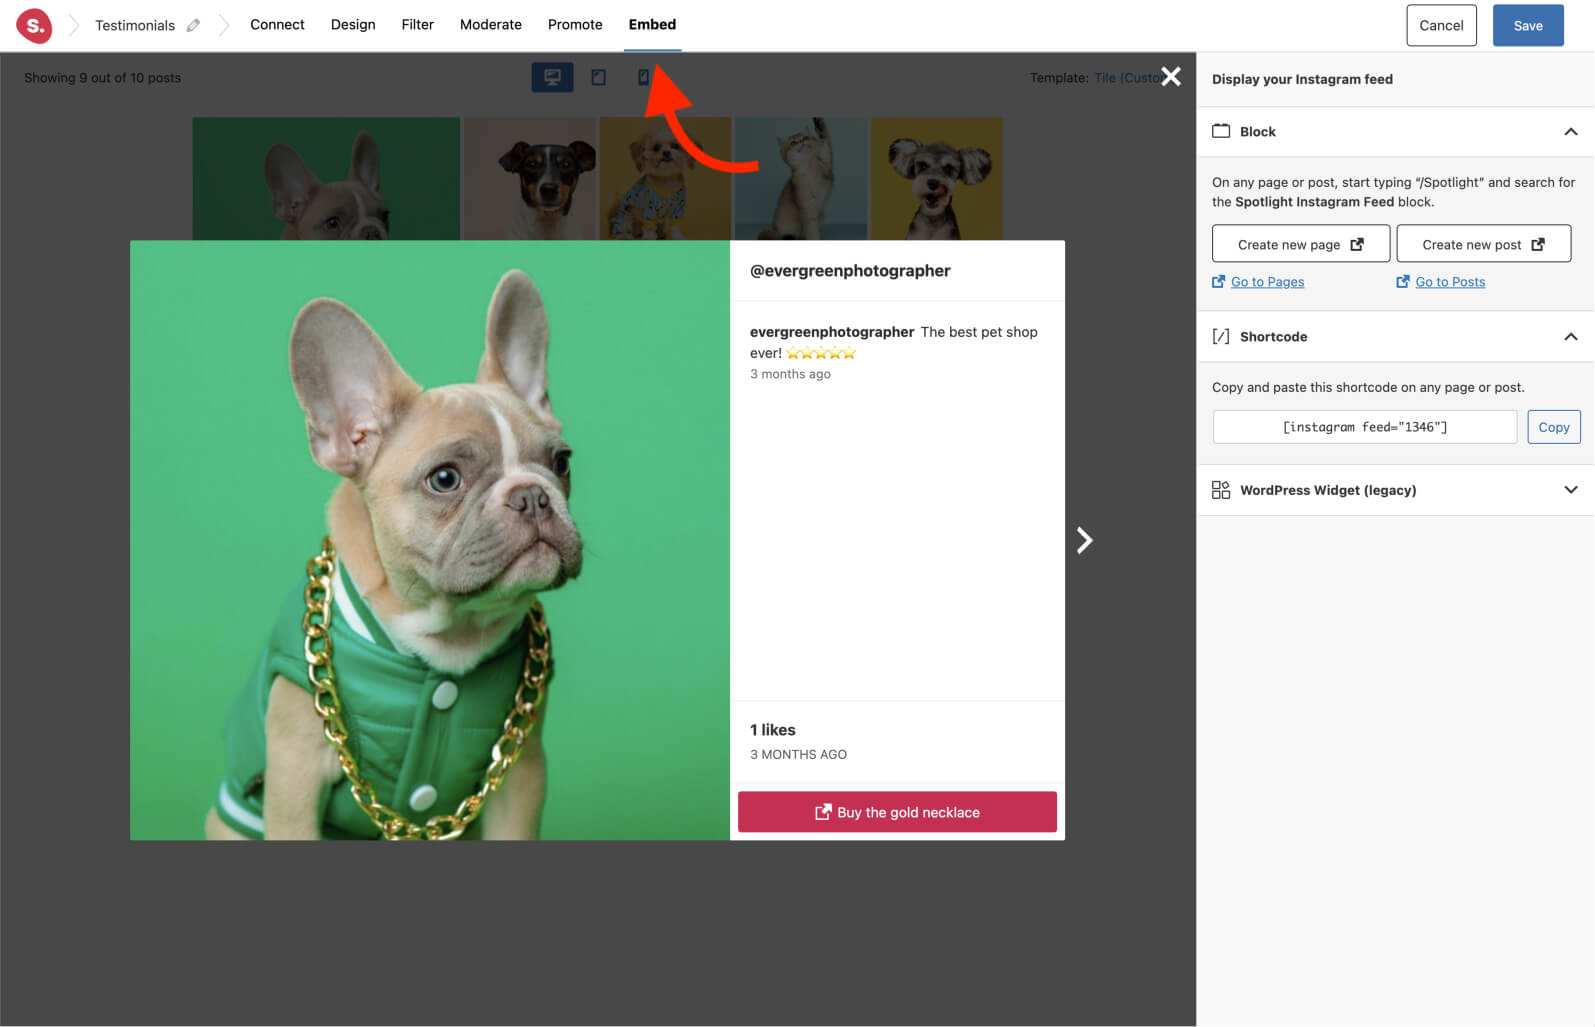
Note: If you’re using Elementor as your page builder, you can use the dedicated Elementor widget for Spotlight.
The end result!
There you have it! Your Instagram testimonials feed is now live and completely responsive.
Conclusion
When it comes to establishing your brand’s credibility and increasing its appeal, Instagram testimonials can be a powerful tool. They provide social proof and reassure potential clients that they are making the right choice by doing business with you.
One effective way to showcase your happy customers and demonstrate the value of your product or service is through an Instagram testimonials feed. By featuring images of satisfied customers and highlighting how your offering addresses their specific needs, you can effectively communicate the worth of your brand.
If you’re building a product website, it’s crucial to keep these factors in mind. Luckily, with Spotlight, creating a testimonial feed has never been easier. You can quickly and easily feature your clients’ experiences and bring their stories to life on your website.