Do you want to display multiple Instagram feeds on your website? Are you looking to add different feeds with Instagram posts from one or more Instagram accounts, or perhaps even a hashtag feed?
You’re in luck! With Spotlight, you can create as many Instagram feeds as you like from an unlimited number of Instagram accounts or public hashtags. It’s really quite simple and only takes a few clicks.
In this tutorial, I’m going to take you through the steps you need to take to create and display multiple Instagram feeds from one or many Instagram accounts or hashtags using both the free and premium versions of the Spotlight plugin.
Let’s get started.
How to display multiple Instagram feeds using Spotlight
Install and activate Spotlight
To start off, let’s install the Spotlight plugin. The free version can be found from the WordPress plugin directory. Go to Plugins > Add New and search for Spotlight in the search bar:
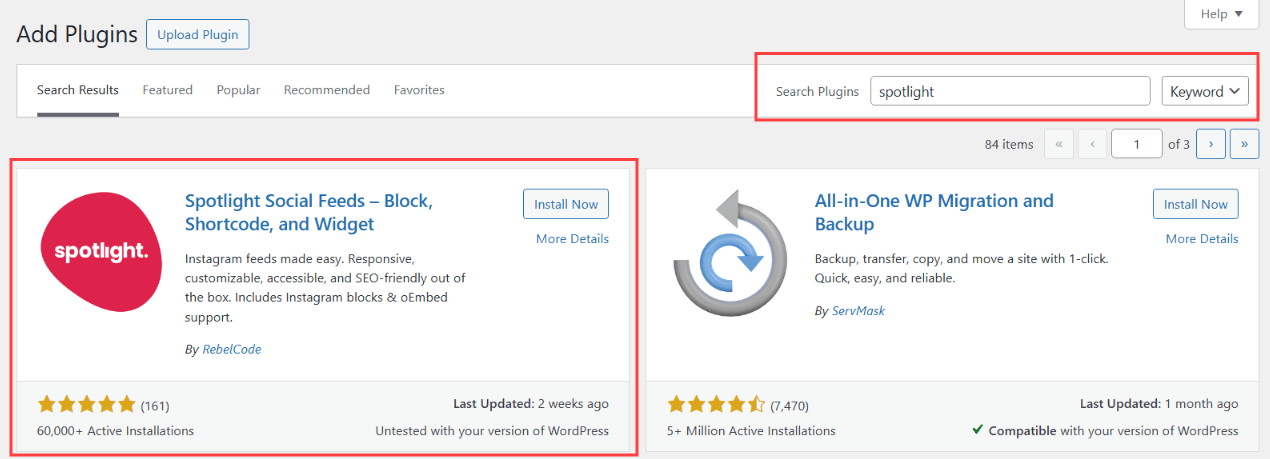
Select the Install button, followed by Activate. Spotlight is now installed on your WordPress website.
Connect your Instagram account
Before we start using Spotlight, make sure you’re logged in to your Instagram account on the device you’re accessing your WordPress site from.
Now, we can connect our account to the Spotlight plugin. To use Spotlight, you’ll need a Professional account (a Creator or Business account)
Due to a recent API change, Personal accounts can no longer be connected to Spotlight.
If you have a Personal account, switch to a Business or Creator account. It won’t affect your day-to-day experience within the app, and you’ll get access to more features.
To connect an account, go to Instagram Feeds > Settings > Accounts. Click on the option that says Connect more Instagram accounts.
Spotlight will prompt you to connect using a Basic or Advanced option or to connect a client’s account using a private access token.
The difference between a Basic and an Advanced account is that a Basic account connects your professional account directly to Spotlight through Instagram, doesn’t require a Facebook Page, but doesn’t support hashtags or tagged feeds.
In contrast, an Advanced account requires your professional Instagram account to be linked to a Facebook Page before connecting it to Spotlight.
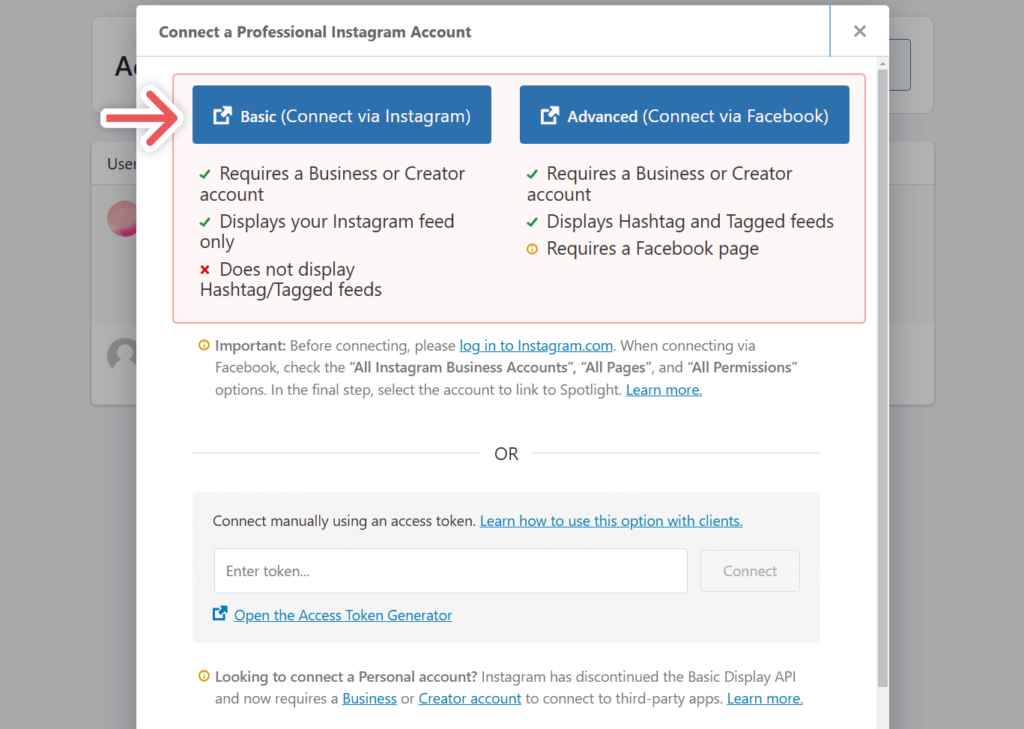
Note: You can connect multiple Instagram accounts to Spotlight and decide which option to use on a feed-by-feed case.
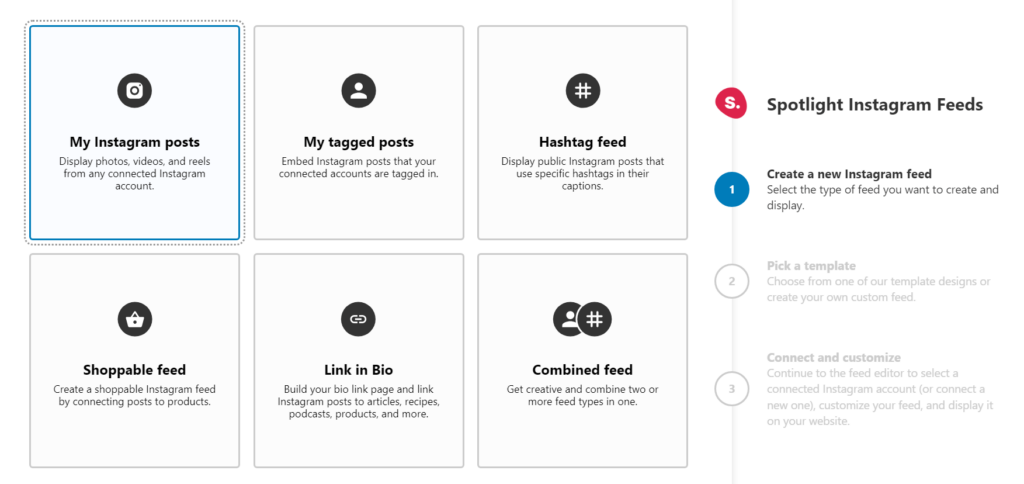
Next, go to Instagram Feeds > Feeds > Create a new feed. On the next page, select what kind of feed you want to create:
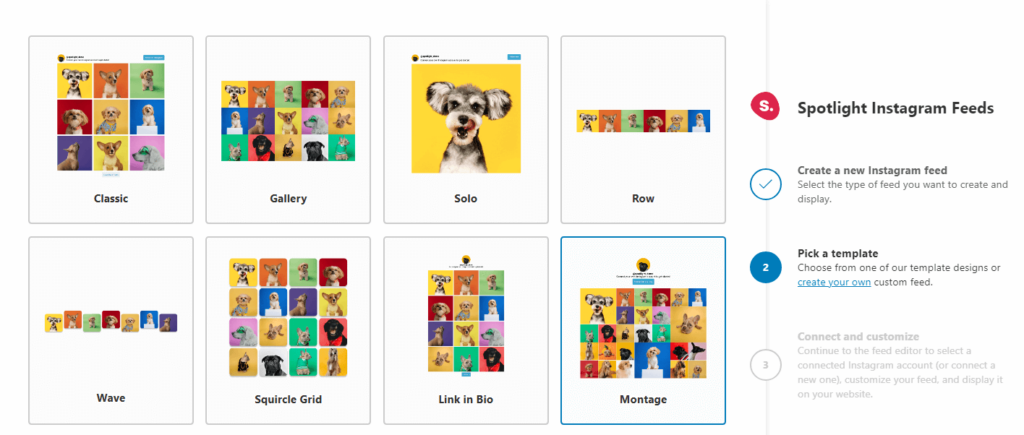
Now go ahead and pick a template. You’ll do this for every feed you set up on your website, so don’t be afraid to experiment with different layouts:
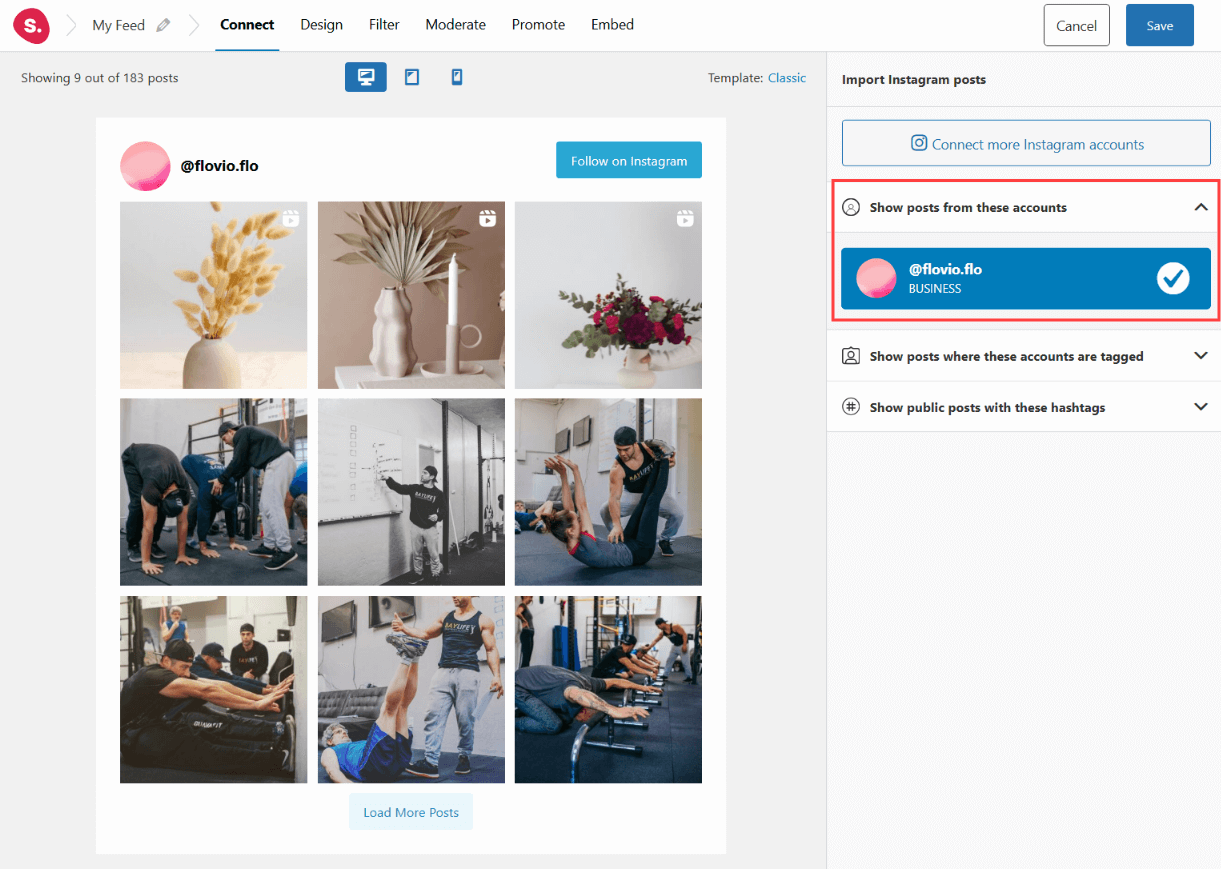
With the feed ready, go ahead and select any of the accounts you’ve connected to Spotlight. Your feed will now automatically show up within Spotlight’s live preview editor and you can start tinkering with its style:
Set up your footer feed
For our next feed, we’ll create something for the footer. My current theme has a footer that is split up into 3 sections.
I want to display my Instagram feed in the first section, my latest posts in the central section, and some text to introduce myself in the third section. Here’s a quick preview of how that’d look:

Due to the horizontal nature of my footer, I want to create a 3×2 grid for my Instagram feed. Switch over to the Design tab and here you will find over 40 customization options.
For this footer feed, I’ve set the number of columns to 3 and the number of posts to 6. I’ve also set my posts to be ordered by date (Most recent first) and the feed to have 0px outside padding.
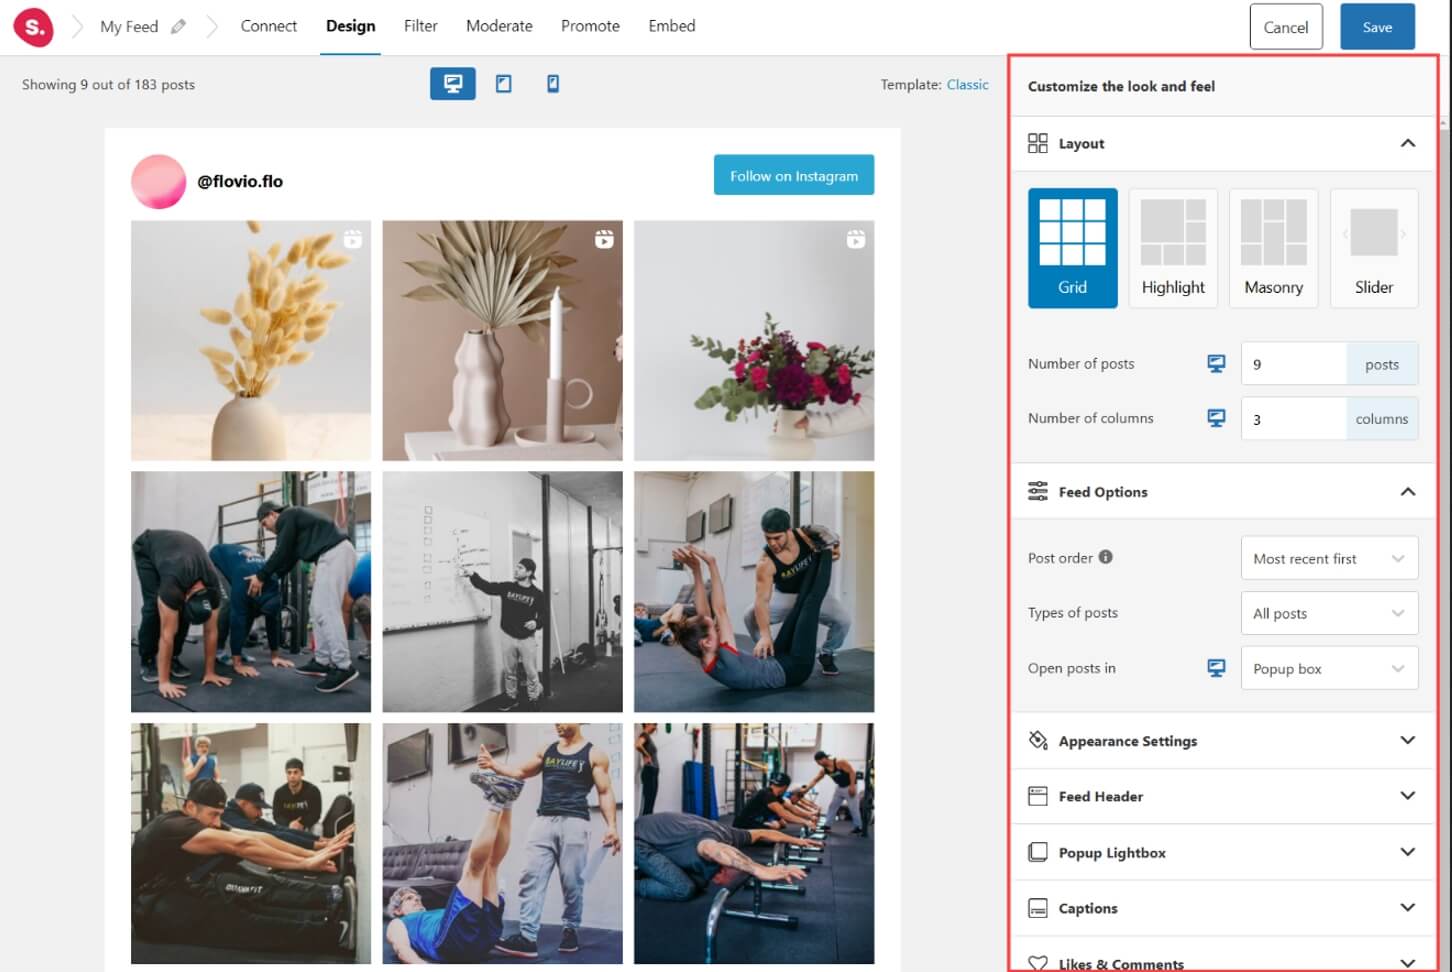
Since my feed will be showing within the footer, I want to have the feed’s background color take on the same color as my footer section. For this reason, I set the background color to transparent. I also set the header and Load More buttons as hidden.
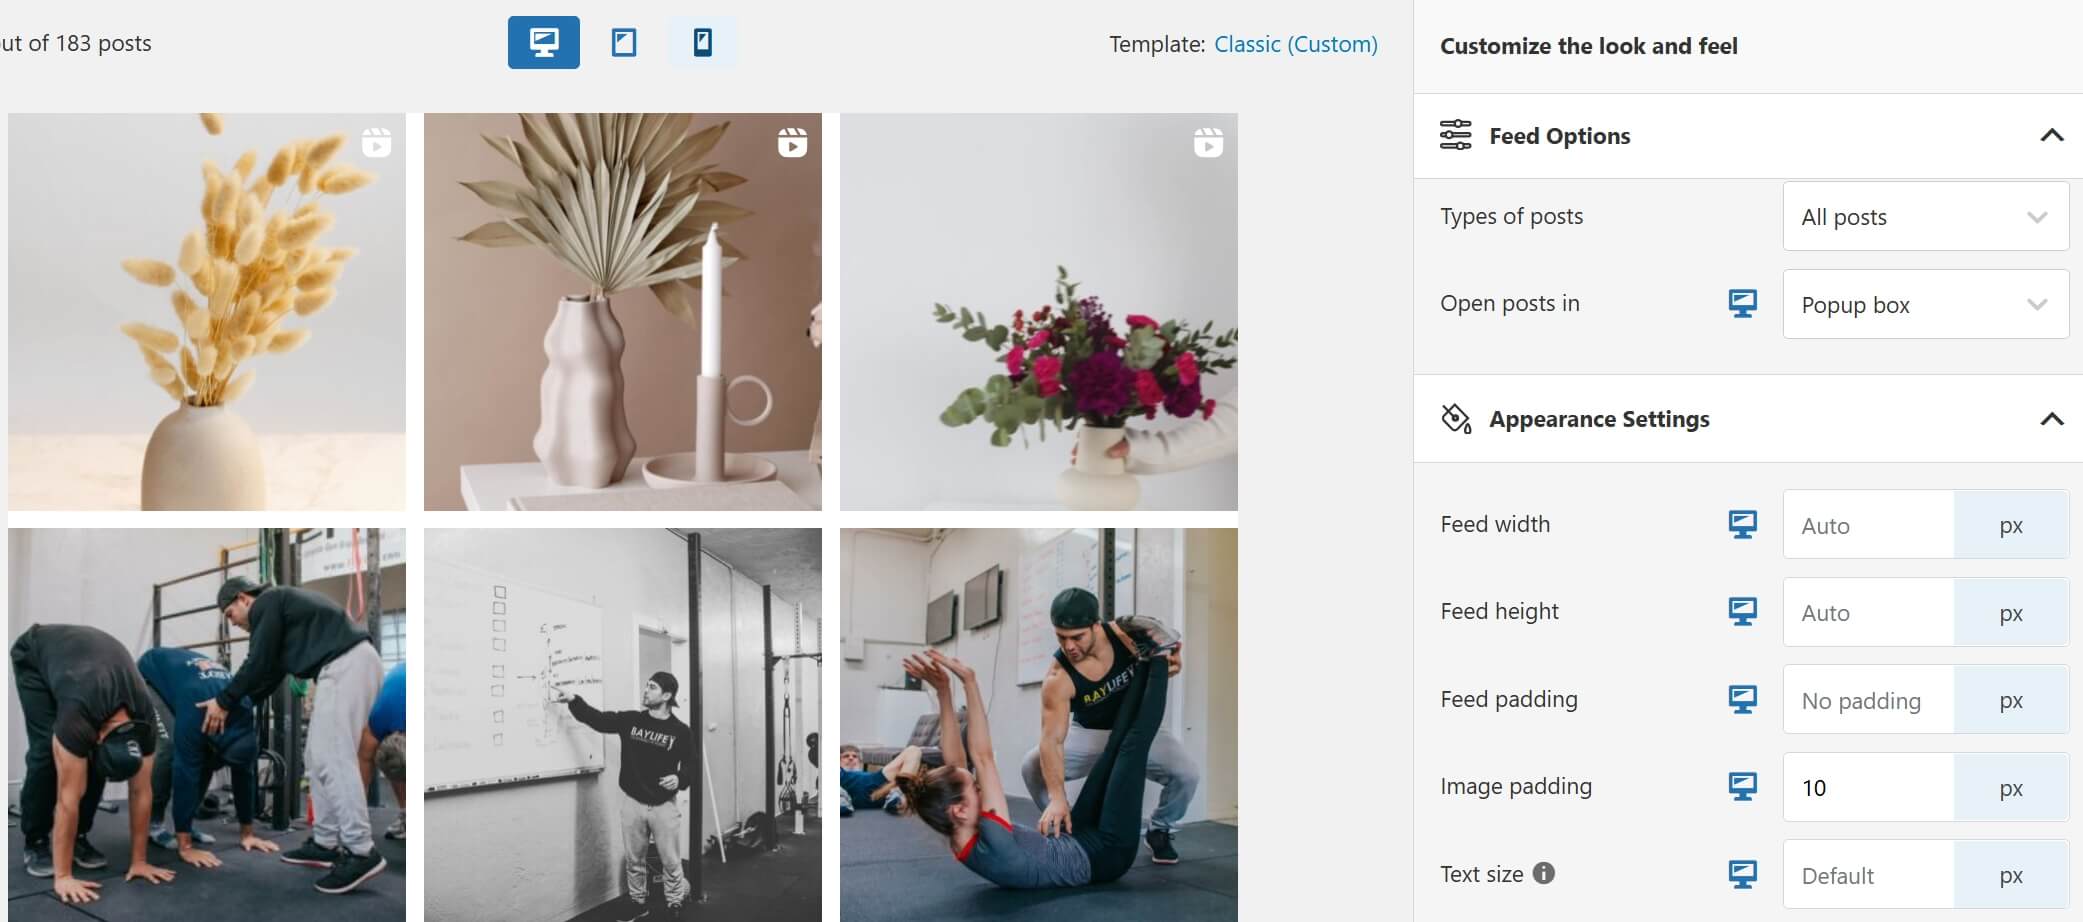
Note: Remember to save your feed using a memorable name
To display your feed within the footer, go to Appearance > Widgets and look for the footer section you want to customize. Add a Spotlight Instagram Feed Widget or Spotlight Instagram Feed block, depending on the style you’re looking for:
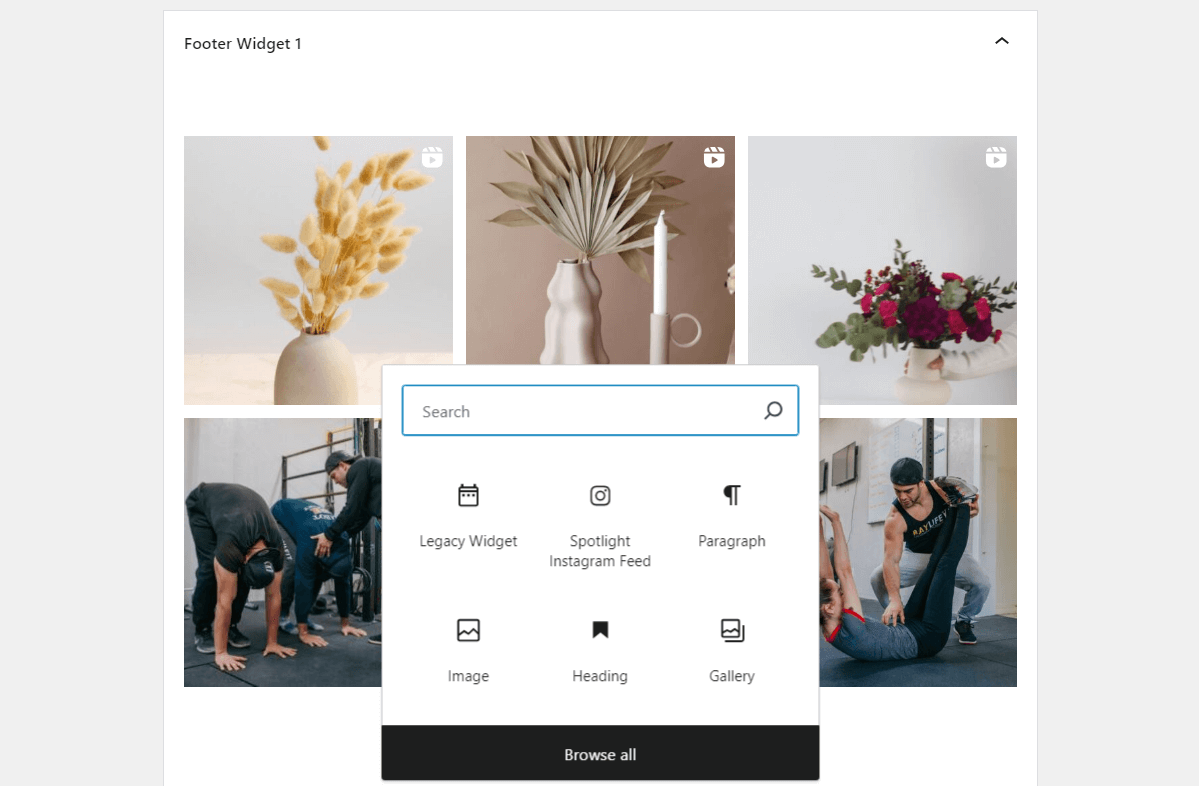
Save the changes to the widget and that’s it. You now have an Instagram feed in the footer and it shouldn’t look out of place if you took a moment to customize its style.
Upgrade to Spotlight’s premium tiers
In the next few sections, I’ll be showing you how to add multiple feeds when using Spotlight PRO. The premium version of Spotlight provides you with additional customization options and features such as the ability to view Instagram stories.
If you wish to continue with the free version, you can still follow along. Please keep in mind that certain features might be unavailable to you. Skip to Set up your sidebar feed to continue the tutorial.
To upgrade to Spotlight PRO, you need to first purchase a license. Once you’ve got your plugin downloaded, go to Plugins > Add New and upload the zip file.
Now install and activate the plugin.
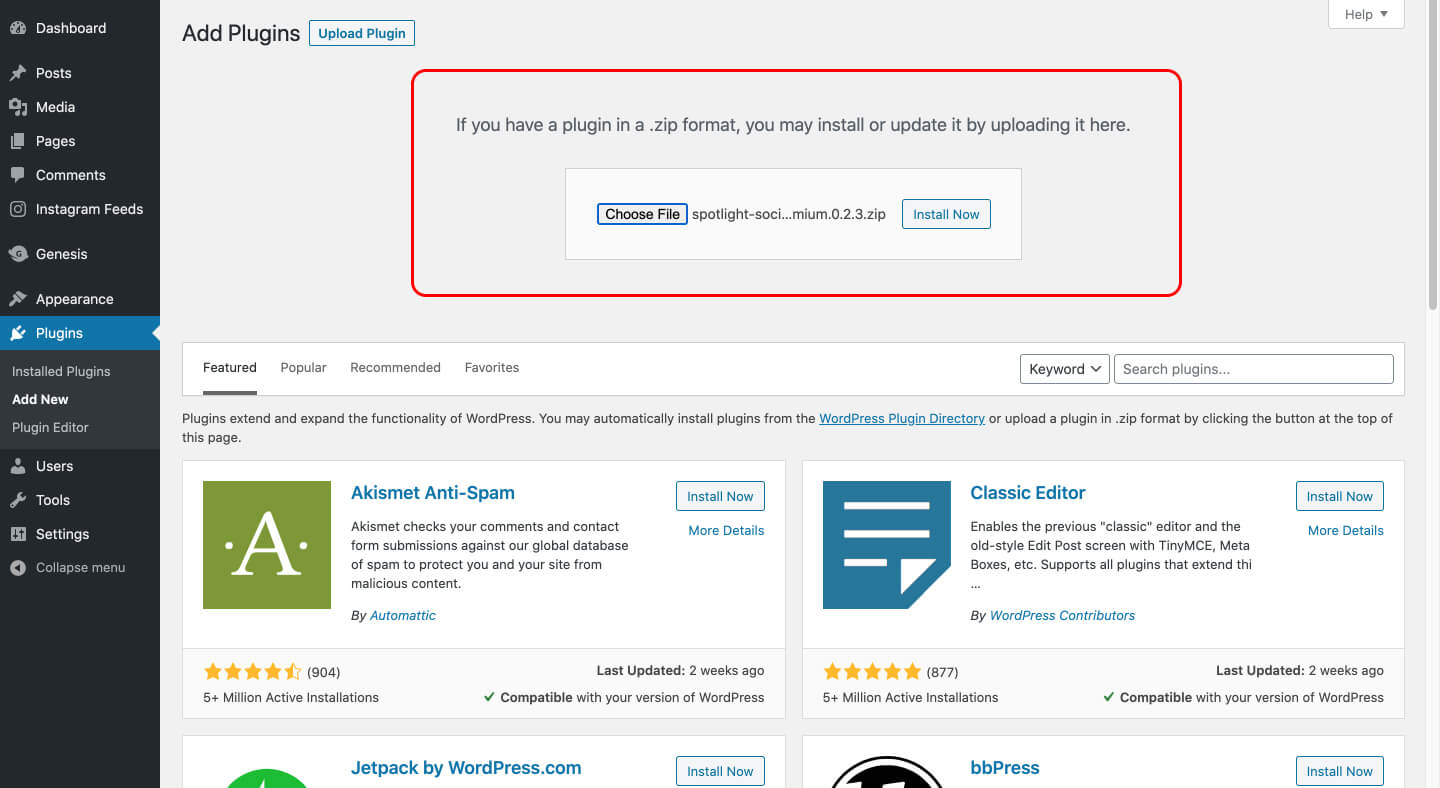
Next up, follow these instructions to activate your premium license. With Spotlight PRO ready, we can take a look at sidebar feeds.
Set up your sidebar feed
In order to set up a new feed, go to Instagram Feeds > Add New, select your account, and go to the Design tab.
For this feed, I opted for a Highlight feed with 6 posts and 3 columns. I’ve also highlighted every 4th post.
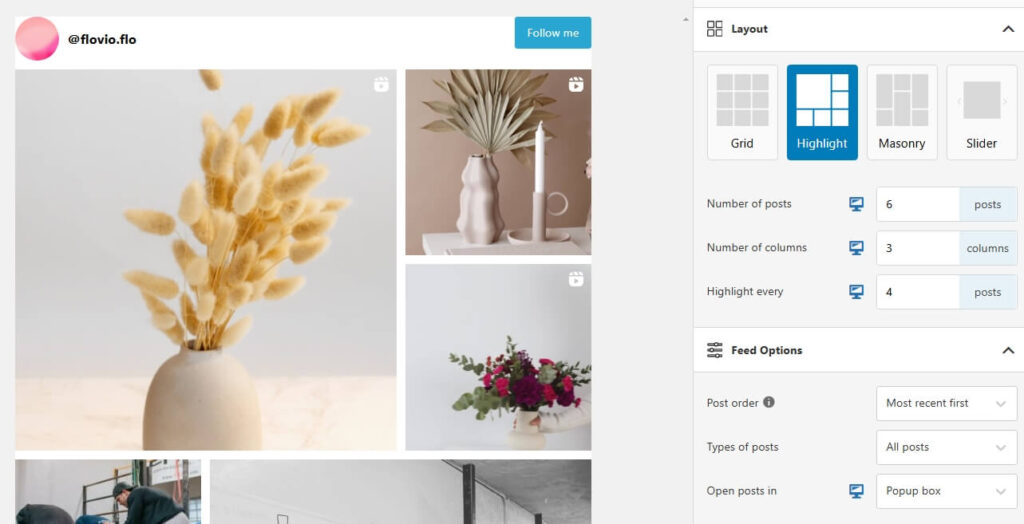
I’ve set the background color for the feed and header to transparent and the header to be centered. Spotlight lets you add a custom bio within the Design tab too, so you can add it here if you skipped that step before. Next, customize your Follow button and hide the Load More button:
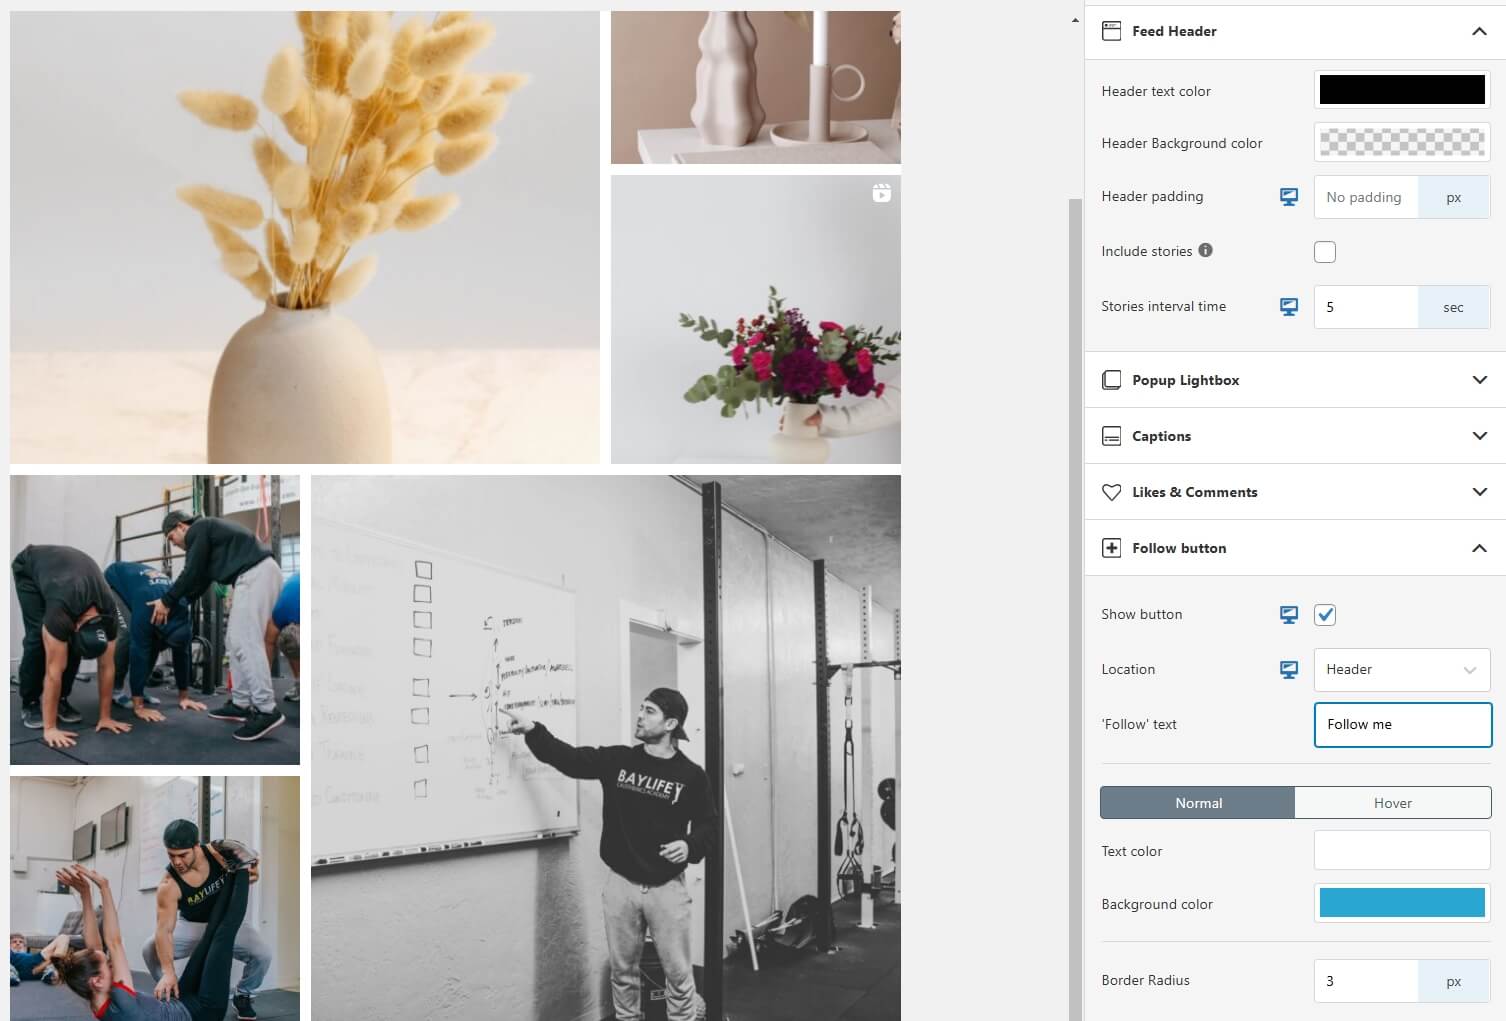
There are some photos in this feed that I don’t want to show in my sidebar. To hide them, go to Moderate and select the images you want to hide. It’s really that easy!
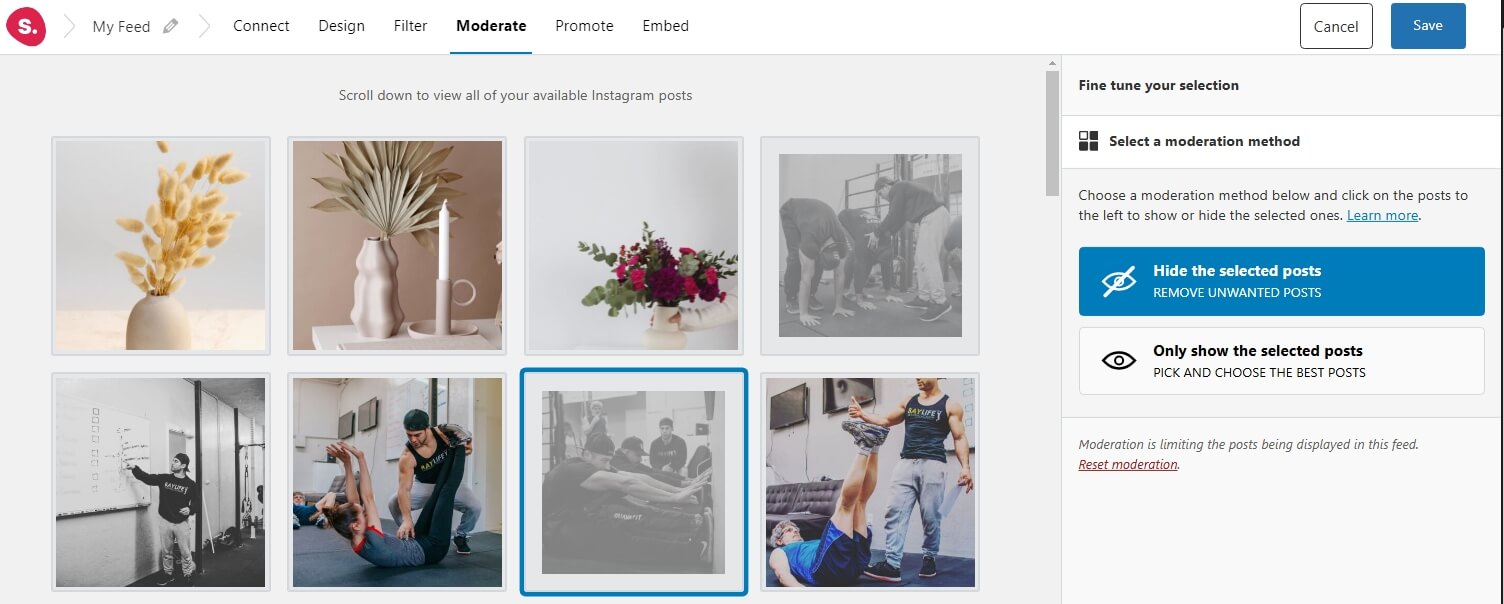
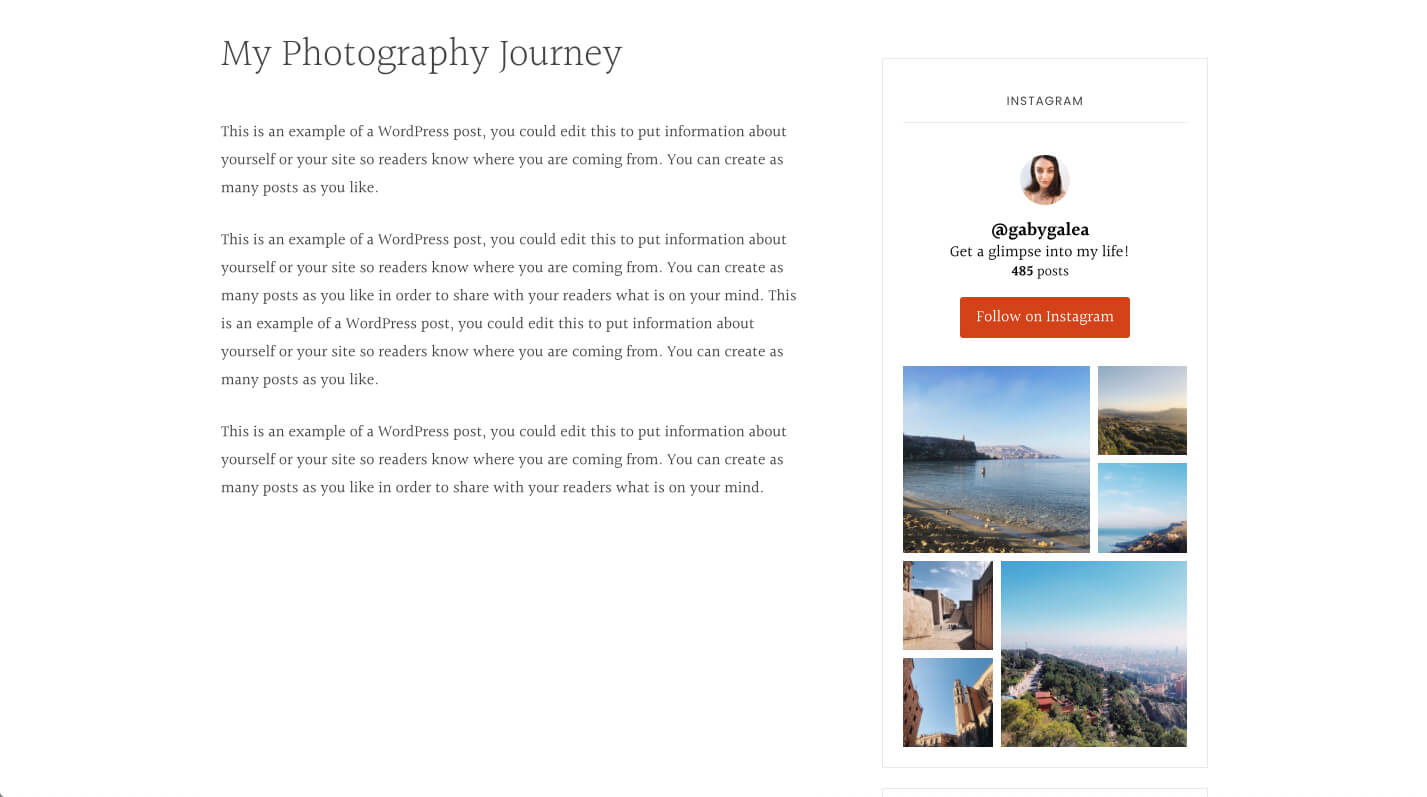
Give your feed a friendly name (I named mine Sidebar Feed) and hit save. Next, go to Appearance > Widgets and add a Spotlight feed block on the sidebar widget.
Your feed should now show up in your sidebar!
Set up your post feed
For this feed, I opted for the Masonry layout with 10 posts and 5 columns. This layout displays your posts in their entirety.
I’ve also hidden the header and set the Load more button option to black:
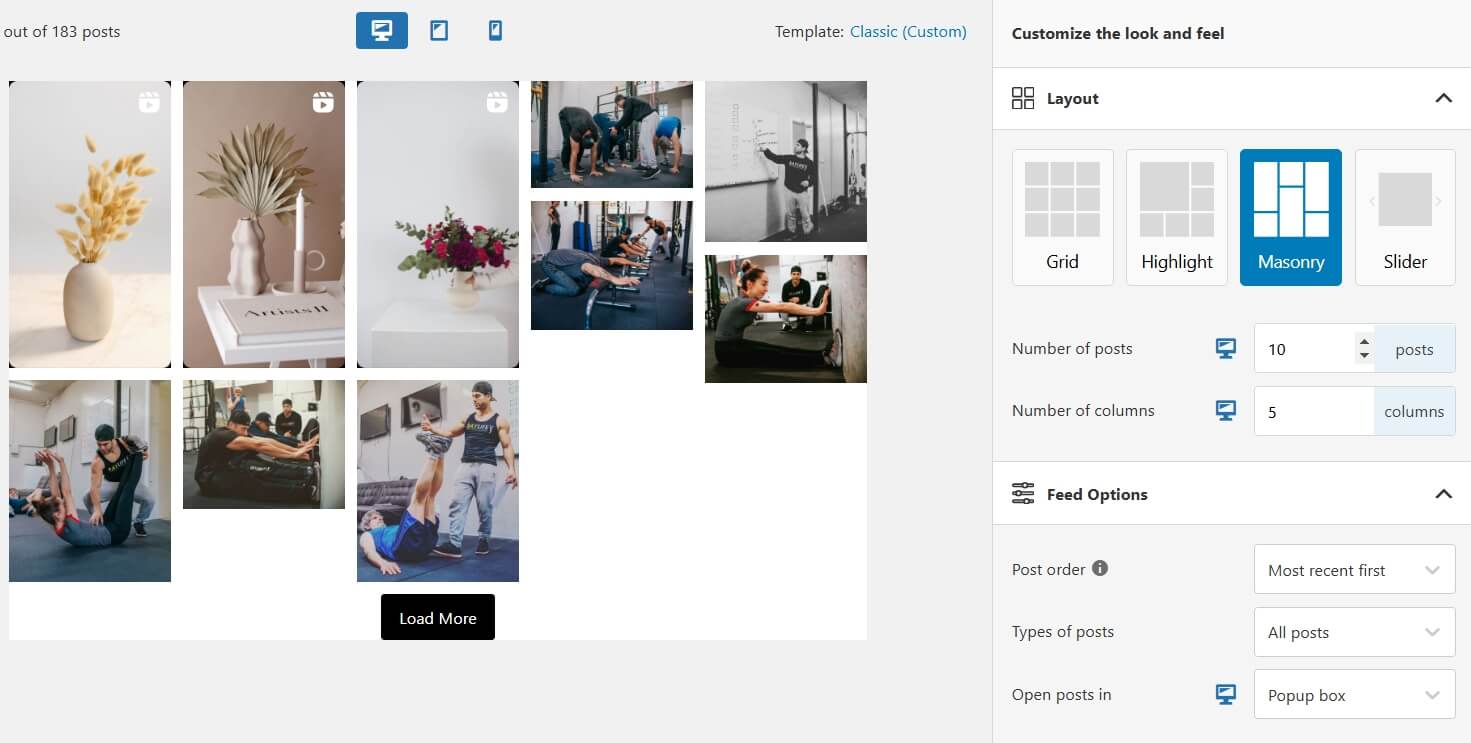
Remember to always check out the responsive version of your feed. In this case, I’ve opted for a 3 column layout with 6 posts on mobile devices:
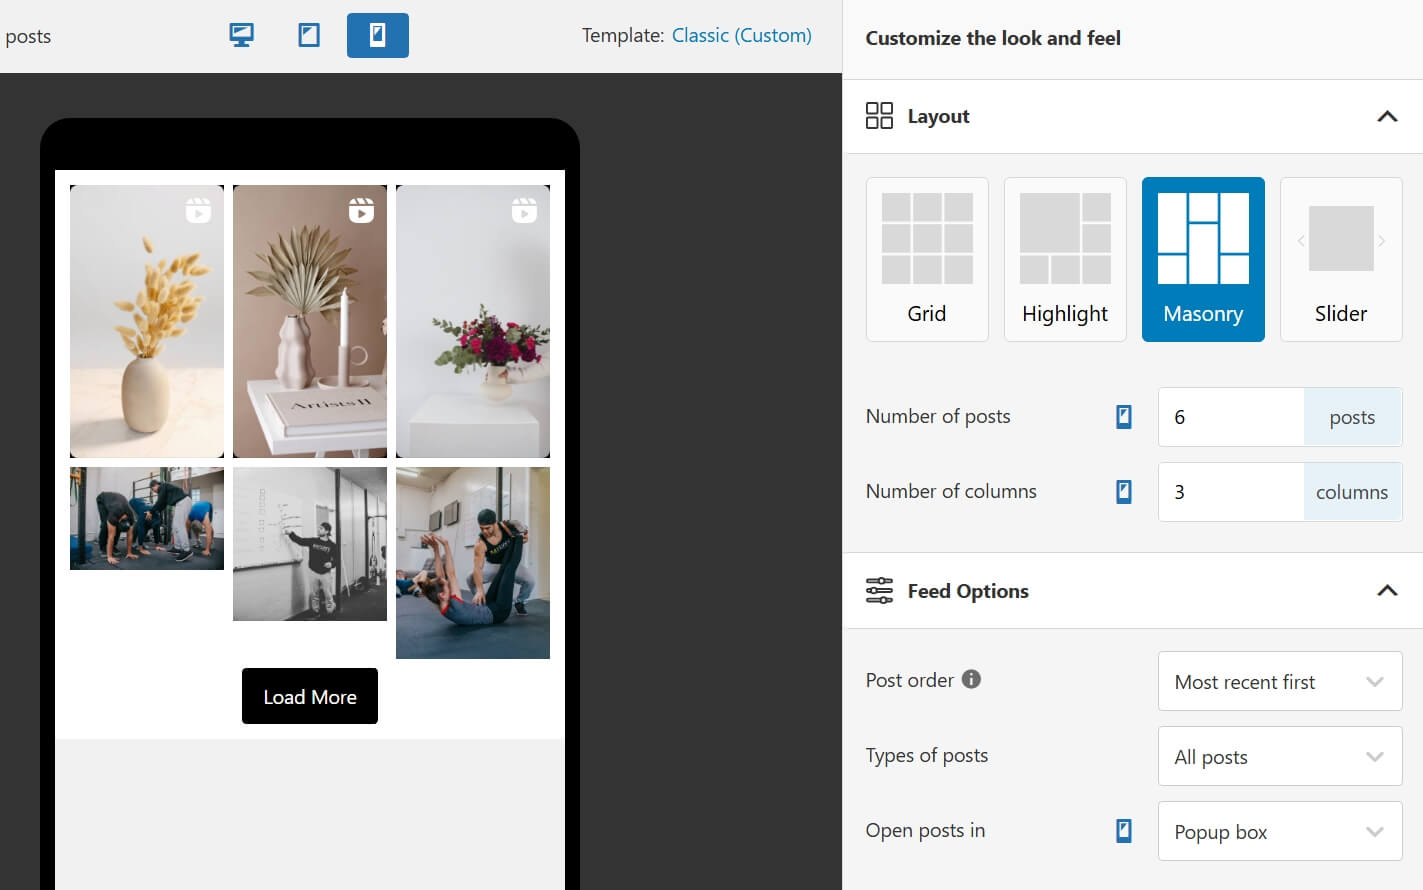
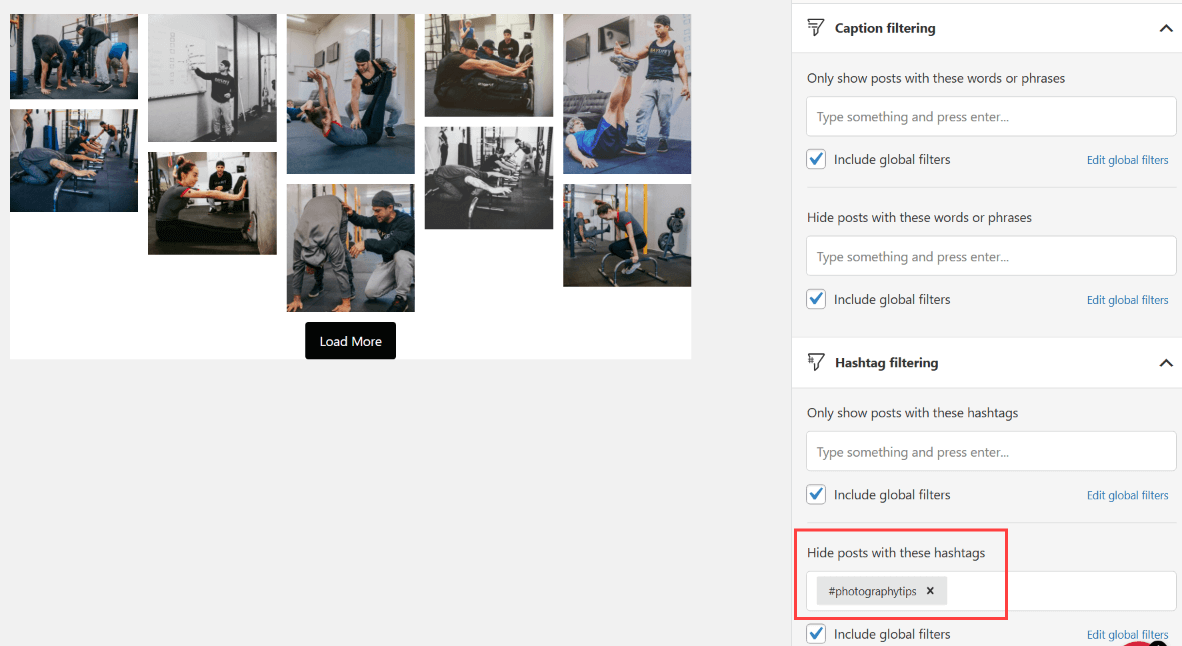
Some of my Instagram posts feature specific types of content, like photography tips. If these pictures share a hashtag on Instagram, I can hide these items from a Spotlight feed using the Filter options.
To hide these posts, go to the Filter tab and scroll down to Hide posts with these hashtags. I’ve added a #photographytips hashtag and instantly, the posts disappear:
Remember that on top of using blocks, Spotlight also generates a unique shortcode for every feed. You can see this shortcode by going to the Embed tab while editing a feed.
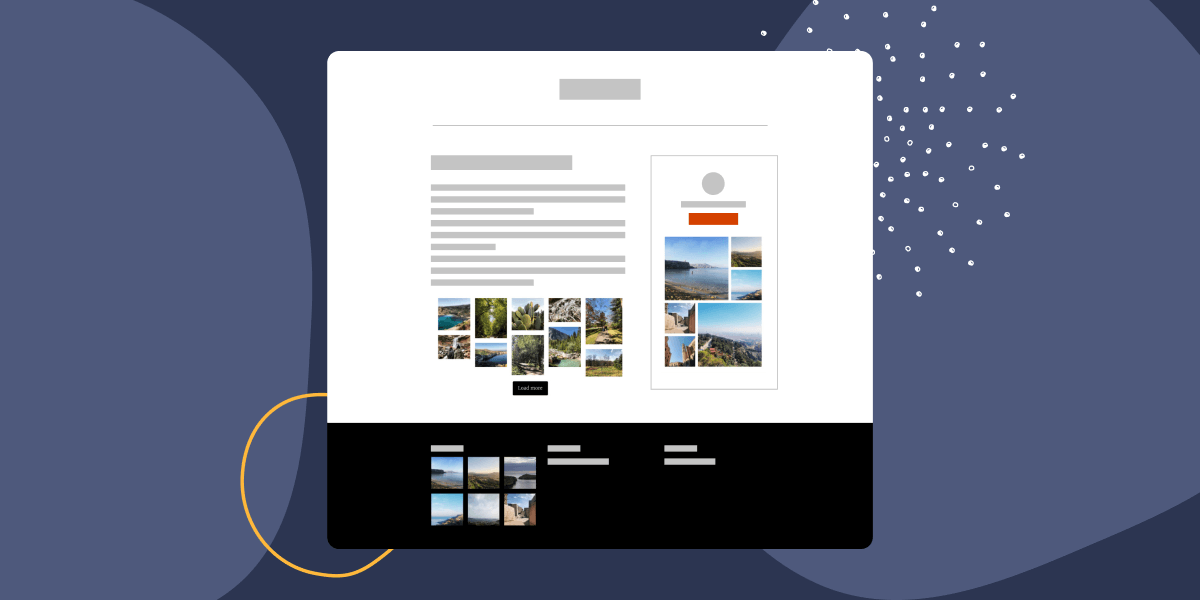
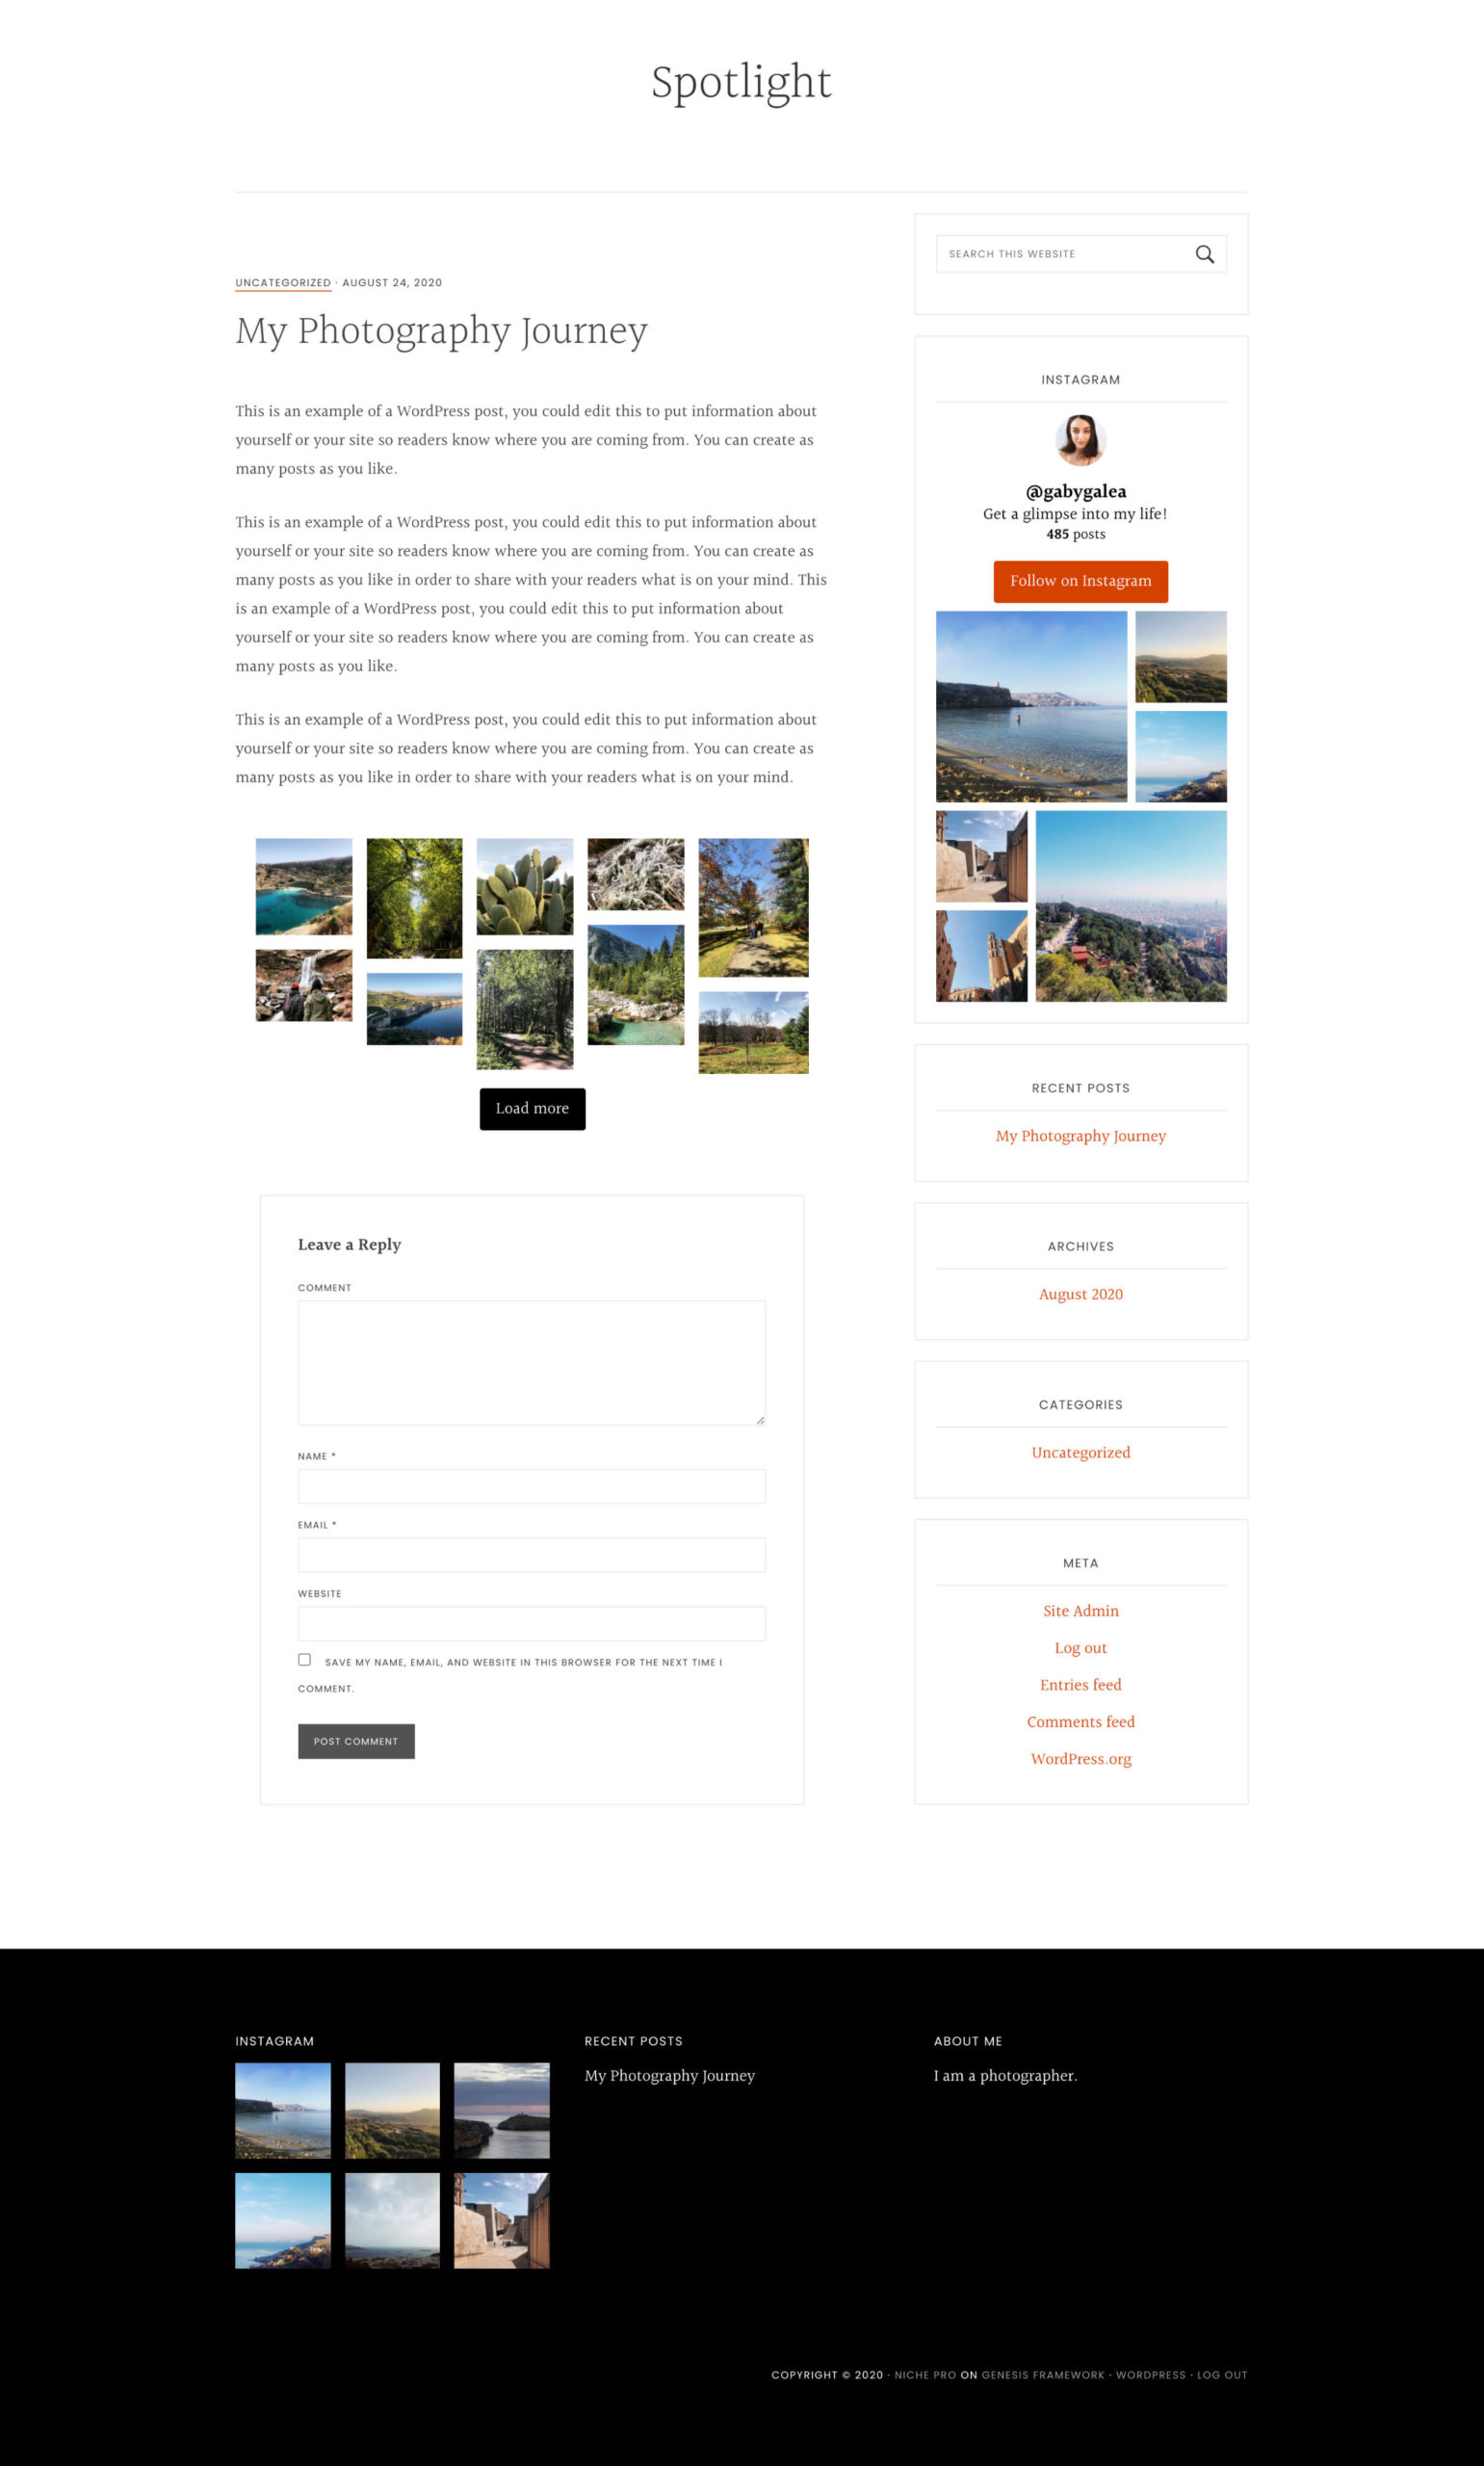
Use either a shortcode or a block to place the new feed and that’s it. This is what my website looks like now, with unique feeds on the sidebar, footer, and the main body of a post:
Conclusion
In this post, we’ve gone through the process of displaying multiple Instagram feeds on a single website. With Spotlight, you can display as many feeds as you’d like and connect an unlimited number of Instagram accounts or hashtag sources.
This process can be applied to both the free version of Spotlight, as well as the premium version. Spotlight PRO provides you with additional functionality such as added customization options, tagged and hashtag feeds, and finally – filtering and moderation.
Have you used Spotlight to display multiple Instagram feeds? Share some examples in the comments section below and inspire

