In this tutorial, we’ll take a look at how Spotlight can enable you to add an Instagram feed to each and every one of your WooCommerce products on your Elementor website.
We’ll be using dynamic content to achieve this so make sure to download and install Advanced Custom Fields – a freemium plugin that can be found in the WordPress plugin directory.
If you know all about Instagram testimonials and want to skip to the tutorial, click here!
Why add an Instagram feed to WooCommerce product pages?
If you run an online store, you know how important maintaining a good reputation is. Not only does it turn your website into an established and trusted eCommerce shop but it also helps your marketing strategy immensely.
As we’ve seen in our previous post, testimonials and reviews are a great way of boosting reliability among your clients. Once you establish this, it’s an easy path toward generating higher conversion rates for your WooCommerce products.
If you’re asking yourself how you might be able to generate enough reviews for your products, you might want to consider the power of Instagram. Marketers across the board now target Instagram users to essentially market their products at virtually no cost.
Once you’ve got a solid client base, your opportunity to use Instagram as a marketing tool grows exponentially. Start off by asking clients to tag your Instagram account or use a particular hashtag. The next step is pretty easy:
Simply install Spotlight on your website and bring in all those awesome Instagram posts!
Let’s see how you can do that on your Elementor website.
Create a new feed for each WooCommerce product
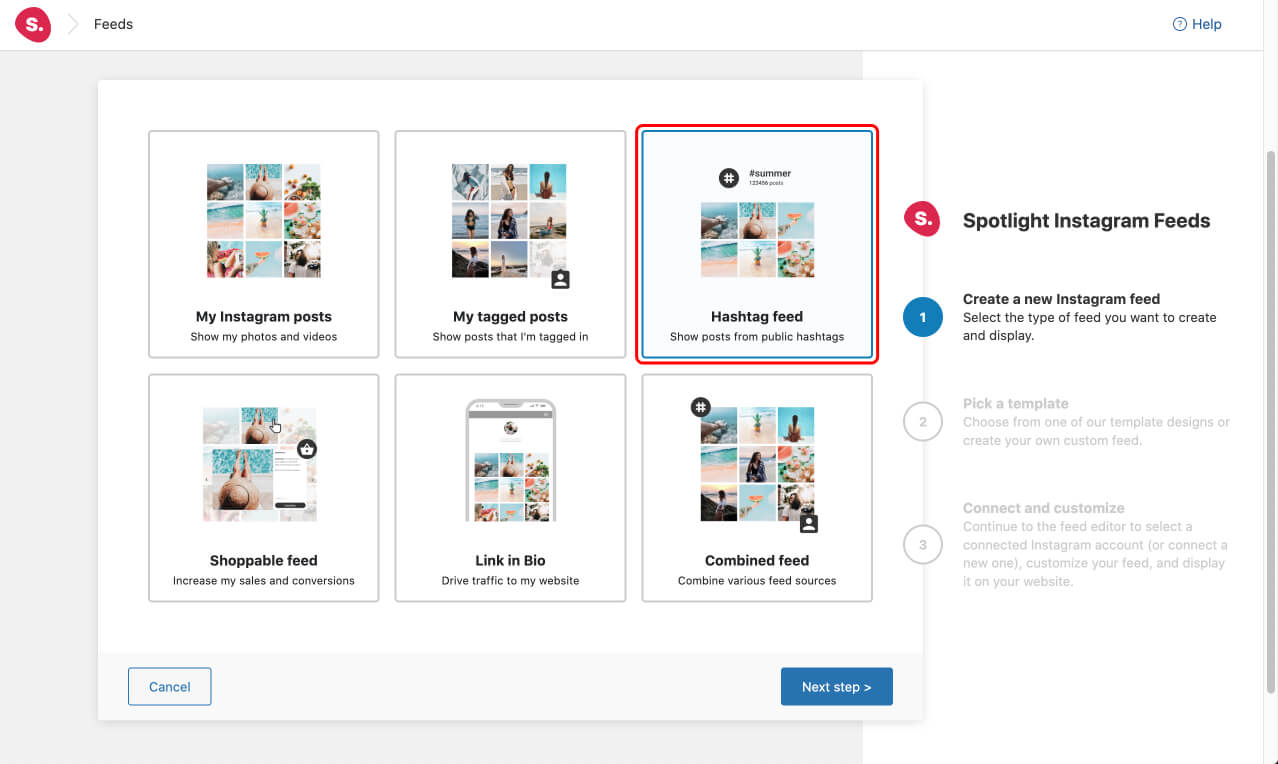
Once you’ve got Spotlight installed and activated on your WordPress website, go ahead and start a new feed. Since we’ll be displaying posts by hashtag, I’ve selected the Hashtag feed type from the first menu.
Of course, you can display any type of feed so feel free to select the type that’s right for you.
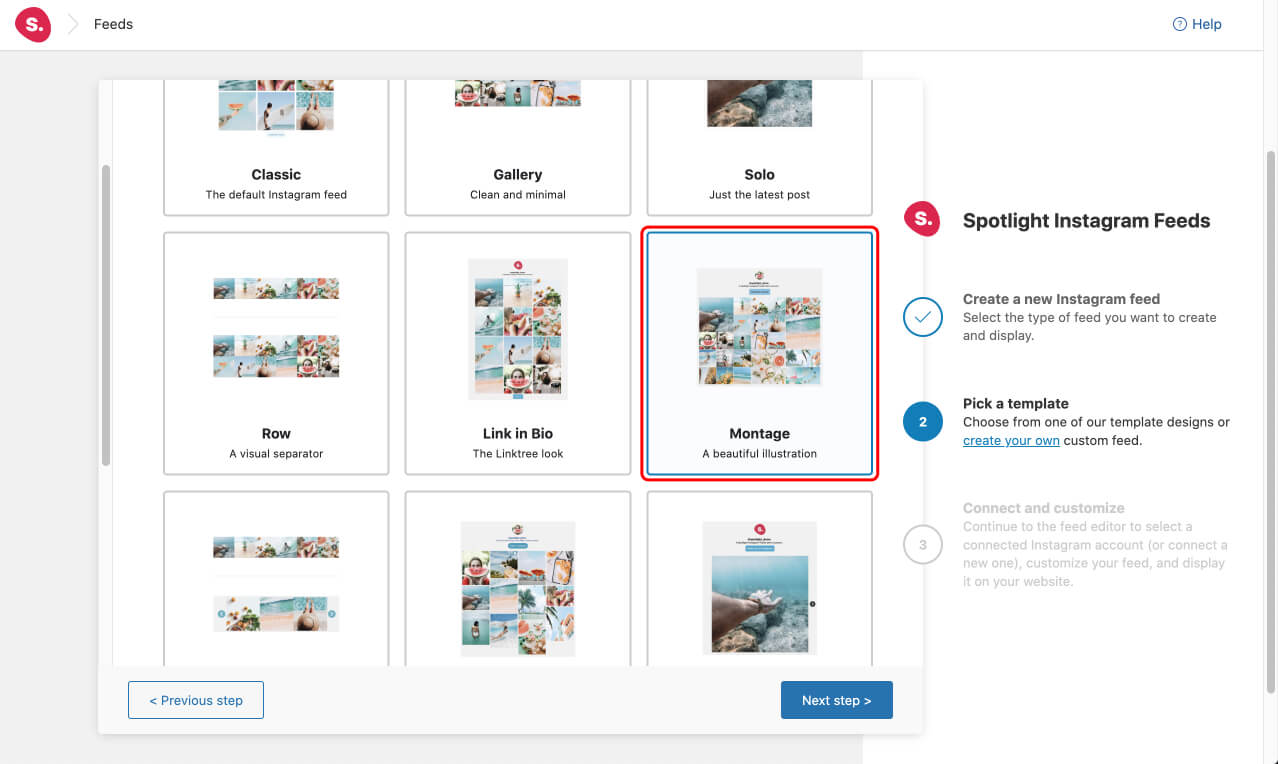
Next, I opted for a montage layout.
Import your testimonials
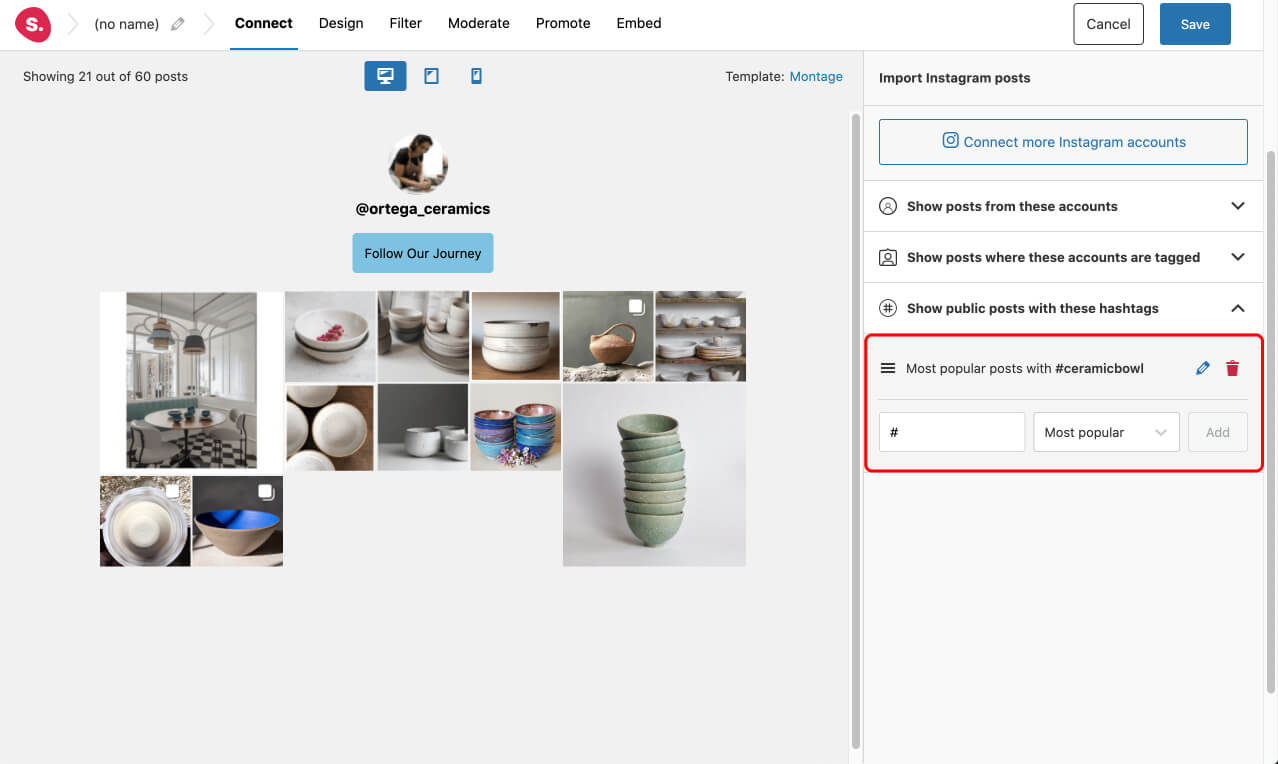
Once you’re in the Connect tab, you will be able to import all those juicy posts from your clients’ Instagram feeds. I’ve asked my clients to add the hashtag #ceramicbowl to their posts so I’m going to go ahead and bring those in.
You can choose between the most recent and most popular posts.
In a few seconds, the posts have been imported and my feed has been updated in the live interactive preview:
Design your feed
Next, it’s time to design your feed by heading to the Design tab.
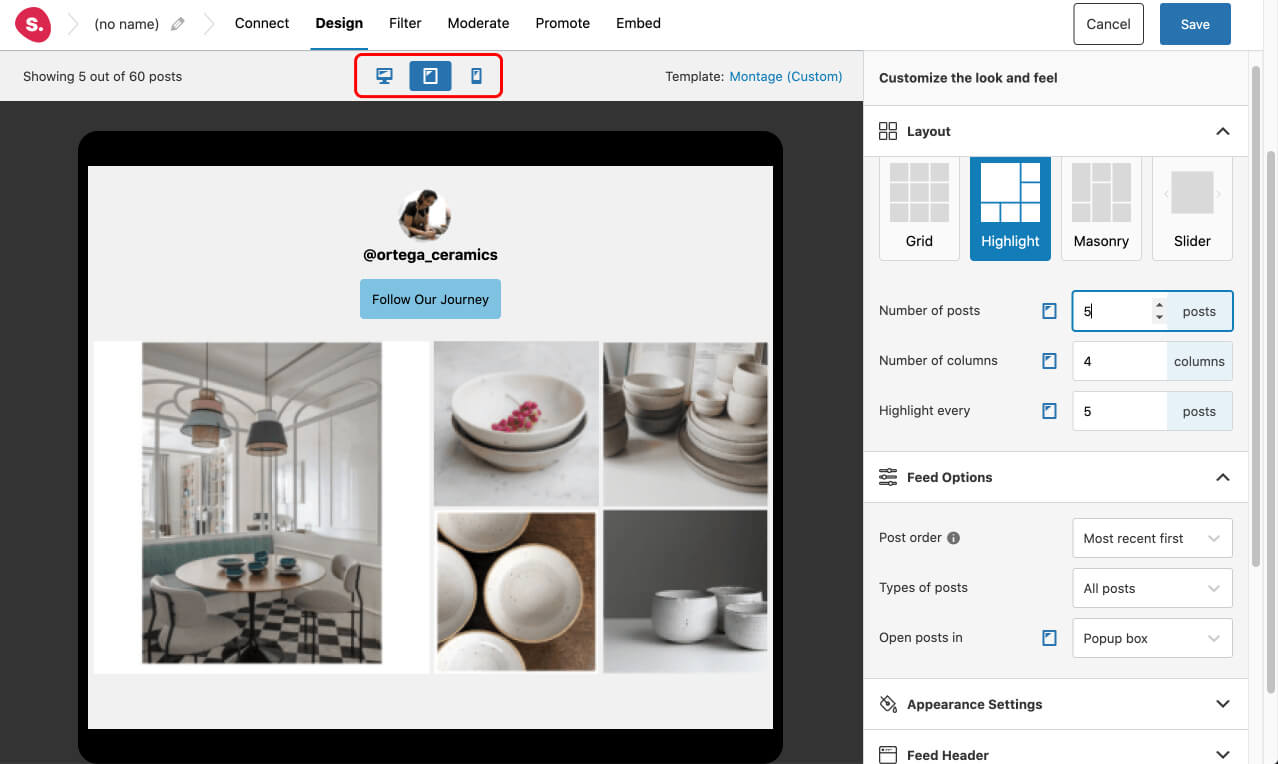
When selecting the Montage layout above, I automatically chose the highlight layout. In this case, I’ll make some adjustments to have 6 columns on desktop. To achieve the layout pictured below, simply set the highlight to show up every 3 posts.
This will give you 2 larger images, one on either end of the feed, and 4 smaller ones in the center:

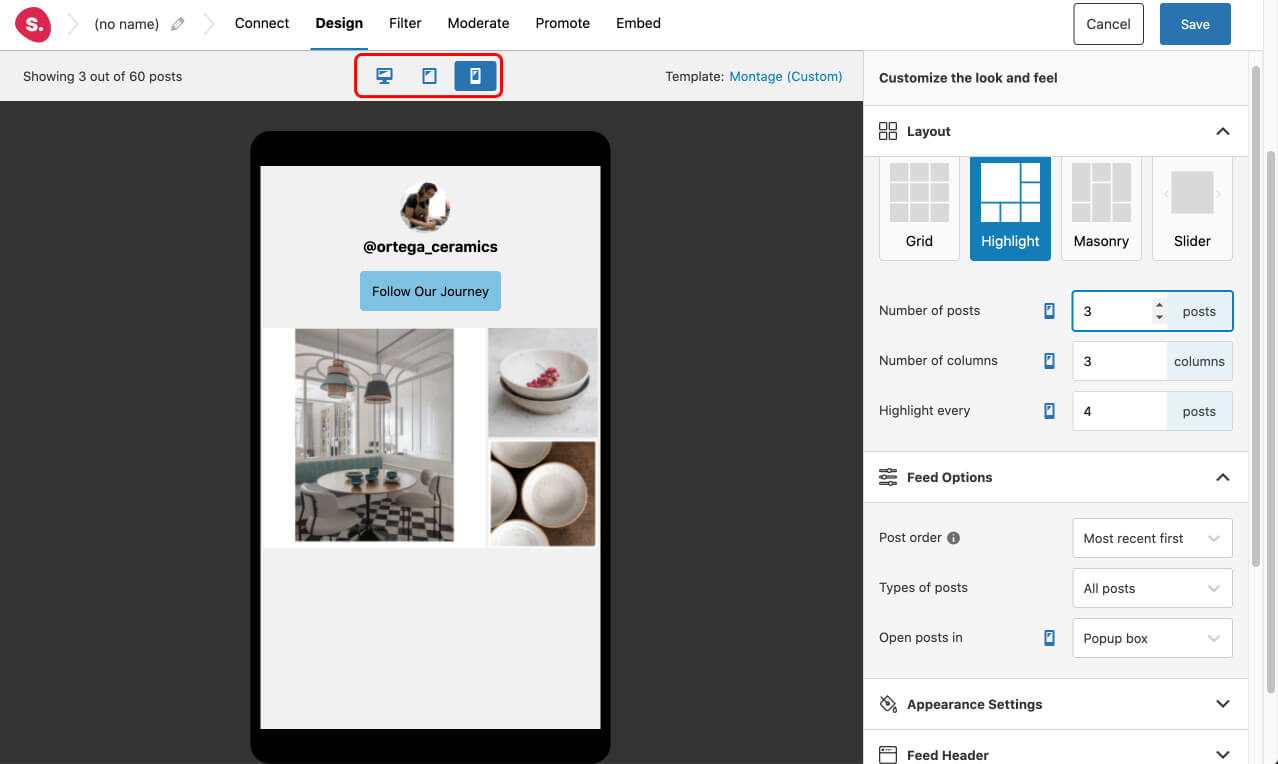
Switch between tablet and mobile views by selecting the icons at the top center of your screen. Then you can set a number of customization options to design your ideal feed for each device.
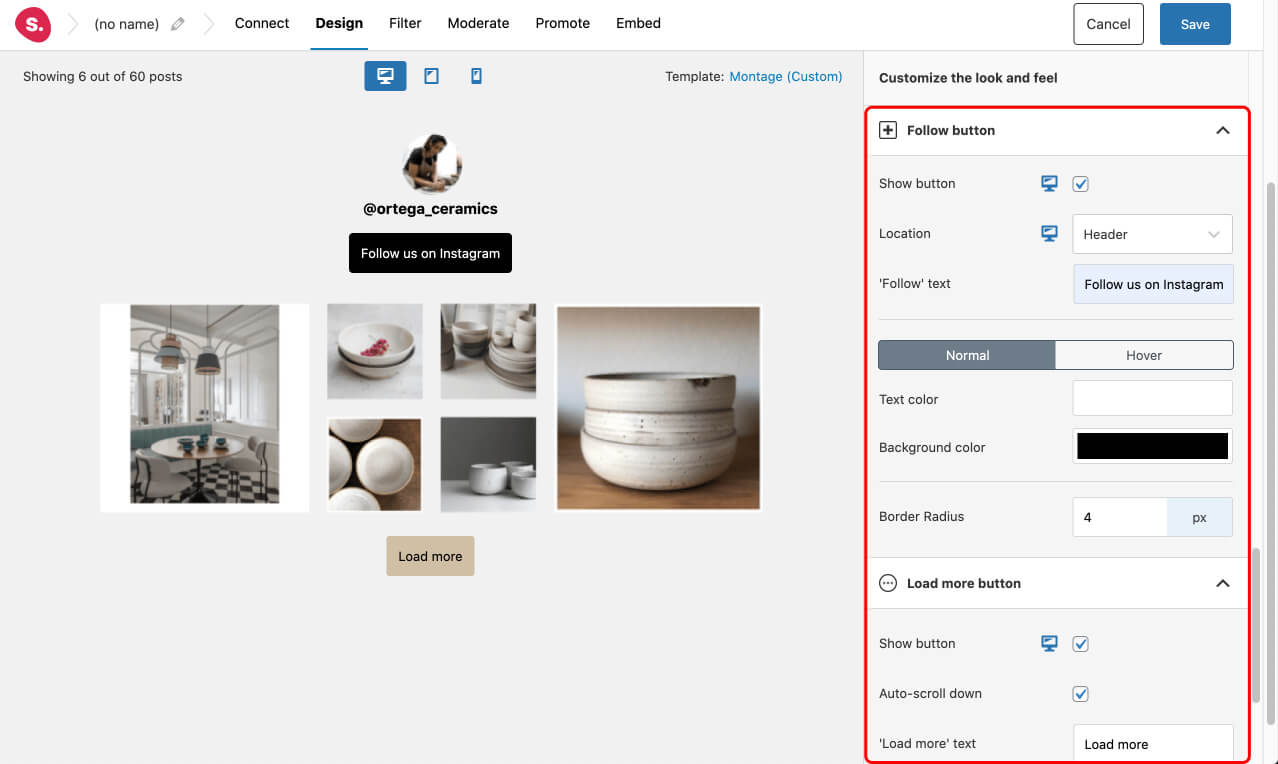
Adjust the buttons and spacing to match your theme and choose your header format. In this case, I’ve gone with the pre-designed centered header and transparent background.
Filter and moderate your feed
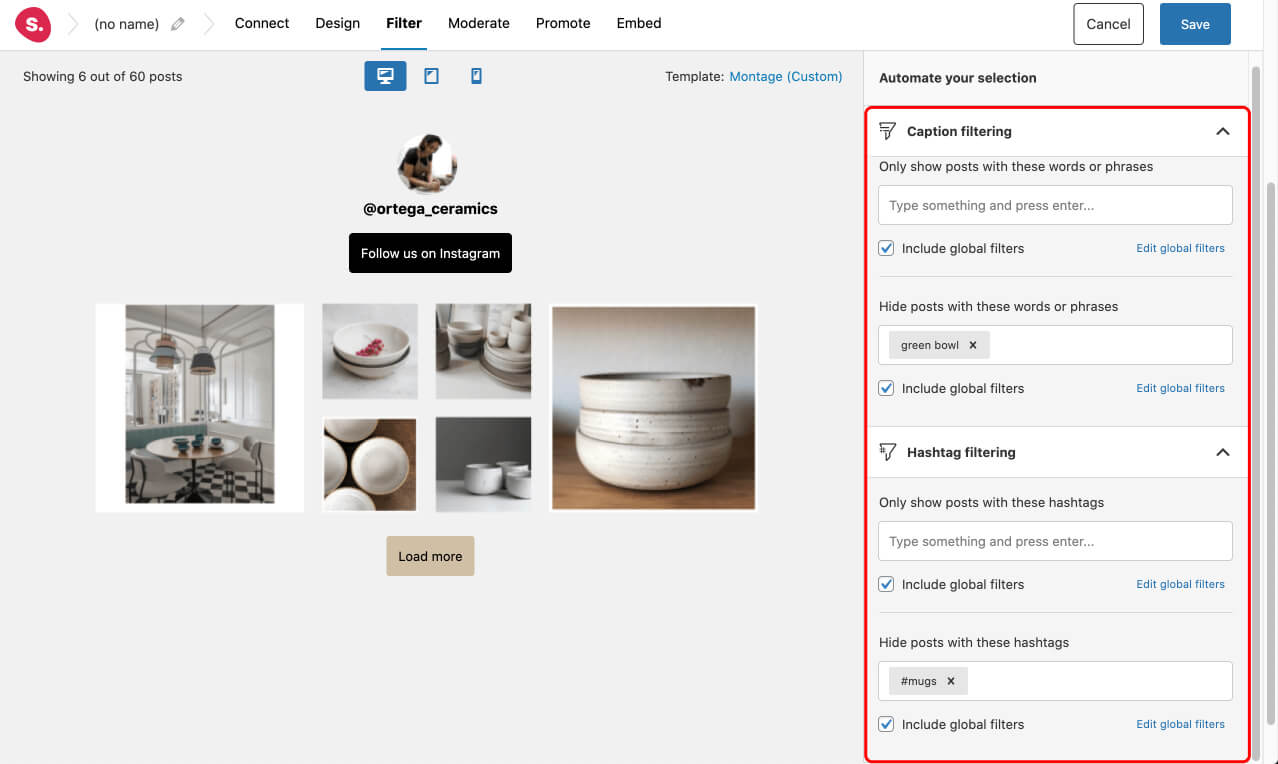
Now you might want to filter your feed from displaying specific images and videos. You can do this in two ways:
1. Caption and hashtag filtering
Hide or show posts that have a specific hashtag or caption:
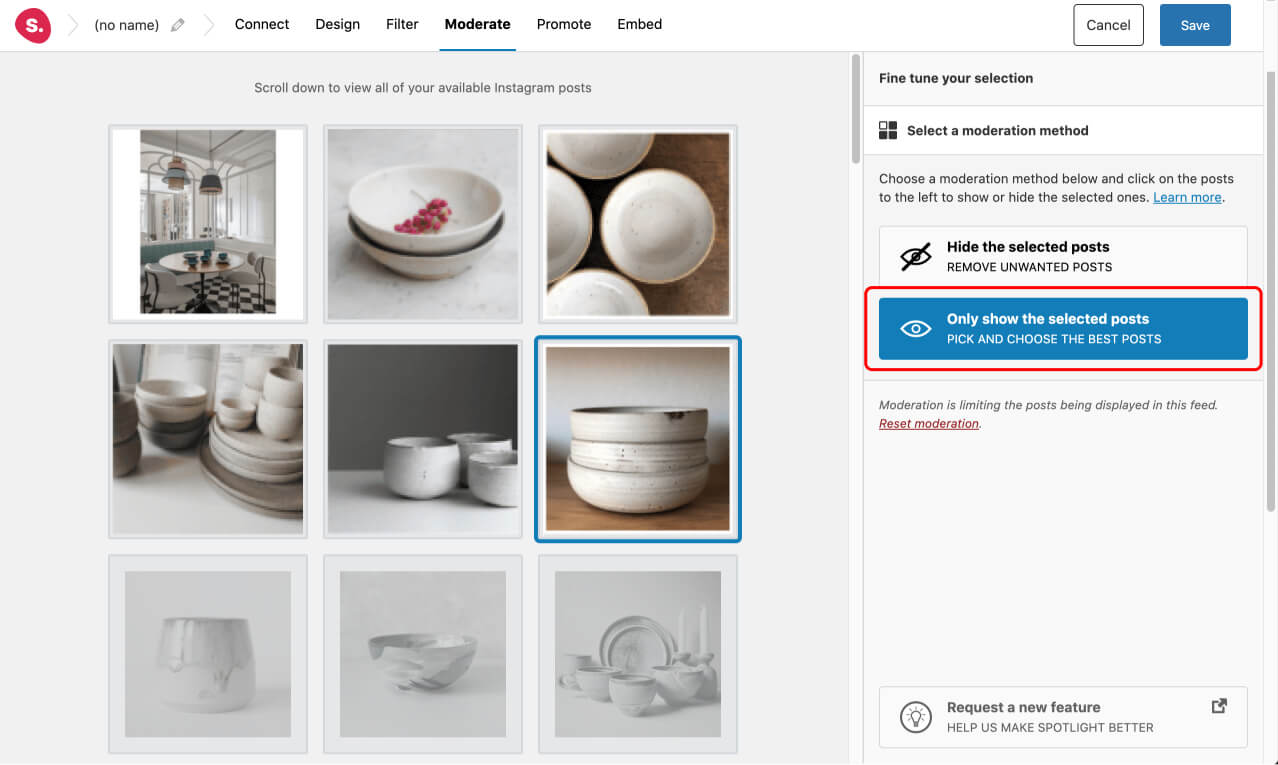
2. Visual Moderation
Manually select the posts you wish to hide or show:
How to embed your feed
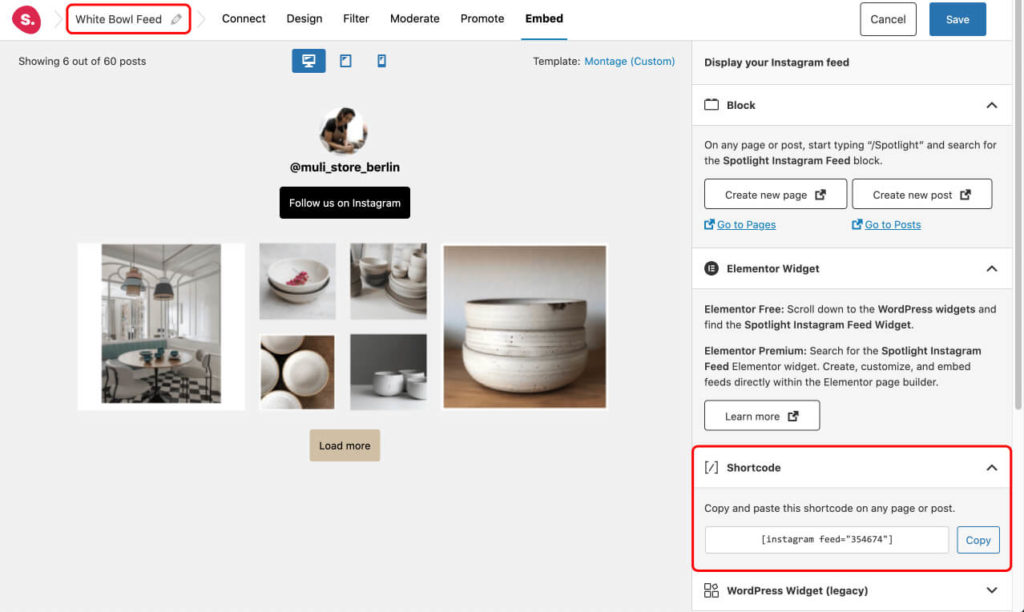
Make sure to name your feed. In this case, I’ve named it White Bowl Feed to correspond to the WooCommerce product under which this feed will be shown.
The best way to display your hashtag feed beneath your WooCommerce products is to use the shortcode method. Once you’re happy with your feed, go to the “Embed” tab to retrieve your generated shortcode. Make sure to copy it.
Advanced Custom Fields (ACF)
As I’ve already pointed out at the beginning of this tutorial, we’ll be using the ACF plugin to add custom fields to our WooCommerce products. This will allow us to add the shortcode to each product which will then be fetched by Elementor.
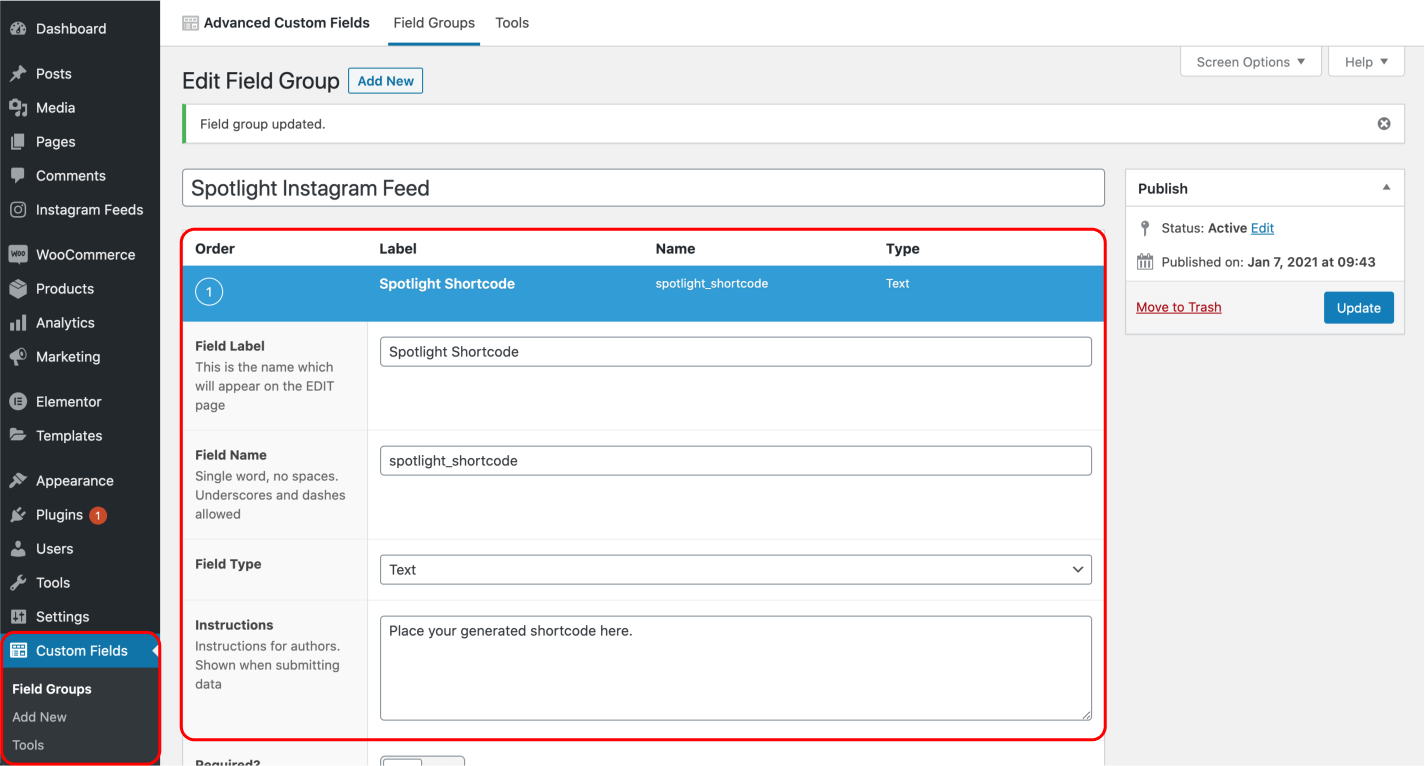
To start off, go to Custom Fields > Field Groups and name your field.
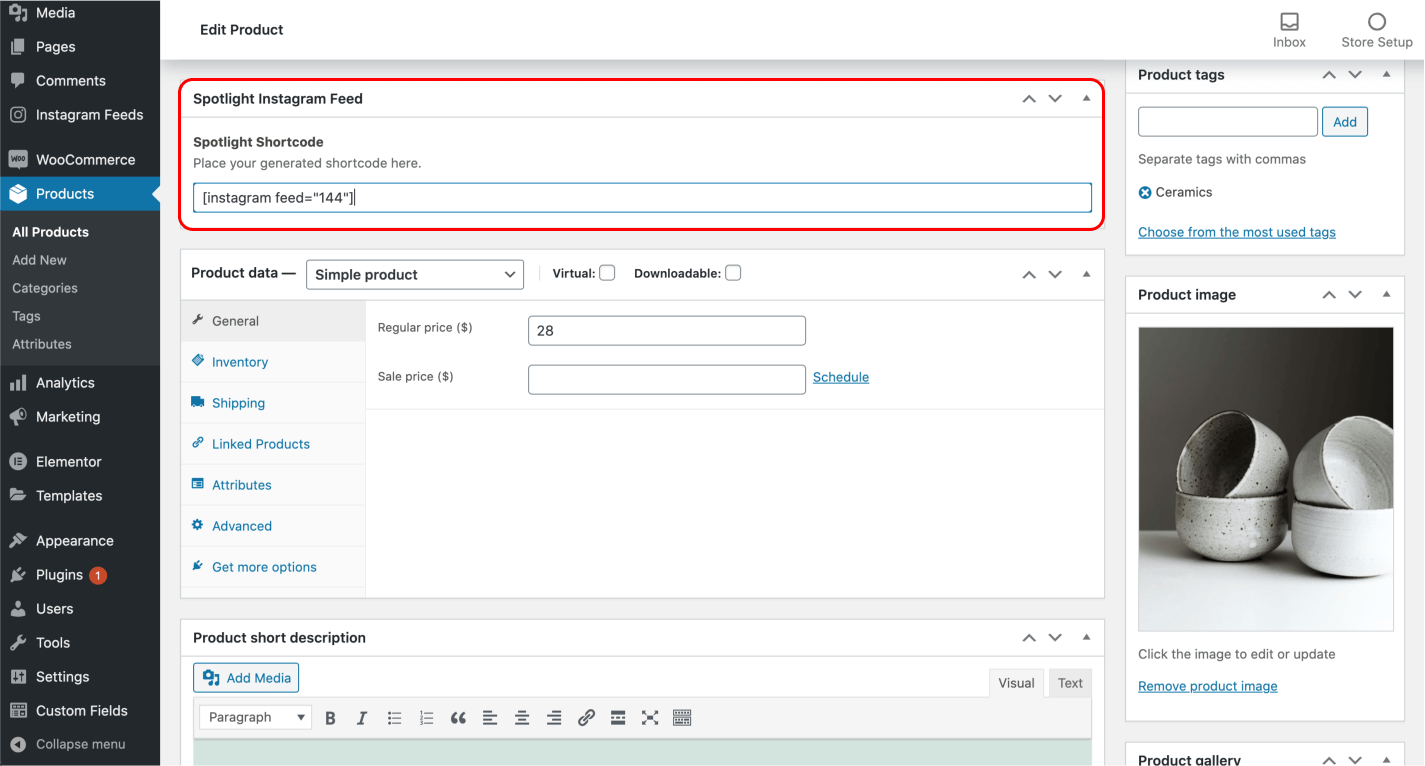
I’ve chosen to name it “Spotlight Instagram Feed” and I’ve added the field label “Spotlight Shortcode”. Set the field type to “Text”.
Next, add a rule to show this field group if the post type is equal to product.
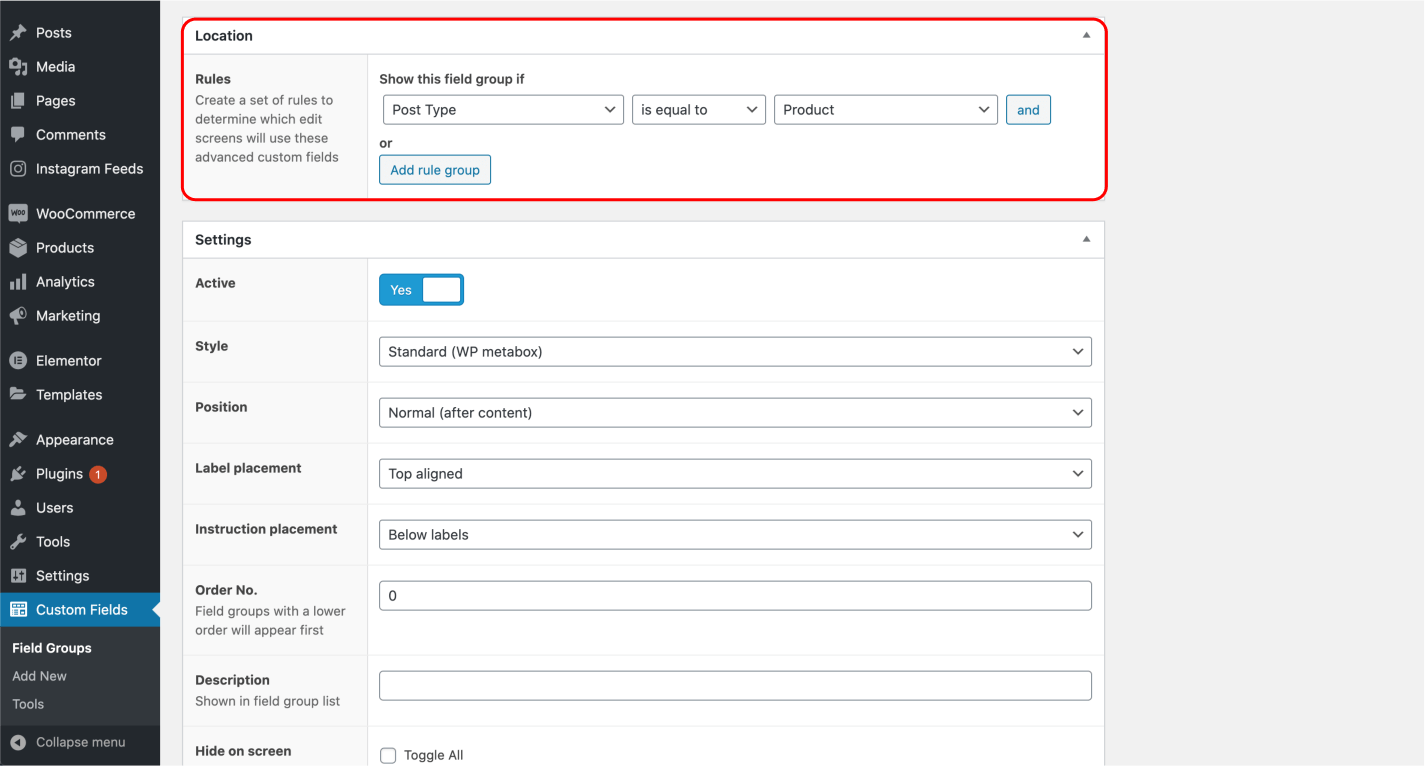
Hit save and head to your WooCommerce product. Here you will find a new field has opened up! Simply paste in your shortcode and update your product.
Elementor Pro
Since you’re using Elementor Pro, you probably already have a single product template for your WooCommerce products. To add a testimonial section, drag and drop a couple of text and heading widgets as I’ve done in the following example.
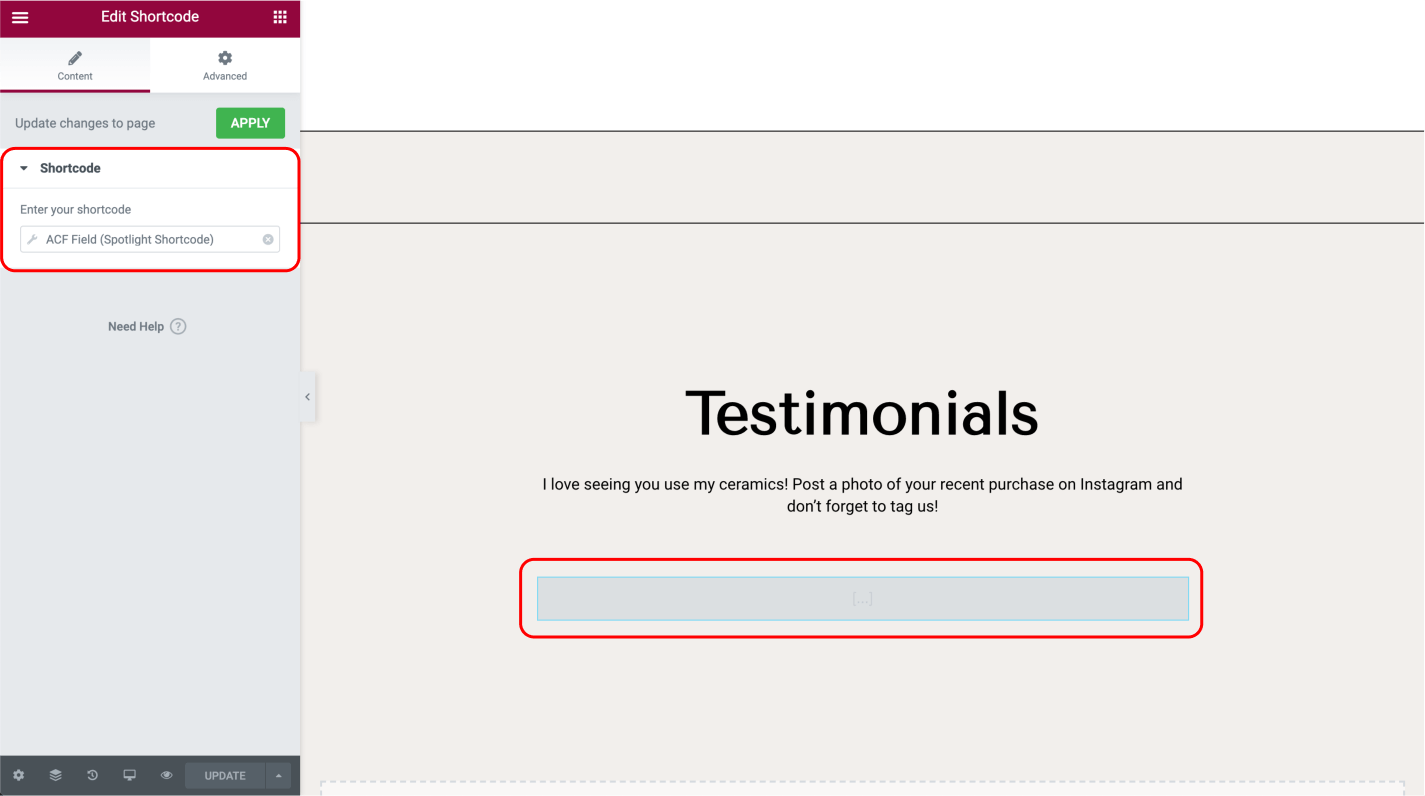
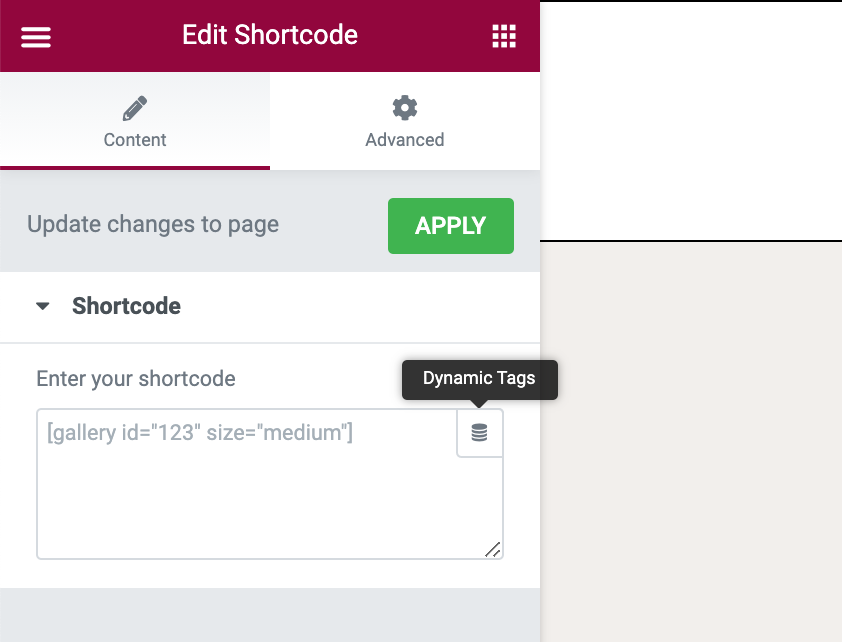
Finally, add a shortcode widget and select the Dynamic tag option:
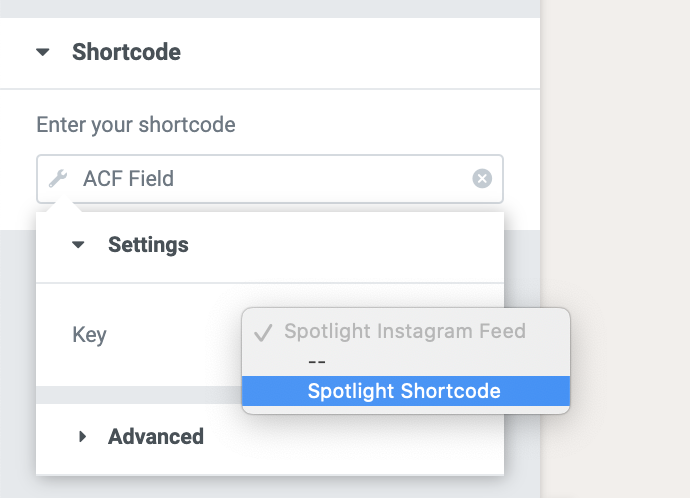
Scroll down the list to find the ACF Field option and select it:
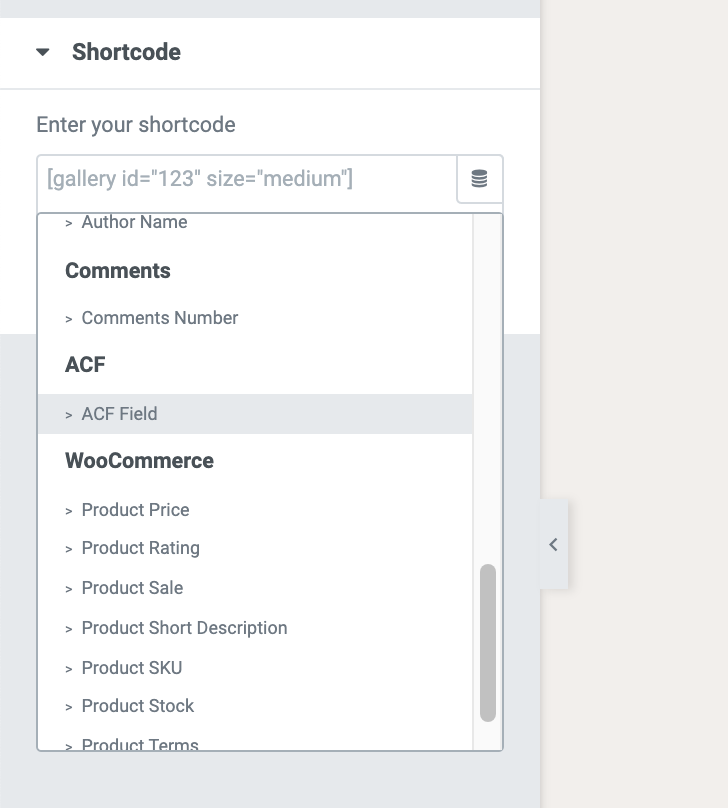
Click on ACF Field one more time and search for your “Spotlight Shortcode” field under “Key”:
Result
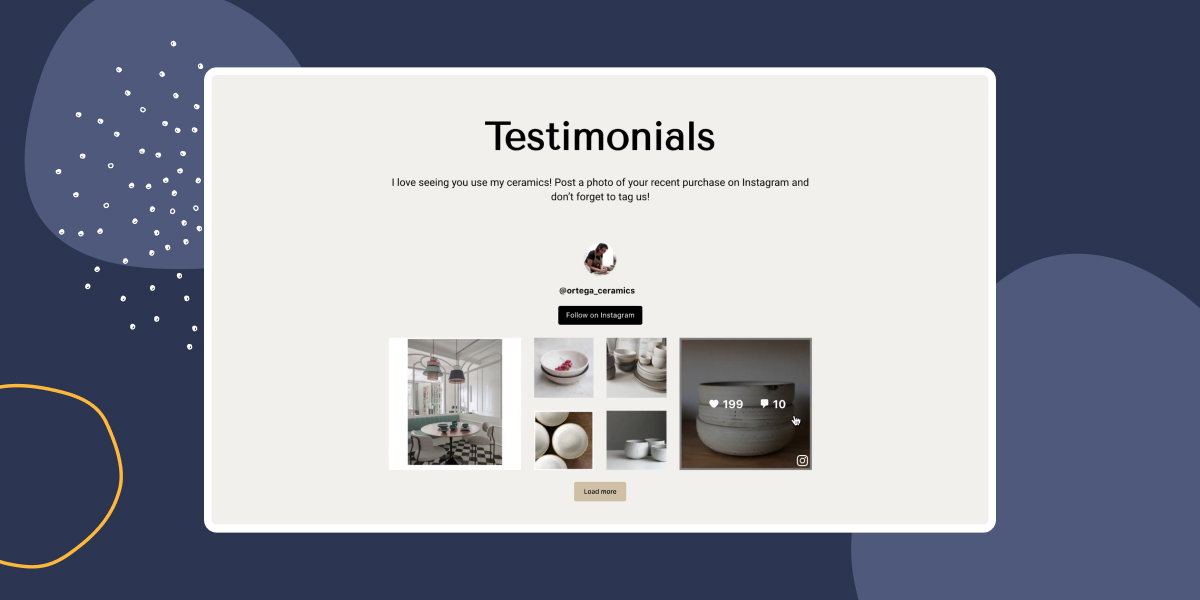
Once you’re done, this setting will be applied to all your WooCommerce products. Here’s what your product pages will look like:
Pretty amazing huh! Your site will look professional and up to date. And hopefully, you will start noticing even more of those orders coming in!