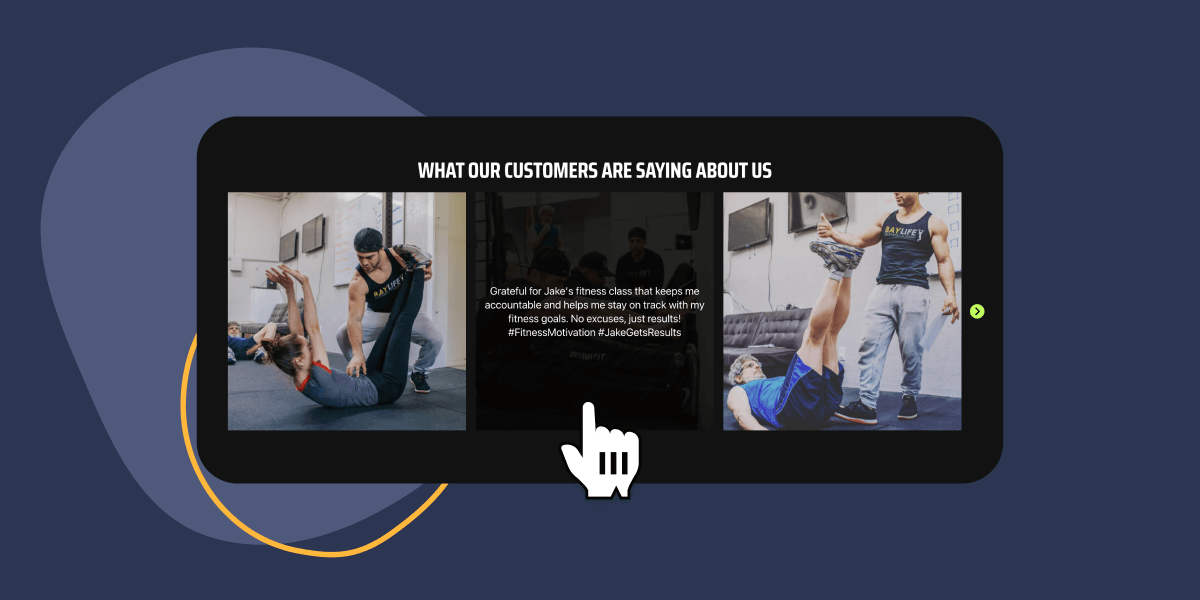
With today’s booming eCommerce and AI landscape, authenticity is key to winning customer trust. User testimonials, in the form of tagged Instagram posts, can be essential for building your brand’s reputation among new customers.
Spotlight, a versatile Instagram feeds plugin, not only showcases your brand’s social media presence but also allows you to leverage user-generated content to enhance credibility.
This article will help guide you through the process of integrating an Instagram testimonial slider in Elementor using Spotlight.
We’ll delve into the do’s and don’ts and also provide helpful tips to ensure you a seamless user experience.
Let’s get started.
The power of social proof
Social proof is one of those terms you see thrown about in many articles over the web. But what exactly is it?
Dan and Louis-Xavier from Growth.Design say it best:
Social proof is a convenient shortcut that users take to determine how to behave. When they are unsure or when the situation is ambiguous, they are most likely to look and accept the actions of others as correct. The greater the number of people, the more appropriate the action seems.
Growth.Design
In short, customers tend to adapt their choices based on what others are doing.
This is where Instagram tagged posts come in. These posts have become a staple in the social media landscape. It’s common to see users and influencers showcasing their latest purchases by posting photos with the products in use. In these instances, they frequently tag the brand’s Instagram account, creating a connection between consumer experiences and the brand’s online presence.
Assuming that you already have an Instagram profile, navigate to your tagged posts section and analyze the posts where you’re being tagged. If you’ve got a healthy number of posts – good job!
If not, don’t worry. Setting up a campaign to encourage more user-generated content is straightforward. Consider launching a contest or a giveaway, or perhaps offer a 10% discount to customers who share an Instagram testimonial. You could also give your followers the opportunity to have their posts showcased on your website. These strategies can quickly ramp up engagement and generate buzz around your products.
As you start receiving tagged Instagram posts, featuring them on your website in a dynamic slider can significantly enhance your social credibility and interaction. This display of social proof can, in turn, inspire new visitors to proceed with a purchase.
Curate and display hashtag feeds from your customers, fans, and followers
Introducing Spotlight
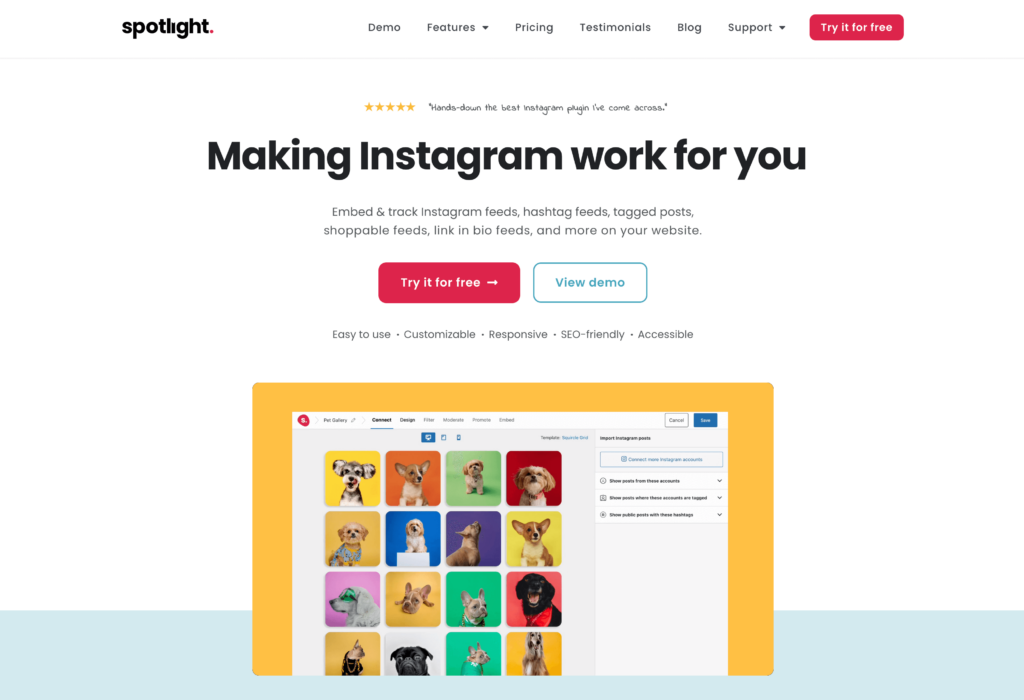
Spotlight is an Instagram feeds plugin that can not only bring in your own Instagram posts, but also tagged posts.
Our team has worked hard on creating the most user-friendly Instagram feed plugin out there to help you bring in your UGC instantly and without any coding knowledge required.
In fact, it has also been endorsed by Hubspot – “It’s easy to set up, and you have full control over the design your visitors see.”
Some of Spotlight’s main features include:
- Bringing in content from an unlimited number of Instagram accounts.
- Displaying hashtag and tagged Instagram posts.
- Filtering and moderating Instagram feeds.
- Creating shoppable feeds where you can link Instagram posts to your product pages.
We’ve spent months researching customer behavioral patterns when it comes to Instagram feeds and the results are great.
Take a look at The Meteor Crater & Barringer Space Museum. This museum wanted to get people excited about the meteor site so they turned to Spotlight to bring in tagged posts which their visitors post on Instagram.
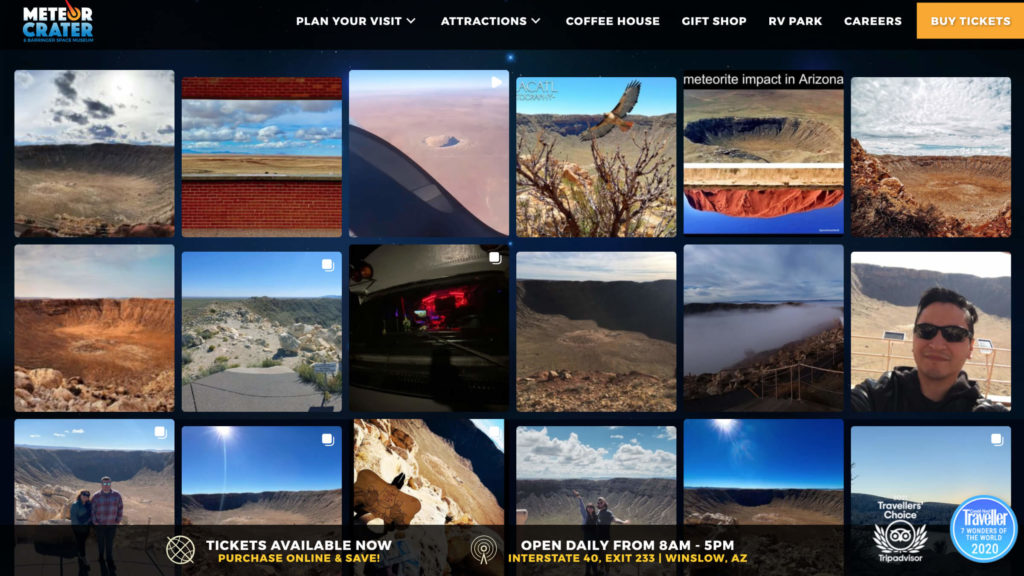
Thanks to UGC testimonials, The Meteor Crater & Barringer Space Museum has been attracting more new visitors through social proof.
Preparing your website
Before we get to the tutorial, here’s a list of prerequisites you’ll need to get started:
- A WordPress website.
- An Advanced (Business or Creator) account.
- Tagged Instagram posts.
- The Spotlight Pro Plan.
Note that Spotlight works brilliantly with most page builders such as Elementor, Divi, and Beaver Builder. If you’re using the WordPress block editor – we’ve got a dedicated Spotlight block you can use.
In this tutorial, we’ll be using Elementor, but you can follow along if you’re using any other solution mentioned above.
How to add a testimonial slider in Elementor
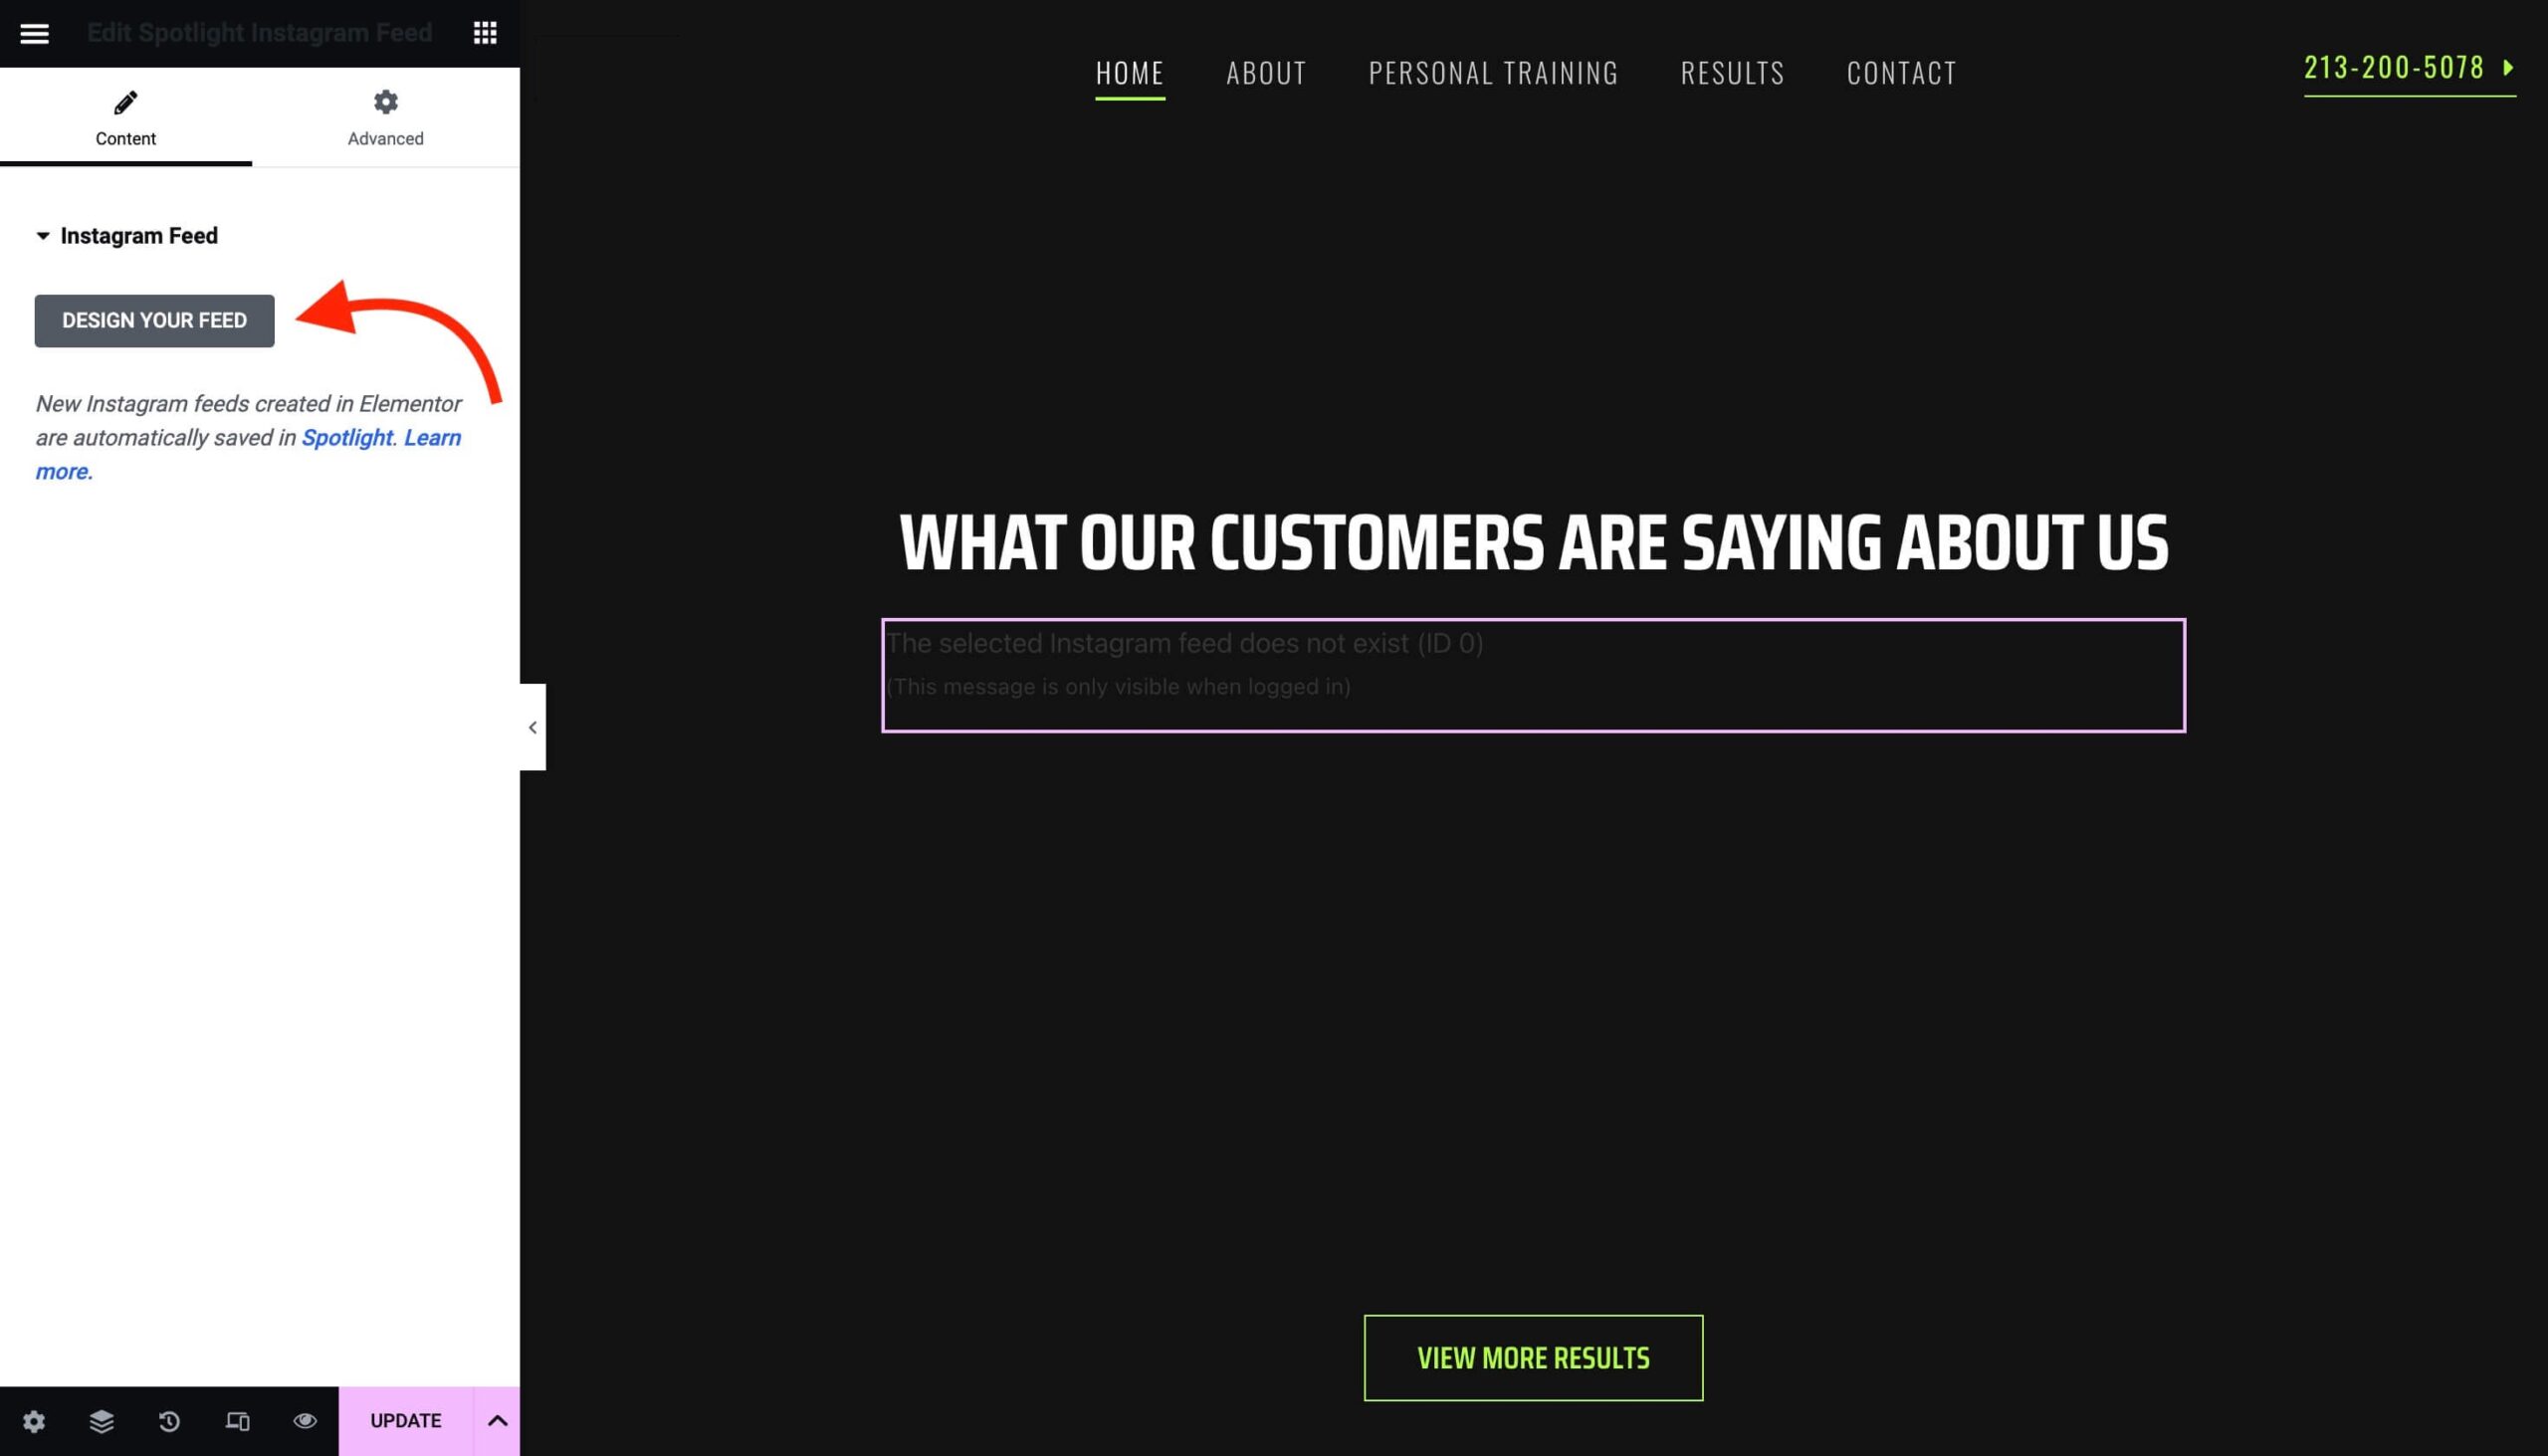
In Elementor, start by typing in Spotlight Instagram Feed in the Elementor sidebar. Then, drag and drop the dedicated widget into your section.
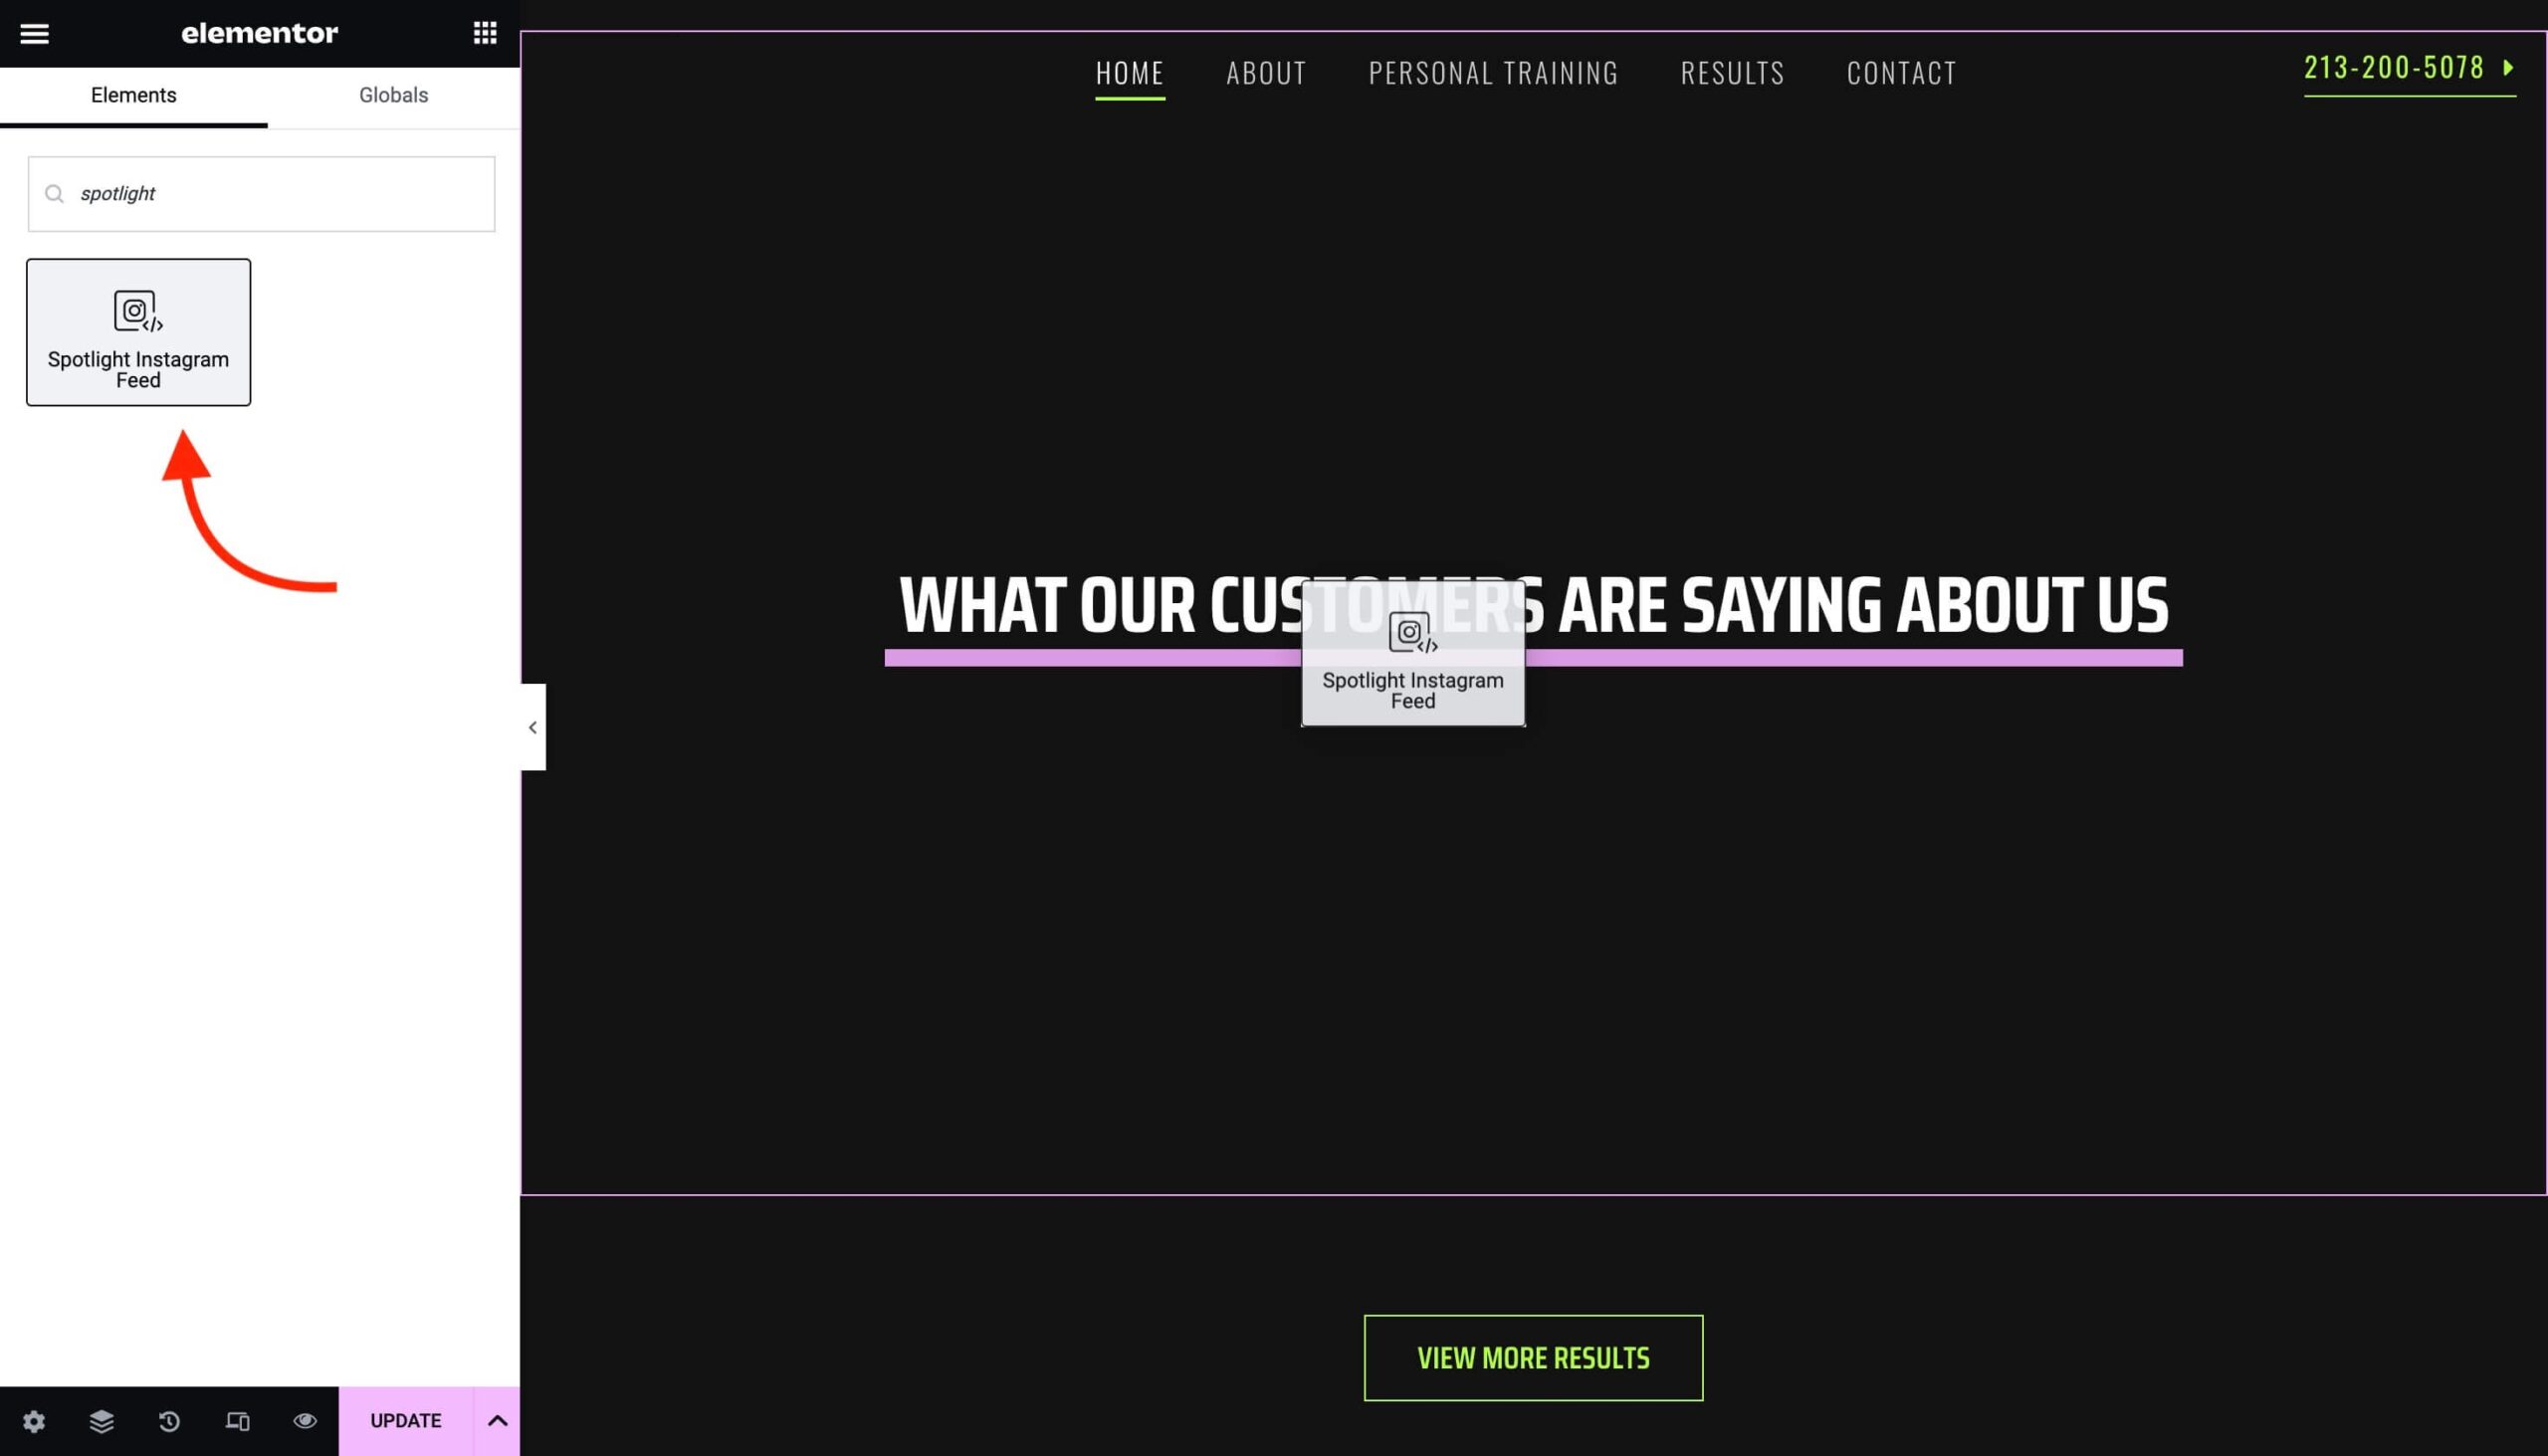
Next, click the Design your feed button.
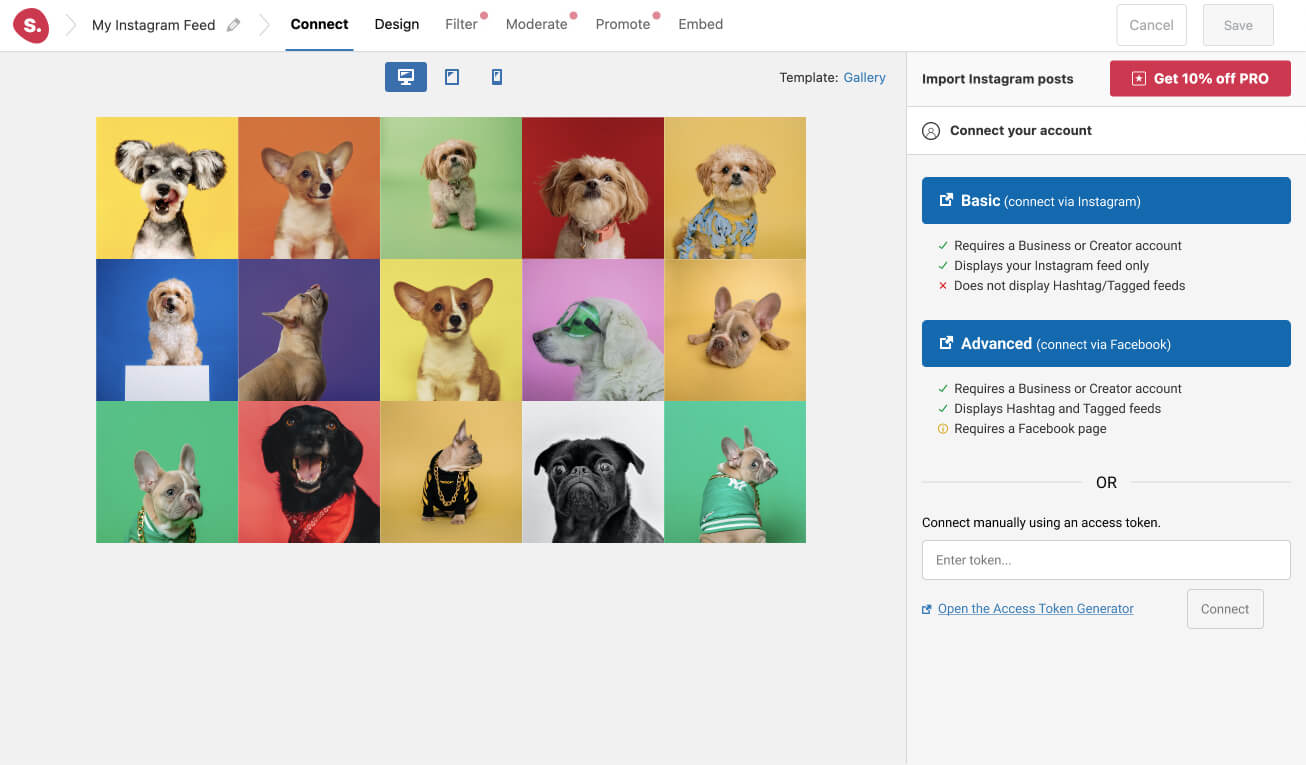
Start off by connecting your Instagram account. Select the Advanced connection option since you’re using Tagged feeds for this tutorial.
The difference between a Basic and an Advanced account is that a Basic account connects your professional account directly to Spotlight through Instagram, doesn’t require a Facebook Page, but doesn’t support hashtags or tagged feeds.
In contrast, an Advanced account requires your professional Instagram account to be linked to a Facebook Page before connecting it to Spotlight.
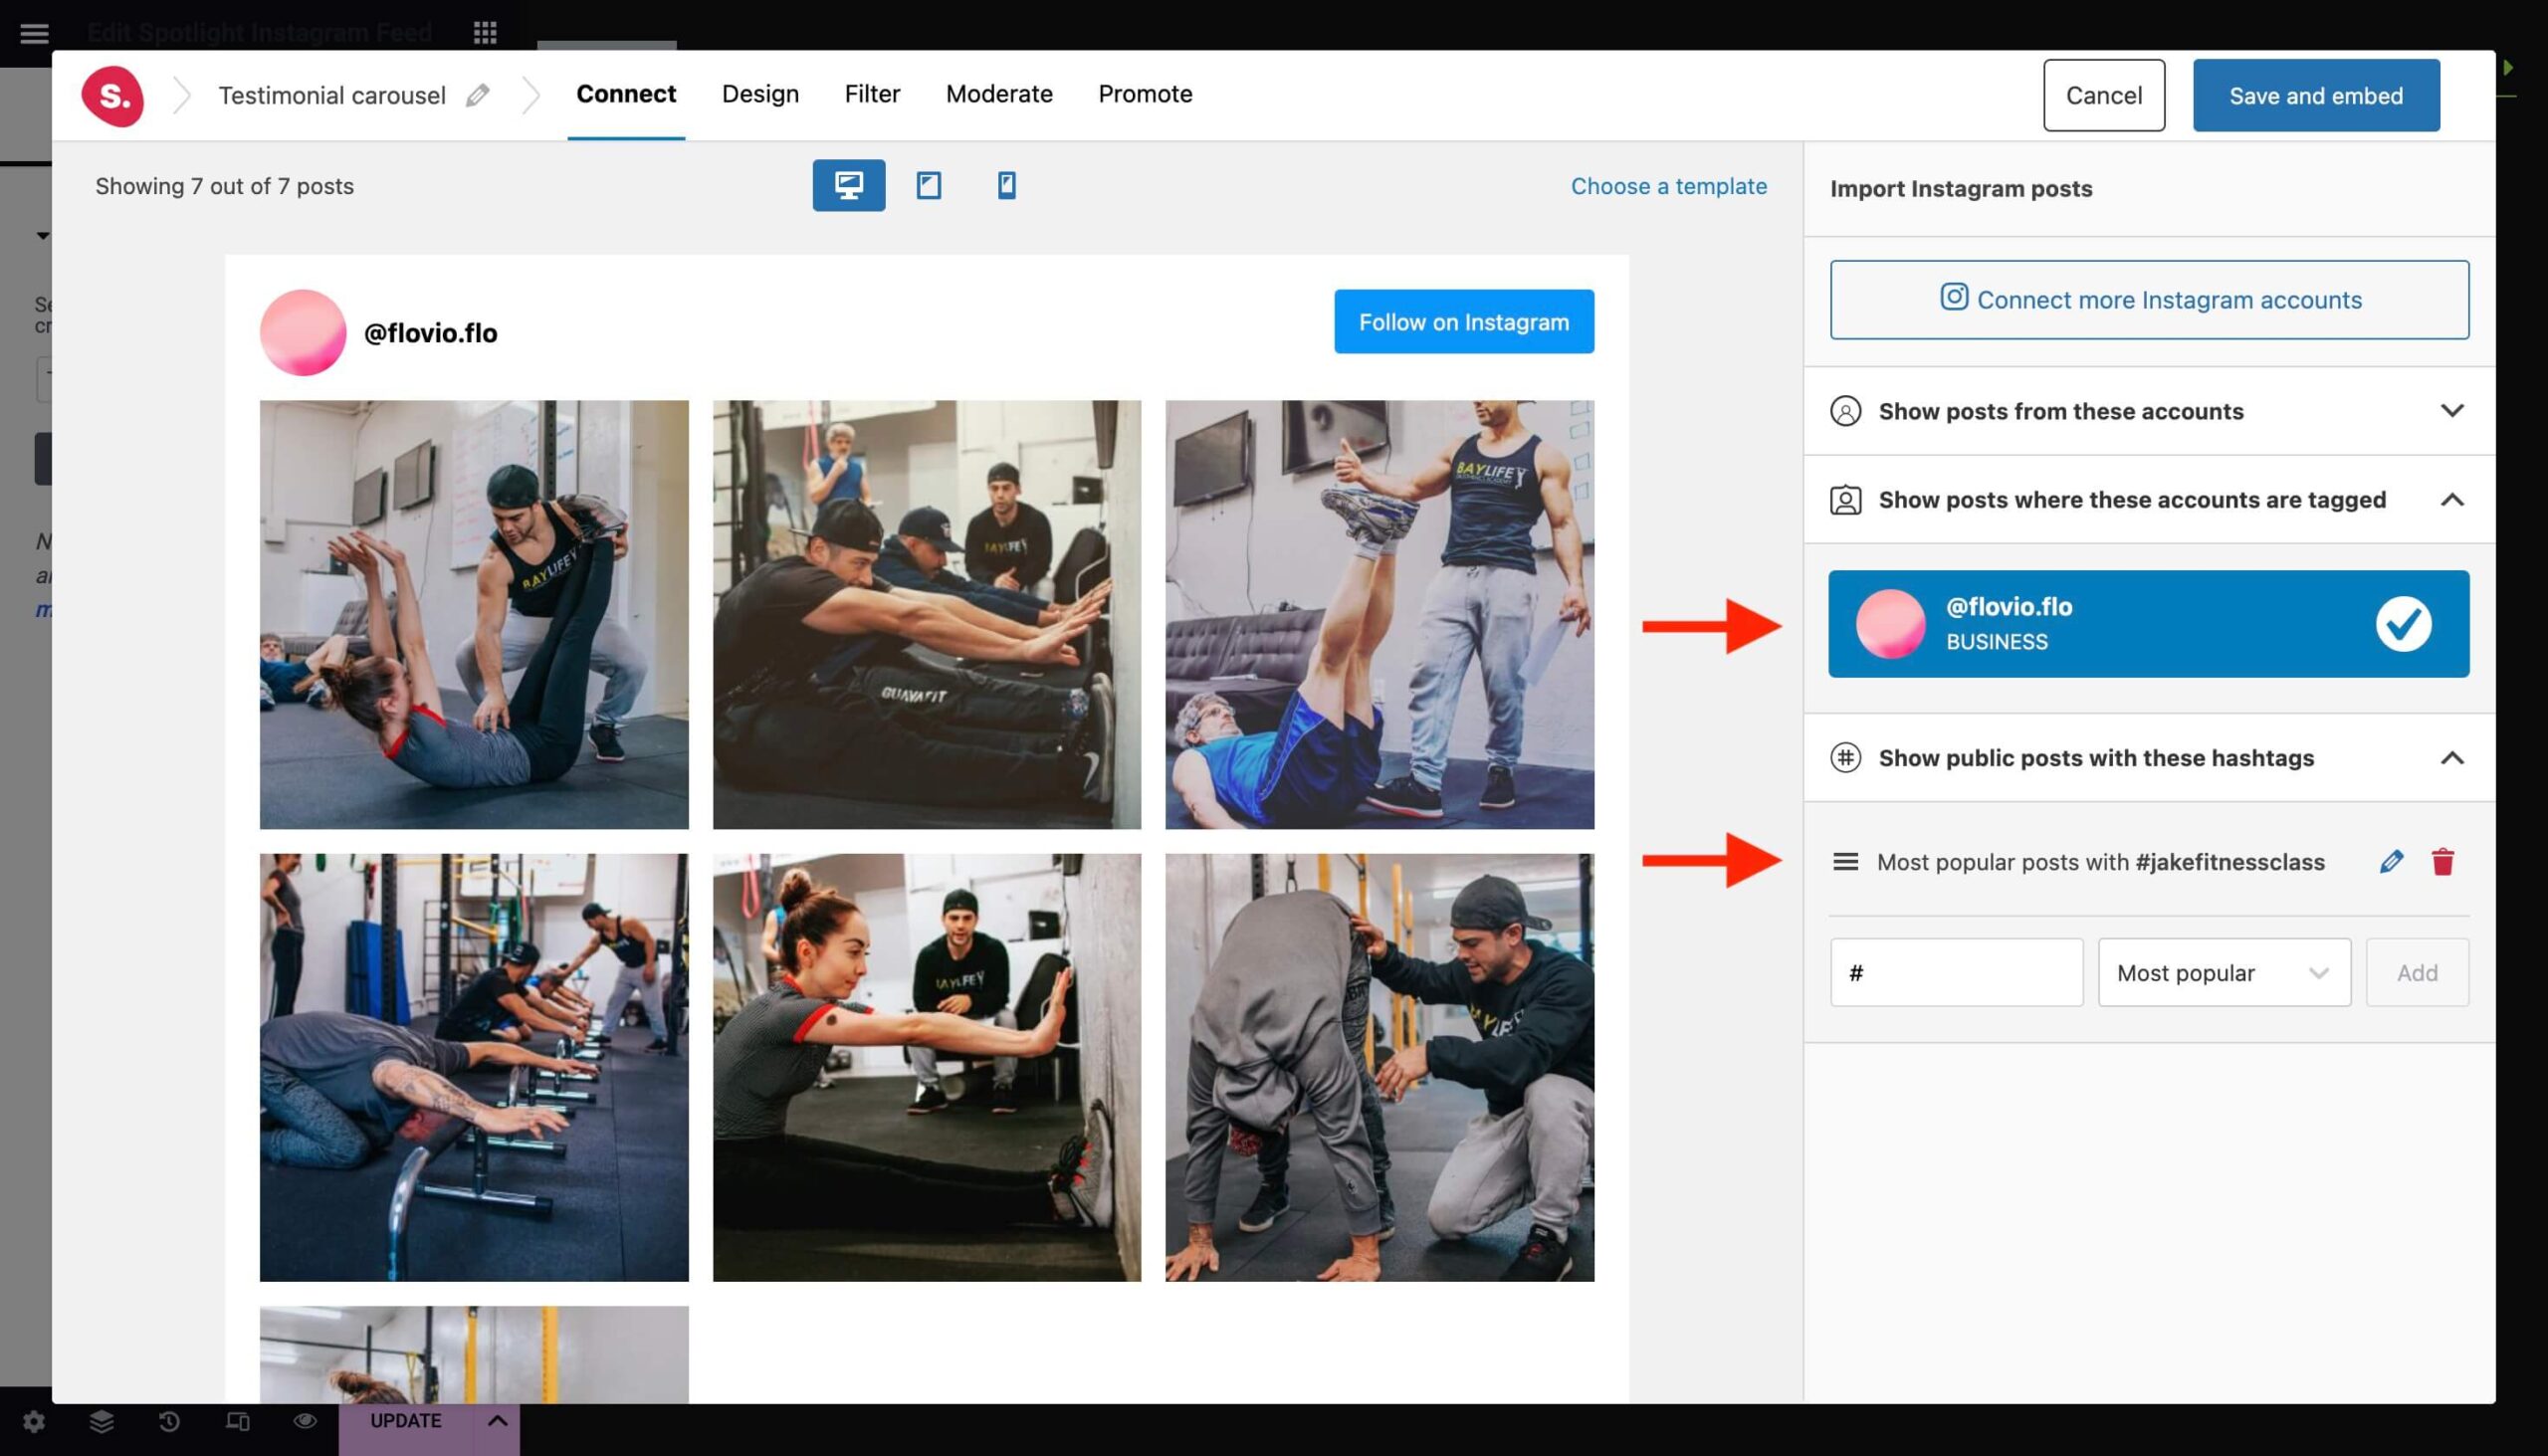
Then deselect your account and select it under the tab titled Show posts where these accounts are tagged.
Note that you can also add a dedicated hashtag below to bring in hashtag posts.
Customizing your testimonial feed
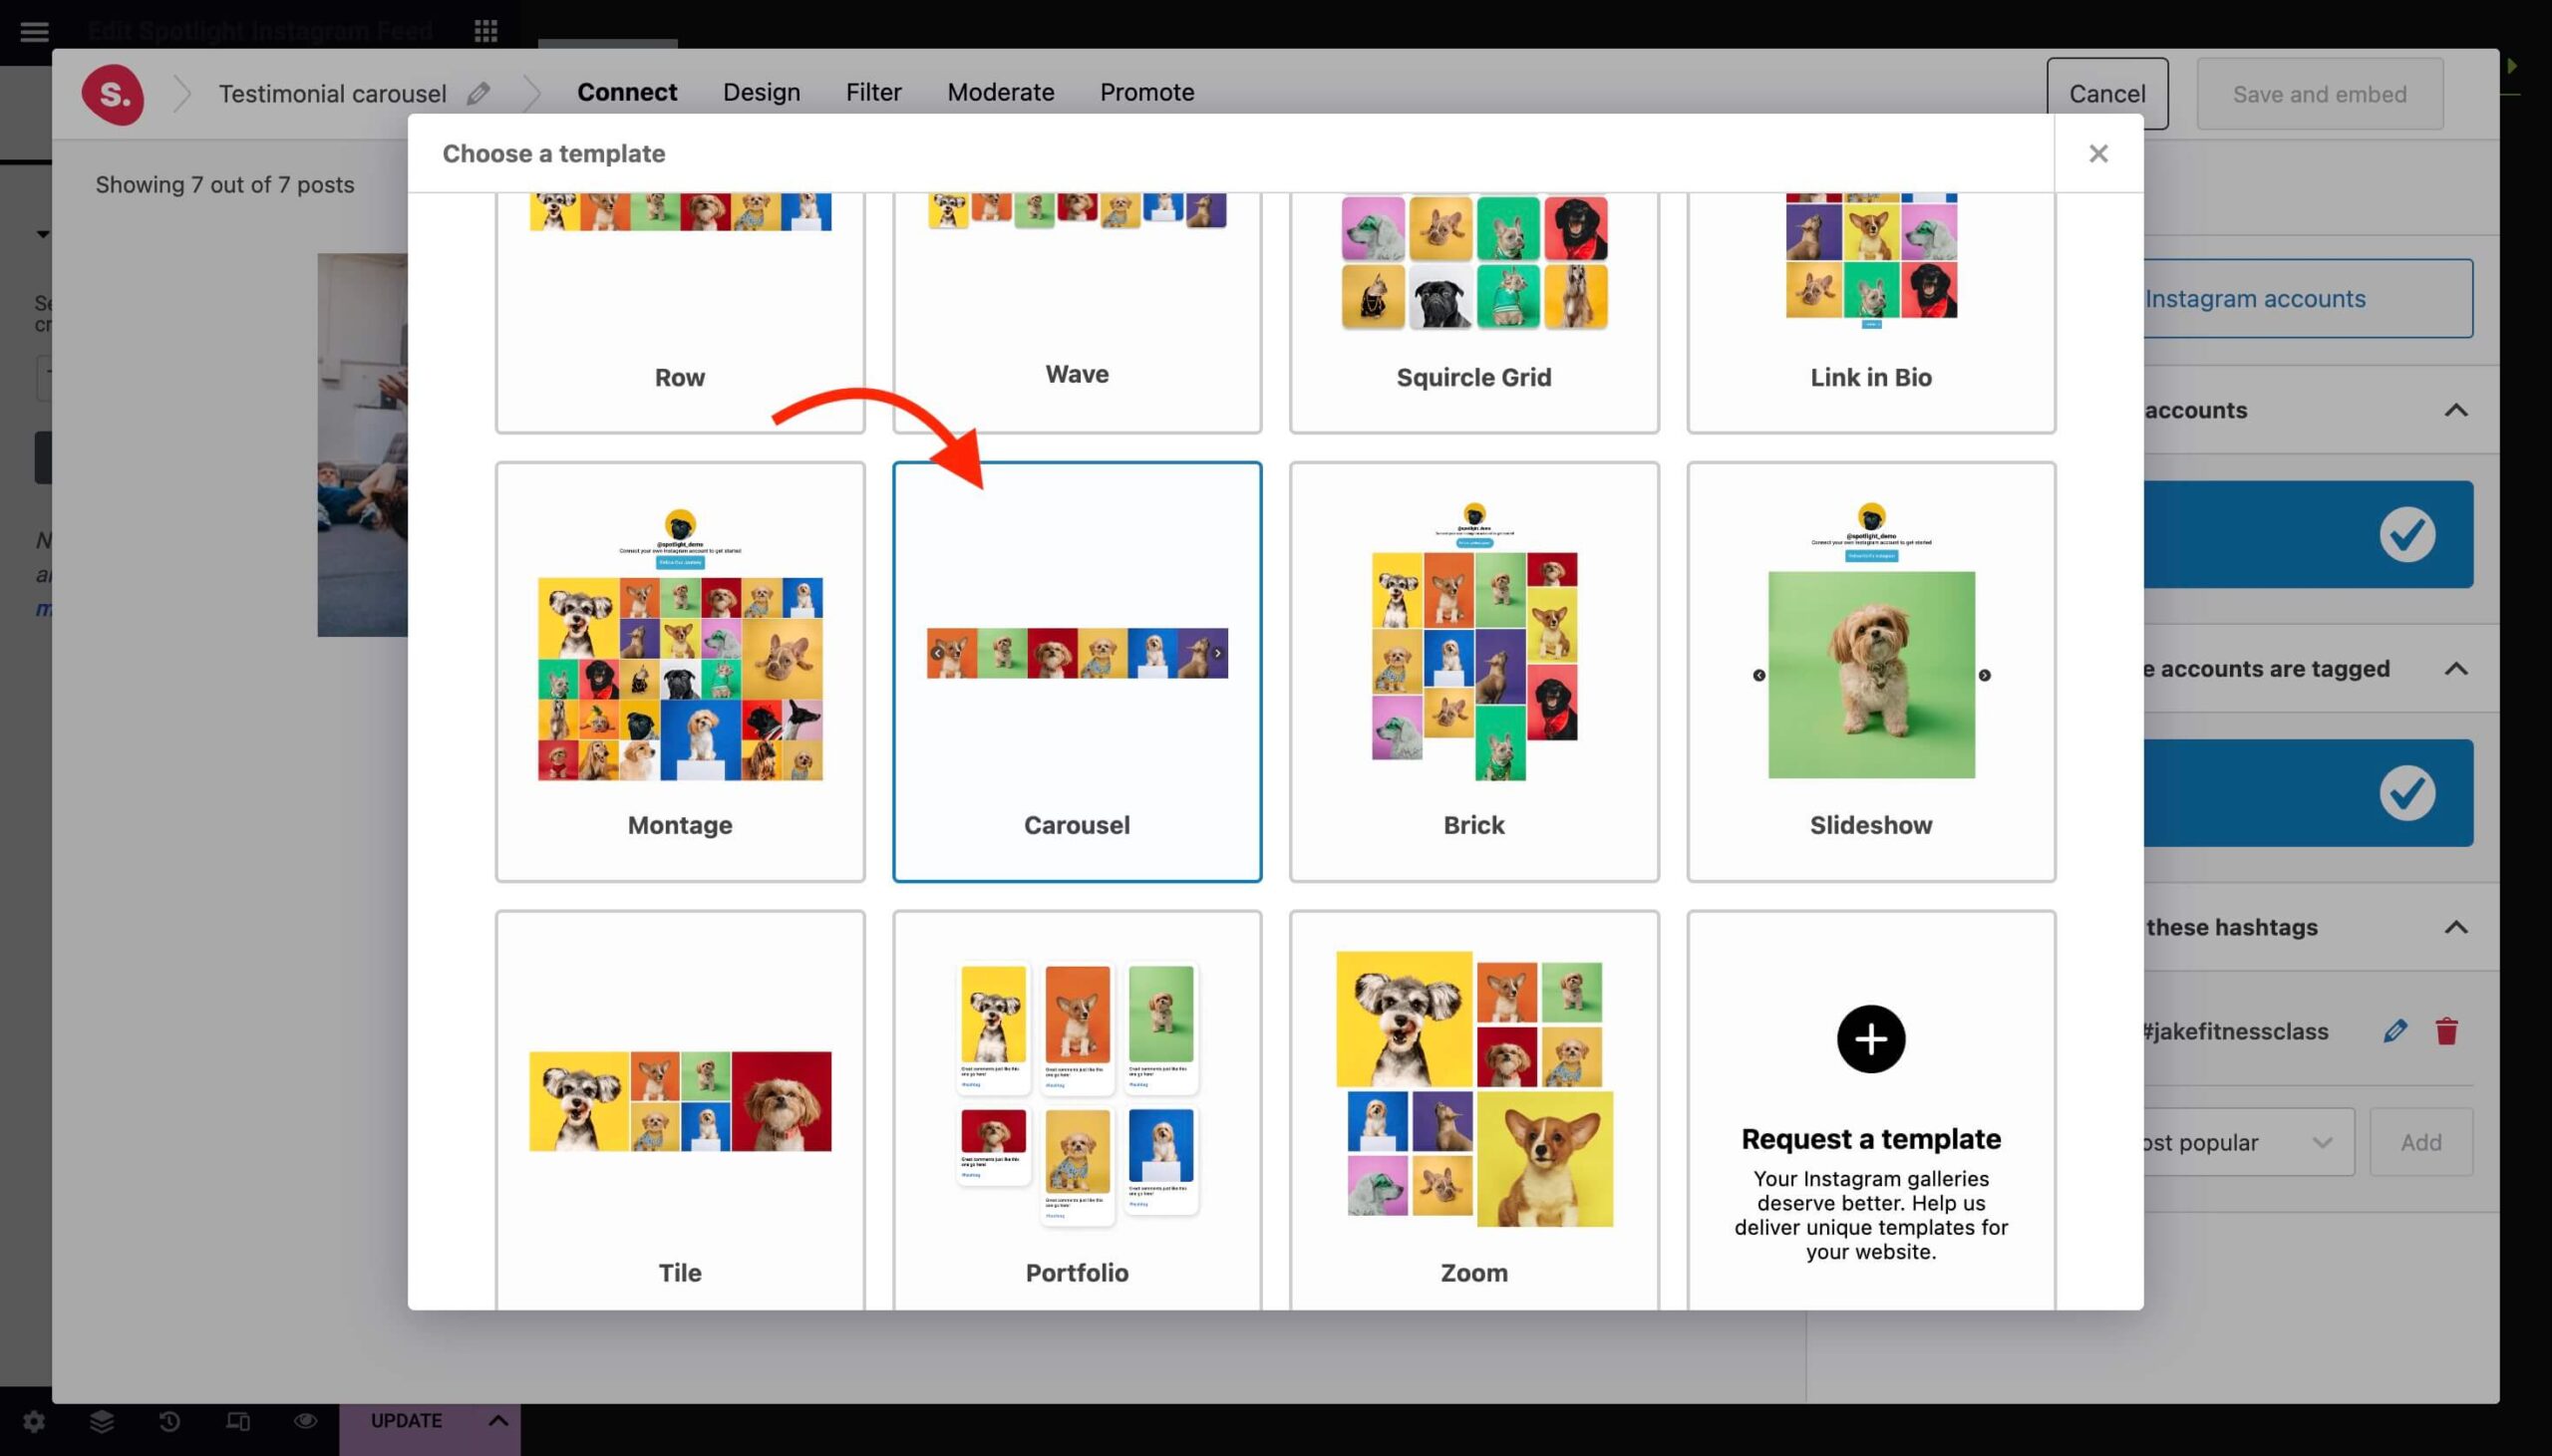
Head over to the Design tab where you can select one of Spotlight’s pre-designed templates under the Choose a template button.
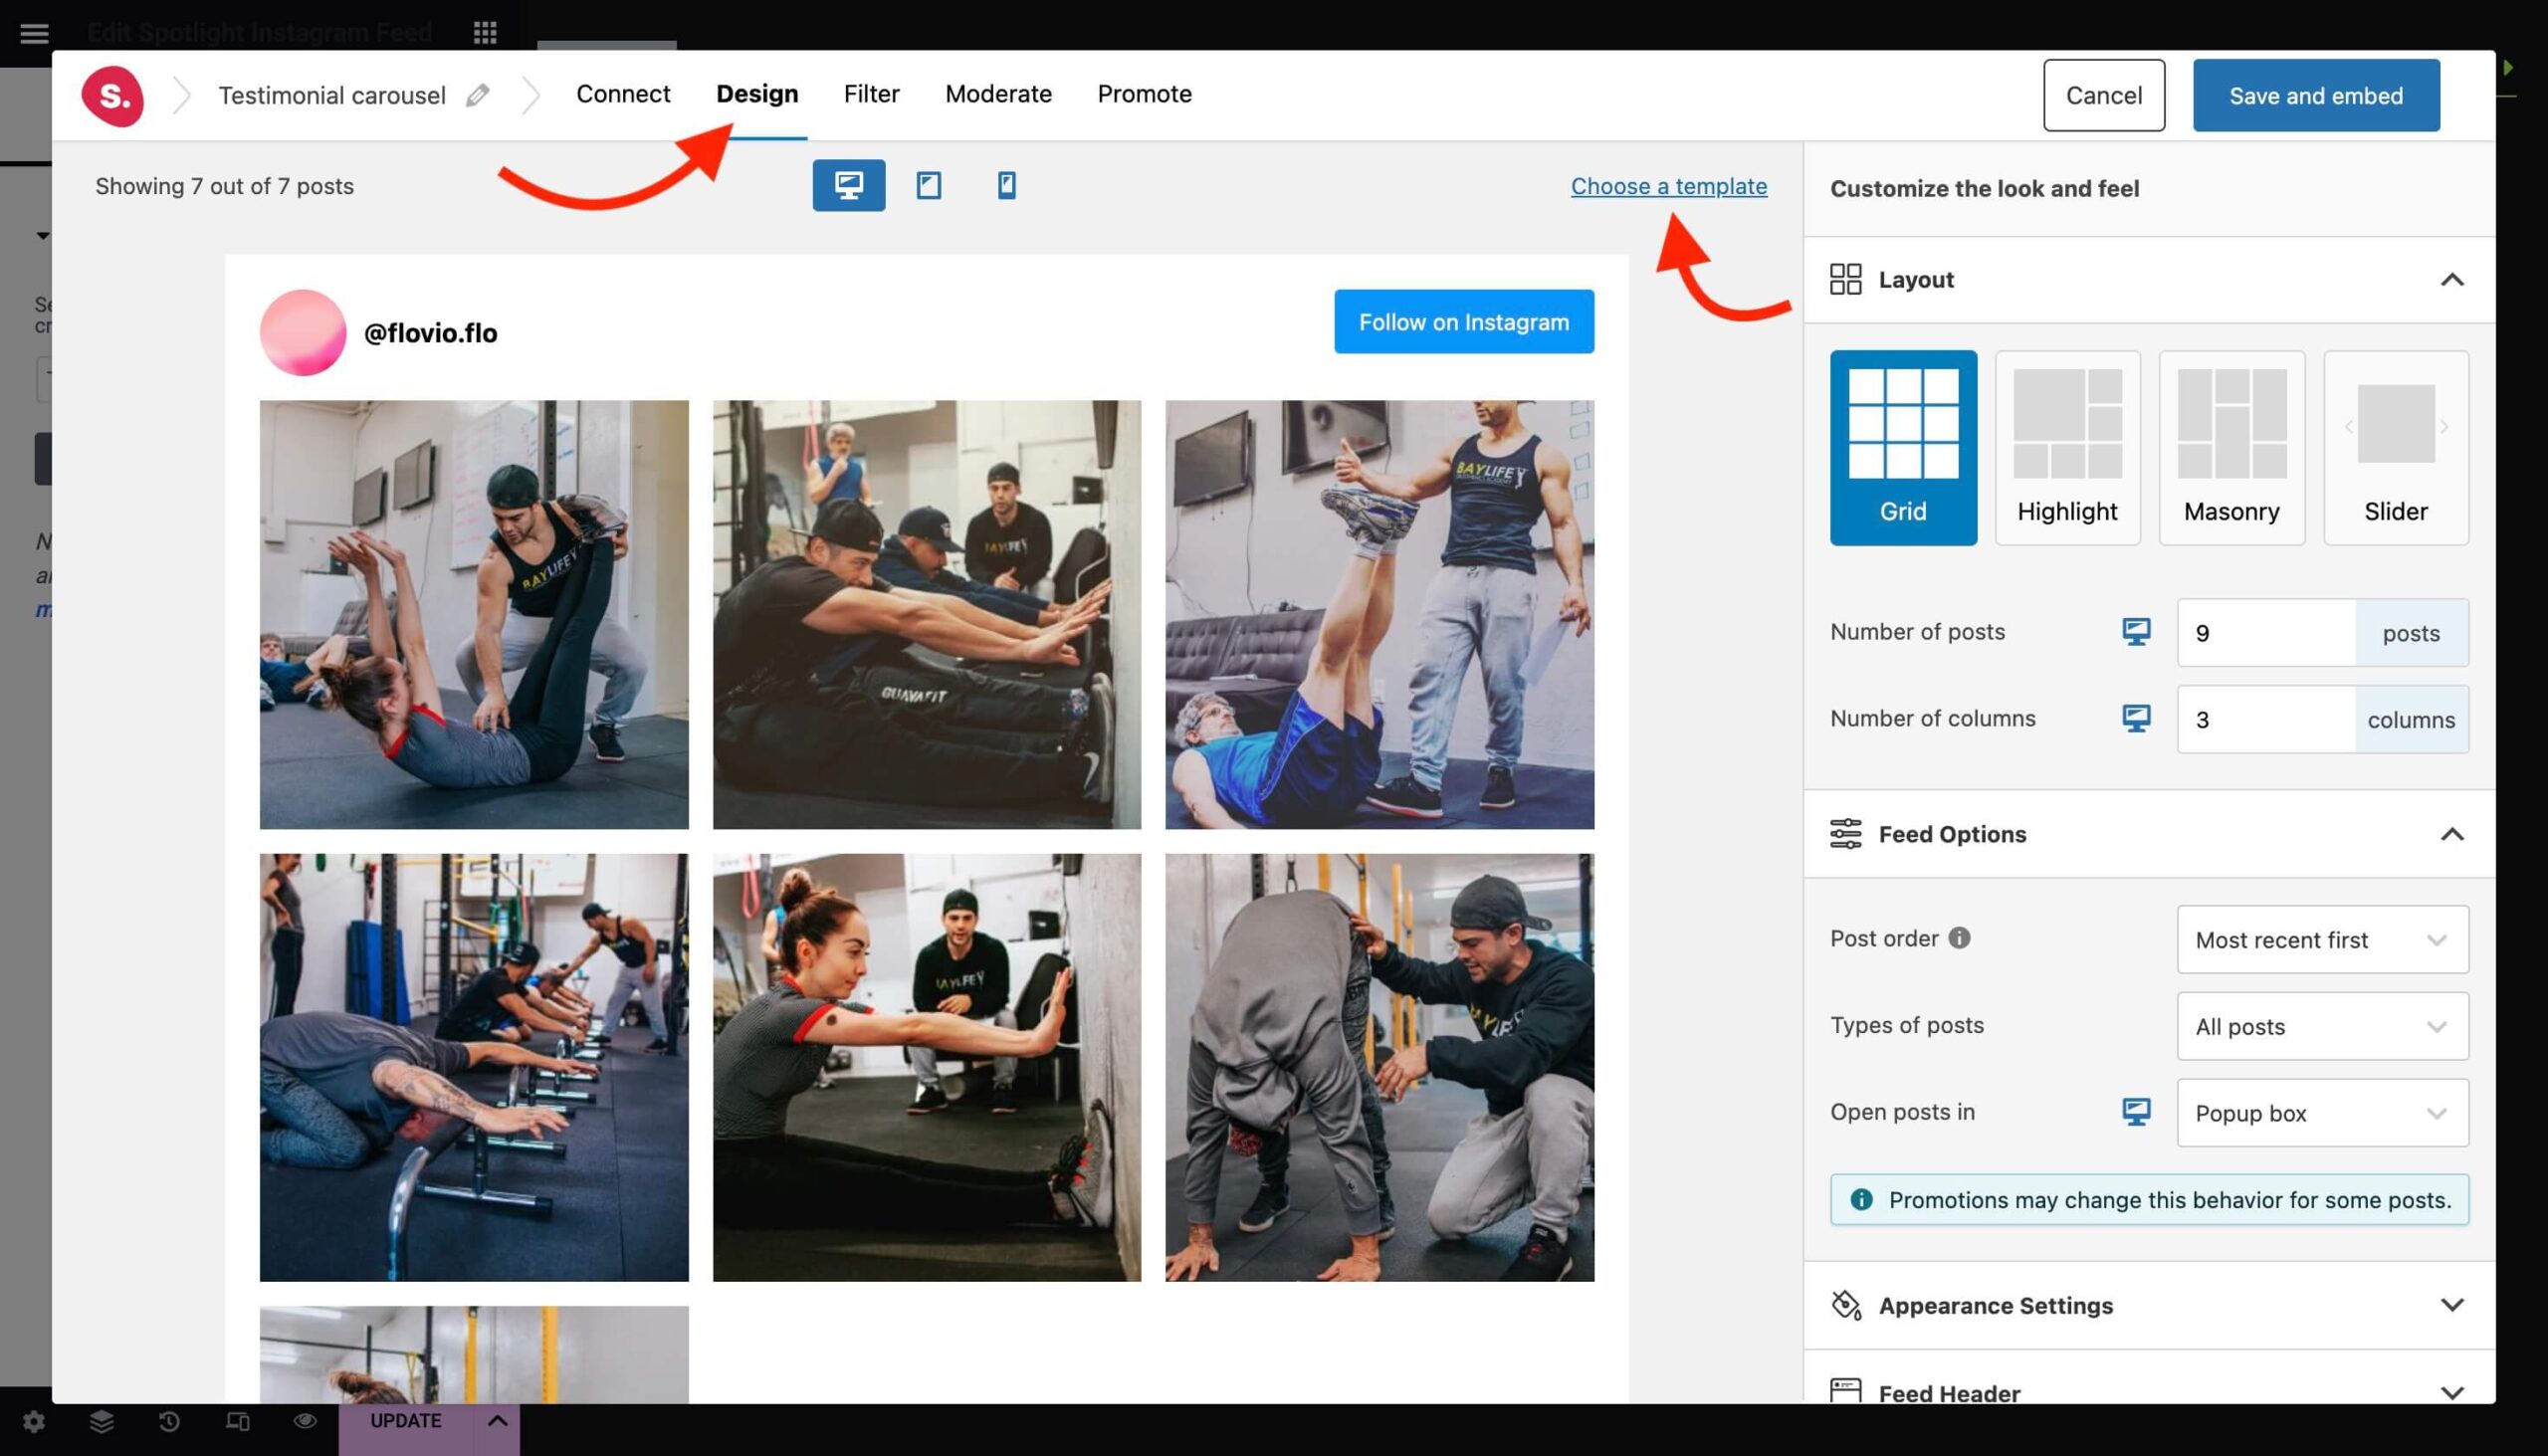
Select Carousel to create a testimonial slider.
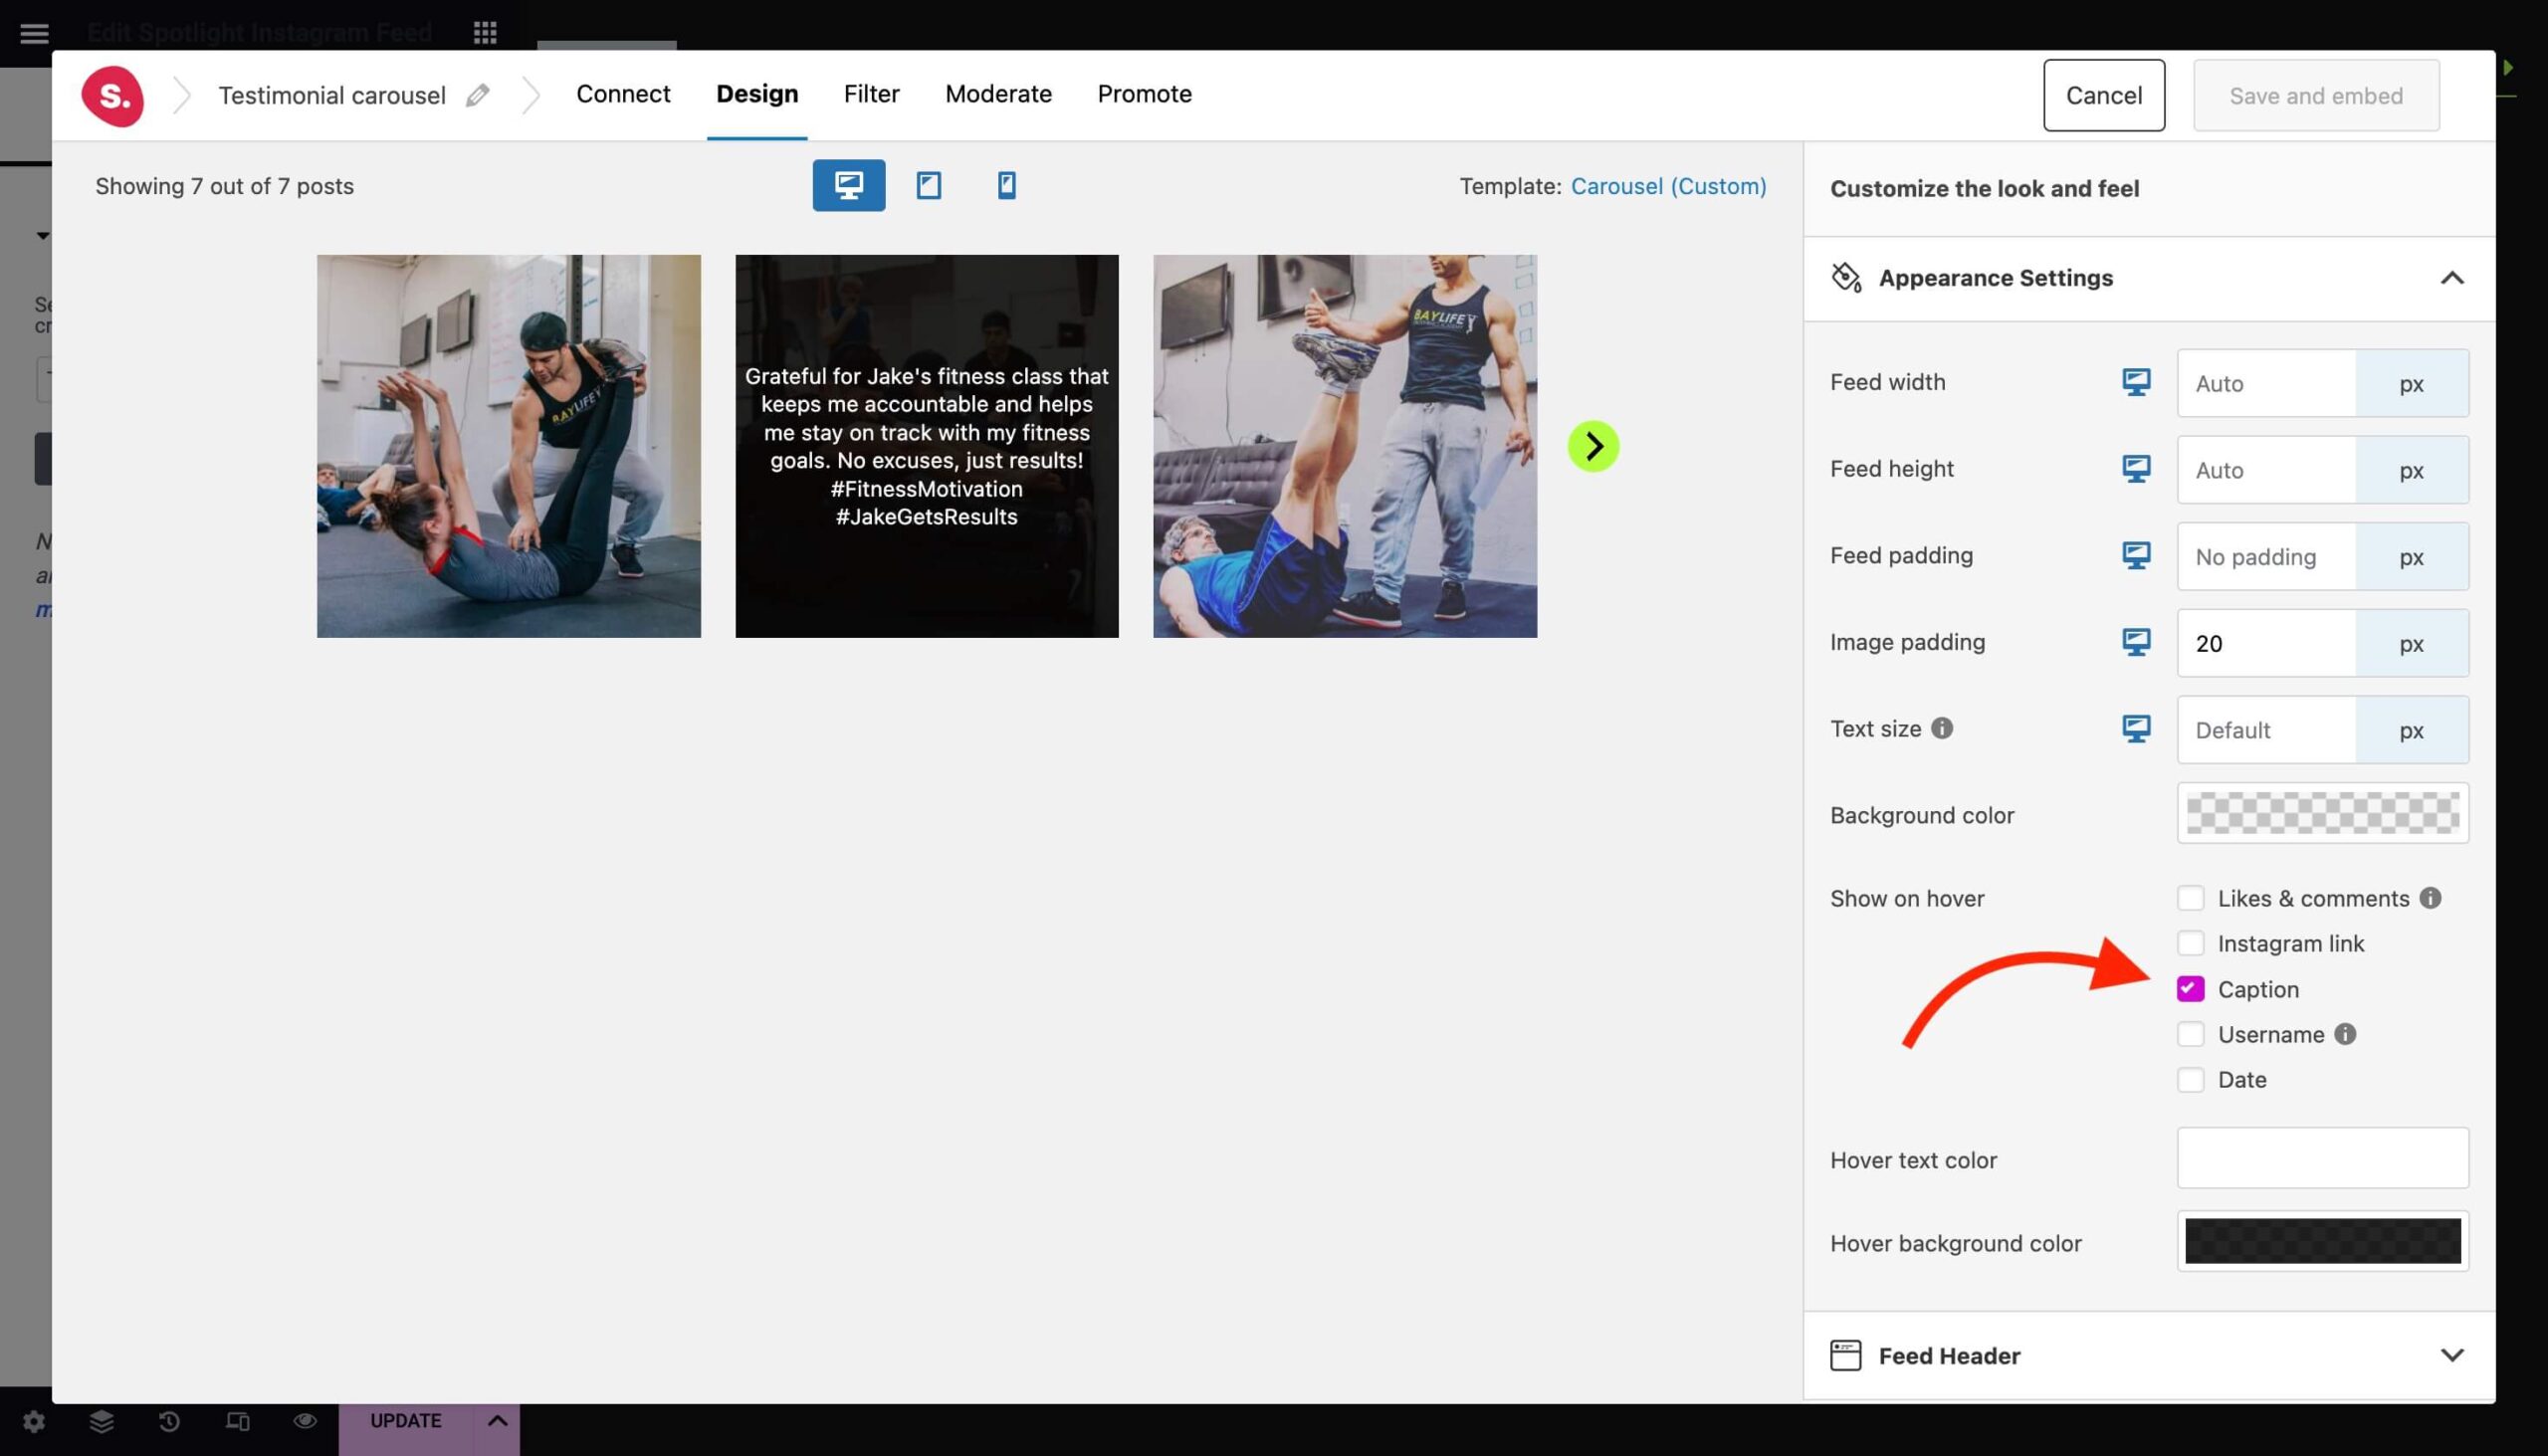
At this point, you can play around with Spotlight’s design settings to match your slider to your website’s look.
In this case, I altered the arrow button styling and gave the images some padding. An important feature that is not to be overlooked is to show the caption on hover. This provides you not only with a visual testimonial but also a written one – perfect for SEO!
Advanced features and tips
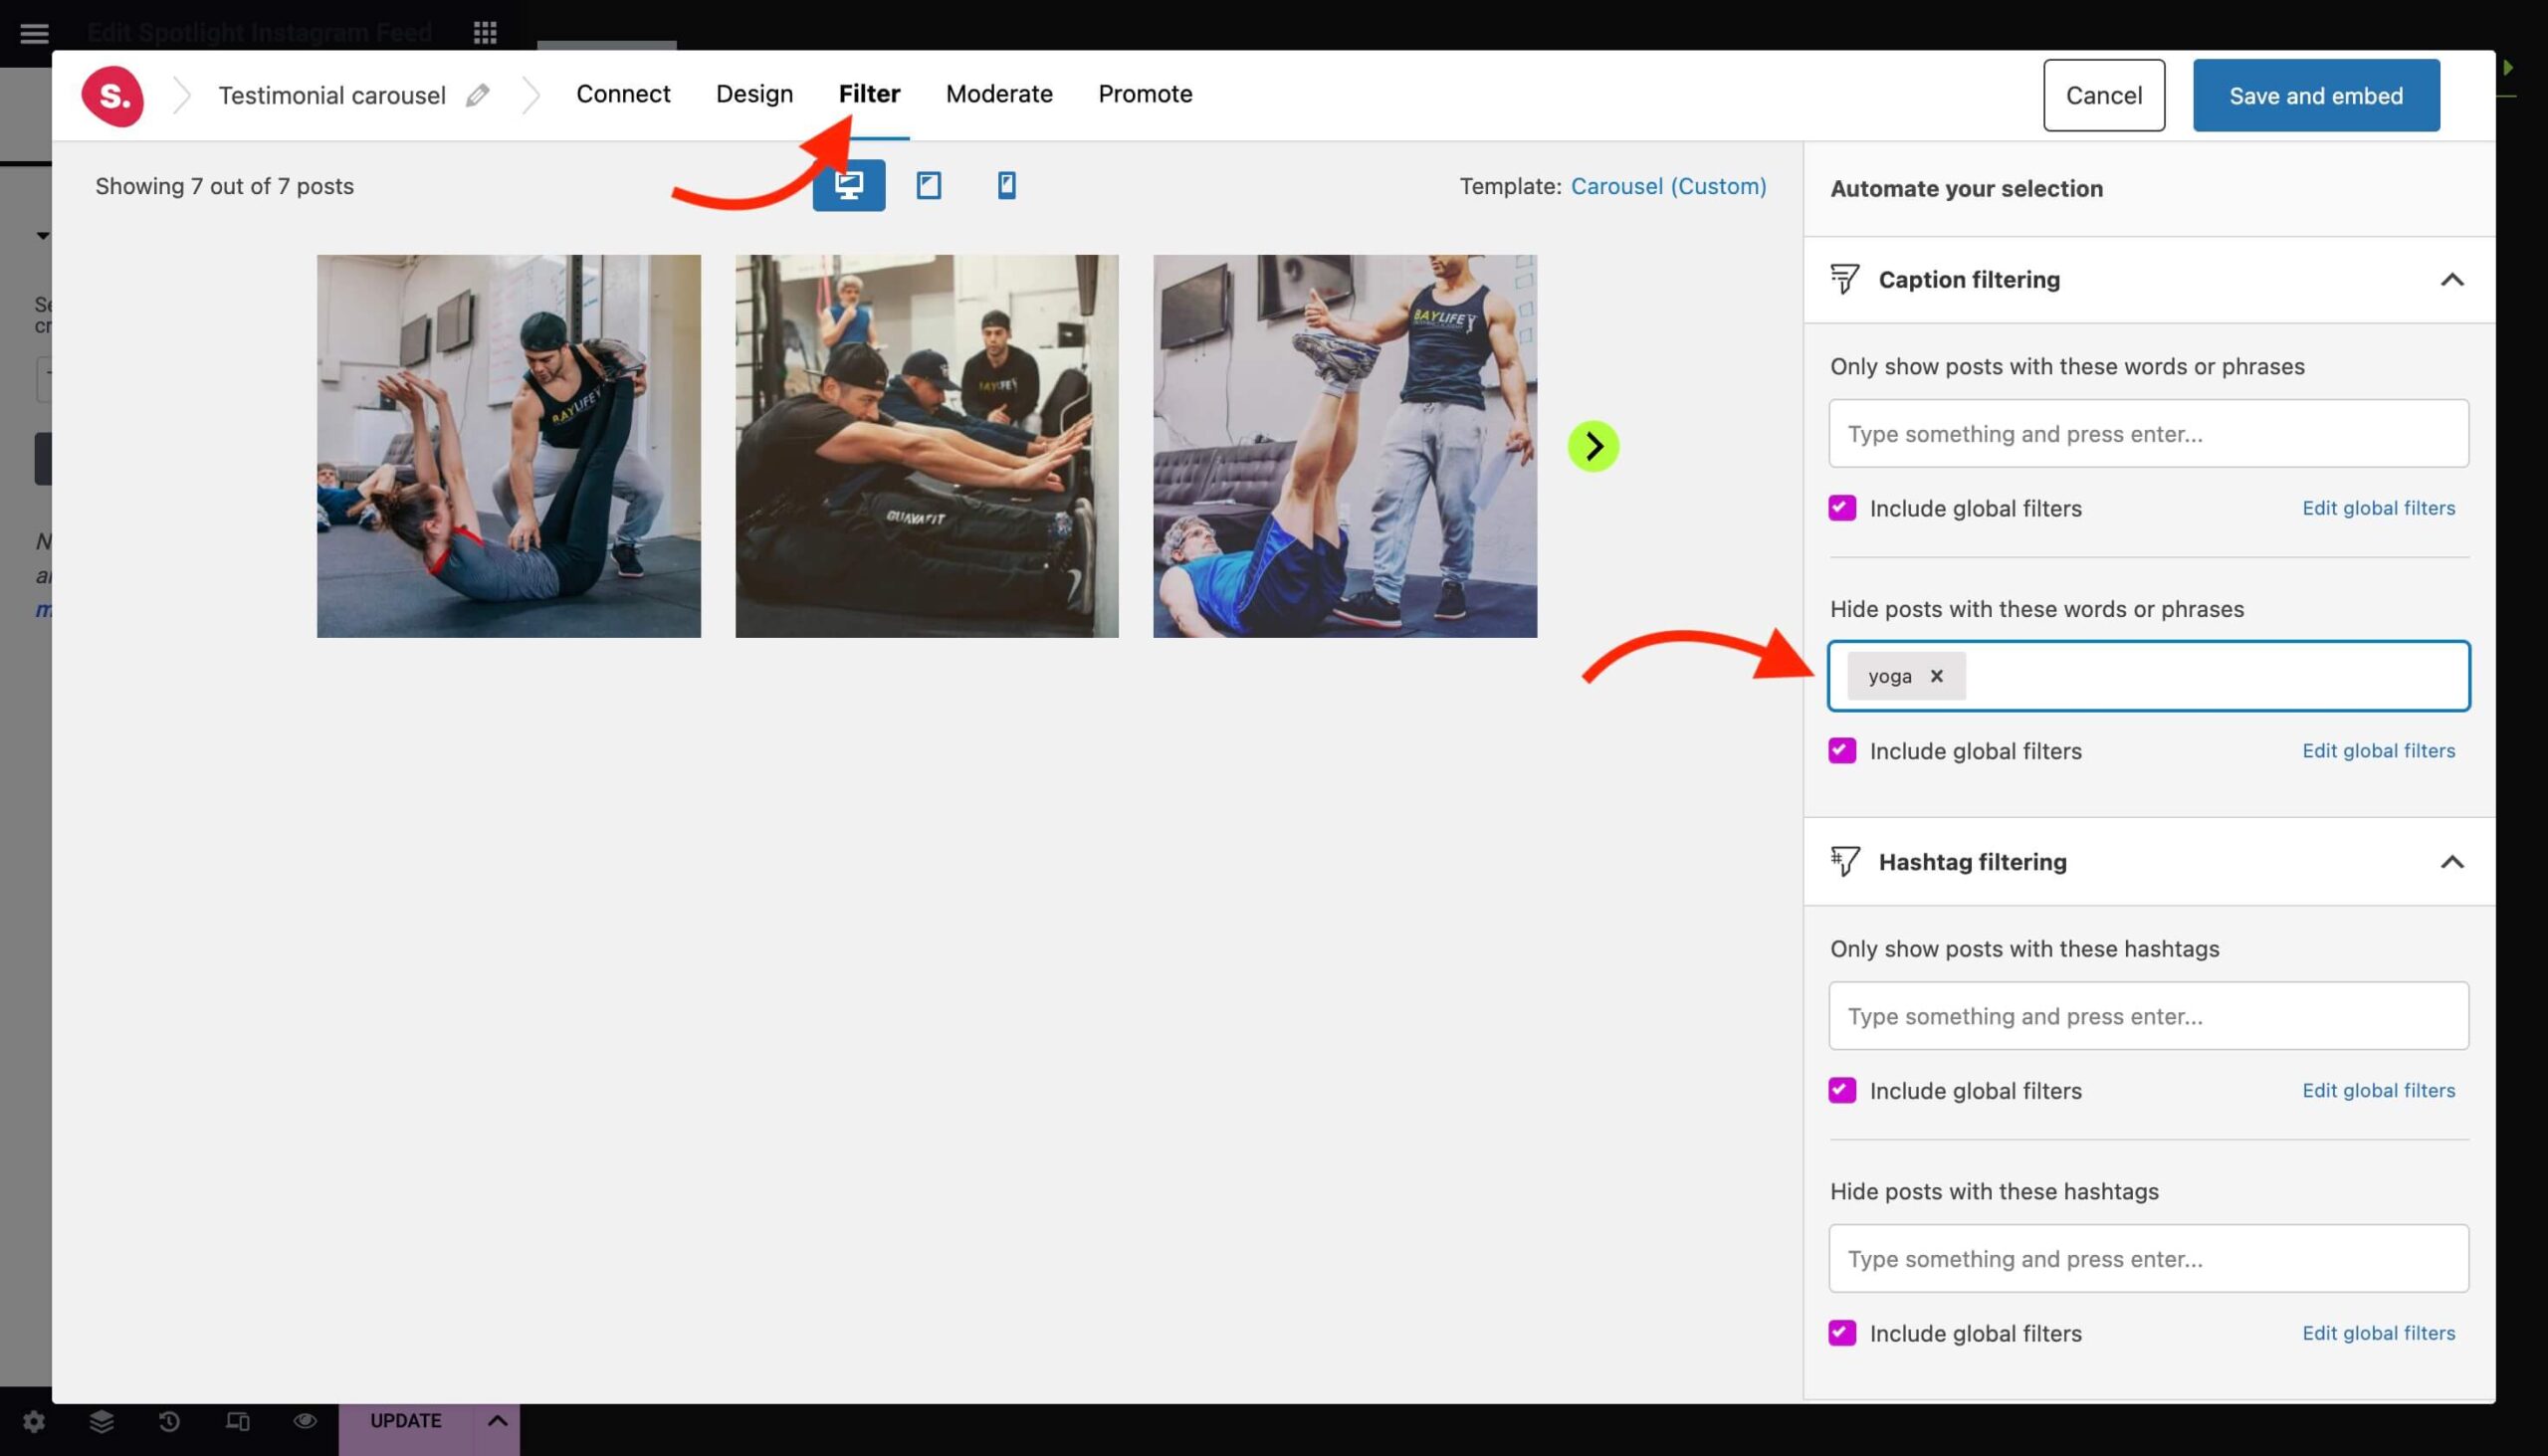
If you want to really curate your feed, you can do so in two ways: Filtering and Moderation.
To filter your feed by caption or hashtag, head over to the Filter tab. Here you can filter out any unwanted content by blacklisting words in the caption or other hashtags.
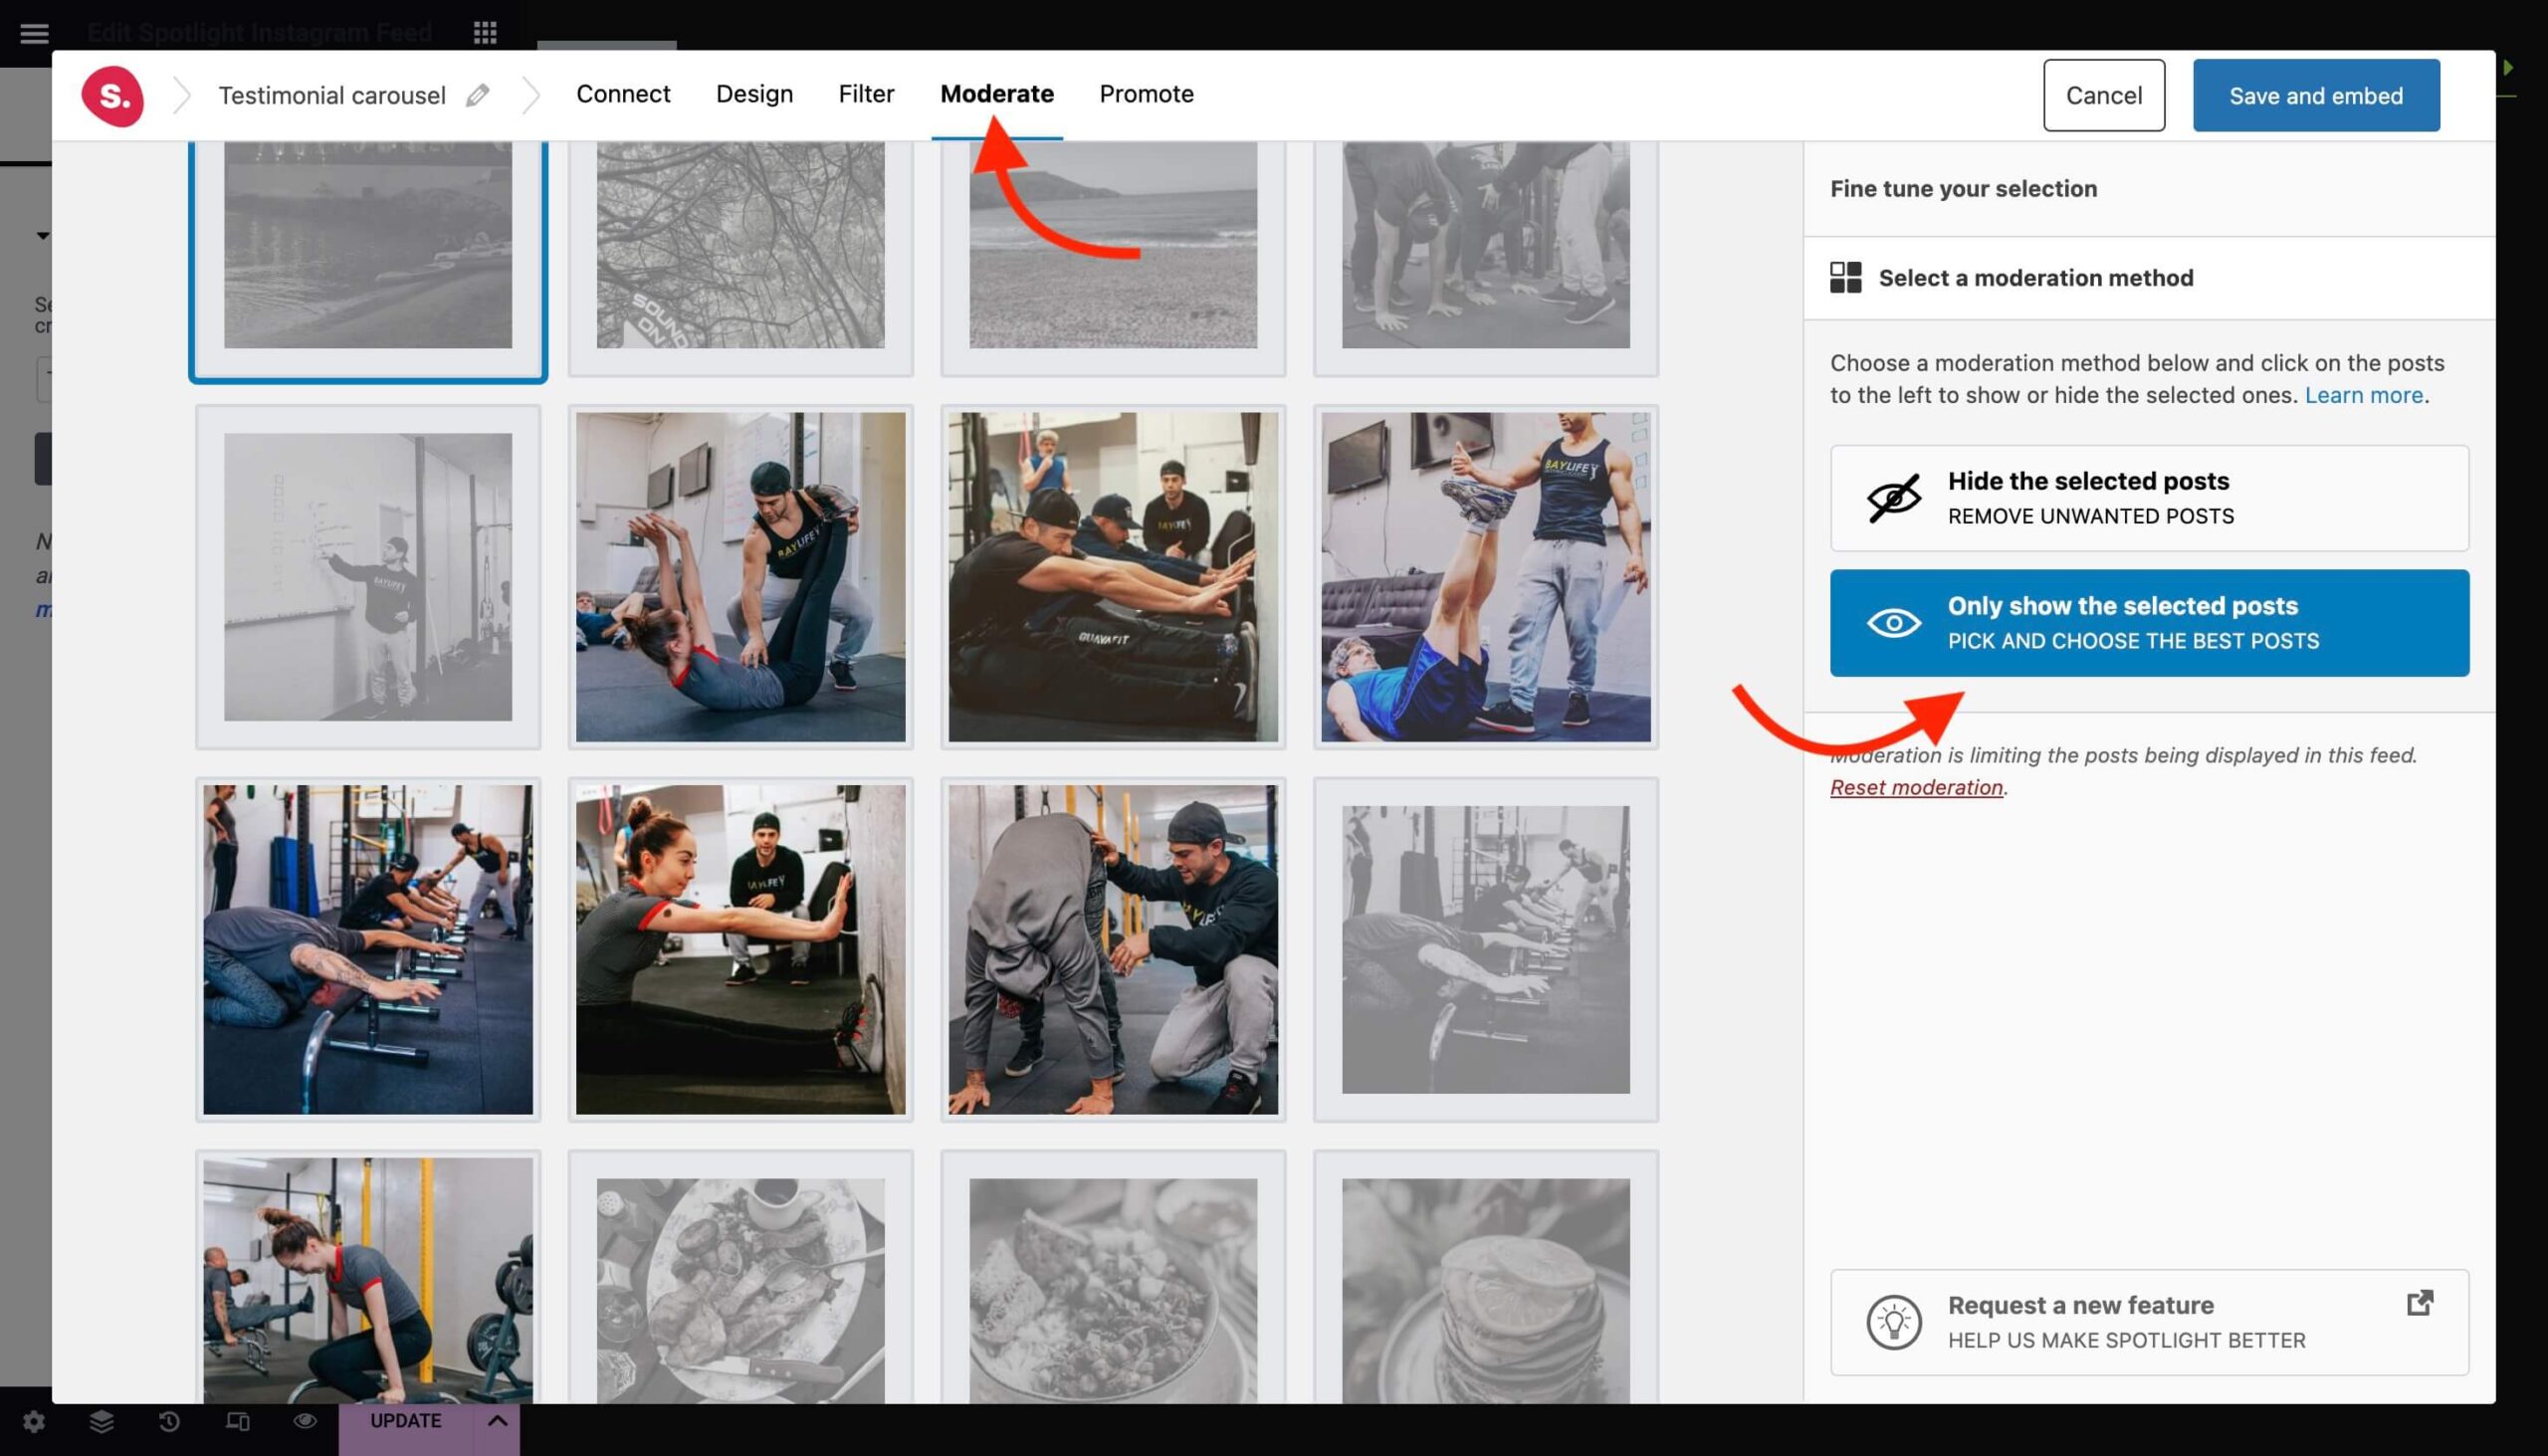
If you want to manually select which posts to show in your feed, go to the Moderate tab.
If you’re selling products and services, you might also want to consider turning your testimonial feed into a shoppable one. We’ve got a guide to help you set this up here.
Embedding your Instagram testimonial slider in Elementor
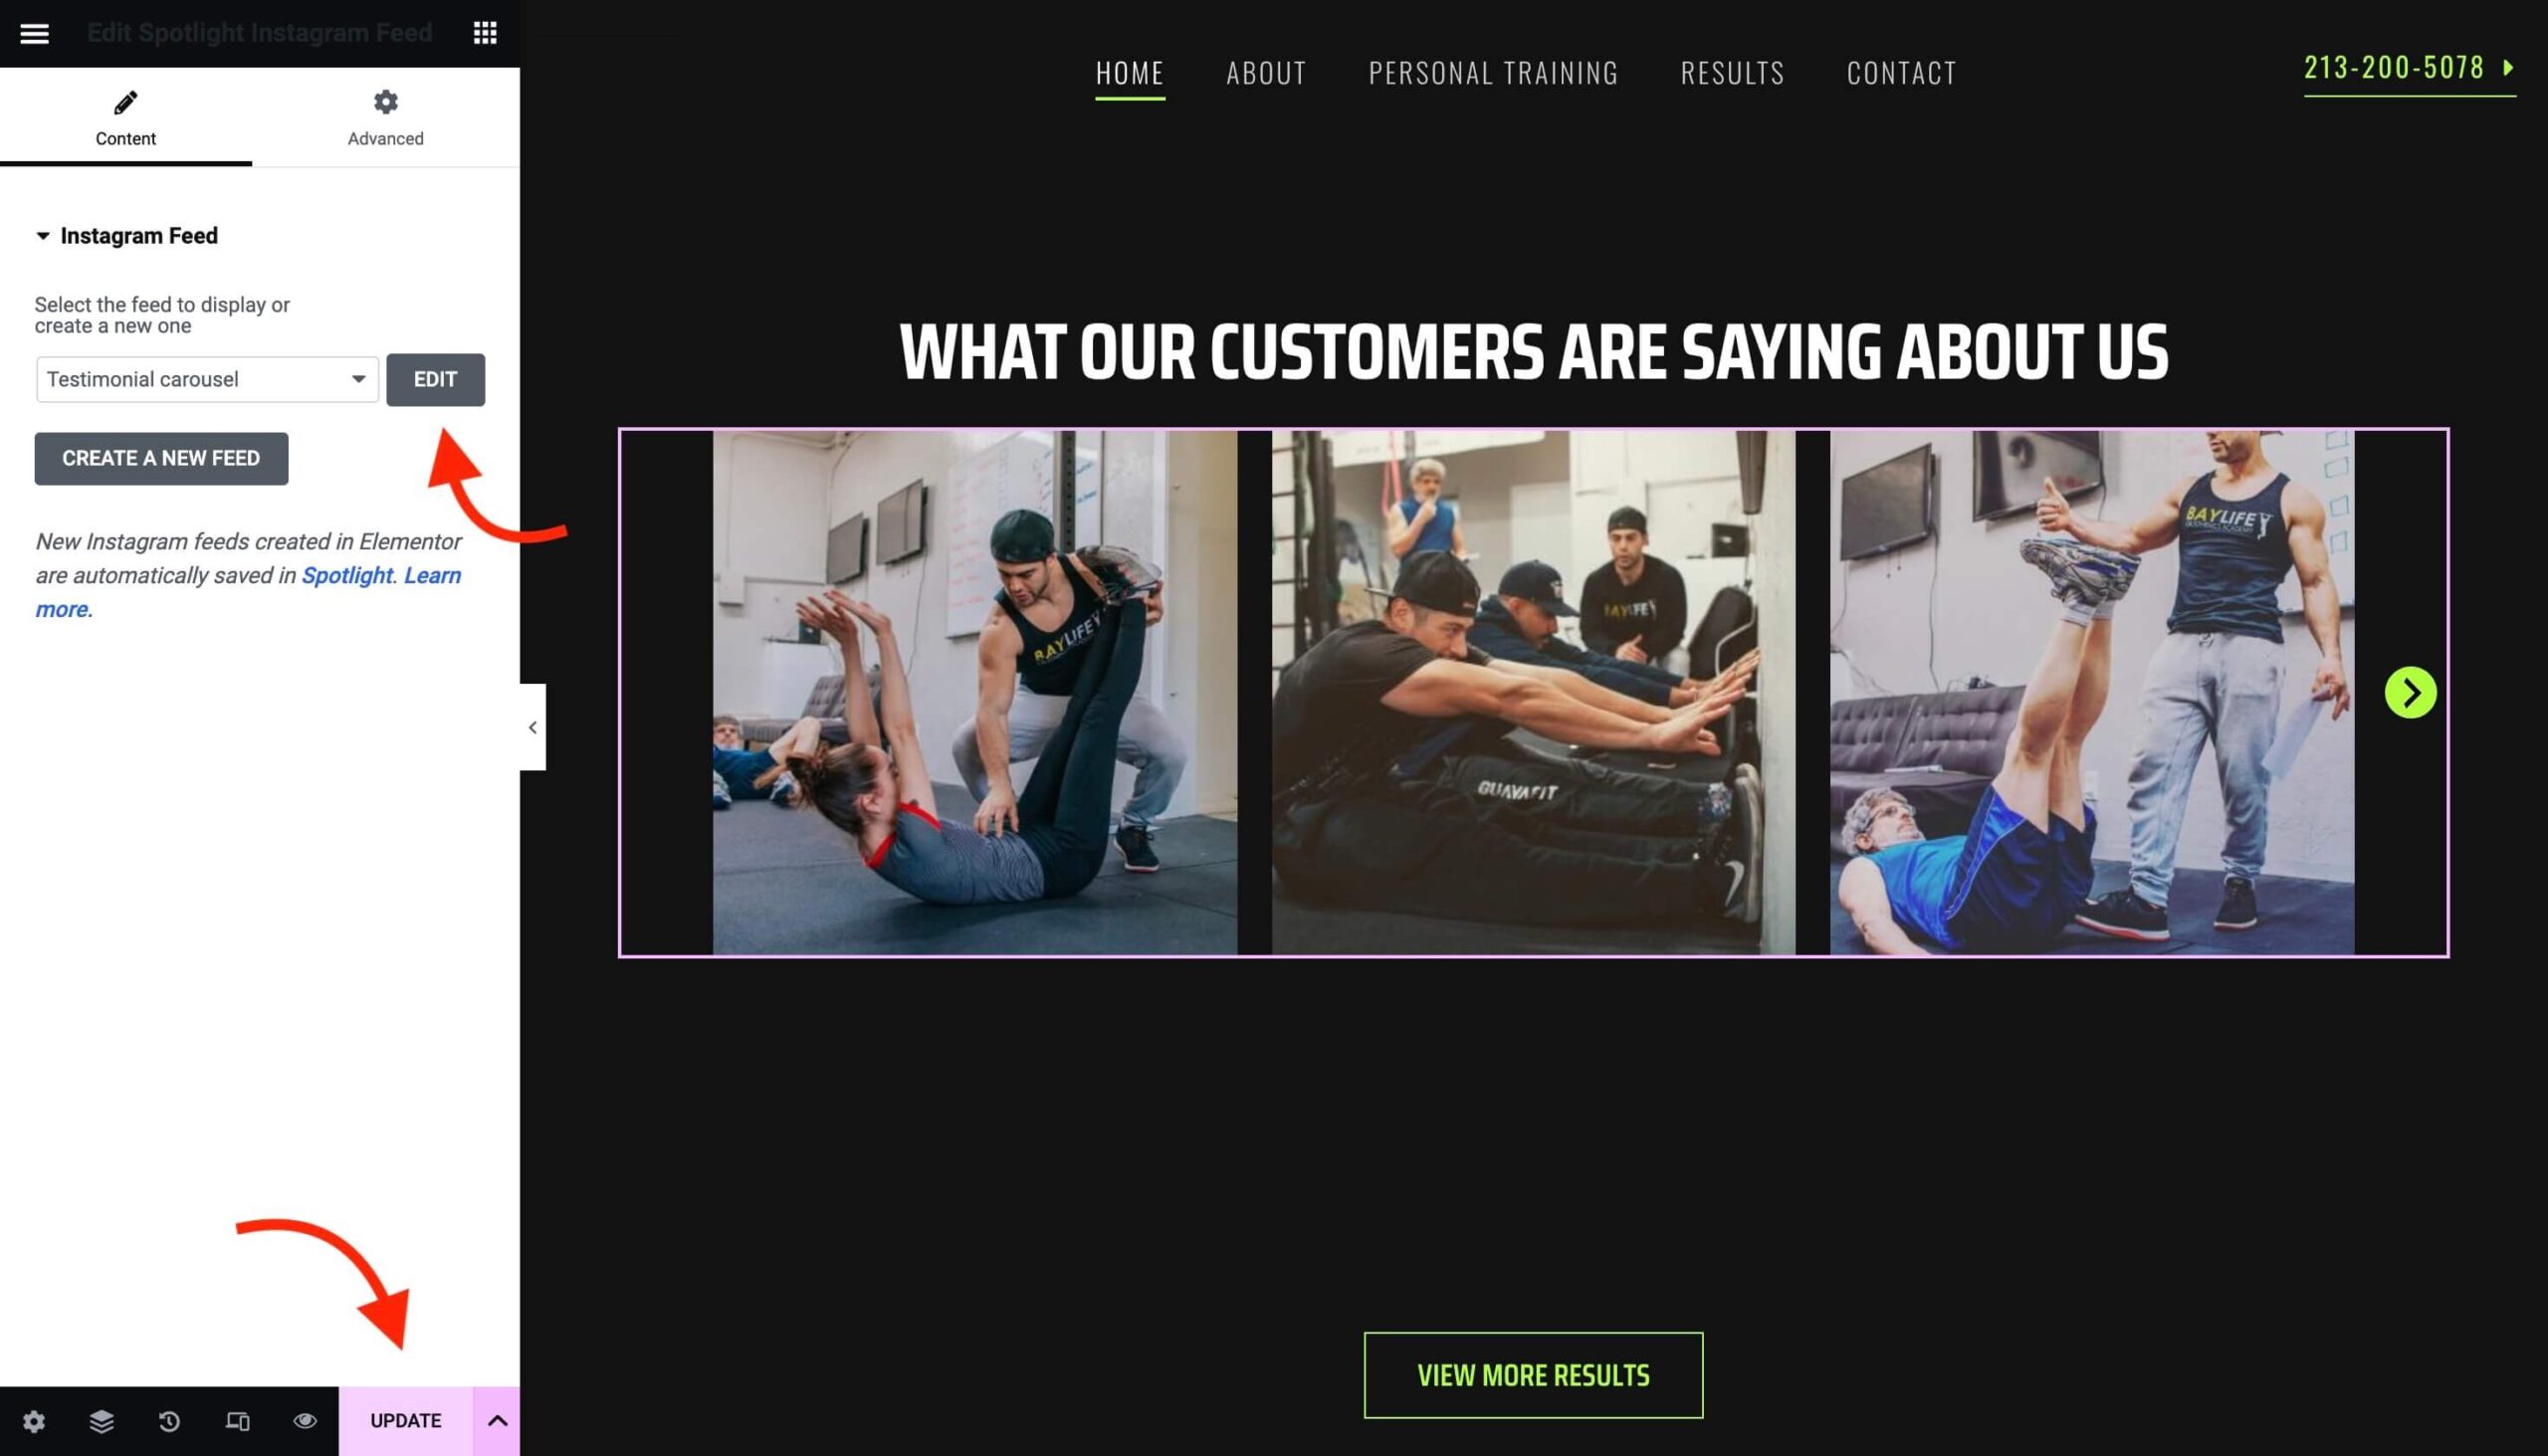
When you’re done, hit the Save and embed button and your feed will be displayed in your Elementor section. You’re done!
Measuring success
If you want to track the impact of your Instagram testimonial slider, you might want to consider upgrading to our All Access tier. This will give you access to our Analytics feature which tracks feed engagement and click-tracking.
Conclusion
By integrating Instagram testimonials into your WordPress site with Spotlight, you’re not just enhancing its visual appeal; you’re building a bridge of trust with potential customers. With our step-by-step guide you can transform your website into a hub of authenticity and trust, driving engagement and conversions through the power of social proof.
Download Spotlight today and start enhancing your website with an authentic testimonial slider.

