Not every Instagram post needs to show up on your website — and that’s okay.
Maybe you’re running a hashtag campaign, curating customer photos, or just want to keep your website looking polished with only your best content. Whatever the reason, you’re probably wondering, how can I filter and moderate my Instagram feed to show only the posts I want?
The good news is, there’s an easy way to do it, without touching a single line of code. With Spotlight, you can filter and moderate your Instagram feeds by hashtags or tagged posts to display exactly what you want, giving you complete control over what shows up on your site.
This curation process helps you highlight customer stories, run hashtag campaigns, or simply keep your website aesthetic on point, all while keeping everything automated.
Let’s discuss why hashtag feeds matter, how Spotlight makes it easier, and show you how to filter and moderate your Instagram content.
The challenge of hashtag posts
Pulling hashtag posts from Instagram seems simple in theory — but in reality? It can quickly become frustrating.
If you’ve ever tried embedding a single Instagram post on your website, you’ve probably noticed how clunky it looks. All it really does is link back to Instagram (not exactly the seamless experience you’re hoping for.)
And if you’re looking to display entire hashtag feeds or even multiple feeds? Instagram’s built-in tools simply don’t allow it.
That’s where Spotlight’s Instagram feed plugin comes in.
With Spotlight, you can bring hashtag feeds straight to your website, automatically too. But here’s the catch, hashtag feeds often need ongoing moderation especially if the hashtag is popular. If you’ve ever browsed a random hashtag on Instagram, you’ll know that not every post is something you’d want on your website.
Thankfully, Spotlight gives you full control to filter out the noise and show only the content that aligns with your brand.
Why Spotlight?
When it comes to Instagram feed plugins for WordPress, there’s no shortage of options. But not all plugins are built with control and customization in mind.
Spotlight makes it effortless to create fully customizable, responsive Instagram feeds that display exactly the content you want — without writing a single line of code. Once you set up your feed with filters and moderation, Spotlight automatically keeps your feed updated, so your site always stays fresh without any extra work. You can configure Instagram posts on a feed to open to custom links, show linkable captions, place feeds anywhere on your site, and much more.
Here’s a quick overview of what Spotlight offers:
- Automatically embed Instagram feeds on your website
- Choose from multiple templates and layouts (including Instagram’s latest grid style) to match your aesthetic and goals
- Display feeds without coding using shortcodes or blocks
- Curate feeds to support your business goals with Shoppable, Tagged, or Hashtag feeds
- Filter and moderate curated feeds to display only relevant content
- Show your Instagram Stories alongside your feed
- Control what content types appear (Reels only, Posts only, or both)
The free version of Spotlight gives you everything you need to create unlimited Instagram feeds but if you’re looking to filter and moderate hashtag feeds, you’ll need Spotlight PRO.
With Spotlight PRO, you’ll unlock advanced filtering tools, hashtag feeds, tagged posts, and moderation features, everything you need to curate the perfect Instagram feed.
Setting up hashtag feeds: step-by-step guide
For this guide, we’ll walk you through installing Spotlight all the way to discussing how to take care of your newly-created hashtag feed. Before we dive in, here’s what you’ll need to set up your Instagram hashtag feed:
- The Spotlight Plugin installed on your WordPress site
- A Spotlight PRO license to unlock hashtag feeds
- A Professional Instagram account (Business or Creator)
- A Spotlight Advanced account type — free to set up, but you’ll need to connect your Instagram account to Spotlight through a Facebook Page to pull in hashtag feeds
Already have everything set up? Skip ahead to Step Three to start filtering and moderating your hashtag feed.
1. Install the Spotlight plugin
The only way to download Spotlight is to go to the WordPress dashboard and navigate to Plugins > Add New. Type “Spotlight” in the search bar and the plugin should appear as the first option. Click on Install Now and give WordPress a minute to set up the plugin. When it’s installed, click on Activate:

Once you install the plugin, sign up for a license. Remember that to set up hashtag feeds, you’ll need a Spotlight PRO license or higher. After signing up, you’ll be able to activate your premium license in the Spotlight settings.
With the plugin and license active, let’s move on to connecting your Instagram account.
2. Connect your Instagram account
As we mentioned earlier, Spotlight only supports Instagram Business or Creator accounts due to the way the Instagram API works. If you’re using a personal account, you can easily make the switch to a business or creator account. Switching to one of these account types is free and it only takes minutes.
If this is your first time using Spotlight, go to Instagram Feeds > Settings > Accounts to connect an Instagram account with the plugin. There are two connection types to choose from, but you’ll need to select the Advanced (Connect via Facebook) option if you want to create hashtag feeds.
Read this documentation to understand why there’s a difference between both account types.
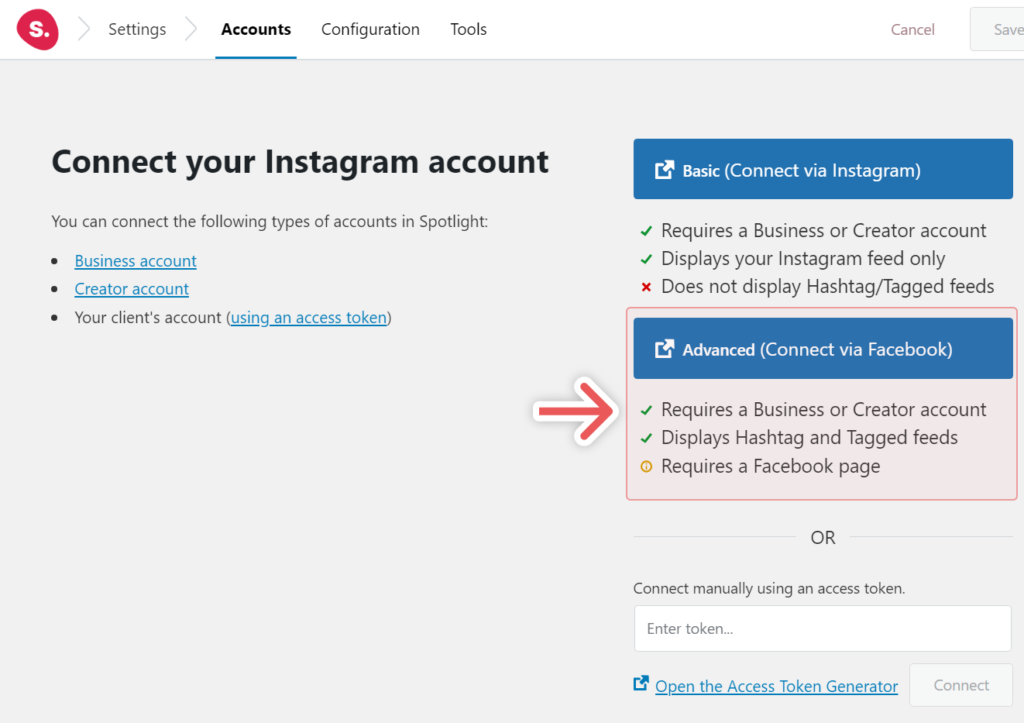
Select the Advanced connection type and a Facebook window will pop up, asking you to confirm access for Spotlight. Give the plugin the permissions it needs and your account will be ready to use. Now let’s set up a hashtag feed.
3. Create a hashtag feed
Now it’s time to set up your hashtag feed and display the exact content you want on your website.
To create a feed, go to Instagram Feeds > Feeds > + Create a new feed. Spotlight will ask what kind of feed you want to create, so select the option that says Hashtag feed and click on Next step >:

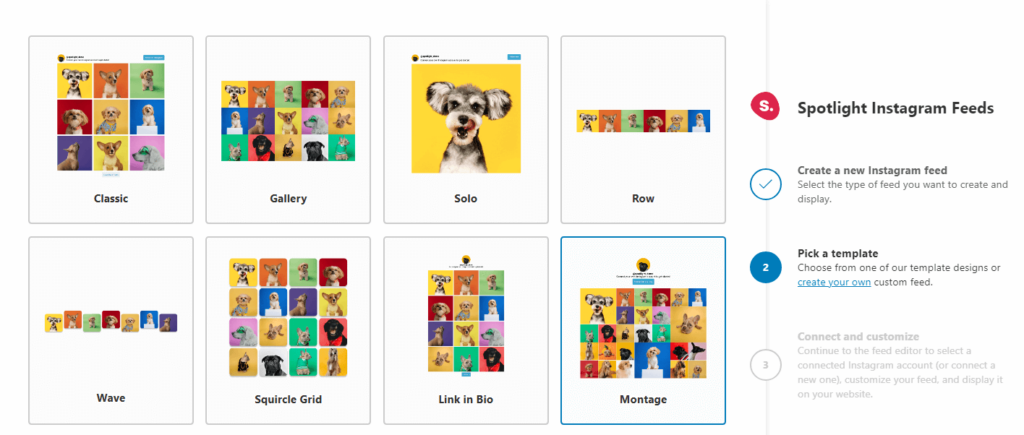
On the next page, you get to choose a starting template or layout of the feed. Spotlight offers a broad range of options, so pick whichever one aligns with your website and the kind of feed you plan on setting up. You’ll get to customize how the feed looks in a minute too, so think of this as a starting point.
Once you select a template, move on to the next step and confirm your choices. This will launch the Spotlight editor, which is where you get to customize how the feed looks, what it shows, and how it works on your site. For starters, select an account to use from the menu under Show posts from these accounts:
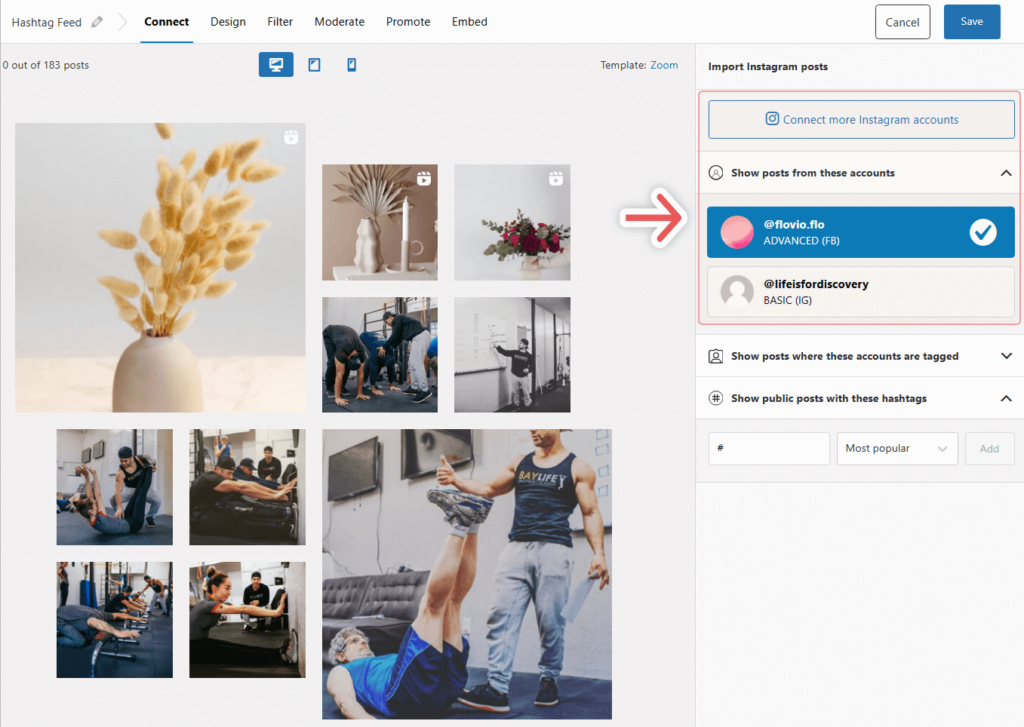
If you just connected Instagram with Spotlight, you’ll only see one option. Select it and move on to the section that says Show public posts with these hashtags.
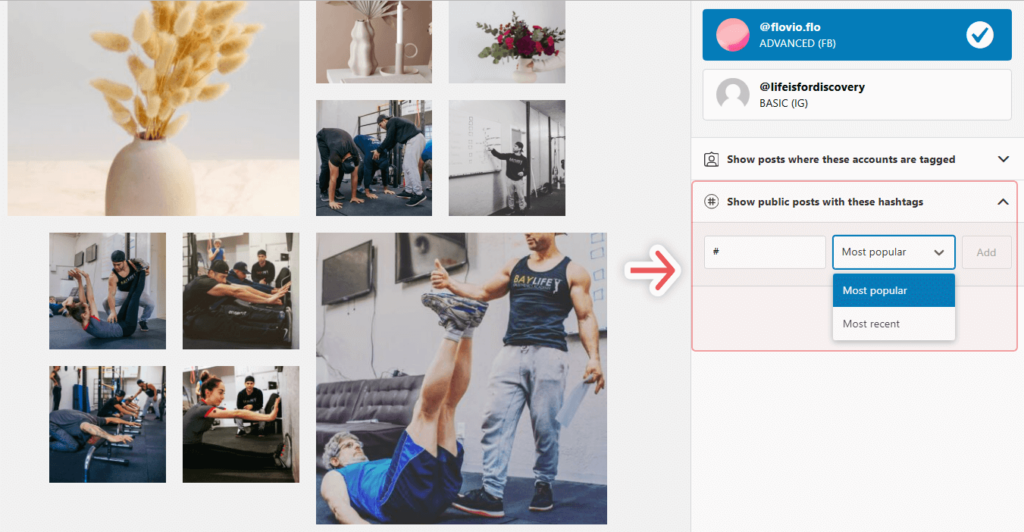
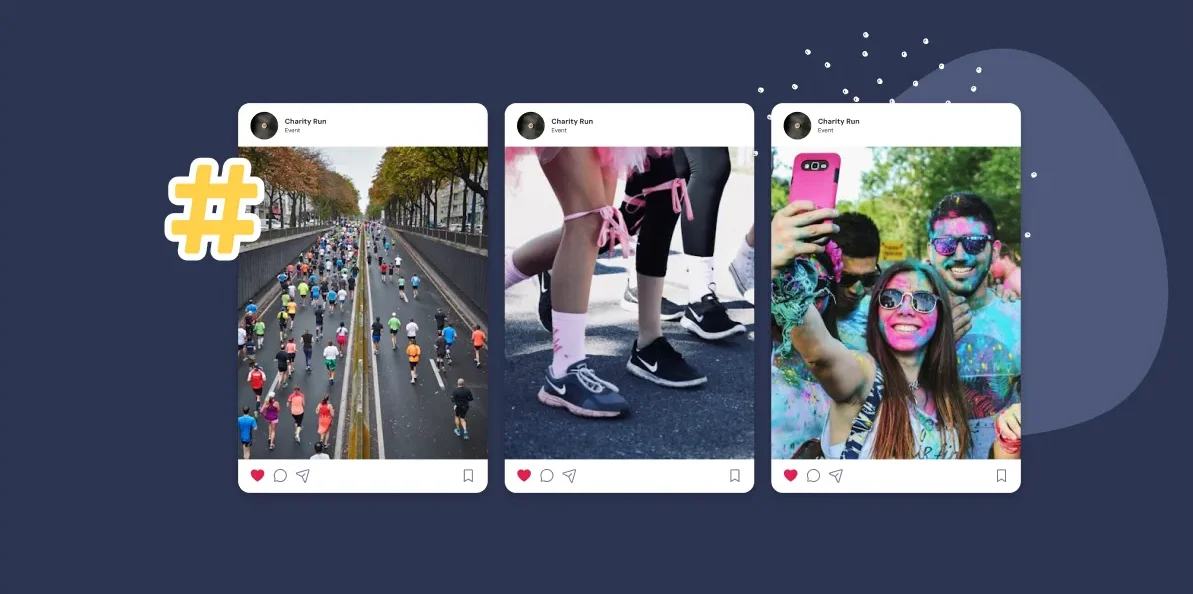
You can add any hashtag here and configure Spotlight to show its content sorting by most popular (the content with the most likes) or most recent. Sorting hashtag posts by most recent can make sense if you’re running a user-generated content campaign, to use an example.
Pick a hashtag, configure its settings, and click on Add. Spotlight will begin importing posts automatically. This might take a few moments — but once it’s done, you’ll get a live preview of your hashtag feed.
In our case, we opted for a classic hashtag, #puppies:
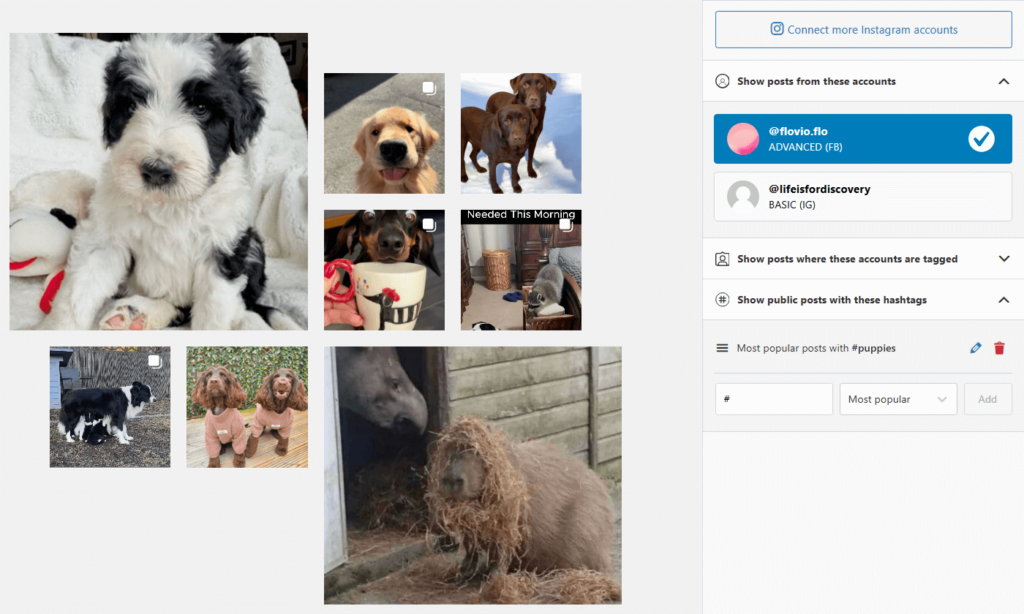
If you look closely, you’ll notice there are a few intruders in that feed. To get rid of them, we’ll filter and moderate the hashtag feed.
4. Filter and moderate your feed
Spotlight offers two types of moderation tools you can use to control what content shows up in each feed. For starters, go to the Moderate tab at the top of the Spotlight editor.
Here, you can select what specific hashtag posts you want to hide from the feed, so we’ll select the intruders in ours:
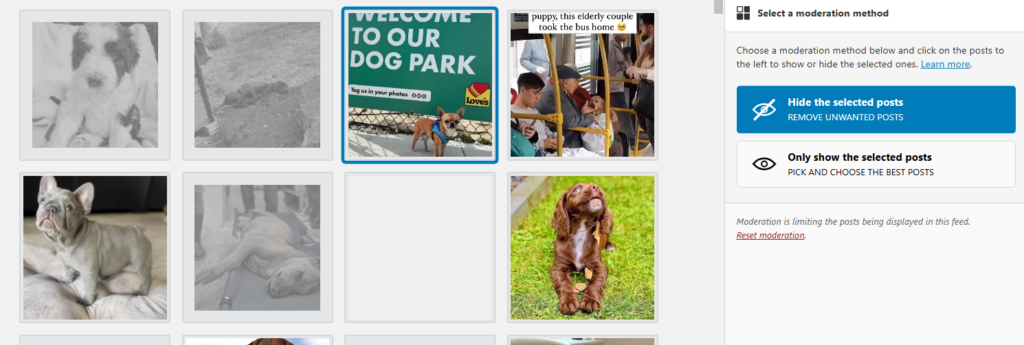
You can also choose the option that says Only show the selected posts and do the reverse. Hand pick the posts that you want the feed to display.
Once you’ve chosen which posts to moderate, move to the Filter tab. Spotlight enables you to set up filters to only display posts with captions that include specific keywords, hide those posts, or to do the same with hashtags.
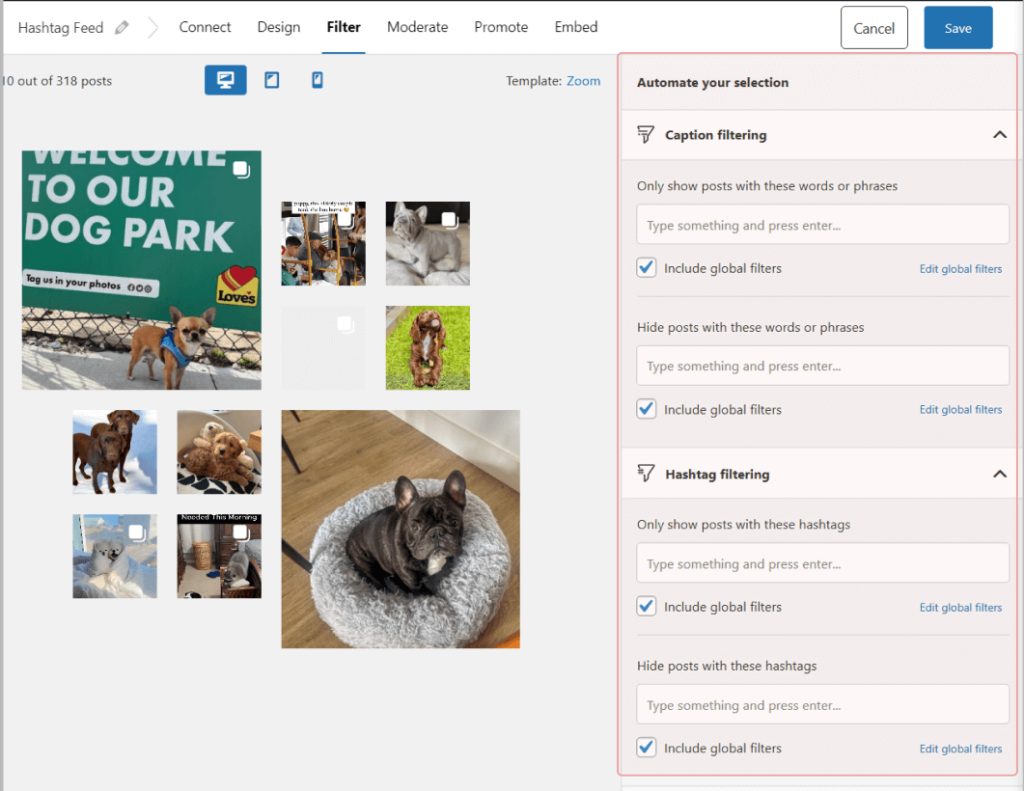
You can set up a caption filter to hide posts with your competitors mentioned. That way, if they post content under a hashtag you’re using in a feed, it won’t show up on your website.
For the best possible results, we recommend using both moderation and filtering to protect hashtag feeds. Spotlight moderation tools help you hand-pick what content to include and exclude.
5. Save and embed your feed
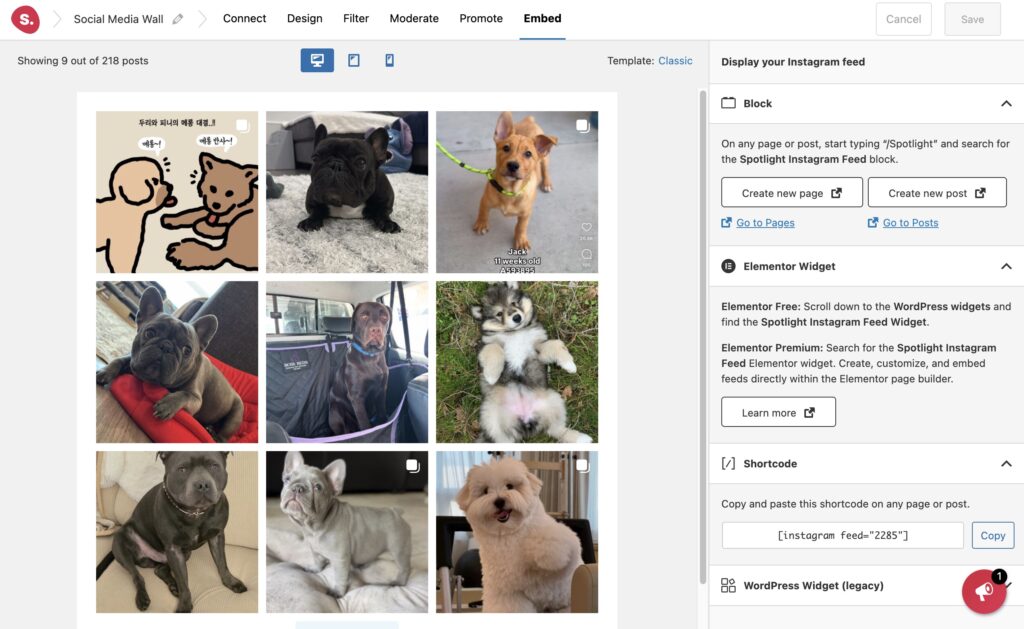
Once you’re happy with how your feed looks (and you’ve filtered out any unwanted posts) it’s time to publish it on your website.
If you haven’t already, give your feed a name and hit Save.
To embed your hashtag feed, head to the page or post where you want it to appear. Spotlight makes this easy. You can either:
- Use the Spotlight Instagram Feed block in the WordPress editor
- Copy and paste the shortcode Spotlight generates for your feed
Either method works seamlessly. Once you’ve embedded the feed, your filtered hashtag posts will appear automatically and update in real-time as new content comes in.
What benefits will you enjoy?
One, or more, strategically curated hashtag feeds on your website can help you deliver measurable results, like improved user engagement, and having people spend longer on your website. Using hashtag feeds (and Spotlight) can help your website in several ways, like:
- Build instant trust: An impressive 93% of customers check reviews before purchasing. When your feed showcases authentic customer experiences with your branded hashtag, you’re creating powerful social proof that can help you convert visitors into buyers.
- Boost discovery potential: Instagram’s visual ecosystem makes it a discovery powerhouse, with 83% of users finding new products while browsing. Your curated feed ensures they see only your best content when they find you.
- Drive higher engagement: Feeds and image carousels generate 2.14x more engagement than single images. People love seeing a lot of images together side by side.
Spotlight makes implementing these benefits straightforward. You can select exactly which content to display, organize it for maximum impact, and update it automatically as you post new material to Instagram. The plugin’s filtering capabilities ensure only your best, most relevant content represents your brand online.
Conclusion
Adding Instagram feeds and content to your website is a great way to increase engagement. With hashtag feeds, you get even more control over what content you display. Spotlight hashtag feeds enable you to show any public content with that hashtag on your website. You can choose the layout of the feed, configure how it works, and decide if there’s any content you want to exclude.
Spotlight makes all of that possible and it’s easy to set up. It’s also a great option if you have an Instagram account and you want to start leveraging that content to grow your website. With Spotlight, you can set up as many Instagram feeds as you want and place them on your site easily.
If you want to try creating a hashtag feed for your website, try Spotlight today.
Do you have any questions about how to set up a hashtag feed in Spotlight? Let us know in the comments section below!