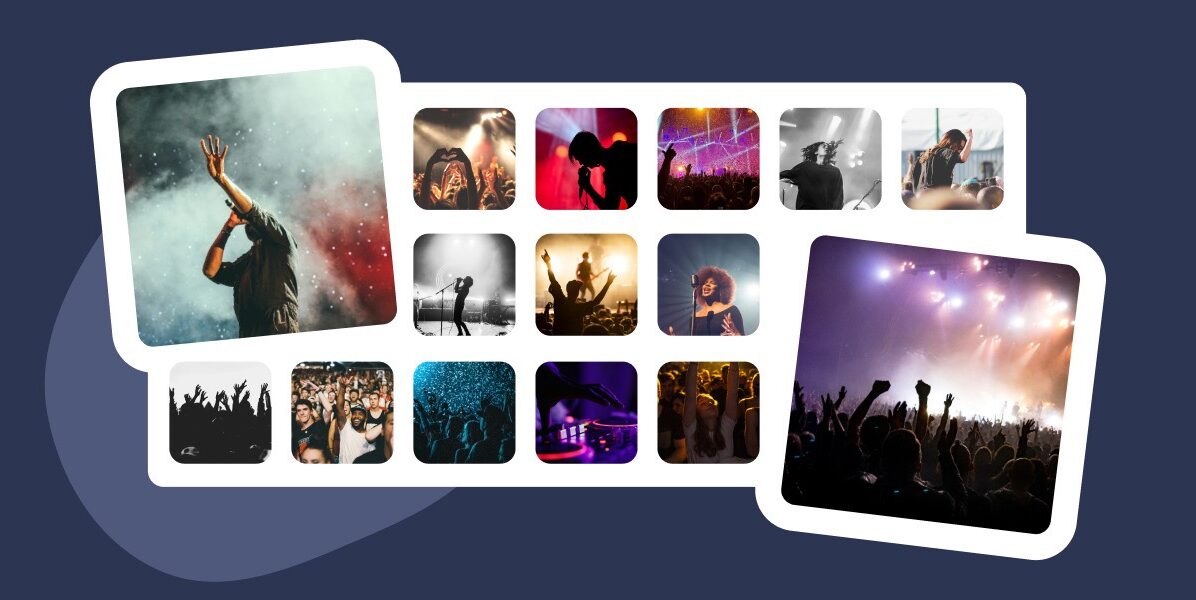
Are you experiencing low engagement for your events? Then maybe you should consider creating an Instagram event wall.
It is an excellent strategy to capture the fun in real time, encourage interactions between attendees, and market your events to a much broader audience.
By displaying an Instagram feed of your past events, you can also build up hype for your upcoming ones and sell presale tickets faster.
Not sure where to begin? In this tutorial, I will show you how to improve event audience engagement by creating an Instagram wall and embedding it on your WordPress site using Spotlight.
What is an Instagram wall?
An Instagram event wall showcases a dynamic feed of photos and videos related to a specific event. This includes but is not limited to weddings, musical concerts, conferences, and trade shows.
When used properly, an Instagram wall is the perfect marketing tool to create buzz around your event and boost audience participation.
The best part? It requires minimal effort on your part, as the Instagram feed mostly aggregates user-generated content (UGC) from attendees, influencers, and sponsors who use event-specific hashtags in their posts or reels.
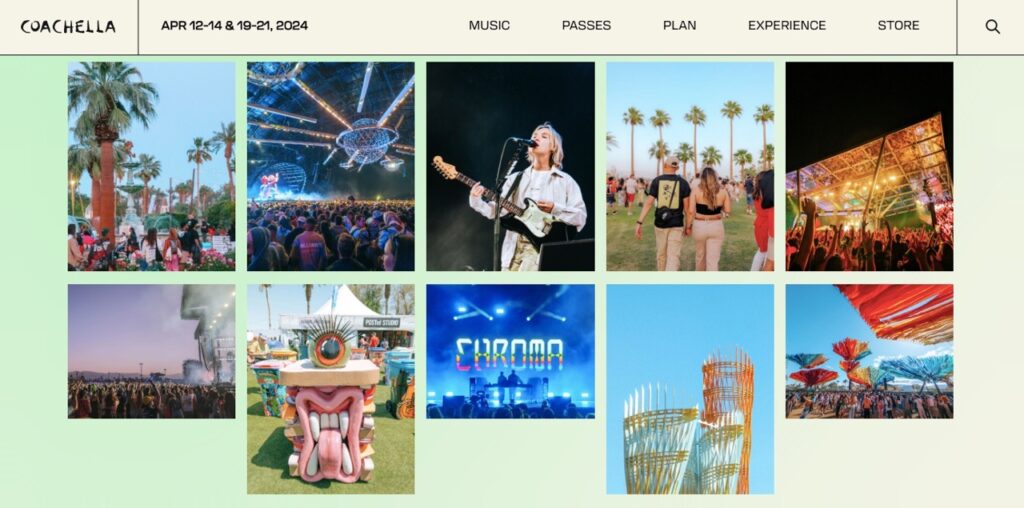
Here’s an excellent example of an Instagram event wall on Coachella’s website:
The advantages of creating an Instagram event wall
By showing an Instagram event feed on your website, you can:
Improve event audience engagement
It’s not every day that users have the chance to show their talent for visual storytelling. So, when your Instagram wall allows them to get their photos or videos seen by thousands, attendees will embrace it with open arms.
As more people share your event’s live updates, others will be more eager to participate and join in the conversation. Fear of missing out (FOMO) is real and you should use it to your advantage.
Of course, you still need to moderate user-generated content to prevent low-quality posts from appearing on your social wall. Failing to do so puts your brand’s reputation in jeopardy.
Increase brand visibility
What’s a better way to reach a wider audience, than having thousands of attendees promoting your event? This is the power of user-generated content, and a social wall helps you unlock its full potential.
As more users upload and share posts about your event, it will get exposed to a much wider audience. Likewise, if their followers like the content, they are more likely to follow your account to learn more about your brand and stay informed on upcoming events.
Build social proof
Even after your event has passed, an Instagram wall is still accessible on your site. When new visitors see the success of your past events, they’ll be keen to join your next ones.
Not to mention, sponsors will come flooding in after witnessing the monetary potential your events bring to the table.
How to create an Instagram wall for your events
Now that you know the potential engagement an Instagram wall brings, the next step is to create one for your events.
Start by encouraging attendees to participate. Run photo contests or caption challenges, and give incentives to those who produce the best results.
Next, develop a branded hashtag that participants must use in their posts or reels. This helps you to collect and moderate user-generated content.
To make your job a lot easier, try social aggregator tools like Spotlight. With these plugins, you can automatically display posts from the event’s attendees, while also filtering out unwanted captions and hashtags in the process.
In this next section, I will show you the step-by-step process of setting up Spotlight, creating a curated Instagram event wall, and embedding it on your site.
Installing and setting up Spotlight
Before proceeding, make sure to register as a Spotlight PRO user. While the free version is powerful, the PRO plan offers filtering and moderation features needed to keep your wall clean.
After you’ve successfully secured your plan, go ahead and install Spotlight from your WordPress admin area.
To set up the plugin, go to Instagram Feeds in the left sidebar. When creating a new feed, choose My tagged posts to display posts from users who have tagged your account, or Hashtag feed to show UGC containing the branded hashtag you determined before.
If you prefer to use both, select Combined feed.
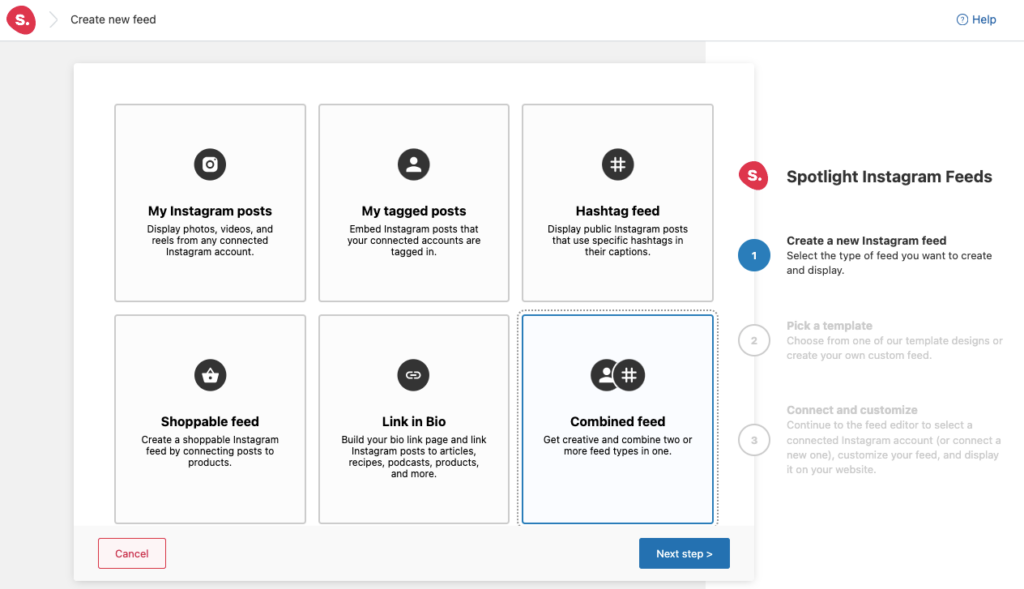
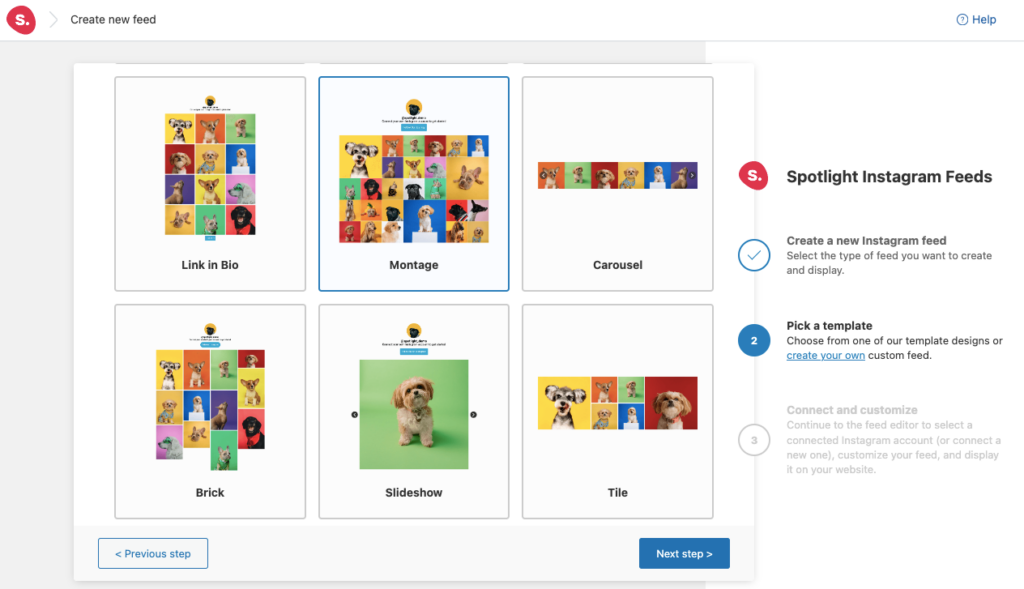
Next, pick the most suitable Instagram wall template for your needs – Spotlight offers plenty of templates designed to boost engagement.
Select Slideshow if you want visitors to focus on one post at a time, or pick Montage for a more diverse and dynamic visual experience.
Customizing your Instagram event feed
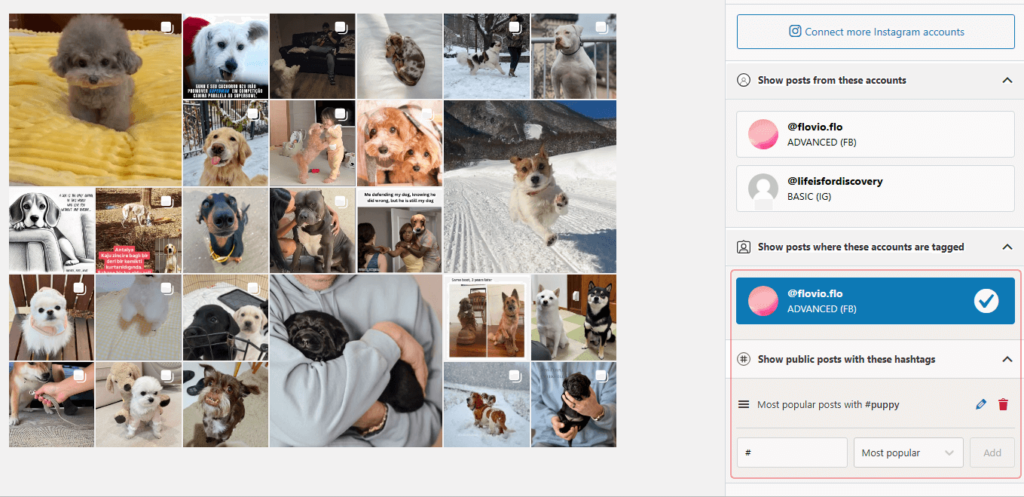
Finally, connect your Advanced (Business or Creator) account and select Show posts where these accounts are tagged in the right menu bar. Under Show public posts with these hashtags, fill in your event hashtag in the relevant field and click Add.
Please note that you cannot access tagged posts with a Basic account.
The difference between both account types is that a Basic account connects your professional account directly to Spotlight through Instagram, doesn’t require a Facebook Page, but doesn’t support hashtags or tagged feeds.
In contrast, an Advanced account requires your professional Instagram account to be linked to a Facebook Page before connecting it to Spotlight.
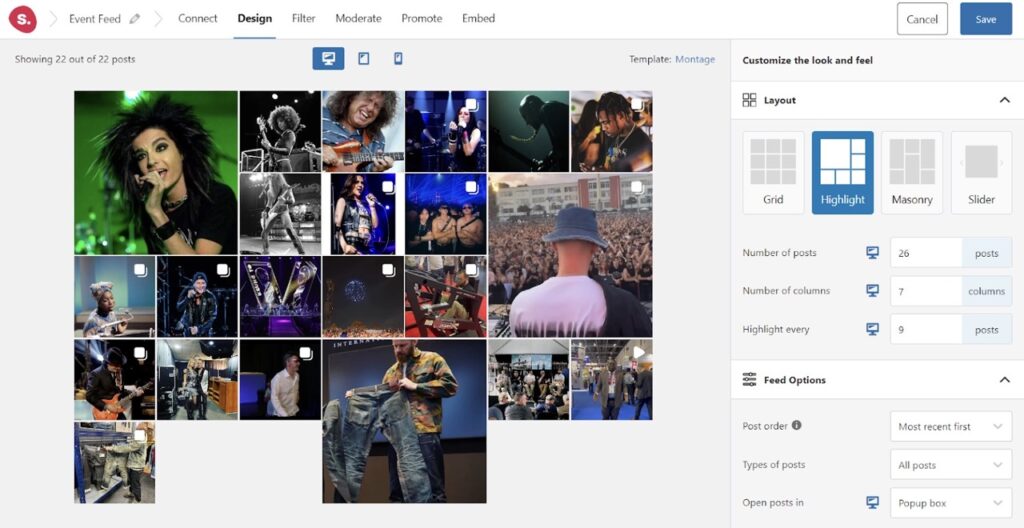
After that, it’s time to customize your feed. In the Design tab, you can set the number of posts, arrange the post order, select which types of posts to show, and so on. Let’s see what that looks like with a different set of hashtags:
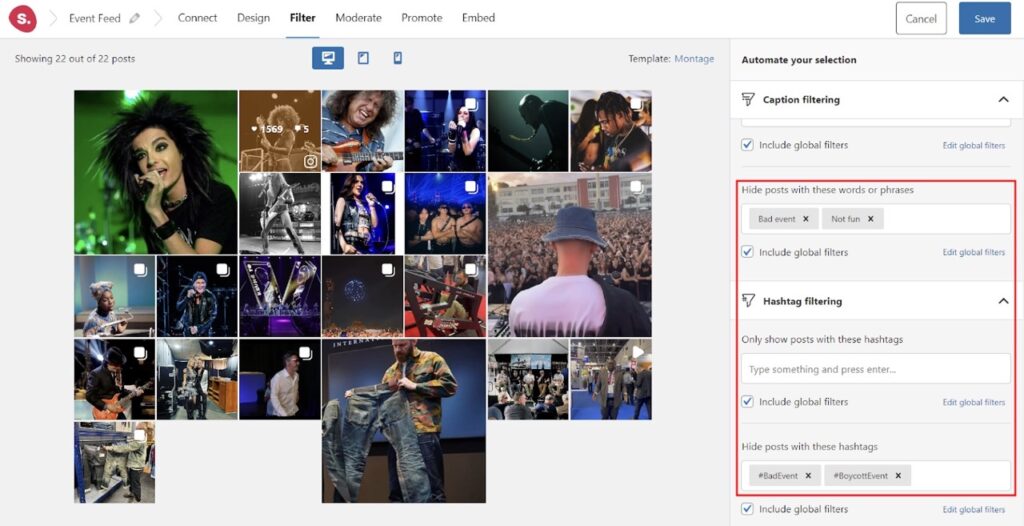
To keep your Instagram wall clean, it’s essential to filter out unwanted posts. Simply head to Filter > Caption filtering, and specify the phrases you want to leave out. Do the same for hashtags under Hashtag filtering.
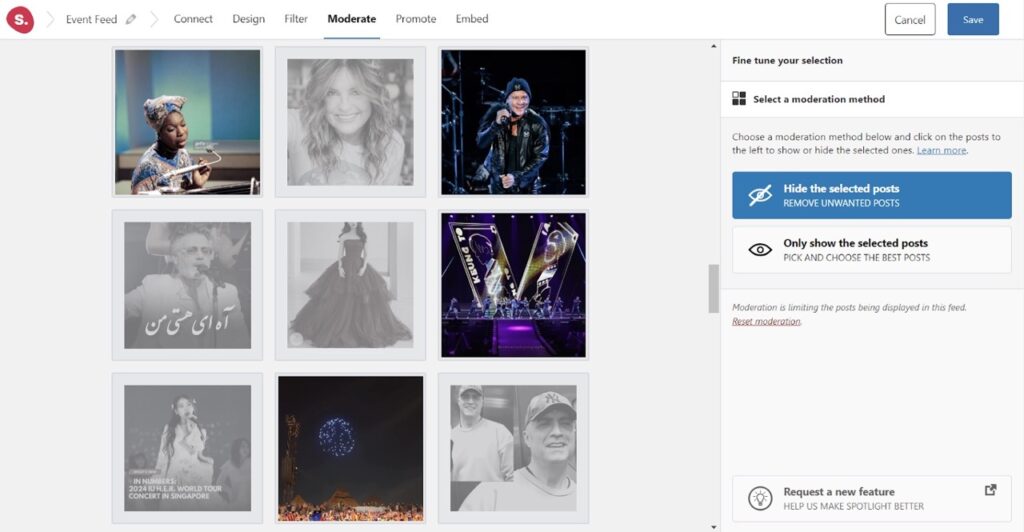
Next, open the Moderate tab, select Hide the selected posts, and choose all posts you want to remove from your Instagram event wall. This helps you curate user-generated content, making sure only the best posts appear.
Embedding the Instagram wall on your site
If you want to create a dedicated page for your Instagram event wall, go to the Embed tab and click Create new page. This will automatically embed your Instagram feed.
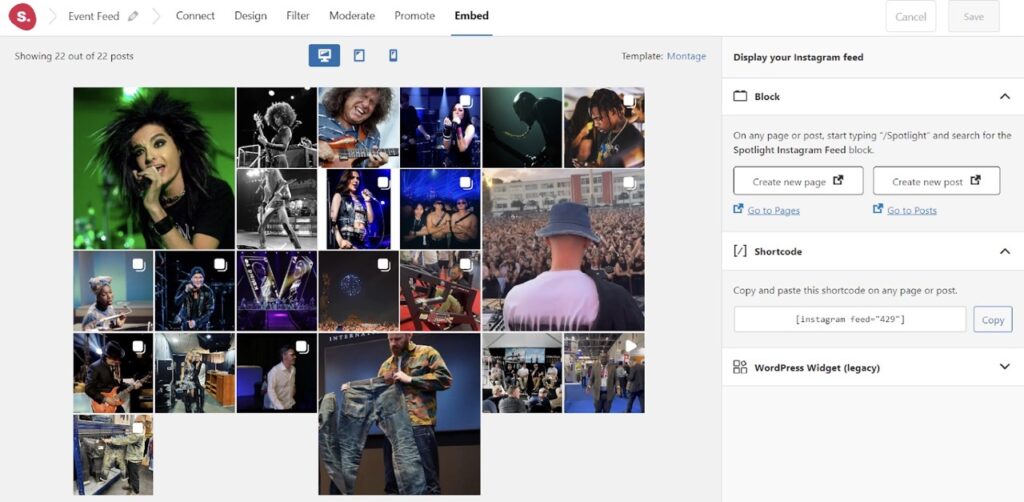
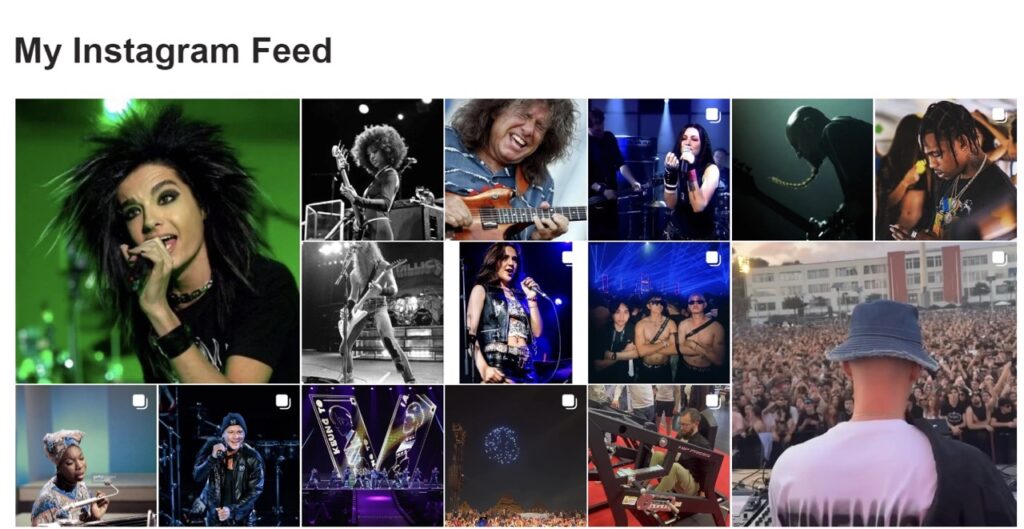
Alternatively, head back to the WordPress dashboard and select Pages > Add New Page. Once the Gutenberg editor appears, click the (+) plus icon. Look for “Spotlight Instagram Feed” and click to embed your newly created Instagram wall.

Make sure to hit Publish in the top right corner of your screen, and there you have it.
Final thoughts
Creating an Instagram wall for your event is a low-effort initiative, but the potential impact can be huge. It enhances the live experience for attendees and extends your reach and engagement beyond the venue.
But since the content mostly comes from users, you have to be extra careful, as low-quality and harmful posts can pop up out of nowhere. Luckily, social aggregator plugins like Spotlight make it a lot easier to display a well-curated Instagram event wall on your site.
All you have to do is install the plugin, create a Combined feed to show both your tagged posts and hashtag posts and maintain a clean wall using its filtering and moderation features. Once your social wall is ready, embedding it on your site only takes a few extra steps.
So, what’s holding you back? Try Spotlight today, and watch as your event audience engagement skyrockets like never before!

